
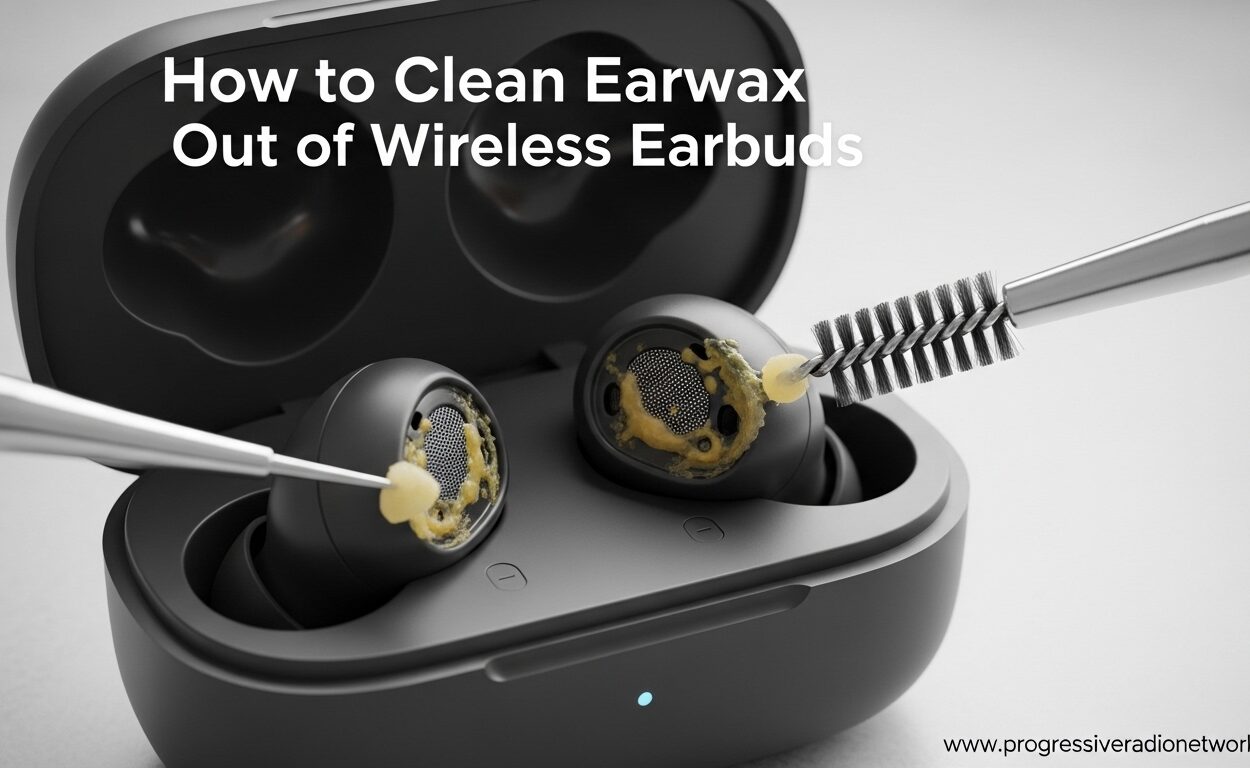
Your wireless earbuds go everywhere with you. They sit in your ears during workouts, commutes, work calls, and late-night streaming sessions. Over time, that constant contact leads to an inevitable buildup of earwax, dirt, and bacteria that can ruin your sound quality and put your ear health at risk. Learning how to safely clean earwax out of wireless earbuds is one of the most important maintenance skills any earbud owner can develop.
I learned this lesson the hard way after noticing my favorite pair of earbuds started sounding like they were underwater. The bass disappeared, voices sounded distant, and no amount of volume adjustment helped. The culprit was not damaged drivers or software glitches, it was a thick layer of compressed earwax blocking the speaker mesh. After 30 minutes of careful cleaning, my earbuds sounded brand new again.
This guide will walk you through everything you need to know about cleaning your wireless earbuds safely and effectively. From the right tools to avoid damaging your expensive audio gear, to step-by-step instructions for every component, and critical safety warnings that could save your earbuds from permanent damage.
Why Cleaning Your Earbuds Matters for Health and Sound Quality
Dirty earbuds are not just gross, they are a genuine health hazard. When you wear earbuds, heat gets trapped in your ear canal and melts earwax, causing it to settle on or inside your earbuds. This warm, waxy environment becomes a breeding ground for bacteria that can lead to ear infections, skin irritation, and other uncomfortable conditions.
Research has shown that earbuds can harbor thousands of bacteria, including staphylococcus and pseudomonas, which can cause serious infections if they enter broken skin in your ear canal. Regular cleaning removes these pathogens before they can cause problems. If you are concerned about overall ear health, consider exploring headphones designed for ear health that minimize ear canal contact.
Beyond health concerns, earwax buildup directly impacts audio performance. Even a thin layer of wax on the speaker mesh can muffle high frequencies, reduce bass response, and create that frustrating underwater sound that makes music sound lifeless. The acoustic mesh on your earbuds is precisely engineered to allow sound waves to pass through while protecting the internal driver. When wax blocks those tiny openings, sound quality degrades significantly.
Many users replace their earbuds thinking they have worn out, when they simply need a thorough cleaning. Before you spend money on new audio gear, try the cleaning methods in this guide. You might be amazed at how much better your current earbuds can sound with proper maintenance.
Tools and Materials You’ll Need for Safe Earbud Cleaning
Before you start cleaning, gather the right tools. Using the wrong materials can damage your earbuds or push wax deeper into the speaker mesh. Most of these items are already in your home, though a few specialized tools can make the job easier.
Here is what you need for a complete cleaning session:
- 70% isopropyl alcohol or rubbing alcohol – This is the gold standard for disinfecting and dissolving earwax without damaging plastics or electronics
- 3% hydrogen peroxide – An alternative solution that softens dried wax effectively
- Cotton swabs or Q-tips – For cleaning exterior surfaces and charging cases
- Microfiber cloth or lint-free cloth – For wiping down surfaces without leaving fibers behind
- Soft-bristled brush – A clean toothbrush or electronics cleaning brush works perfectly
- Adhesive putty or blue tack – Essential for lifting wax out of speaker mesh without pushing it deeper
- Mild dish soap – For washing silicone ear tips
- Small bowl – For soaking ear tips
- Compressed air – Optional, for blowing dust out of charging ports
- Toothpick – For cleaning exterior crevices only, never for speaker mesh
Avoid harsh chemicals like bleach, ammonia, or abrasive cleaners. These can corrode charging contacts, damage rubber components, and discolor plastic housings. Stick to isopropyl alcohol, hydrogen peroxide, or mild soapy water for safe results.
How to Clean Earwax Out of Wireless Earbuds: Step-by-Step Guide
Follow this complete process to safely clean earwax out of wireless earbuds without damaging delicate components. Work in a well-lit area with good ventilation, and set aside at least 20-30 minutes for a thorough cleaning session.
Step 1: Remove the Ear Tips
Start by removing any silicone or foam ear tips from your earbuds. Most tips pull straight off with gentle pressure, though some models may have a twist-to-remove mechanism. Check your user manual if you are unsure. Removing tips exposes the nozzle and speaker mesh for easier cleaning, and allows you to clean the tips separately.
Step 2: Clean the Speaker Mesh
The speaker mesh is the most delicate and important part to clean. Never use a cotton swab directly on the mesh, as this pushes wax deeper and can leave cotton fibers stuck in the grille. Instead, use adhesive putty or blue tack. Press a small piece firmly against the mesh, then pull away slowly. The adhesive lifts wax and debris out without pushing anything inward. Repeat with fresh putty until the mesh looks clean.
For stubborn dried wax, lightly dampen a cloth with hydrogen peroxide and hold it against the mesh for 2-3 minutes. This softens the wax, making it easier to remove with the putty method. Do not saturate the cloth, just dampen it.
Step 3: Clean the Earbud Exterior
Dampen a microfiber cloth with 70% isopropyl alcohol and gently wipe down the entire outer surface of each earbud. Pay special attention to seams and crevices where wax and skin oils accumulate. Use a soft-bristled brush to dislodge debris from textured areas or microphone openings.
Step 4: Clean the Ear Tips
Silicone tips can be washed with mild soap and warm water. Use your fingers to work soap into the material, rinsing thoroughly until all residue is gone. Pat dry with a clean towel and let air dry completely before reattaching. Foam tips require gentler care, just wipe with a slightly damp cloth and let dry. Never submerge foam tips in water.
If your ear tips are worn, torn, or permanently discolored, consider investing in replacement earbud tips for the best fit and hygiene.
Step 5: Clean the Charging Case
Empty the charging case and inspect the charging contacts for green or white corrosion. Use a dry cotton swab or soft brush to remove debris from the contacts and charging pins. For stubborn buildup, lightly dampen the swab with isopropyl alcohol, but never pour liquid directly into the case. Wipe the exterior and interior surfaces with your dampened cloth.
Step 6: Dry Everything Thoroughly
This step is critical. Even a small amount of trapped moisture can damage your earbuds or charging case. Let all components air dry for at least 30 minutes before reassembling. Never use a hair dryer or heat source, as excessive heat can warp plastics and damage internal batteries.
Step 7: Reassemble and Test
Once everything is completely dry, reattach the ear tips and place the earbuds back in their charging case. Test them with your favorite music to confirm sound quality has improved. If you still hear muffled audio, repeat the speaker mesh cleaning process.
Cleaning Specific Earbud Components: Mesh, Tips, and Cases
Different parts of your wireless earbuds require specific cleaning approaches. Understanding these distinctions helps you clean thoroughly without causing damage to expensive components.
Speaker Mesh and Grille Cleaning Methods
The speaker mesh is a thin membrane that protects the internal driver while allowing sound to pass through. This delicate structure can be permanently damaged by sharp objects or excessive moisture. For AirPods and similar designs with recessed mesh, use the adhesive putty method described above. Press gently and pull away slowly.
Sony LinkBuds and similar models with open-ring designs have tiny holes that are notoriously difficult to clean. For these, use a soft brush with outward strokes, never pushing inward. Some users report success with compressed air blown across, not directly into, the openings. If wax has penetrated deep into the mesh, professional cleaning may be necessary.
Silicone vs Foam Ear Tips: Different Cleaning Approaches
Silicone and foam ear tips require completely different cleaning methods. Silicone tips are durable and washable. Remove them weekly, wash with mild soap and warm water, rinse thoroughly, and dry completely before reattaching. Foam tips are more delicate and absorb moisture. Never submerge them. Instead, wipe gently with a slightly damp cloth and let air dry for several hours.
The material you choose affects both comfort and cleaning frequency. Learn more about the differences in our guide to silicone vs foam ear tips to choose the best option for your needs.
Charging Case and Contact Maintenance
The charging case often gets overlooked, but it collects dust, lint, and wax residue that can interfere with charging. Clean the case interior weekly with a dry cotton swab or soft brush. Pay special attention to the charging pins, which must make clean contact with your earbuds to charge properly. If you notice green or white corrosion on the contacts, lightly dampen a swab with isopropyl alcohol and gently clean the affected areas.
Never store earbuds in the case immediately after cleaning. Wait until both the earbuds and case are completely dry to prevent moisture damage and corrosion.
What NOT to Do When Cleaning Earbuds: Critical Safety Warnings
Knowing what to avoid is just as important as knowing what to do. Many well-meaning cleaning attempts have resulted in permanently damaged earbuds. Follow these warnings to protect your investment.
Never Use Sharp Objects on Speaker Mesh
Toothpicks, needles, pins, and safety pins can puncture the delicate speaker membrane. Once the mesh is torn, sound quality degrades permanently and moisture can reach the internal driver. Only use soft brushes and adhesive putty on speaker components. Reserve toothpicks for exterior crevices only.
Never Submerge Earbuds in Water
Even earbuds with high IP ratings for water resistance should never be submerged during cleaning. IP ratings protect against accidental splashes and sweat, not against soaking in cleaning solutions. Water can seep into seams and damage internal electronics, even if the exterior appears sealed.
Never Push Wax Deeper
This is the most common mistake people make. Using cotton swabs or tools to push into the speaker mesh only compresses wax further into the grille, making it harder to remove and potentially blocking sound permanently. Always use lifting motions with adhesive putty or brushing motions with soft brushes, never pushing inward.
Avoid Harsh Chemicals
Bleach, ammonia, window cleaner, and abrasive cleaners can damage plastic housings, corrode metal contacts, and degrade rubber ear tips. Stick to isopropyl alcohol, hydrogen peroxide, or mild soap. If you are unsure about a cleaning product, check the manufacturer guidelines or stick to the safe options listed in this guide.
Never Use Heat to Dry
Hair dryers, heat guns, and direct sunlight can warp plastics, damage adhesives, and harm battery cells. Always air dry components at room temperature. Patience prevents permanent damage.
How Often Should You Clean Your Earbuds: Maintenance Schedule
Cleaning frequency depends on how often you use your earbuds and under what conditions. Here is a practical schedule to keep your earbuds in optimal condition:
| Usage Level | Daily Maintenance | Weekly Cleaning | Deep Cleaning |
|---|---|---|---|
| Light (1-2 hours/day) | Wipe with cloth | Clean tips and exterior | Monthly |
| Moderate (3-5 hours/day) | Wipe with cloth | Full exterior cleaning | Bi-weekly |
| Heavy (6+ hours/day) | Inspect and wipe | Clean tips, mesh, exterior | Weekly |
| Workout Use | Wipe sweat after use | Full cleaning post-workout | Weekly |
| Sleep Use | Quick wipe in morning | Complete cleaning | Bi-weekly |
Watch for these warning signs that your earbuds need immediate cleaning: muffled or distant sound quality, reduced bass response, visible wax on the exterior, ear tips feeling slippery or greasy, or charging issues. Address these signs promptly to prevent permanent damage.
If you use your earbuds during workouts, proper cleaning workout headphones is especially important because the combination of sweat and earwax creates an ideal environment for bacteria. Similarly, if you wear sleep headphones for 6-8 hours nightly, they accumulate more wax than typical use and need more frequent attention.
Prevention Tips to Reduce Buildup
The best way to clean earwax out of wireless earbuds is to prevent excessive buildup in the first place. Clean your ears gently before using earbuds, especially after showering when wax is softer. Avoid sharing earbuds with others. Store them in their case when not in use to protect from dust and debris. Consider earbuds for small ears if standard sizes fit too loosely, as poor fit can cause your ears to produce more wax in response to irritation.
Frequently Asked Questions
What dissolves ear wax from earbuds?
Several household items can safely dissolve earwax from earbuds. 70% isopropyl alcohol (rubbing alcohol) is most effective and evaporates quickly without leaving residue. 3% hydrogen peroxide works well for softened dried wax. Mild soapy water can clean silicone components but should never be used on speaker mesh. Apply these solutions sparingly using a dampened cloth rather than pouring directly on earbuds. For best results with stubborn wax, let the solution sit for 2-3 minutes to loosen buildup before gently wiping away.
Can I use alcohol wipes on my earbuds?
You can use alcohol wipes on earbud exteriors with caution. Only use wipes containing 70% isopropyl alcohol without additional chemicals like bleach or fragrances. Many disinfectant wipes contain harsh chemicals that damage plastics and rubber. Never use alcohol wipes on speaker mesh or charging contacts. If using wipes, choose alcohol-free electronics wipes or dampen a microfiber cloth with 70% isopropyl alcohol instead for better control and safety.
Is it okay to use a toothpick to clean earbuds?
Toothpicks are risky and should be used with extreme caution. Only use wooden toothpicks on exterior seams and charging case crevices. Never use toothpicks on speaker mesh as they can easily puncture the delicate membrane and permanently damage sound quality. For mesh cleaning, use adhesive putty (blue tack) or a soft brush instead. If you must use a tool for stubborn exterior debris, try a plastic dental pick rather than wood, which can splinter.
How do professionals clean earbuds?
Professional cleaning services use specialized tools including soft-bristled electronics brushes, medical-grade adhesive putty to lift wax without pushing, 99% isopropyl alcohol for thorough sanitizing, and compressed air for charging ports. Some audio shops offer ultrasonic cleaning for severe buildup, which uses sound waves to dislodge debris. However, most professional cleaning follows the same principles as DIY methods: gentle tools, minimal moisture, careful attention to speaker mesh, and thorough drying. With proper technique, you can achieve professional-level results at home.
Conclusion: Keep Your Earbuds Clean and Your Ears Healthy
Learning how to safely clean earwax out of wireless earbuds is an essential skill that protects both your investment and your health. Regular cleaning prevents bacteria buildup that can cause infections, restores sound quality that wax buildup degrades, and extends the lifespan of your expensive audio equipment.
Remember the key principles: use adhesive putty for speaker mesh, never push wax deeper, stick to 70% isopropyl alcohol or 3% hydrogen peroxide, and let everything dry completely before reassembling. Following the maintenance schedule in this guide will keep your earbuds sounding their best for years to come.
If you are experiencing persistent earwax issues or sound quality problems that cleaning does not resolve, consider whether your current earbuds are the right fit for your ears. Sometimes switching to side sleeper earbud care alternatives or open-ear designs can reduce wax buildup and improve your overall listening experience in 2026.



Leave a Comment