
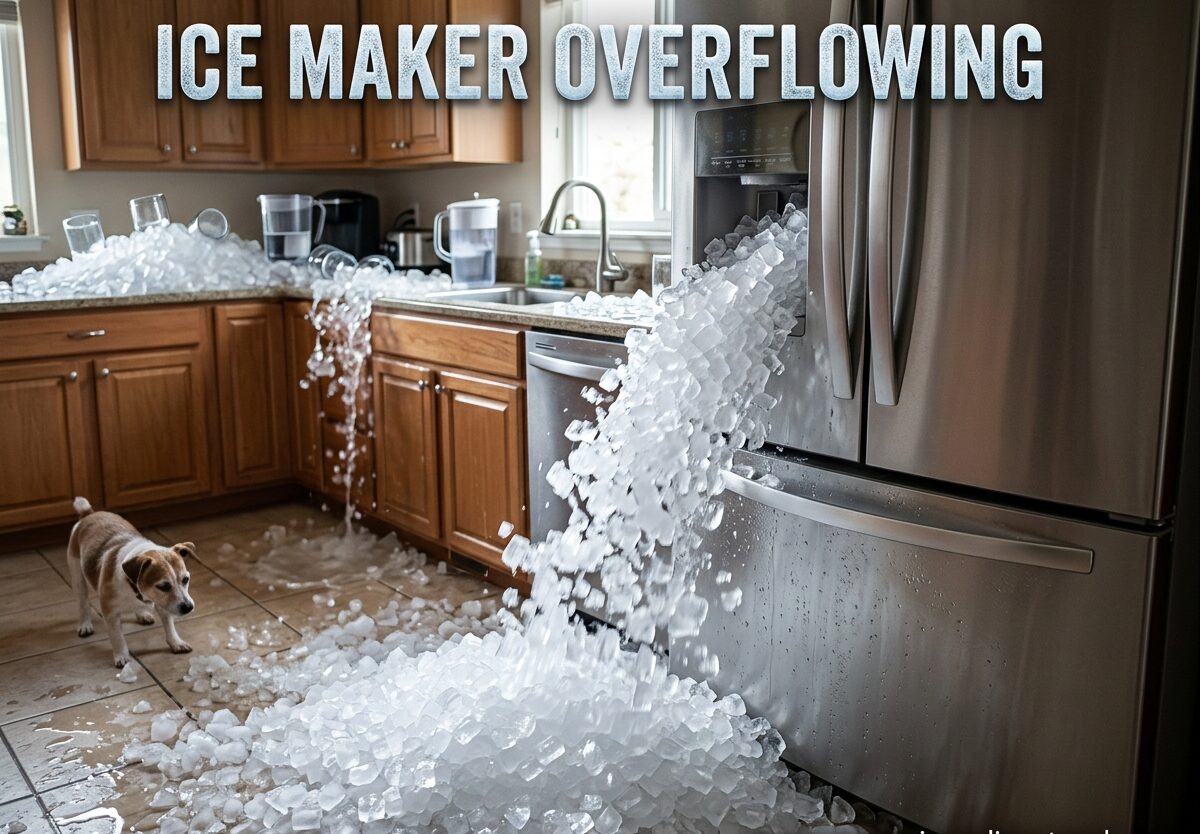
Dealing with an ice maker overflowing can turn your kitchen into a waterlogged mess faster than you might expect. I’ve spent years troubleshooting refrigerator issues, and ice maker overflow remains one of the most frustrating problems homeowners face. When water starts spilling into your freezer or leaking onto your floor, you need answers fast.
This guide covers everything you need to know about ice maker overflowing, from identifying the root cause to fixing it yourself or knowing when to call a professional. I’ve compiled real solutions that work across major refrigerator brands including Whirlpool, Samsung, GE, and Frigidaire.
Understanding Ice Maker Overflowing
Ice maker overflowing happens when water continues filling the ice mold beyond its capacity. This differs from ice maker overfilling, which typically produces oversized cubes. True overflow means water doesn’t stop at all, causing it to spill into the ice bin, freeze into solid blocks, or leak onto your kitchen floor.
The key difference? Overflow is continuous water flow where something has failed in the shut-off mechanism. Overfilling usually produces too much water per cycle but still stops between cycles. Knowing which problem you have helps pinpoint the solution faster.
Most ice makers use a simple system: water enters through a fill tube, the mold freezes it into cubes, and a feeler arm or sensor detects when the ice bin is full. When any component in this chain fails, you end up with ice maker overflowing issues.
5 Common Causes of Ice Maker Overflowing
Understanding what causes your ice maker to overflow helps you fix it faster. I’ve seen these five issues account for over 90% of overflow problems in my troubleshooting experience.
Faulty Water Inlet Valve
The water inlet valve controls water flow into your ice maker. When this valve fails, it can stick open and continuously send water even when the ice maker doesn’t need it. This is the most common cause of serious ice maker overflowing.
Signs of a bad water inlet valve include water continuously running into the ice maker, ice forming in unusual places, or water leaking from the refrigerator. The valve contains an electric solenoid that opens and closes based on signals from your ice maker control module.
I’ve found that water inlet valves typically fail after 5-8 years of use. The rubber diaphragm inside can deteriorate, or mineral buildup from hard water can prevent the valve from closing completely. In either case, replacement is usually the only reliable fix.
Broken or Stuck Feeler Arm
The feeler arm (also called a shut-off arm) is the metal wire that extends into your ice bin. When ice fills the bin, it pushes this arm up, signaling the ice maker to stop producing ice. If the arm is broken, missing, or stuck in the down position, the ice maker never gets the signal to stop.
Test your feeler arm by manually lifting it while the ice maker is running. The ice cycle should stop immediately. If it doesn’t, or if the arm feels loose or floppy, you likely need a replacement feeler arm.
Some newer refrigerators use electronic sensors instead of mechanical arms. These optical sensors can fail or get blocked by ice buildup, causing the same overflow problem. Cleaning the sensor with a soft cloth often resolves this issue.
Low Water Pressure Problems
Surprisingly, low water pressure can cause ice maker overflow issues. When water pressure drops below 20 psi, the inlet valve may not close properly between fill cycles. This allows water to trickle continuously into the ice maker.
Common causes of low water pressure include a partially closed shut-off valve, kinked water line, or clogged water filter. I’ve seen simple solutions like replacing an old water filter fix persistent overflow problems within hours.
Test your water pressure by disconnecting the water line from the refrigerator and running it into a bucket for 20 seconds. You should collect about 3/4 cup of water. Anything less indicates pressure problems that need addressing before blaming the ice maker itself.
Frozen or Misaligned Fill Tube
The fill tube directs water into the ice mold. When this tube freezes internally or becomes misaligned, water can spray or drip continuously instead of entering the mold properly. This often creates the “snowy ice” pattern where ice forms everywhere except where it should.
Check your fill tube by looking inside the freezer where it enters the ice maker assembly. Ice buildup around the tube indicates a freezing problem. A hair dryer can temporarily melt the ice, but you’ll need to address why it’s freezing in the first place.
Misalignment often happens after refrigerator repairs or moving the unit. The fill tube should point directly into the ice mold without touching any other components. Even a slight misalignment can cause water to miss the mold entirely.
Ice Bin Positioning Issues
Sometimes the problem isn’t the ice maker at all—it’s the ice bin. If the bin isn’t seated properly or slides forward during ice ejection, the feeler arm can’t detect the ice level. This tricks the ice maker into thinking the bin is empty, causing continuous production and eventual overflow.
Remove your ice bin and check for broken tabs, cracked plastic, or ice buildup that prevents proper seating. The bin should slide in smoothly and lock into place without wobbling. Some models have specific positioning marks that must align correctly.
I’ve also seen cases where owners have removed the ice bin temporarily and forgotten to reinstall it properly. Always ensure the bin is fully inserted and making contact with any shut-off mechanisms before assuming your ice maker is broken.
How to Fix Ice Maker Overflowing: Step-by-Step Guide
Follow this systematic approach to diagnose and fix your ice maker overflow problem. I recommend working through these steps in order, from simplest fixes to more complex repairs.
Step 1: Turn Off the Ice Maker
Before anything else, stop the water flow. Most ice makers have a simple shut-off either by lifting the feeler arm or using an on/off switch. This prevents further water damage while you troubleshoot. If you can’t find a shut-off, turning off the water supply valve behind your refrigerator works too.
Step 2: Inspect the Feeler Arm
Check the feeler arm for damage, ice buildup, or obstructions. Manually test it by lifting the arm while watching for the ice maker to respond. Clean any ice or debris around the arm mechanism. If the arm is broken or loose, replacement is straightforward and usually costs under $20.
Step 3: Check Ice Bin Position
Remove the ice bin completely and inspect it for damage. Reinsert it carefully, ensuring it locks into place correctly. Test the ice maker with the bin removed to see if the feeler arm works without bin interference. This simple step solves more problems than most people expect.
Step 4: Examine the Fill Tube
Look for ice buildup around the fill tube inside the freezer. If frozen, use a hair dryer on low heat to melt the ice (never use sharp objects to chip ice). Check that the tube points directly into the ice mold without touching other parts. Misaligned tubes often need professional adjustment.
Step 5: Test Water Pressure
Disconnect the water line behind the refrigerator and test flow into a bucket. You should get steady, strong water flow. Weak flow indicates a supply problem—check the shut-off valve, replace kinked lines, or change your water filter if it’s been more than six months.
Step 6: Evaluate the Water Inlet Valve
If you’ve reached this step with no solution found, the water inlet valve is likely your culprit. Listen for a humming sound when the ice maker should be filling—a continuously humming valve indicates it’s stuck open. Testing with a multimeter requires some electrical knowledge, so this might be the point where professional help makes sense.
Step 7: Perform a Manual Reset
Sometimes electronic ice makers develop glitches. Most models have a reset procedure—try turning off the ice maker for 5 minutes, then restarting it. Some brands require specific button combinations or holding the reset button for 10 seconds. Check your owner’s manual for model-specific instructions.
Brand-Specific Ice Maker Issues
Different refrigerator brands have unique ice maker designs and common failure points. Knowing your brand’s typical issues can save you hours of troubleshooting time.
Samsung Ice Maker Overflowing
Samsung refrigerators are notorious for ice maker issues, particularly overflow problems. The most common cause is a faulty water inlet valve assembly, which Samsung has addressed in newer models. Samsung ice makers also suffer from “air leak” issues where warm air enters the freezer and causes irregular ice production that mimics overflow symptoms.
Samsung owners should check for the “clear ice” versus “snowy ice” pattern. Clear ice blocks indicate water valve problems, while snowy ice spread throughout the freezer suggests air leaks or fill tube freezing issues.
Whirlpool Ice Maker Overflowing
Whirlpool ice makers typically use a reliable mechanical feeler arm design. Most overflow issues stem from a broken feeler arm or failed water inlet valve. Whirlpool also manufactures many Kenmore and KitchenAid refrigerators, so the troubleshooting steps are identical across these brands.
Whirlpool’s modular ice maker design makes replacement straightforward for DIYers. The entire ice maker assembly typically costs $100-150 and can be swapped out in under 30 minutes with basic tools.
GE and Hotpoint Ice Maker Overflowing
GE refrigerators often suffer from ice bucket positioning problems. The bucket must align precisely with optical sensors for proper shut-off. Even slight misalignment causes continuous ice production. GE also uses a unique fill cup design that can crack, causing water to spray incorrectly during fill cycles.
Check the ice bucket rear tabs for breakage—this is a common GE problem that prevents proper sensor contact. Replacement buckets cost around $50 and fix many overflow issues.
Frigidaire Ice Maker Overflowing
Frigidaire ice makers typically fail due to water inlet valve issues or control module problems. The brand uses electronic controls more than mechanical arms, making diagnosis trickier for DIYers. Frigidaire also manufactures many Gibson, Kelvinator, and some Electrolux models with identical ice maker systems.
Frigidaire owners should first check the water filter location—a clogged filter in the refrigerator section can reduce pressure enough to cause valve problems. Always try a fresh filter before ordering replacement parts.
Preventing Future Ice Maker Overflow Problems
Once you’ve fixed your ice maker overflow issue, these preventive measures help avoid future problems:
Replace water filters regularly: Clogged filters reduce water pressure and can cause valve failures. Most manufacturers recommend every 6 months, but homes with hard water may need more frequent changes.
Check ice bin position weekly: A quick visual inspection ensures the bin hasn’t shifted. This 10-second check prevents the most common cause of overflow.
Clean the freezer vents: Proper airflow prevents ice buildup around the fill tube and feeler arm. Vacuum dust from vents monthly and don’t overstuff the freezer.
Inspect water lines annually: Look for kinks, cracks, or connections that might leak. Catching these problems early prevents water damage and ice maker issues.
Test shut-off mechanisms monthly: Manually lift the feeler arm or activate the optical sensor to verify it stops ice production. This quick test catches failures before they cause overflow.
When to Call a Professional Repair Service
Some ice maker overflow problems require professional expertise. Consider calling a technician if you encounter these situations:
Electrical component failure: If the ice maker control module or main board needs replacement, professional diagnosis ensures you’re replacing the right part. These components cost $150-300, so accurate testing matters.
Sealed system problems: If your ice maker is part of a sealed refrigeration system, DIY repairs can release refrigerant and violate environmental regulations. These repairs require EPA-certified technicians.
Repeated failures: If you’ve replaced parts and the problem returns, there may be an underlying issue like incorrect water pressure or voltage problems that require professional equipment to diagnose.
Warranty considerations: If your refrigerator is under warranty, DIY repairs can void coverage. Professional service preserves your warranty and ensures proper documentation.
Most professional ice maker repairs cost $150-300 including parts. While this isn’t cheap, it’s often less than the cost of multiple DIY attempts that don’t solve the problem.
Countertop Ice Maker Considerations
Countertop ice makers have different overflow issues than built-in models. These portable units typically lack water inlet valves and feeler arms, relying instead on simple float mechanisms or timers.
Portable ice maker overflow usually stems from overfilling the water reservoir beyond the max line, or using the unit on an uneven surface that causes water to spill. Always place countertop ice makers on level surfaces and never exceed the maximum water fill line.
Countertop units also need regular cleaning—mineral buildup can cause float mechanisms to stick. Descaling monthly with vinegar or a commercial descaling solution prevents most overflow problems with portable ice makers.
FAQs
How do I stop my ice maker from overflowing?
First, turn off the ice maker using the feeler arm or on/off switch. Then check the ice bin is properly positioned and the feeler arm moves freely. Inspect the fill tube for ice buildup and verify your water filter isn’t clogged. If these quick fixes don’t work, the water inlet valve likely needs replacement.
Why is my ice maker not shutting off when full?
A stuck or broken feeler arm is the most common cause. The arm should rise when ice fills the bin and stop production. If the arm is damaged, loose, or frozen in place, it can’t detect the ice level. Electronic ice makers may have blocked optical sensors that need cleaning or a failed sensor module requiring replacement.
How do I know if my ice maker water line is clogged?
Disconnect the water line from the back of your refrigerator and direct it into a bucket. Turn on the water supply for 20 seconds. You should collect about 3/4 cup of water with strong, steady flow. Weak flow or trickling indicates a clog or kink in the line that needs addressing before the ice maker will function properly.
How do I manually reset my ice maker?
Most ice makers reset by turning off the unit for 5 minutes, then restarting. Some models require holding a reset button for 10 seconds or pressing specific button combinations. Samsung owners often need to simultaneously hold the ice type and child lock buttons. Check your owner’s manual for model-specific reset procedures as they vary significantly between brands.
Conclusion
Ice maker overflowing problems are frustrating but usually solvable with systematic troubleshooting. Start with the simple fixes—check the feeler arm, verify ice bin positioning, and inspect the fill tube. These basic steps resolve most overflow issues without any special tools or expertise.
When DIY fixes don’t work, don’t hesitate to call a professional. Water inlet valve replacements and electronic repairs often justify the service call cost, especially when you factor in the time and frustration of multiple failed attempts.
Preventive maintenance goes a long way toward avoiding future problems. Regular filter changes, proper bin positioning, and routine inspections keep your ice maker running smoothly for years. Most importantly, address overflow problems immediately—ignoring them leads to water damage and more expensive repairs down the road.
Whether you’re dealing with a Samsung, Whirlpool, GE, or any other brand, understanding these common causes and solutions gives you the knowledge to fix ice maker overflowing issues quickly and confidently.

Leave a Comment