
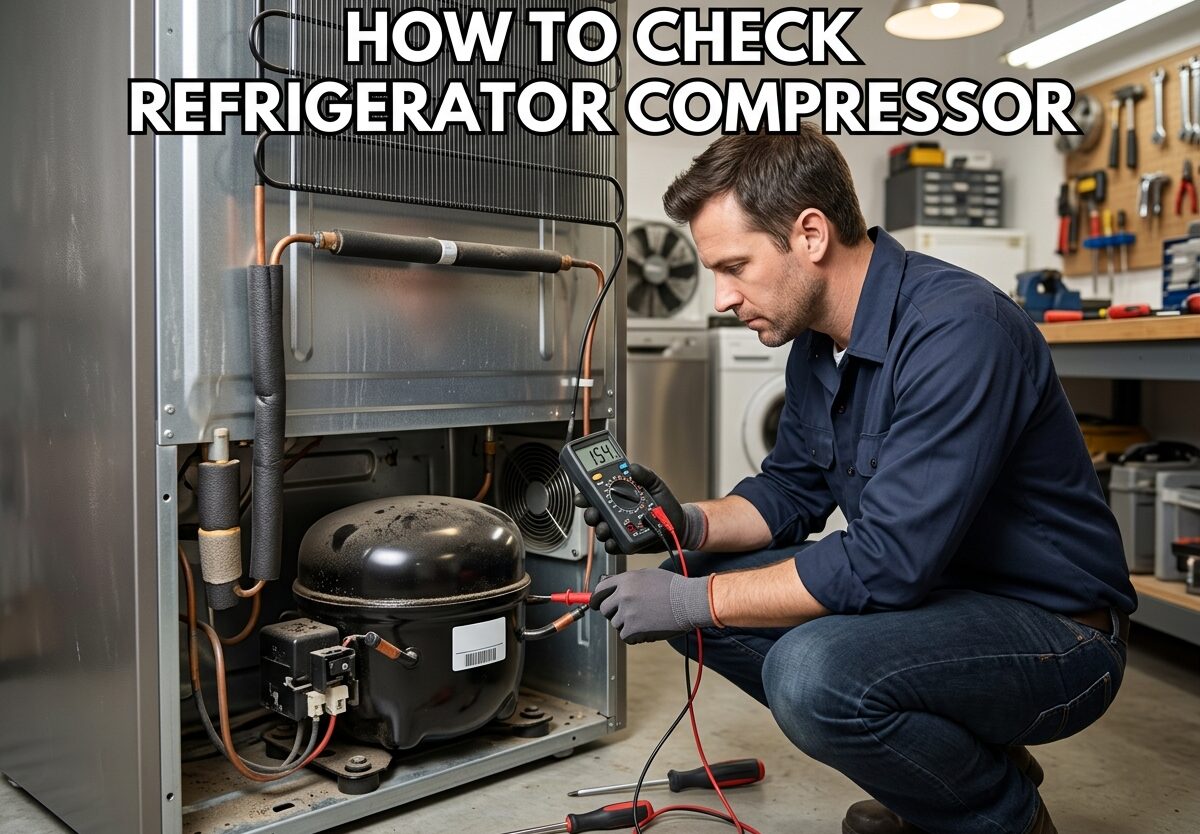
If your refrigerator isn’t cooling properly, one of the first components you should investigate is the compressor. Learning how to check refrigerator compressor functionality can save you time and money by helping you diagnose the problem before calling a professional technician. I’ve worked through refrigerator compressor issues myself, and I’ll walk you through the exact process I use to test these components safely and accurately.
What Is a Refrigerator Compressor and How Does It Work?
The refrigerator compressor is essentially the heart of your cooling system. It’s a motor-driven pump that pressurizes refrigerant and circulates it through the coils to remove heat from the refrigerator interior. When the compressor runs, it compresses refrigerant vapor and pushes it to the condenser coils where heat is released to the outside air.
The compressor receives power through the start relay, which provides the initial electrical boost needed to start the motor. Once running, the compressor maintains the refrigeration cycle that keeps your food cold. Without a functioning compressor, the entire cooling system stops working.
Most residential refrigerators use hermetic compressors sealed within a metal housing, which protects them from external damage but also makes them more challenging to service. Understanding how this component works helps you better diagnose problems when they occur.
Safety Precautions Before Testing Your Refrigerator Compressor
Before attempting to check refrigerator compressor components, I cannot emphasize safety enough. Refrigerator compressors operate on high voltage and contain pressurized refrigerant that requires special handling. These are the safety steps I always follow before any testing begins.
First, unplug the refrigerator from the wall outlet completely. Simply turning off the temperature control isn’t enough – you need to disconnect all power. I recommend waiting at least 5 minutes after unplugging to allow any stored electrical charge to dissipate.
Ensure the area around the refrigerator is dry to avoid electrical hazards. If you’re working in a wet or damp location, consider using rubber mats or wearing insulated boots. Never attempt to test a compressor while standing on a wet floor.
Be aware that compressor components can become extremely hot during operation. Allow the refrigerator to sit unplugged for at least 30 minutes if it was recently running. The compressor housing and surrounding components can cause serious burns if touched while hot.
Finally, know your limitations. If you’re uncomfortable working with electrical components or unsure about any step in the testing process, it’s better to call a professional technician. Refrigerator repair isn’t worth risking your safety.
Tools You’ll Need to Check Your Refrigerator Compressor
Gathering the right tools before starting will make the testing process much smoother. Here’s what I keep in my diagnostic kit for refrigerator compressor testing.
A digital multimeter is the most essential tool. You’ll need one that can measure resistance in ohms and has a continuity testing function. I recommend a multimeter with at least 200-ohm resolution for accurate compressor winding readings. Analog meters can work but digital models provide clearer readings.
A screwdriver set with various sizes will be needed to access the compressor compartment. Most refrigerators use Phillips-head screws, but some may require Torx or specialty bits. A nut driver set can also be helpful for removing terminal cover bolts.
A notepad and pen for recording your multimeter readings. This is crucial – you’ll need to compare measurements between different terminals, and writing them down prevents confusion during the testing process.
Optional but helpful items include a flashlight for better visibility in dark compressor compartments, and a camera to document the wiring connections before disconnecting anything. This can be invaluable if you need to reference the original configuration later.
Step 1: Visual and Auditory Inspection
Before connecting your multimeter, a thorough visual and auditory inspection can reveal obvious problems. I always start with this simple check, as it can save time by identifying issues that don’t require electrical testing.
Look for visible signs of damage on the compressor itself. Check for burn marks, discoloration, or oil residue around the compressor housing and connections. Oil spots often indicate a refrigerant leak, which would explain cooling problems. Any visible damage to the compressor housing is a serious sign that the unit may need replacement.
Examine the electrical connections at the compressor terminal cover. Look for loose wires, corroded terminals, or burnt connections. These are common failure points that can mimic compressor problems. I’ve seen many cases where cleaning or replacing a corroded connection solved the issue without needing compressor replacement.
Listen carefully when the refrigerator should be running. A working compressor typically produces a steady low humming sound. Clicking sounds that repeat every few minutes usually indicate a start relay problem – the compressor is trying to start but failing. A loud buzzing or humming noise that never stops suggests the compressor is stuck or seized.
Complete silence when the refrigerator should be cooling could mean the compressor isn’t receiving power or has completely failed. Note any unusual sounds and when they occur during the cooling cycle, as this information will help narrow down the problem.
How to Check Refrigerator Compressor with a Multimeter
When you need to check refrigerator compressor electrical components, a multimeter resistance test is the most reliable diagnostic method. This test measures the resistance of the compressor windings to determine if they’re functioning properly. I’ll walk you through the exact process I use, with the specific readings you should expect.
First, locate the compressor terminal cover on the side of the compressor housing. Remove the cover to expose the three terminal pins. These are typically labeled C (Common), S (Start), and R (Run), though labels may be missing on older models. If unlabeled, you’ll need to identify them through resistance testing.
Set your multimeter to measure resistance in ohms (Ω). Choose the lowest range that will measure up to at least 50 ohms – most compressors read between 2 and 30 ohms depending on the model. Make sure your multimeter batteries are fresh for accurate readings.
Test the resistance between each pair of terminals. You’ll take three measurements: between Common and Start (C-S), Common and Run (C-R), and Start and Run (S-R). Record each reading carefully. For a healthy compressor, you should get the following results:
- Common to Start: Highest resistance (typically 5-15 ohms)
- Common to Run: Lower resistance (typically 2-6 ohms)
- Start to Run: Highest resistance, equal to C-S plus C-R (typically 7-20 ohms)
If your readings are significantly higher or lower than these ranges, or if you measure infinite resistance (open circuit) between any terminals, the compressor windings are likely damaged. A reading of zero ohms between any terminal and the compressor housing indicates a short to ground, which means the compressor has failed internally.
For unlabeled terminals, the Common terminal will show continuity to both other terminals, while Start and Run will show the highest resistance between them. This identification method helps ensure you’re testing the correct points even without labels.
Testing the Start Relay
The start relay is a small component attached to the compressor that provides the extra electrical boost needed to start the motor. In my experience testing refrigerators, start relays are actually one of the most common failure points – and they’re much cheaper to replace than a compressor.
Remove the start relay from the compressor terminals by gently pulling it straight off. Avoid twisting or rocking the relay, as this can damage the compressor pins. Visually inspect the relay for any signs of burning, melting, or physical damage.
For a solid-state start relay, set your multimeter to continuity mode and test between the relay’s terminals. A good relay should show no continuity (infinite resistance) when the relay is cold and not powered. If you measure continuity through a solid-state relay, it has likely failed shorted and needs replacement.
For mechanical start relays with a coil, measure the resistance between the coil terminals. A typical reading should be between 1-10 ohms, though this varies by model. Consult your refrigerator’s service manual for the exact specifications. Infinite resistance indicates an open coil, while zero resistance suggests a shorted coil.
Shake the relay gently near your ear. If you hear rattling sounds inside, the internal components may be broken – another sign the relay needs replacement. I’ve found this simple test catches many failing relays that pass electrical testing.
Testing the Overload Relay
The overload relay protects the compressor from overheating by cutting power if temperatures become excessive. When checking refrigerator compressor problems, the overload relay should be tested as it can fail and prevent the compressor from running.
Locate the overload relay, which is typically attached to or near the start relay on the compressor terminal cover. It’s often a small rectangular or disc-shaped component with two connections. Remove it carefully from the compressor terminals.
Set your multimeter to continuity or resistance mode. Test between the two terminals of the overload relay. A good overload relay should show continuity (low resistance, typically less than 5 ohms) when it’s at room temperature. If you measure infinite resistance at room temperature, the overload has failed open and needs replacement.
For a more thorough test, you can carefully warm the overload relay using a heat gun or hair dryer. As it heats to its activation temperature (usually around 100-120°F), the relay should open and show infinite resistance. This test isn’t always necessary but can confirm the overload is functioning correctly.
Remember that overload relays are designed to fail open when tripped, which protects the compressor from further damage. If your overload has failed, it’s important to determine why it overheated before simply replacing it, or the new one may fail again.
Testing the Run Capacitor
Some refrigerator compressors use a run capacitor to improve efficiency and provide consistent power. A failed capacitor can cause the compressor to struggle starting or run inefficiently. I always test the capacitor when checking refrigerator compressor components.
First, discharge the capacitor safely to avoid electrical shock. Even with the refrigerator unplugged, capacitors can store dangerous electrical charge. Use an insulated screwdriver to bridge the capacitor terminals, or use a resistor discharge method for safer discharge.
Set your multimeter to capacitance measurement mode if available. If your meter doesn’t measure capacitance, you can use resistance mode for a basic test. Connect the meter leads to the capacitor terminals, observing polarity if the capacitor is polarized.
A good capacitor should show a capacitance value within 10% of its rated value (printed on the capacitor label). For example, a capacitor rated at 15µF should measure between 13.5-16.5µF. Values significantly outside this range indicate a failing capacitor that needs replacement.
If using resistance mode, you should see the resistance reading start low and gradually increase as the capacitor charges. If the resistance stays at zero, the capacitor is shorted. If it shows infinite resistance immediately, the capacitor is open. Both conditions mean the capacitor needs replacement.
Checking for Short to Ground
A short to ground is a serious compressor failure where the internal windings have developed an electrical connection to the compressor housing. When you check refrigerator compressor components, this test is crucial because a compressor with a short to ground cannot be safely repaired.
With your multimeter still set to resistance or continuity mode, place one probe on one of the compressor terminals (C, S, or R) and touch the other probe to the bare metal of the compressor housing or a clean metal surface on the refrigerator frame.
Repeat this test for all three compressor terminals. For a properly functioning compressor, you should measure infinite resistance (no continuity) between any terminal and ground. Any measurable resistance less than infinite indicates a short to ground.
Even a relatively high resistance reading like 50k ohms between a terminal and ground indicates a problem – a good compressor will show completely open circuit. I’ve seen compressors with intermittent ground faults that test good when cold but fail when operating temperature is reached.
If you discover a short to ground, the compressor has failed internally and will need replacement. This type of failure cannot be repaired, and attempting to run a compressor with a ground fault can create a safety hazard.
Symptoms of a Bad Refrigerator Compressor
Recognizing the symptoms of a failing compressor can help you identify problems early. Based on my experience troubleshooting refrigerators, here are the most common signs that indicate you may need to check refrigerator compressor function.
The most obvious symptom is that the refrigerator isn’t cooling properly while the freezer may still work somewhat. This happens because the compressor isn’t pressurizing the refrigerant adequately. You might notice the fresh food compartment warming up first while the freezer maintains marginal temperature.
Listen for the compressor clicking but not starting. This typically indicates the compressor is trying to start but failing – often due to bad start relay or failing compressor windings. The click you hear is the start relay attempting to engage and then safety shut-off activating.
A compressor that runs continuously without cycling off is another warning sign. Normally, the compressor should run for 20-30 minutes and then shut off for 20-30 minutes. Continuous running suggests the compressor can’t build enough pressure to satisfy the thermostat, which points to internal wear or failure.
Unusually loud noises during compressor operation can indicate internal problems. While some compressor noise is normal, excessive banging, rattling, or grinding sounds suggest mechanical failure. These noises often mean the internal components are wearing out or have failed.
The refrigerator tripping the circuit breaker is a serious symptom that indicates an electrical short. This could be in the compressor, start relay, overload, or wiring. If the breaker trips immediately when the compressor tries to start, the compressor windings may have shorted.
How to Reset a Refrigerator Compressor
Sometimes what appears to be a compressor problem is actually a temporary issue that a reset can resolve. I always attempt a reset before condemning the compressor, as this simple procedure can solve various electrical glitches.
Start by unplugging the refrigerator from the wall outlet completely. Turn off the temperature controls inside both the fresh food and freezer compartments. This ensures all electrical systems are fully disconnected before the reset process.
Wait at least 5-10 minutes with the refrigerator unplugged. This waiting period allows the compressor to fully depressurize and any electrical components to discharge completely. I recommend waiting the full time even if you’re in a hurry – rushing this step can result in an incomplete reset.
While waiting, check that the condenser coils are clean. Dirty coils can cause the compressor to overheat and trip the overload protector, which may be why a reset is needed in the first place. Vacuum or brush the coils if they’re dusty or dirty.
After the waiting period, plug the refrigerator back in and turn on the temperature controls. Set them to your normal preferred settings. Wait at least 2-3 hours before evaluating whether the reset was successful – it takes time for the refrigerator to reach proper operating temperature.
Listen for the compressor to start within 5-10 minutes after plugging in. If it starts normally and the refrigerator begins cooling, the reset was successful. If the compressor still doesn’t start or exhibits the same symptoms, you’ll need to proceed with the electrical testing procedures outlined earlier.
Repair vs Replace: When to Call a Professional
After you check refrigerator compressor components, you’ll need to decide whether to repair or replace. This decision depends on several factors I consider when evaluating refrigerator problems.
Compressor replacement is typically the most expensive refrigerator repair, costing between $400 and $800 for parts plus labor. If your refrigerator is over 10 years old, investing this amount may not make economic sense when you consider that a new refrigerator costs between $800 and $2000 depending on features and size.
However, if the problem turns out to be the start relay, overload, or capacitor rather than the compressor itself, repair costs drop dramatically to $50-200 for parts. These are much more reasonable repairs that make sense on refrigerators of almost any age.
The refrigerator’s overall condition should factor into your decision. Consider the age, brand reputation, and general condition. If the refrigerator has had multiple problems or shows signs of wear elsewhere, replacement may be the better choice even if the compressor is the only current failure.
Your comfort level with electrical repairs matters too. Compressor replacement requires specialized tools including refrigerant recovery equipment, soldering torches, and vacuum pumps. Unless you have these tools and experience, compressor replacement is best left to professional technicians.
I recommend calling a professional if: the compressor tests bad, you’re uncomfortable working with high voltage, you don’t have the necessary tools, or the refrigerator is still under warranty. Professional diagnosis typically costs $100-150 but can save you money by correctly identifying the problem.
FAQ
How do I check if my fridge compressor is bad?
Use a multimeter to test resistance between the three compressor terminals (Common, Start, Run). A good compressor will show specific resistance values between terminals (typically 2-15 ohms depending on the pair). Any reading of infinite resistance or zero ohms indicates a failed compressor. Also test for continuity between terminals and the compressor housing – any continuity means a short to ground and the compressor has failed.
How do I reset my refrigerator compressor?
Unplug the refrigerator from the wall outlet and turn off the temperature controls. Wait at least 5-10 minutes to allow the compressor to depressurize and electrical components to discharge. Clean the condenser coils if needed. Plug the refrigerator back in, turn on the temperature controls, and listen for the compressor to start within 5-10 minutes. Wait 2-3 hours to evaluate if cooling resumes.
What is the most expensive thing to fix on a refrigerator?
The compressor is typically the most expensive component to replace on a refrigerator, costing between $400-800 for parts plus labor. The high cost is due to the specialized tools and refrigerant handling required. Compressor replacement often represents 40-60% of the cost of a new refrigerator, which is why many homeowners choose replacement rather than repair when the compressor fails.
Is it worth replacing a compressor on a refrigerator?
It depends on the refrigerator’s age and condition. For refrigerators under 5 years old or high-end models over $2000, compressor replacement may be worthwhile. For basic refrigerators over 8-10 years old, replacement is usually more economical. Consider that compressor repair costs $400-800 while a new refrigerator costs $800-2000. If the problem is actually the start relay or overload rather than the compressor, repair costs drop to $50-200 making repair worthwhile even on older units.
What are the common troubles of a refrigerator compressor?
Common compressor problems include: failed start windings (preventing startup), shorted windings (causing breaker trips), open windings (infinite resistance), mechanical seizure (compressor can’t turn), short to ground (electrical connection to housing), and worn internal bearings (causing noise). Many symptoms attributed to compressor failure are actually caused by failed start relays, overload protectors, or capacitors which are much cheaper to replace.
How can you tell if a compressor is bad on a refrigerator?
Signs of a bad compressor include: refrigerator not cooling while fan runs, compressor clicking but not starting, compressor running continuously without cycling off, unusual loud noises (banging, grinding), circuit breaker tripping when compressor attempts to start, and warm fresh food compartment while freezer partially works. A multimeter test showing infinite resistance between terminals, zero ohms, or continuity to ground confirms compressor failure.
Conclusion
Learning how to check refrigerator compressor function is a valuable skill for any homeowner. By following the testing procedures I’ve outlined, you can accurately diagnose compressor problems and decide whether repair or replacement makes the most sense. Remember to always prioritize safety, take your time with each test, and record your measurements carefully.
Many refrigerator cooling problems are actually caused by start relays, overload protectors, or capacitors rather than the compressor itself. These components are much cheaper to replace and can often restore your refrigerator to proper working condition. Complete the full diagnostic process before condemning the compressor.
If you discover that your compressor has failed, consider the age and condition of your refrigerator when deciding between repair and replacement. For newer or high-end models, professional compressor repair may be worthwhile. For older basic refrigerators, replacement often makes more economic sense.
When in doubt, consult a professional technician. The cost of professional diagnosis is often worth it to avoid replacing components unnecessarily or attempting repairs beyond your skill level. Your safety and the proper functioning of your refrigerator are worth the investment.





Leave a Comment