
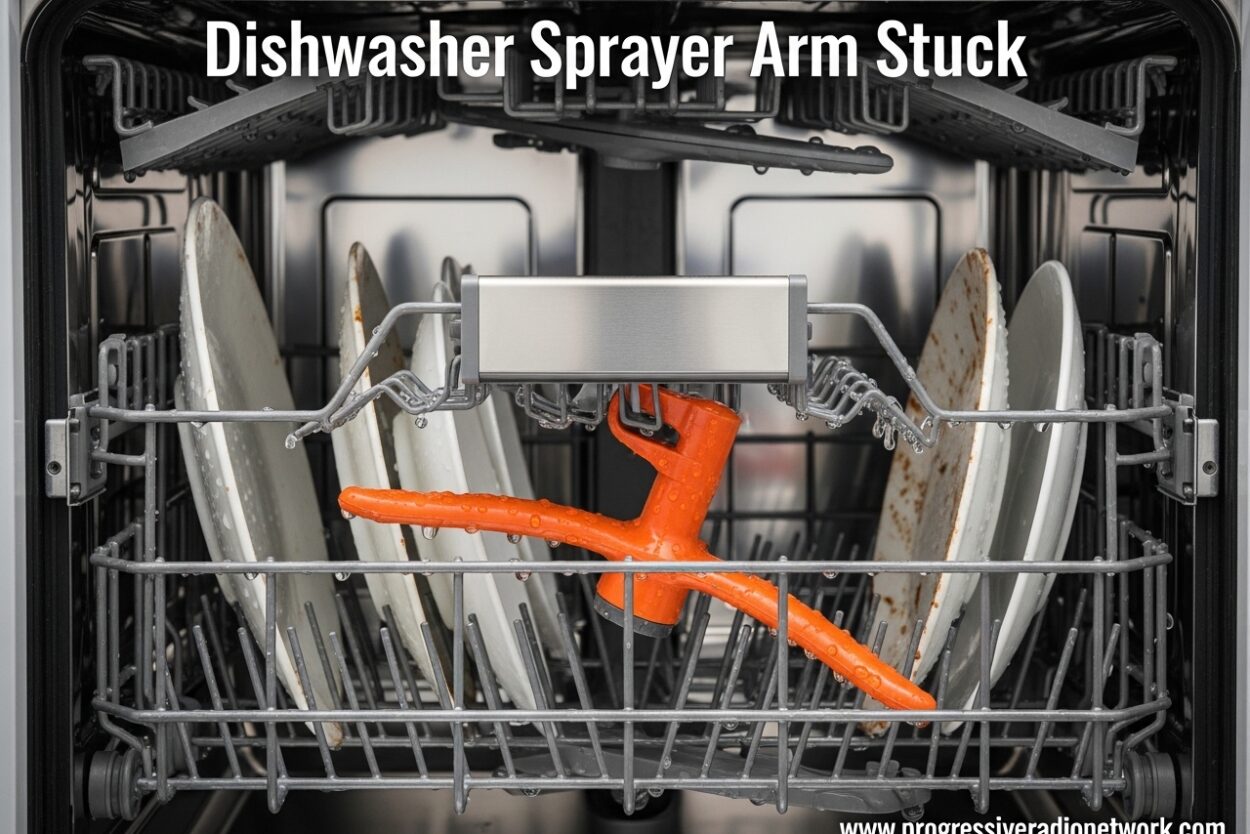
There’s nothing more frustrating than unloading your dishwasher only to find dishes that are still dirty. If you’ve noticed your dishes aren’t getting clean like they used to, a stuck or clogged dishwasher sprayer arm might be the culprit. I’ve dealt with this issue multiple times over the years, and I’m going to walk you through exactly how to diagnose and fix it yourself.
A dishwasher sprayer arm stuck in place prevents water from reaching all your dishes effectively. The good news is that most spray arm problems are easy to fix without calling a professional. In this guide, I’ll cover why spray arms get stuck, how to tell if yours is the problem, and step-by-step instructions for getting it working again.
What Is a Dishwasher Sprayer Arm and How Does It Work?
Before diving into repairs, it helps to understand what you’re working with. A dishwasher sprayer arm (also called a spray arm) is a rotating component that distributes water throughout your dishwasher during the wash cycle. It connects to the water pump and features multiple small holes or nozzles that spray water at high pressure.
Most dishwashers have two spray arms: an upper spray arm located beneath the top rack and a lower spray arm at the bottom of the tub. The circulation pump forces water up through these arms, causing them to rotate and spray water in all directions. This rotation is what ensures every dish gets thoroughly cleaned.
The rotation happens naturally due to water pressure – as water shoots out of the angled spray holes, it creates torque that spins the arm. When this system works properly, your dishes come out sparkling clean every time.
Why Is My Dishwasher Spray Arm Not Moving?
This is the most common question I hear about dishwasher sprayer arm issues. Based on my experience and research from appliance repair forums, here are the primary reasons your dishwasher sprayer arm might be stuck:
Clogged Spray Holes – This is the number one cause. Food particles, detergent buildup, and mineral deposits from hard water can block the small spray holes. When these holes get clogged, water can’t escape properly, which reduces the pressure needed to rotate the arm. I’ve seen this happen especially in households with hard water, where mineral deposits slowly build up over months.
Physical Obstruction – Sometimes the spray arm literally gets stuck on something. A utensil falling through the rack, a warped dish, or even a broken glass piece can physically block the arm from spinning. I once found a small spoon that had fallen and was wedged between the spray arm and the tub wall.
Worn or Broken Parts The spray arm mounting nut can become loose or stripped over time. The plastic rotation mechanism may crack or wear down. In some cases, the spray arm itself might be cracked and not sitting properly on its mount.
Water Pressure Issues – If your dishwasher isn’t getting enough water pressure, the spray arm won’t rotate properly. This could be due to a clogged filter, a failing circulation pump, or even a problem with your home’s water supply. The circulation pump is responsible for pressurizing the water that drives the spray arms.
Diverter Valve Problems – Some dishwashers use a diverter valve to direct water between the upper and lower spray arms. If this valve fails, one or both arms might not receive adequate water flow. This is a more serious issue that often requires professional repair.
Improper Loading – Overloading your dishwasher or large items blocking the spray arm can prevent rotation. I’ve seen tall pans or cutting boards placed in a way that physically stops the arm from spinning.
Signs Your Dishwasher Sprayer Arm is Stuck
How can you tell if your dishwasher sprayer arm stuck issue is real? Watch for these telltale signs:
- Dishes come out dirty even with a full cycle
- Food residue remains on the top rack especially (upper arm problem)
- You can hear the motor running but don’t see water spraying forcefully
- The spray arm doesn’t spin when you manually test it
- White mineral deposits visible around spray holes
- Unusual grinding or rattling noises during operation
- Water pooling at the bottom of the dishwasher
If you notice any of these symptoms, it’s time to investigate your spray arms. I recommend checking both the upper and lower arms, even if you think only one is problematic.
Tools You’ll Need to Fix a Stuck Sprayer Arm
The good news is that most dishwasher sprayer arm repairs require basic household items. Here’s what I keep on hand for this job:
- Flashlight for visibility inside the dishwasher
- Toothpicks or sewing needle for clearing small holes
- Small adjustable wrench or pliers
- White vinegar for dissolving mineral deposits
- Soft brush or old toothbrush
- Towels for water cleanup
- Optional: CLR or similar lime remover for tough deposits
You probably have most of these items already. The only thing you might need to buy is a lime-scale remover if you have particularly stubborn mineral buildup.
How to Fix a Stuck Dishwasher Sprayer Arm: Step-by-Step
Now let’s get your dishwasher sprayer arm unstuck. Follow these steps carefully, and you’ll have it working again in under an hour.
Step 1: Turn Off Power and Water
Safety first. Before doing anything, turn off your dishwasher at the circuit breaker or unplug it. If you’re comfortable working with shut-off valves, you can also turn off the water supply, though this isn’t strictly necessary for spray arm work. I always recommend this step because water and electricity don’t mix.
Step 2: Remove the Lower Rack
Pull out the bottom dish rack completely and set it aside. This gives you full access to the lower spray arm. You might want to place towels around the base of the dishwasher to catch any water that drips out.
Step 3: Inspect and Remove the Spray Arm
Look closely at how the spray arm is mounted. Most simply pull straight up or unscrew counter-clockwise. Some models have a plastic retaining clip that needs to be pressed. Gently lift or unscrew the arm and remove it from the dishwasher.
Pro tip: Take a photo with your phone before removing anything so you know exactly how it goes back together. I’ve learned this the hard way.
Step 4: Clean Spray Holes with Toothpick or Needle
Hold the spray arm up to a light source and look through each hole. You’ll be surprised how much debris can accumulate. Use a toothpick, sewing needle, or straightened paperclip to gently push out any clogs from each spray hole.
I recommend working from both sides – push the debris through from one side, then flush from the other. Run water through the arm under your faucet to verify each hole is clear. Water should flow freely through every opening.
Step 5: Soak in Vinegar for Mineral Deposits
If you see white, crusty buildup around the spray holes, you’re dealing with mineral deposits from hard water. Fill a bowl or bucket with equal parts white vinegar and hot water. Submerge the spray arm and let it soak for at least 30 minutes, preferably longer.
The vinegar will dissolve the mineral deposits. For stubborn buildup, you can use a commercial lime remover like CLR, but vinegar works surprisingly well and is much cheaper. After soaking, use your soft brush to scrub away any remaining deposits.
Step 6: Check for Debris in Pump Housing
With the spray arm removed, look down into the pump housing at the bottom of the dishwasher tub. You might see food particles, broken glass, or other debris blocking the water intake. Carefully remove any obstructions with your fingers or tweezers.
Be extremely cautious here – there are sharp components in the pump housing. Don’t force anything or you could damage the seals or impeller. If you see what looks like internal damage, stop and consider calling a professional.
Step 7: Reinstall Spray Arm Correctly
Before reinstalling, verify the spray arm mounting area is clean and undamaged. Refer to the photo you took earlier. Place the spray arm back onto its mount, ensuring it sits flush and secure.
If it screws on, tighten it by hand first, then give it a quarter turn with your wrench – don’t overtighten. If it’s a push-on design, make sure you hear or feel it click into place. A loose spray arm won’t rotate properly, but an overtightened one can bind up.
Step 8: Test Rotation Manually
Before closing everything up, manually spin the spray arm with your finger. It should rotate freely and smoothly, making several complete revolutions without binding or stopping. If it feels stiff or catches at certain points, something isn’t right.
Check that the arm isn’t hitting the rack or any other component. The clearance should be even all around. Manual testing saves you from having to reassemble everything twice.
Step 9: Run Test Cycle
Replace the lower rack and close the door. Restore power and run a short wash cycle with no dishes. Watch through the door window (if your model has one) or listen carefully to verify the spray arm is rotating properly.
You should hear the familiar sound of water spraying and see (or hear) the arm spinning. After the cycle completes, inspect the spray arm again to make sure it’s still seated correctly and rotating freely.
For the upper spray arm, the process is similar but accessed through the top rack. Some models require removing the upper rack, while others allow you to reach the upper spray arm by simply lowering the rack.
Brand-Specific Issues (Bosch, Whirlpool, Samsung, LG)
While the basic repair process is similar across brands, each manufacturer has unique quirks. Based on my research and experience, here are some brand-specific considerations:
Bosch Dishwashers – Bosch dishwashers are known for having intricate spray arm designs with very small holes that clog easily. The mounting system is often a simple push-on design, but the arms can be tricky to remove. I’ve found that Bosch spray arms are particularly prone to mineral buildup in hard water areas.
Whirlpool Dishwashers – Whirlpool often uses a screw-on mounting system that can become corroded over time. If the spray arm won’t unscrew, try applying penetrating oil and letting it sit for an hour. Some Whirlpool models have a known issue with the spray arm hitting the lower rack when loaded with large items.
Samsung Dishwashers – Samsung spray arms often feature a unique rectangular design with many small jets. These can be challenging to clean thoroughly. I recommend extra attention to the corner holes, which seem to clog more frequently. Samsung also uses a specialized locking ring on some models.
LG Dishwashers – LG provides official spray arm maintenance guides for their models. LG spray arms typically have a simple twist-lock mechanism. LG dishwashers also sometimes include a spray arm cleaning cycle feature – check your manual to see if yours has this option.
Frigidaire Dishwashers – Frigidaire spray arms are generally straightforward to access and remove. However, replacement parts for older Frigidaire models can sometimes be harder to find. If you need to replace a damaged Frigidaire spray arm, verify part compatibility carefully.
Can You Run a Dishwasher Without the Spray Arm?
This is a common question I see in appliance forums. Technically, yes – your dishwasher will run without the spray arm, but I strongly don’t recommend it. Here’s why.
Without the spray arm, water still enters the tub but simply pools at the bottom or sprays weakly from the water jet. Your dishes will not get clean. More importantly, running the dishwasher without properly installed components can cause water to spray where it shouldn’t, potentially damaging door seals or electrical components.
Some people ask if they can run the dishwasher with just the lower arm if the upper arm is broken. This is better than nothing, but you’ll still have poorly cleaned dishes on the top rack. The proper solution is to replace the damaged spray arm promptly.
How to Prevent Your Dishwasher Sprayer Arm from Getting Stuck
Prevention is always easier than repair. Here’s how I keep my dishwasher spray arms working properly:
- Scrape dishes before loading – Remove large food particles to prevent them from entering the spray arm holes
- Clean the filter regularly – A clogged filter reduces water pressure and allows debris to reach the spray arm
- Use the right detergent – Cheap detergents can leave more residue. Quality detergent dissolves better and leaves less buildup
- Run a cleaning cycle monthly – Use an approved dishwasher cleaner or run a empty cycle with vinegar to dissolve mineral deposits
- Check spray arm rotation periodically – Every few months, manually spin the arms to ensure they’re not binding
- Don’t overload the dishwasher – Overcrowding prevents proper water circulation and can physically block spray arm movement
- Address hard water issues – If you have hard water, consider a water softener or use rinse aid to minimize mineral deposits
- Inspect spray arms annually – Once a year, remove and thoroughly clean both spray arms as preventive maintenance
I’ve found that following these simple maintenance steps dramatically reduces spray arm problems. The 15 minutes you spend on preventive maintenance saves hours of repair work down the road.
When to Call a Professional
Most dishwasher sprayer arm stuck issues are DIY-friendly, but some situations require professional expertise. Here’s when I recommend calling an appliance repair technician:
Circulation Pump Failure – If you’ve cleaned the spray arms and verified they’re not obstructed, but still have no water pressure, the circulation pump may be failing. Pump replacement is a significant repair that requires disassembling the dishwasher.
Diverter Valve Problems – Symptoms like only one spray arm working while the other doesn’t, or arms alternating in a strange pattern, can indicate a faulty diverter valve. This internal component directs water between spray arms and requires professional diagnosis and replacement.
Electrical Issues – If the dishwasher isn’t getting power or the control panel is malfunctioning, these are electrical problems that require a professional. Electrical work on appliances carries shock risk and should be left to qualified technicians.
Broken Internal Components – If you discover cracked pump housings, damaged seals, or broken internal parts when inspecting your spray arm area, these typically require professional replacement. The parts themselves might be affordable, but the disassembly required is extensive.
Under Warranty – If your dishwasher is still under warranty, DIY repairs could void your coverage. Check your warranty terms before attempting any repairs beyond basic cleaning.
A professional appliance repair typically costs $150-300 for spray arm related issues, depending on parts and labor in your area. While this might seem expensive, it’s often cheaper than buying a new dishwasher and ensures the repair is done correctly.
Frequently Asked Questions
Why is my dishwasher spray arm not moving?
The most common reason is clogged spray holes from food particles, detergent buildup, or mineral deposits. Other causes include physical obstructions from fallen utensils, worn mounting components, insufficient water pressure from a clogged filter or failing pump, or a malfunctioning diverter valve in some models.
Can I run my dishwasher without the upper spray arm?
I don’t recommend running your dishwasher without any spray arm installed. While the dishwasher will technically operate, your dishes won’t get clean without proper water distribution. Running without properly installed components can also cause water damage to seals or electrical parts. If one spray arm is broken, you can temporarily run with just the lower arm, but top rack dishes will not clean properly until the upper arm is replaced.
How do I remove a stuck dishwasher spray arm?
First, turn off power to the dishwasher. Remove the lower rack to access the spray arm. Most spray arms either pull straight up, unscrew counter-clockwise, or have a retaining clip that must be pressed. If it’s stuck due to mineral buildup, try applying penetrating oil around the mounting area and waiting 30 minutes. Never force it, as you could break the mounting mechanism. For stubborn cases, consulting your appliance’s service manual is recommended.
How do I put dishwasher spray arm back on?
After cleaning, align the spray arm with the mounting post. For push-on designs, press down firmly until you feel or hear it click into place. For screw-on types, thread it clockwise by hand first, then give a quarter turn with pliers – don’t overtighten. Always test the rotation manually by spinning the arm with your finger to ensure it moves freely before running a cycle. The arm should complete several smooth revolutions without binding.
What causes mineral buildup in spray arms?
Hard water containing high levels of calcium and magnesium is the primary cause of mineral buildup. As water evaporates on the spray arm surface during the wash and dry cycles, these minerals are left behind and slowly accumulate in the spray holes. Over time, this forms white, crusty deposits that restrict water flow and prevent proper rotation. Areas with very hard water may require monthly cleaning with vinegar or commercial lime removers to prevent this issue.
Conclusion
A dishwasher sprayer arm stuck is a frustrating problem, but it’s usually one you can fix yourself in under an hour. By following the steps I’ve outlined, you can diagnose the issue, clean or replace the spray arm, and get your dishwasher back to cleaning effectively.
Remember that prevention is key – regular cleaning and proper loading habits will keep your spray arms working smoothly for years. If you’ve tried everything and your dishwasher still isn’t cleaning properly, it might be time to call a professional to check for more serious issues like pump failure or electrical problems.
Have you dealt with a stuck dishwasher sprayer arm? What worked for you? I’d love to hear about your experience in the comments below.



Leave a Comment