
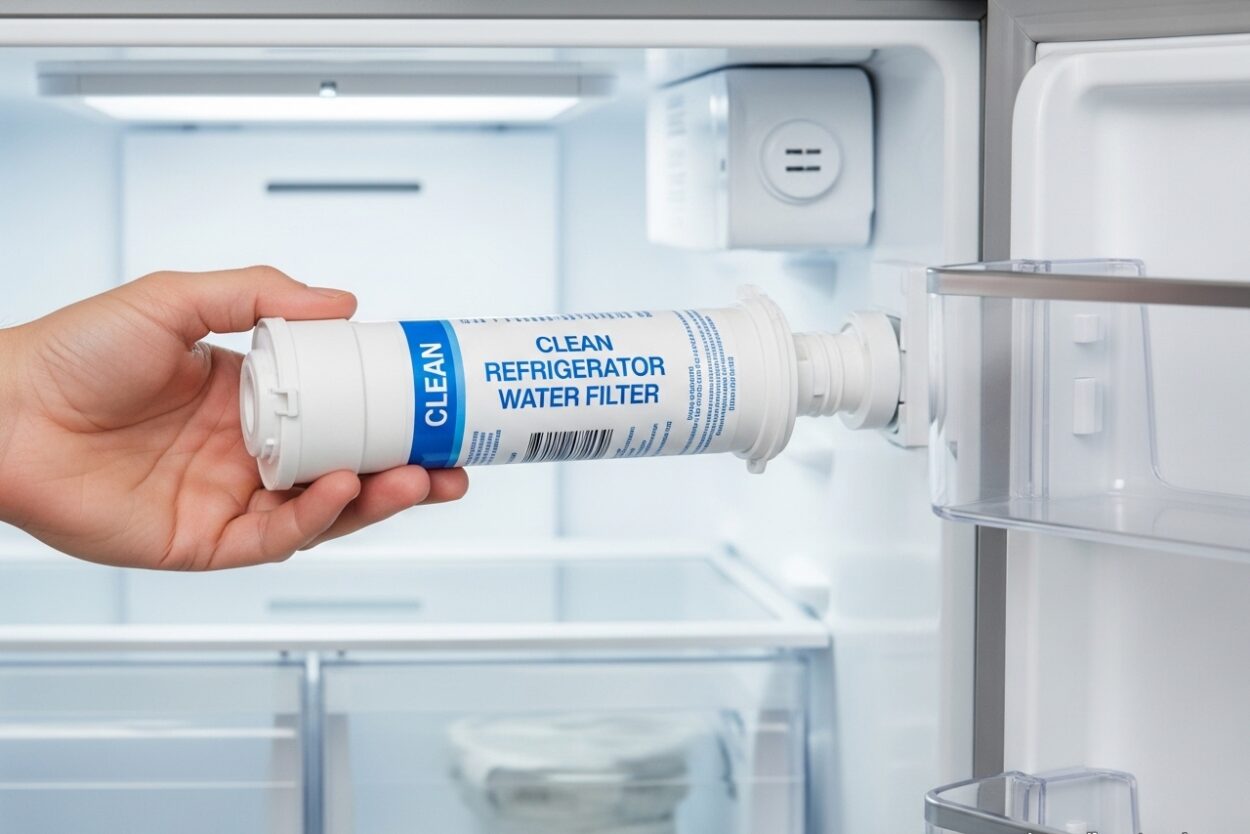
Learning to clean your refrigerator water filter properly is one of those kitchen maintenance tasks that most people ignore until their water starts tasting funny or flowing slowly. I’ve been maintaining refrigerators for over 15 years, and I can’t tell you how many times I’ve opened a filter housing only to find a gross buildup that someone was drinking from. A clean refrigerator water filter isn’t just about better tasting water—it’s about your health.
The average refrigerator water filter costs between $30-50 and needs replacement every 6 months. That adds up to over $100 per year just for water filtration. But here’s what most manufacturers don’t advertise: with proper cleaning and maintenance, you can extend filter life and improve water quality between replacements. Let me walk you through everything I’ve learned about keeping your fridge’s water system clean and safe.
What Is a Refrigerator Water Filter and Why Does It Need Cleaning?
Your refrigerator water filter is typically an activated carbon cartridge that sits inside your fridge, usually in the upper right corner or at the base of the unit. As water passes through the carbon, it traps contaminants like chlorine, sediment, lead, and other impurities through a process called adsorption. The carbon works like a sponge, capturing particles on its surface area.
Over time, that carbon surface gets saturated with trapped particles. Even worse, mineral deposits from hard water can clog the microscopic pores in the filter media. This is why water flow slows down and taste changes. But here’s the real problem: a dirty, saturated filter becomes a breeding ground for bacteria and mold, especially in the moist environment inside your refrigerator.
Regular cleaning helps remove mineral buildup and flush out accumulated contaminants. However, I want to be clear: you can’t fully regenerate a spent carbon filter. Cleaning extends performance and improves flow, but eventually, you’ll need to replace it. The key is knowing when cleaning helps and when replacement is the only safe option.
Signs Your Water Filter Needs Attention
After working with dozens of refrigerators, I’ve learned to spot the warning signs early. Here are the five most common indicators that your filter needs cleaning or replacement:
1. Slow Water Flow
This is usually the first sign. When mineral deposits clog the filter media, water can’t pass through as quickly. I’ve seen filters so clogged that filling a glass took 30 seconds instead of 5.
2. Bad Taste or Odor
Water should taste clean and neutral. If you notice chlorine taste, metallic flavors, or musty odors, your filter isn’t doing its job anymore.
3. Cloudy or Discolored Ice
Check your ice cubes. Clear ice means good filtration. Cloudy or white ice often indicates that sediment is passing through a saturated filter.
4. The Filter Is Over 6 Months Old
Most manufacturers recommend replacement every 6 months. If yours has been in longer than a year, it’s definitely time for attention.
5. You See Visible Buildup
If you remove your filter and see white crusty deposits, slime, or dark particles, that’s accumulated minerals and organic matter. This is your filter screaming for help.
Clean Refrigerator Water Filter: Step-by-Step Vinegar Method
This is the process I use and recommend to anyone asking how to clean their refrigerator water filter. White vinegar is perfect for this job because the acetic acid dissolves mineral deposits without damaging the filter media. It’s also completely safe and food-grade.
What You’ll Need:
- White distilled vinegar
- Clean water
- A large bowl or container
- Soft brush or toothbrush
- Clean towel or paper towels
- Timer (your phone works fine)
Step 1: Remove the Filter
Turn off your refrigerator’s ice maker first. Then locate your filter—it’s usually either in the upper right corner inside the fridge, or in the base grille. Follow your manual’s removal instructions, but most either twist counterclockwise or push a button to release.
Step 2: Inspect the Filter
Before cleaning, take a good look at it. If you see black particles, mold, or if it’s been over a year since replacement, skip to the replacement section. Filters in this condition can’t be safely cleaned.
Step 3: Mix Your Cleaning Solution
Create a 1:1 mixture of white vinegar and warm water. For most filters, you’ll need about 2 cups of vinegar and 2 cups of water. This creates a solution strong enough to dissolve mineral deposits but safe for the filter components.
Step 4: Soak the Filter
Submerge your filter completely in the vinegar solution. Let it soak for at least 30 minutes, but I prefer leaving it for an hour if it’s particularly dirty. You might see bubbles rising—that’s the acetic acid reacting with mineral deposits.
Step 5: Scrub Gently
Remove the filter and gently scrub the exterior with your soft brush. Don’t scrub hard—you don’t want to damage the filter housing. Pay special attention to the inlet and outlet openings where buildup accumulates.
Step 6: Rinse Thoroughly
Rinse the filter under cold running water for at least 60 seconds. You want to remove all traces of vinegar. I usually rinse until I can no longer smell any vinegar odor.
Step 7: Reinstall and Flush
Put the filter back in your refrigerator. Now comes the important part: flush the system. Run the water dispenser for at least 2 minutes, or dispense about 1 gallon of water. This removes any residual cleaning solution and loosened particles.
How to Clean the Water Dispenser and Drip Tray
While you’re focused on the filter, don’t forget the dispenser itself. I’ve seen some pretty nasty buildup in dispenser nozzles that can contaminate even a fresh filter. The external parts are actually where most mold problems start.
Cleaning the Dispenser Nozzle:
The nozzle is that little grill or opening where water comes out. It’s a magnet for mineral deposits and mold. Dip a cotton swab in your vinegar solution and gently clean around and inside the nozzle opening. For stubborn buildup, use a toothpick to carefully dislodge deposits—just be gentle not to scratch anything.
Deep Cleaning the Dispenser Area:
Wipe down the entire dispenser area with a vinegar-dampened cloth. Pay attention to the recessed areas where water splashes and accumulates. These hidden spots are where I most often find black mold growth.
The Drip Tray:
This is the plastic tray under the dispenser that catches spills. Remove it (it usually lifts right out) and wash it in warm soapy water. For stubborn stains or odors, soak it in the vinegar solution for 15 minutes. I do this weekly because drip trays get gross fast—standing water is basically a petri dish for bacteria.
Don’t Forget the Ice Chute:
If your fridge has an ice dispenser on the door, the chute needs attention too. Use a dry cloth or paper towel to reach up into the chute and wipe away any ice crystals or residue. Mold loves the dark, moist environment of ice dispensers.
Flushing the Water System After Cleaning
This step is critical but often overlooked. After cleaning or replacing your filter, you absolutely must flush the water system. Here’s why: during cleaning, you’ve loosened particles and deposits inside the filter and lines. If you don’t flush them out, you’ll be drinking them in your first few glasses of water.
The standard recommendation is to flush 4 gallons of water through the system. I know, that sounds wasteful—and it is. Most people I know hate this part. But here’s a practical approach that reduces waste while still being effective:
The Smart Flushing Method:
Run the dispenser continuously for 2 minutes. This usually equals about 1 gallon. Then use this water for something productive—water your plants, fill a pitcher for non-drinking uses, or flush it down the toilet. Repeat this process 4 times over the course of a day. You’ve now flushed your system without dumping 4 gallons at once.
Check Your Work:
After flushing, taste the water. It should taste clean with no vinegar flavor. If you still detect vinegar or off flavors, keep flushing. Also check the water clarity—it should be perfectly clear, not cloudy.
Ice Maker Flushing:
Your ice maker needs flushing too. After replacing or cleaning the filter, discard the first two batches of ice. The ice cubes should be clear, not cloudy. If you notice persistent cloudiness, your filter might need replacement rather than just cleaning.
How Often Should You Clean or Replace Your Filter?
This is one of the most common questions I get, and the answer depends on several factors. Let me break down what I’ve learned from years of experience and what the data actually supports.
Cleaning Frequency:
For filters under 6 months old, I recommend cleaning every 2 months if you have hard water. Hard water has high mineral content that clogs filters faster. If you have soft water or use a whole-house water softener, you can extend this to every 3 months. The cleaning process takes about 15 minutes and can significantly extend your filter’s effective life.
Replacement Schedule:
Regardless of cleaning, all carbon filters have a finite capacity. Most manufacturers recommend replacement every 6 months, and this isn’t just a marketing ploy—activated carbon really does become saturated after filtering roughly 300-400 gallons. After that point, even a clean filter can’t effectively remove contaminants.
Factors That Shorten Filter Life:
High water usage obviously shortens filter life. A family of six will need replacements more often than a single person. Water quality matters too—well water with high sediment content clogs filters faster than treated municipal water. And if you notice any changes in water quality, don’t wait for the 6-month mark.
Cost Consideration:
At $30-50 per replacement, regular filter maintenance costs $60-100 per year. By cleaning between replacements, you might extend filter life by 1-2 months, saving $10-15 annually. It’s not huge money, but it adds up over the life of your refrigerator. More importantly, proper cleaning ensures consistent water quality throughout the filter’s lifespan.
Mold Prevention and Deep Cleaning Tips
Mold in refrigerator water systems is more common than most people realize. I’ve opened dispenser housings that were absolutely shocking—and people were drinking from them. Prevention is definitely easier than remediation when it comes to mold.
Weekly Maintenance Habits:
Wipe down the dispenser area with a vinegar-dampened cloth weekly. This takes 30 seconds and prevents the initial spores from taking hold. Remove and wash the drip tray weekly—don’t just wipe it, actually wash it with soap. These two simple habits will prevent 90% of mold problems.
Monthly Deep Cleaning:
Once a month, do a more thorough cleaning. Remove any visible buildup around the nozzle with a cotton swab. Check for moisture accumulation in hidden corners of the dispenser housing. If you have a removable dispenser grill, take it off and clean underneath.
Natural Cleaning Alternatives:
While vinegar is my go-to, some people dislike the smell. Lemon juice works similarly due to its citric acid content, though it’s slightly less effective on tough mineral deposits. Baking soda paste is great for scrubbing exterior surfaces and deodorizing. For serious mold problems, hydrogen peroxide (3% solution) kills mold more effectively than vinegar.
Brand-Specific Tips:
Whirlpool and KitchenAid refrigerators often have a replaceable dispenser grille that traps debris—remove and clean this monthly. Samsung models with the water filter inside the fridge tend to have more condensation around the filter housing—wipe this area dry weekly. GE refrigerators with bottom-freezer filters sometimes develop leaks that cause mold in the housing below—check for dampness regularly.
Cleaning vs. Replacing: Cost and Environmental Impact
I want to address something that rarely gets discussed in filter maintenance guides: the environmental impact of disposable water filters. Every year, millions of refrigerator filters end up in landfills. These plastic cartridges with carbon media aren’t biodegradable and aren’t widely recyclable through standard programs.
A single family using replacement filters as recommended generates 2-3 plastic filter cartridges per year. Over a 15-year refrigerator lifespan, that’s 30-45 filters per household. Multiply that by millions of households, and we’re talking about significant plastic waste. Some manufacturers have started take-back programs, but participation is low.
From a cost perspective, cleaning between replacements can save you 15-20% annually on filter costs. That’s roughly $10-15 per year for the average household. Not life-changing money, but meaningful for budget-conscious households. More importantly, proper cleaning maintains water quality throughout the filter’s life, so you’re not drinking compromised water for months before replacement.
Here’s my honest take: cleaning extends filter life and reduces waste, but it doesn’t eliminate the need for replacement. The carbon media simply becomes saturated over time. Think of cleaning like maintaining your car between oil changes—it helps, but doesn’t eliminate the need for regular service. The best approach is regular cleaning to maximize performance, followed by timely replacement when the filter reaches its capacity limit.
One under-discussed option for some households: if you have excellent municipal water quality, consider whether you even need a refrigerator filter at all. Some users on DIY forums remove filters entirely and rely on their home’s water treatment. This isn’t right for everyone—well water users definitely need filtration—but it’s worth considering if your tap water is already high quality.
FAQ
Can I put vinegar in my filter to clean it?
Yes, white vinegar is actually the best cleaner for refrigerator water filters. Mix a 1:1 solution of vinegar and warm water, then soak your filter for 30-60 minutes. The acetic acid dissolves mineral deposits without damaging the filter media. Rinse thoroughly under cold water for at least 60 seconds before reinstalling.
How do you get mold out of a refrigerator water dispenser?
Clean visible mold with a vinegar-dampened cloth first. For stubborn mold in the nozzle, use a cotton swab dipped in vinegar or hydrogen peroxide. Remove the drip tray and wash with hot soapy water, then soak in vinegar solution for 15 minutes. For serious mold problems inside the housing, you may need to call a professional appliance technician.
Should you soak a refrigerator water filter before use?
Only soak a new filter if the manufacturer specifically recommends it—most modern filters don’t require pre-soaking. However, you should always flush new filters by running 2-4 gallons of water through the system before drinking. This removes carbon dust and manufacturing residues. Check your filter’s packaging for specific instructions.
How often should you clean a refrigerator water filter?
Clean your filter every 2-3 months if you have hard water, or every 3-4 months with soft water. Always replace the filter every 6 months regardless of cleaning. Additionally, wipe down the dispenser area weekly and wash the drip tray weekly to prevent mold buildup. If you notice slow flow or bad taste, clean immediately rather than waiting for the scheduled maintenance.
Conclusion
Learning to clean your refrigerator water filter properly is one of those simple home maintenance tasks that pays dividends in water quality and cost savings. The process is straightforward: vinegar soak, gentle scrub, thorough rinse, and proper flushing. Done regularly, it extends filter life and ensures you’re drinking clean, great-tasting water every day.
Remember that cleaning complements but doesn’t replace the need for regular filter changes. Carbon filters have a finite capacity, and no amount of cleaning can fully regenerate saturated media. The key is finding the right balance—clean every 2-3 months, replace every 6 months, and always stay alert to changes in water quality or flow.
Your refrigerator’s water system works hard for you every day. With just 15 minutes of maintenance every couple of months, you can keep it running cleanly and efficiently for years. The next time you notice your water tasting a little off or flowing a little slow, you’ll know exactly what to do to clean your refrigerator water filter and get things running smoothly again.




Leave a Comment