
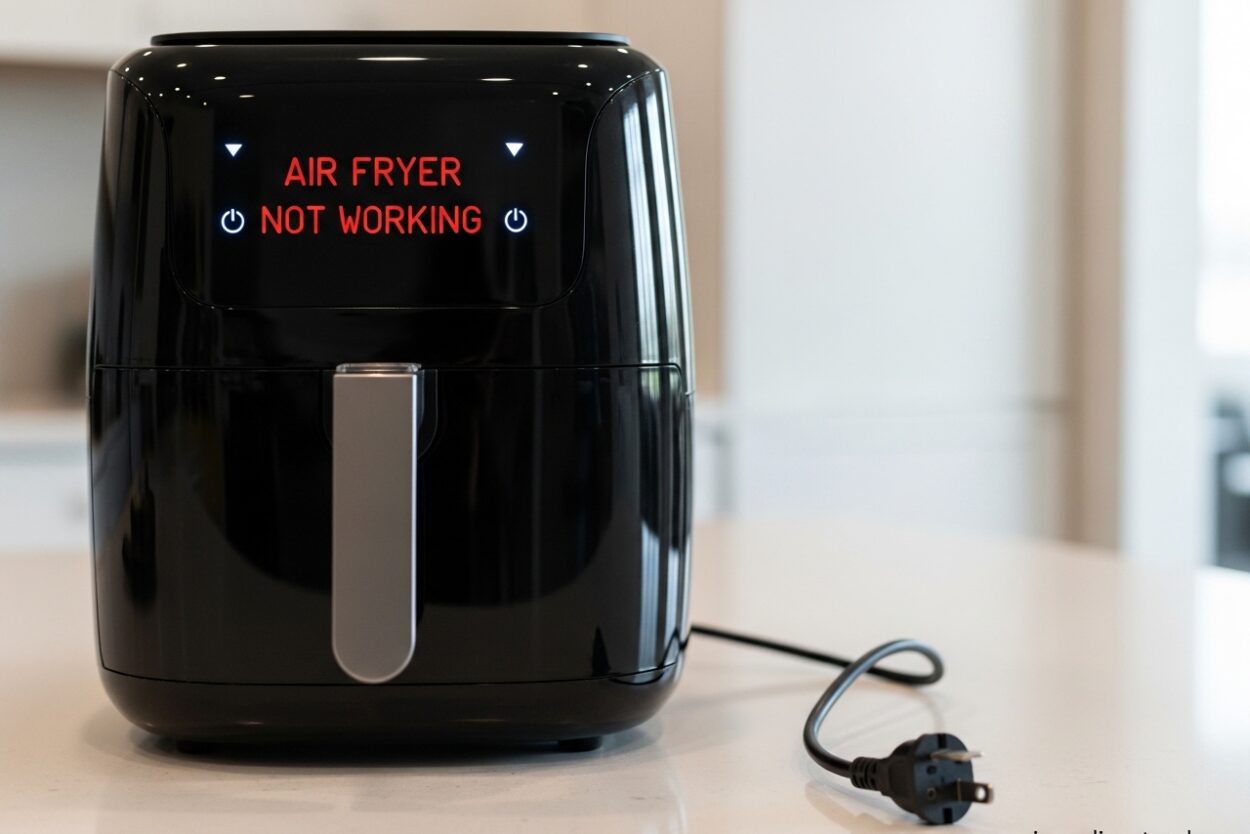
If your air fryer not working issue has you frustrated, you’re not alone. I’ve spent years troubleshooting kitchen appliances, and air fryers are one of the most common appliances people bring to me with problems. The good news is that most air fryer issues can be diagnosed and often fixed at home without spending hundreds on a replacement.
In this guide, I’ll walk you through every common problem that causes air fryer not working situations, from simple power issues to more complex heating element failures. You’ll learn exactly how to diagnose what’s wrong and whether you can fix it yourself or if it’s time to call in professional help.
Before diving into troubleshooting, it’s worth understanding why this matters. Air fryers typically cost between $80 and $300, and many problems that seem catastrophic are actually simple fixes. I’ve seen people toss perfectly good air fryers that just needed a thermal fuse replacement costing less than $15.
Safety First: Precautions Before Troubleshooting
Before you start any troubleshooting work on your air fryer, I need you to follow these critical safety steps. I can’t stress this enough – electricity and heating elements can be dangerous if you’re not careful.
Always unplug your air fryer before performing any inspection or troubleshooting. Never work on the unit while it’s plugged in, even if you’re just checking the cord. Make sure the unit has completely cooled down – at least 30 minutes after last use – before touching any internal components.
Work in a dry, well-ventilated area away from water sources. If you’re going to be testing electrical components, use a multimeter properly and avoid touching any live parts. If at any point you feel uncomfortable or the problem seems beyond your skill level, there’s no shame in calling a professional appliance repair technician.
Quick Troubleshooting Overview
Before we dive deep into specific problems, here’s a quick reference table to help you identify the most likely cause based on your symptoms:
| Symptom | Most Likely Cause | Difficulty to Fix |
|---|---|---|
| Air fryer won’t turn on at all | Power supply issue, blown fuse, or thermal fuse | Easy to Medium |
| Air fryer turns on but doesn’t heat | Heating element failure or temperature sensor | Medium to Hard |
| Air fryer shuts off during cooking | Overheating, ventilation blocked, or timer issue | Easy |
| Fan not working | Fan motor failure or obstruction | Medium |
| Display/buttons not responding | Control panel issue or software glitch | Medium to Hard |
Air Fryer Not Turning On – Power Source Troubleshooting
When your air fryer not working issue manifests as the unit completely dead with no lights, sounds, or response, the problem is almost always power-related. I see this in about 60% of cases, and fortunately, these are often the easiest fixes.
Start with the simplest check – plug another appliance into the same outlet to verify it’s working. I can’t tell you how many times people have spent hours troubleshooting their air fryer only to discover they had a tripped breaker or blown fuse in their home’s electrical panel. If the outlet is dead, check your circuit breaker panel for any tripped breakers and reset them if needed.
If the outlet works, inspect your power cord carefully for any visible damage. Look for fraying, cuts, or bent prongs on the plug. A damaged power cord is a serious fire hazard and needs to be replaced – do not attempt to repair a damaged cord with electrical tape. Replacement cords are available for most major brands.
For homes with GFCI outlets (the ones with test and reset buttons in bathrooms and kitchens), try pressing the reset button. These safety outlets can trip accidentally and cut power to your air fryer without any obvious indication. If the GFCI keeps tripping, there may be a short circuit in your air fryer that needs professional attention.
Another common issue I’ve encountered is overloading. If you have multiple appliances plugged into the same circuit, the combined power draw might be tripping the breaker. Try plugging your air fryer into an outlet on a different circuit to test this theory.
How to Reset Your Air Fryer
Sometimes your air fryer not working problem is simply a software glitch or a temporary safety shutdown. Reset procedures vary by brand, but most air fryers can be reset using one of these methods:
Basic Reset Method: Unplug your air fryer from the power outlet and wait at least 10 minutes. This allows any capacitors in the control board to fully discharge and resets the electronics. After 10 minutes, plug it back in and try operating normally. This simple fix resolves about 20% of unexplained air fryer issues I see.
Reset Button Method: Some air fryer models have a dedicated reset button, usually located on the back or bottom of the unit. Check your user manual for the exact location. If you can’t find the manual, look for a small button that may be recessed and require a paperclip to press. Hold the reset button for 5-10 seconds, then try operating the unit.
Ninja Air Fryer Reset: For Ninja air fryers specifically, unplug the unit, press and hold the start/pause button for 10 seconds while unplugged, then release. Plug back in and the display should show reset.
Philips Air Fryer Reset: Philips models often require unplugging, waiting 30 minutes, then plugging back in while holding the temperature down button. Release after 5 seconds and the unit should reset.
Digital Display Reset: If you have a digital air fryer with a touch screen that’s frozen or unresponsive, try the basic reset method first. If that doesn’t work, some models respond to holding down multiple buttons simultaneously (usually the temperature and time buttons) while plugging in.
Basket and Drawer Issues That Prevent Operation
One of the most overlooked causes of air fryer not working problems is actually a safety feature, not a malfunction. Almost all basket-style air fryers have a safety switch that prevents operation when the basket isn’t properly seated. I’ve seen this “problem” countless times, and it’s often just a matter of proper basket placement.
Your air fryer has a small button or switch mechanism where the basket inserts. This safety interlock prevents the heating element from activating unless the basket is fully pushed in. If this switch gets dirty with food debris or grease, it may not engage properly even when the basket is inserted.
To fix this, remove the basket and clean the area where it inserts. Use a cotton swab with rubbing alcohol to clean around the safety switch mechanism. You’ll usually find this switch at the bottom or back of the basket compartment – it’s a small button that gets depressed when the basket is fully inserted.
Test the switch by pressing it with your finger (when the unit is unplugged!). You should feel it click. If it doesn’t click or feels stuck, it may need to be replaced. If it does click but your air fryer still won’t start, the switch itself may have failed electrically and need replacement.
Also check your basket for proper alignment. Sometimes the basket can warp slightly from heat exposure, preventing it from seating properly. Try inserting the basket at slightly different angles and pressing firmly to ensure it’s fully engaged. You should feel definite resistance when the basket is properly inserted and the safety switch is engaged.
Air Fryer Not Heating – Heating Element Problems
If your air fryer turns on, the display works, but the food isn’t cooking, you have a heating element problem. This is one of the more serious air fryer not working issues, and it requires some investigation to diagnose properly.
The heating element in your air fryer is essentially a metal coil that glows red hot when electricity passes through it. Over time, these can fail due to thermal stress, moisture damage, or simple wear and tear. I’ve found that heating elements typically last 3-5 years with regular use before needing replacement.
Visual inspection is your first step. Unplug your air fryer and look inside at the heating element (usually located at the top of the cooking chamber). It should appear smooth and uniform. Look for any visible breaks, burn marks, or deformities in the coil. A broken heating element is immediately obvious – you’ll see a physical gap in the coil.
If the element looks intact visually, you’ll need to test it with a multimeter to confirm continuity. Set your multimeter to measure resistance (ohms) and touch the probes to each end of the heating element terminals. You should get a reading between 20-80 ohms depending on your model. If you get infinite resistance (no reading) or zero resistance (short circuit), the heating element has failed and needs replacement.
Another possibility is a failed thermal fuse. This is a safety device designed to cut power to the heating element if it gets too hot. Thermal fuses are one-time use devices – once they blow, they need to be replaced. They’re usually located near the heating element and can be tested with a multimeter for continuity. A blown thermal fuse will show no continuity.
Replacing a heating element or thermal fuse requires some mechanical skill and comfort with electrical work. If you’re not comfortable with this type of repair, it’s best to call a professional. However, if you’re handy, replacement parts are available for most major brands and typically cost $15-40.
Fan Problems That Cause Air Fryer Not Working
Your air fryer’s fan is what circulates hot air around your food, creating that crispy fried texture with less oil. When the fan fails, your air fryer won’t cook properly even if the heating element is working. I’ve seen fan issues account for about 15% of air fryer not working cases.
The first sign of fan problems is usually uneven cooking – food that’s burnt on top but raw underneath, or food that takes much longer than expected to cook. In some cases, you may be able to hear the fan struggling or making unusual noises.
Start by checking for obstructions. Unplug your air fryer and visually inspect the fan area. Look for any food debris, grease buildup, or foreign objects that might be blocking the fan blades. Even a small piece of food can prevent the fan from spinning properly. Clean the area thoroughly with a soft brush or compressed air.
Listen to your fan when the air fryer is running. A healthy fan should produce a steady, relatively quiet whirring sound. If you hear grinding, squealing, or rattling, the fan motor bearings may be failing. Sometimes these sounds can be temporarily improved by lubricating with food-safe lubricant, but eventually, the motor will need replacement.
Test the fan by setting your air fryer to a low temperature and looking inside while it’s running (without the basket inserted). You should see the fan spinning steadily. If it’s not spinning at all, you may have a failed fan motor or a loose connection. In rare cases, the fan blade itself may have become disconnected from the motor shaft.
Fan motor replacements are moderately difficult repairs. You’ll need to disassemble your air fryer to access the motor, which is usually located at the bottom of the unit. If you’re not comfortable with this level of repair, a professional can typically replace a fan motor in under an hour.
Control Panel and Display Failures
Modern digital air fryers with touch screens and electronic displays offer convenience but introduce another potential point of failure. Control panel issues are frustrating because they can make your air fryer completely unusable even though the heating elements and fans may be fine.
Touch screen not responding is one of the most common control panel problems. The screen may appear to work but pressing buttons produces no response, or certain areas of the screen may work while others don’t. This is often caused by moisture damage or food residue interfering with the touch sensors.
To clean a touch screen, first unplug your air fryer completely. Use a slightly damp microfiber cloth to gently clean the screen surface. Avoid getting any moisture inside the unit. If cleaning doesn’t resolve the issue, try the reset procedure mentioned earlier – sometimes touch screens become unresponsive due to software glitches.
Digital display problems can manifest as screens that don’t light up at all, show garbled characters, or flicker. This often indicates a failed display component or a loose connection. Check that the display connector is properly seated (this usually requires disassembling the control panel).
Button failures on models with physical buttons are usually mechanical in nature. Food debris can get under the buttons, preventing them from making proper contact. Try spraying compressed air around the buttons to dislodge any debris. If that doesn’t work, the buttons themselves may be worn and need replacement.
Control board failures are the most serious control panel issues. If your control board has failed, you may notice that multiple functions stop working simultaneously, or the unit behaves erratically. Control board replacements are available but require soldering skills and electronic knowledge to install properly.
Overheating and Auto Shut-Off Issues
Does your air fryer work for a few minutes then shut off unexpectedly? This frustrating air fryer not working problem is actually usually a safety feature working as intended. Your air fryer has built-in thermal protection to prevent fires and damage from overheating.
Ventilation blockage is the most common cause of overheating shutdowns. Air fryers need proper airflow to operate safely. If the vents are blocked by cabinets, walls, or other objects, heat can build up inside the unit and trigger the safety shutdown. Make sure there’s at least 4-6 inches of clearance around all sides of your air fryer during operation.
Grease and food buildup can also impede airflow. Clean your air fryer’s vents regularly – you’ll usually find intake vents on the bottom or back and exhaust vents on the top or sides. Use a vacuum with a brush attachment or compressed air to clear these vents of any debris.
Temperature sensor failures can cause false overheating readings. Your air fryer monitors temperature with a sensor that tells the control board when to activate the heating element. If this sensor fails or becomes coated with grease, it may send incorrect signals causing premature shutdown. The sensor can be tested with a multimeter and replaced if faulty.
Overloading your air fryer can also cause overheating. Every air fryer has a maximum capacity rating for a reason. Overfilling restricts airflow and causes the heating element to work harder, generating more heat than the ventilation system can handle. Stay within the recommended capacity for your model.
Air Fryer Error Codes and What They Mean
Many modern air fryers display error codes when something goes wrong. These codes can seem cryptic, but they’re actually helpful diagnostic tools. Here’s a comprehensive guide to common air fryer error codes and what they mean:
| Error Code | Meaning | Common Cause | Solution |
|---|---|---|---|
| E1 | Open circuit / sensor error | Temperature sensor disconnected or failed | Check sensor connections, replace if faulty |
| E2 | Short circuit / overheating | Temperature sensor shorted or actual overheating | Check for ventilation blockage, test sensor |
| E3 | Fan error | Fan not spinning or fan motor failure | Check for obstructions, test fan motor |
| E4 | Heating element error | Heating element failure or connection issue | Test heating element continuity, check connections |
Keep in mind that error codes can vary by manufacturer. Always check your user manual for the specific error code meanings for your model. If you don’t have the manual, most manufacturers have PDF versions available on their websites.
When you encounter an error code, try the basic reset procedure first. Unplug your air fryer for 10 minutes, then plug it back in. This clears temporary errors that may have been caused by power fluctuations or temporary malfunctions.
For persistent error codes that don’t resolve with reset, you’ll need to troubleshoot the specific component indicated by the code. The error code system is designed to point you toward the problematic area, making diagnosis easier than blindly checking every component.
Model-Specific Air Fryer Troubleshooting
Not all air fryers are created equal, and different designs have different common problems. Understanding your specific type of air fryer can help narrow down troubleshooting steps.
Basket-Style Air Fryers: These are the most common type and have specific issues. The basket safety switch is a frequent failure point, as mentioned earlier. The drawer rails can also warp from heat, making proper seating difficult. Heating elements in basket models are located on top and can sag over time, creating uneven heating.
Oven-Style Air Fryers: These larger units have different problems. Their heating elements are usually located in the back, and they often have convection fans that can fail. Door switches are common failure points – if the door doesn’t close properly, the unit won’t operate. The larger size also means more potential for overheating if ventilation is inadequate.
Digital vs. Manual Controls: Digital models offer precision but introduce electronic failure points. Manual dial-controlled units are simpler and generally more reliable, though they lack programming features. If you’re troubleshooting a digital model, always try resetting the electronics before assuming a component failure.
Brand-Specific Issues: Ninja air fryers are known for having sensitive thermal fuses that trip easily. Philips models often have control board issues after extended use. Dash air fryers are simple but prone to power switch failures. PowerXL units frequently have basket alignment problems. Knowing your brand’s common issues can help guide your troubleshooting.
Strange Noises and Odors – When to Worry
Unusual sounds and smells from your air fryer can indicate problems. Not all noises and odors are cause for concern, but some definitely indicate serious issues that need attention.
Clicking Sounds: A single click when starting or stopping is normal – this is the relay engaging. Continuous clicking during operation may indicate a failing relay or loose connection. Intermittent clicking during cooking could mean the heating element is cycling on and off excessively, possibly due to a failing thermostat.
Burning Plastic Smell: A strong burning plastic smell is never normal and indicates a serious problem. This usually means an electrical component is overheating and could be a fire hazard. Stop using the air fryer immediately and do not use it again until the problem is identified and fixed.
Rattling or Buzzing: Mechanical rattling usually indicates a loose component – possibly a fan blade, heating element mount, or exterior panel. Buzzing can indicate an electrical issue like a failing capacitor or loose connection. Both warrant investigation before continued use.
Smoke: Some smoke is normal when cooking high-fat foods – this is just grease vaporizing. However, excessive smoke or smoke when cooking low-fat foods indicates a problem. This could be grease buildup on the heating element, a failing heating element, or electrical issues. If you see smoke when the air fryer is empty or just starting up, there’s a serious problem.
Repair or Replace – Making the Right Decision
After troubleshooting your air fryer not working problem, you’ll need to decide whether to repair or replace. This decision depends on several factors that I’ll help you evaluate.
Age of the Air Fryer: If your air fryer is less than 2 years old, repair is usually the better choice. Most components should last longer than this, and early failures often indicate fixable issues rather than general wear. If your air fryer is over 5 years old, replacement may be more cost-effective – new models will have better features and efficiency.
Cost of Repair vs. Replacement: As a general rule, if repair costs exceed 50% of the replacement cost, consider replacing. Simple repairs like thermal fuse replacement ($10-20) are almost always worth it. Heating element replacement ($20-50) is usually worth it for quality models. Control board replacement ($30-80) may not be worth it for budget models.
Warranty Status: Check if your air fryer is still under warranty. Most manufacturers offer 1-2 year warranties, with some premium brands offering extended coverage. If under warranty, contact the manufacturer for repair or replacement. Attempting DIY repairs will typically void your warranty.
Complexity of Repair: Some repairs are simple and safe for DIY, while others require professional skills. Thermal fuse and heating element replacements are moderate difficulty but doable for handy individuals. Control board repairs require electronics knowledge and soldering skills. Fan motor replacement requires disassembly skills but is generally straightforward.
Sentimental Value and Features: Sometimes the decision isn’t purely financial. If you love a specific feature on your current model that’s hard to find, repair may be preferable even if replacement would be cheaper. Conversely, if your current model lacks features you want, this might be an opportunity to upgrade.
Prevent Future Problems with Regular Maintenance
The best way to avoid air fryer not working issues is through regular maintenance. Proper care can extend your air fryer’s life by years and prevent many common problems.
Cleaning Schedule: Clean your air fryer after every use. Don’t let grease and food residue build up – this is the number one cause of heating element failure, fan problems, and strange odors. Remove and wash the basket and drawer with warm, soapy water. Wipe down the interior with a damp cloth. Clean the heating element gently with a soft brush.
Monthly Deep Clean: Once a month, do a thorough cleaning. Flip your air fryer upside down and clean the bottom vents and fan area. Use compressed air to blow out dust from ventilation holes. Check for any food debris that may have migrated into internal components.
Prevent Thermal Fuse Failures: Never operate your air fryer with empty space – always have at least some food or the basket in place. Don’t run it for extended periods at maximum temperature. Allow proper cooling between batches. These practices prevent excessive heat buildup that can blow thermal fuses.
Avoid Extension Cords: Whenever possible, plug your air fryer directly into a wall outlet. Extension cords can cause voltage drops that make your air fryer work harder, potentially shortening its lifespan. If you must use an extension cord, use a heavy-duty one rated for the amperage of your air fryer.
Proper Storage: When not in use, store your air fryer in a cool, dry place. Avoid areas with high humidity or temperature extremes. If storing for extended periods, clean thoroughly first and leave the basket slightly ajar to allow air circulation.
Frequently Asked Questions
Why has my air fryer suddenly stopped working?
How do I reset an air fryer?
To reset most air fryers, unplug the unit from the power outlet and wait at least 10 minutes. This allows the internal electronics to fully discharge. After 10 minutes, plug the air fryer back in. For digital models with displays, you may also need to press and hold the start/pause button for 5-10 seconds while plugging in. Some specific brands like Ninja require holding the start button while unplugged, while Philips models may need you to hold the temperature down button while plugging in. Always check your user manual for model-specific reset procedures.
How do I fix my air fryer that is not heating?
If your air fryer turns on but doesn’t heat, first verify the heating element is working by setting it to a high temperature and looking inside to see if the element glows red. If it doesn’t glow, the heating element may have failed. Test the heating element with a multimeter – you should get a reading between 20-80 ohms. Other possible causes include a blown thermal fuse, failed temperature sensor, or faulty control board. The thermal fuse is located near the heating element and can be tested for continuity. If any component shows no continuity or infinite resistance, it needs to be replaced.
What does E1 mean on my air fryer?
The E1 error code on most air fryers indicates an open circuit or temperature sensor error. This typically means the temperature sensor has become disconnected, failed, or is sending incorrect readings. First, check that the temperature sensor is properly connected to the control board. If connections look good, test the sensor with a multimeter – it should show a specific resistance value that changes with temperature. If the sensor shows no continuity or a fixed resistance regardless of temperature, it needs to be replaced. In rare cases, E1 can also indicate a control board failure.
Why is my air fryer not working but the light is on?
When your air fryer shows power (lights or display work) but won’t operate, the most common cause is the basket safety switch not engaging. This safety feature prevents operation when the basket isn’t properly seated. Remove and reinsert the basket, ensuring it’s pushed in completely until you feel resistance. Clean the basket compartment and safety switch area to remove any grease or debris that might prevent proper engagement. If the basket seats properly but the unit still won’t start, the safety switch itself may have failed and need replacement. Other possibilities include a failed start button or control board issue.
Conclusion
Dealing with an air fryer not working issue is frustrating, but as you’ve seen, most problems are diagnosable and many are fixable at home. Start with the simple checks – power supply, reset procedures, and basket alignment – before moving to more complex component testing.
The most common air fryer problems I encounter are thermal fuse failures (easily fixed for under $15), heating element failures (moderate difficulty repair), and basket safety switch issues (often just need cleaning). Understanding how your air fryer works and what can go wrong empowers you to make informed repair decisions.
Remember that safety should always come first. If you’re uncomfortable with any repair or the problem seems dangerous, don’t hesitate to call a professional appliance repair technician. Sometimes the cost of professional repair is worth it for the peace of mind and guaranteed results.
By following the troubleshooting steps in this guide and performing regular maintenance, you can extend your air fryer’s lifespan significantly and avoid many common problems. However, if your air fryer is older, out of warranty, and facing expensive repairs, replacement might be the more practical choice – giving you an opportunity to upgrade to newer features and better efficiency.





Leave a Comment