
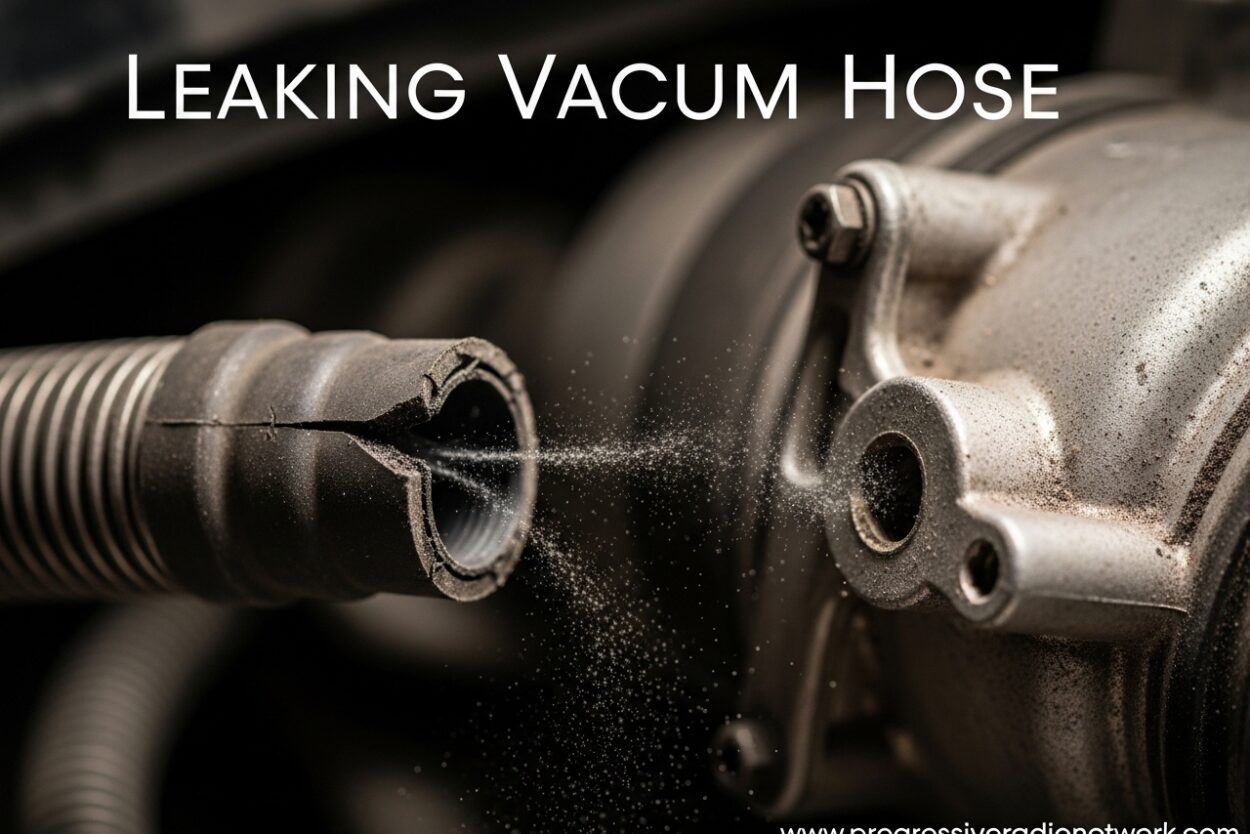
If your car is idling roughly, stalling at stoplights, or making strange hissing sounds from under the hood, you might be dealing with a leaking vacuum hose. I’ve seen this issue countless times over the years, and catching it early can save you from costly repairs down the road.
A leaking vacuum hose is more than just an annoyance. It disrupts your engine’s air-fuel mixture, reduces performance, and can even trigger your check engine light. The good news is that most vacuum hose leaks are straightforward to diagnose and fix, especially when you know what to look for.
In this guide, I’ll walk you through everything you need to know about leaking vacuum hoses—from symptoms and causes to proven detection methods and repair options. Whether you’re a seasoned DIY mechanic or just want to understand what’s happening with your vehicle, you’ll find actionable information here.
What Is a Vacuum Leak?
Your engine relies on a precise balance of air and fuel to run properly. The vacuum system creates negative pressure that helps regulate this balance while powering essential components like your brake booster, emissions controls, and various engine sensors.
A vacuum leak occurs when unmetered air enters your engine through gaps or cracks in the vacuum system. This extra air bypasses the mass airflow sensor, throwing off the carefully calibrated air-fuel mixture. Your engine’s computer tries to compensate by adding more fuel, but it can only adjust so much before performance suffers.
The result is an engine running leaner than designed, which leads to rough operation, reduced power, and increased emissions. In severe cases, a leaking vacuum hose can cause engine damage over time if left untreated.
Symptoms of a Leaking Vacuum Hose
Recognizing the signs of a vacuum leak early can prevent more serious problems. Based on my experience working with vehicle owners, here are the most common symptoms that indicate a leaking vacuum hose:
- Rough idle: Your engine feels shaky or unstable when stopped, with noticeable vibrations through the steering wheel or seat.
- High idle speed: The tachometer shows higher-than-normal RPMs when the car is in park or neutral, often 1,000+ RPM instead of the usual 600-800.
- Engine stalling: Your car dies at stoplights or when decelerating, especially when coming to a complete stop.
- Check engine light: The illuminated light often triggers codes like P0171 (system too lean) or P0300 (random misfire).
- Hissing or whistling sounds: A distinct sucking or whistling noise from the engine bay, which may change with engine speed.
- Reduced fuel economy: You notice more frequent trips to the gas station as your engine works less efficiently.
- Poor acceleration: The engine hesitates or feels sluggish when you press the accelerator, especially from a stop.
I’ve worked with vehicle owners who experienced these symptoms for months before realizing a simple vacuum hose replacement was all they needed. Don’t ignore these warning signs—addressing them early can prevent more expensive repairs.
Common Causes of Vacuum Hose Leaks
Understanding why vacuum hoses fail can help you prevent future leaks and address the root cause rather than just treating symptoms. In my experience, these are the most common culprits behind leaking vacuum hoses:
Age and heat deterioration: Vacuum hoses are typically made of rubber or silicone that breaks down over time. Under-hood temperatures, oil exposure, and constant engine vibration cause the material to become brittle, crack, or crumble. I’ve seen hoses that literally disintegrate when touched due to years of heat cycling.
Disconnected hoses: Sometimes a hose simply pops off its connection point due to a loose clamp, deteriorated plastic fitting, or recent engine work. This is actually the easiest fix—you just need to locate the disconnected hose and reconnect it properly.
Cracked intake manifold gasket: While not technically a hose, the intake manifold gasket serves the same function as part of the sealed vacuum system. When this gasket fails, it creates a significant vacuum leak that often mimics hose symptoms.
Faulty PCV or EGR valves: These components connect to the vacuum system and can develop leaks around their seals or connections. A failing PCV valve is especially common on higher-mileage vehicles.
Seasonal temperature changes: Extreme cold can make brittle hoses crack, while intense heat accelerates rubber deterioration. Vehicle owners in climates with dramatic temperature swings often experience vacuum hose issues more frequently.
When you find one leaking vacuum hose, I recommend inspecting all of them. In my experience, when one hose fails due to age, others are likely close behind. Replacing them as a set can save you repeat trips under the hood.
How to Find a Leaking Vacuum Hose
Locating the exact source of a vacuum leak can be frustrating, but several proven methods make the process much easier. I’ve used these techniques countless times, and each has its advantages depending on your situation and available tools.
Visual inspection: Start with a thorough visual examination of all vacuum hoses. Look for obvious cracks, splits, or disconnected hoses. Follow each hose from its connection point to ensure it’s properly secured. Pay special attention to hoses near heat sources like the exhaust manifold, as these are most prone to failure.
The spray test (using WD-40 or carburetor cleaner): With the engine running, spray small amounts of WD-40, carburetor cleaner, or brake cleaner around suspected leak points—hose connections, intake manifold gaskets, and vacuum fittings. If the engine RPM changes when you spray a specific area, you’ve found your leak. The flammable fluid gets drawn into the engine through the leak, temporarily altering the air-fuel mixture and changing idle speed.
Listening for leaks: Sometimes the simplest method works best. With the engine running, listen carefully for hissing or whistling sounds. A piece of tubing or a mechanic’s stethoscope can help you pinpoint the sound’s origin. Be cautious around moving parts and hot engine components.
The propane torch method: This is a technique I’ve seen verified by many mechanics in automotive forums. With an UNLIT propane torch, carefully pass the propane gas around suspected leak areas while the engine is running. If the engine RPM increases when propane enters a leak, you’ve located the problem. The propane acts as additional fuel, compensating for the lean condition caused by unmetered air.
Professional smoke test: For stubborn leaks that evade detection, a professional smoke machine is the gold standard. A mechanic introduces smoke into the intake system, and any leak point becomes visible as smoke escapes. This method can detect even the smallest leaks that other methods might miss.
OBD-II scanner analysis: While not a direct detection method, scanning for trouble codes can narrow your search. Codes like P0171 (System Too Lean) or P0300 (Random Misfire) often point to vacuum leaks, especially when combined with the symptoms mentioned earlier.
Start with the simplest methods first—visual inspection and listening—before moving to spray tests or professional equipment. Many vacuum leaks are visible to the naked eye if you take the time to look carefully.
How to Fix a Leaking Vacuum Hose
Once you’ve identified the source of your vacuum leak, you have several repair options depending on the severity and your mechanical comfort level. Here’s my proven approach based on years of helping vehicle owners resolve these issues.
Complete hose replacement (recommended): For permanently cracked, brittle, or deteriorated hoses, complete replacement is the best long-term solution. Purchase the correct replacement hose for your vehicle—auto parts stores can help you find the right diameter and material. Simply remove the old hose, noting its routing, and install the new one using proper clamps at connection points. This typically costs $5-20 per hose depending on length and material.
Temporary fixes (for emergencies): If you’re stranded or need a short-term solution, heat shrink tubing with adhesive lining can seal small cracks or holes. Some DIYers have also successfully used electrical tape or duct tape as a very temporary measure, but I strongly advise replacing these patched hoses as soon as possible. Tape repairs typically fail within weeks due to under-hood temperatures.
Reconnecting disconnected hoses: If a hose simply popped off its connection, clean both the hose end and the fitting, then reconnect firmly. If the clamp is damaged or missing, replace it with a new clamp of the correct size. This is a quick fix that takes just minutes.
Intake manifold gasket replacement: If your leak is at the intake manifold gasket rather than a hose, this repair is more involved and typically requires removing the intake manifold. I recommend this job for experienced DIYers or professional mechanics, as improper installation can cause more serious engine problems.
Tools you’ll need for most vacuum hose repairs include screwdrivers or pliers for hose clamps, a utility knife for cutting replacement hose to length, and possibly a ratchet set for accessing tight spaces. The job is straightforward on most vehicles and typically takes 15-30 minutes depending on the hose location.
Repair Costs and Considerations
One of the advantages of vacuum hose repairs is that they’re generally affordable compared to many other automotive repairs. Here’s what you can expect based on real-world experiences from vehicle owners and mechanics.
DIY repair costs: Replacement vacuum hoses typically cost $5-20 each depending on length, diameter, and material quality. Most repairs require just one or two hoses, bringing total parts cost to $10-40 in most cases. Clamps add $1-3 each if replacements are needed. This makes vacuum hose repair one of the most budget-friendly DIY automotive projects.
Professional repair costs: Having a shop diagnose and repair a vacuum leak typically costs $100-200 depending on labor rates in your area. This includes diagnostic time to locate the leak plus the actual repair. Smoke tests alone often cost $50-100 as a standalone service. Dealership rates will be higher than independent shops.
Factors affecting cost: The location of the leaking hose significantly impacts repair time and cost. Easily accessible hoses near the top of the engine are quick fixes, while hoses routed underneath the intake manifold or behind other components require additional labor time. European luxury vehicles often have more complex vacuum systems that increase diagnostic and repair time.
Addressing vacuum leaks promptly prevents additional costs down the road. A lean-running engine can damage oxygen sensors and catalytic converters over time—repairs that cost significantly more than a simple hose replacement.
Is It Safe to Drive With a Vacuum Leak?
This is one of the most common questions I receive, and the answer depends on the severity of the leak. Based on automotive forum discussions and professional recommendations, here’s what you need to know.
Minor leaks: Small vacuum leaks often don’t immediately endanger your vehicle. Many drivers have operated cars with minor vacuum leaks for extended periods. However, you’ll experience reduced fuel economy, rougher operation, and increased emissions. The check engine light may remain illuminated, potentially masking other problems.
Significant leaks: Larger leaks can cause stalling, especially at idle, which creates safety concerns in traffic. If your car stalls unexpectedly, you could find yourself in dangerous situations. Additionally, severe vacuum leaks can cause your engine to run extremely lean, potentially leading to internal engine damage or catalytic converter failure over time.
Specific vehicle considerations: Some vehicles are more sensitive to vacuum leaks than others. Cars with turbochargers, diesel engines, or sophisticated emission systems may experience more severe symptoms. Brake booster vacuum leaks can affect braking performance, which is an immediate safety concern.
My recommendation: address vacuum leaks as soon as possible, especially if symptoms include stalling, significant power loss, or braking concerns. The relatively low repair cost makes procrastination an unnecessary risk.
Prevention and Maintenance
Preventing vacuum hose problems is far easier than dealing with the symptoms and repairs. I’ve seen vehicles go 150,000+ miles without vacuum issues thanks to proper maintenance, while others develop problems before hitting 75,000 miles. Here’s how to stay ahead of vacuum hose problems.
Regular visual inspections: During routine oil changes or whenever you’re under the hood, take a few minutes to visually inspect vacuum hoses. Look for cracks, brittleness, swelling, or loose connections. Catching deteriorating hoses before they fail completely prevents unexpected breakdowns.
Proactive replacement: On vehicles 8-10 years old or with 100,000+ miles, consider replacing vacuum hoses preventively even if they appear intact. The cost is minimal compared to the inconvenience of a failure. Many mechanics recommend replacing all vacuum hoses as part of a major tune-up on higher-mileage vehicles.
Use quality replacement parts: When replacing hoses, choose silicone or high-quality rubber replacements rather than the cheapest option. Silicone hoses last longer and resist heat and oil degradation better than standard rubber. The small price difference pays off in longevity and reliability.
Seasonal considerations: If you live in an area with extreme temperature swings, pay extra attention to vacuum hoses during seasonal transitions. Cold snaps can cause brittle hoses to crack, while summer heat accelerates deterioration. A quick inspection each spring and fall can catch seasonal damage before it causes problems.
Proper installation: When replacing hoses, ensure correct routing and secure all connections with appropriate clamps. Avoid kinking or sharply bending hoses, which can create weak points. Follow the original hose path exactly—automotive engineers routed these hoses specifically for a reason.
A little preventive maintenance goes a long way. The 15 minutes you spend inspecting vacuum hoses during an oil change can save you hours of frustration and hundreds of dollars in repairs down the road.
Frequently Asked Questions
What happens if I have a vacuum hose leak?
A vacuum hose leak allows unmetered air to enter your engine, disrupting the air-fuel mixture. This causes rough idle, high idle speed, stalling, reduced fuel economy, and can trigger your check engine light. The engine runs leaner than designed, which may reduce performance and potentially cause long-term engine damage if ignored.
Is it okay to drive with a vacuum leak?
Minor vacuum leaks are generally safe for short-term driving, though you’ll experience reduced performance and fuel economy. However, significant leaks that cause stalling or affect braking should be addressed immediately. Driving with a severe vacuum leak can damage oxygen sensors and catalytic converters over time.
How to fix a leaking vacuum hose?
Start by locating the leak through visual inspection or a spray test. For cracked or deteriorated hoses, complete replacement is the best solution—simply remove the old hose and install a new one using proper clamps. For temporary emergencies, heat shrink tubing with adhesive can seal small cracks until proper replacement is possible.
What is the most common cause of a vacuum leak?
The most common cause of a vacuum leak is a cracked, brittle, or disconnected vacuum hose. Rubber hoses deteriorate over time due to under-hood heat, oil exposure, and age. Other common causes include intake manifold gasket failures, loose hose connections, and faulty PCV or EGR valve connections.
Can I tape a vacuum hose?
Tape can work as a very temporary emergency repair, but it’s not a permanent solution. Heat shrink tubing with adhesive lining provides a better temporary seal. However, I strongly recommend replacing damaged hoses as soon as possible—tape repairs typically fail within weeks due to high under-hood temperatures and constant engine vibration.
How much does it cost to fix a vacuum hose leak?
DIY repairs typically cost $10-40 for replacement hoses and clamps. Professional diagnosis and repair usually runs $100-200 depending on labor rates and how difficult the hose is to access. A standalone smoke test for diagnosis costs approximately $50-100 at most repair shops.
Can I use WD-40 to find a vacuum leak?
Yes, WD-40 works well for finding vacuum leaks. With the engine running, spray small amounts around suspected leak points—hose connections, intake gaskets, and vacuum fittings. If the engine RPM changes when you spray a specific area, you’ve found the leak. The WD-40 temporarily affects the air-fuel mixture when drawn into the engine through the leak.
Conclusion
A leaking vacuum hose is a common automotive problem that’s straightforward to diagnose and repair when you know what to look for. By recognizing symptoms like rough idle, stalling, hissing sounds, and decreased fuel economy, you can catch vacuum leaks early before they cause more serious issues.
Whether you choose the DIY approach or professional repair, addressing a leaking vacuum hose promptly restores your engine’s performance, improves fuel efficiency, and prevents potential long-term damage. The repair costs are relatively low compared to many other automotive issues, making it an ideal problem to tackle quickly.
Remember that when one vacuum hose fails due to age, others are likely close behind. Consider inspecting and replacing all vacuum hoses preventively on higher-mileage vehicles to avoid repeat issues. A little preventive maintenance now can save you significant time, money, and frustration down the road.





Leave a Comment