
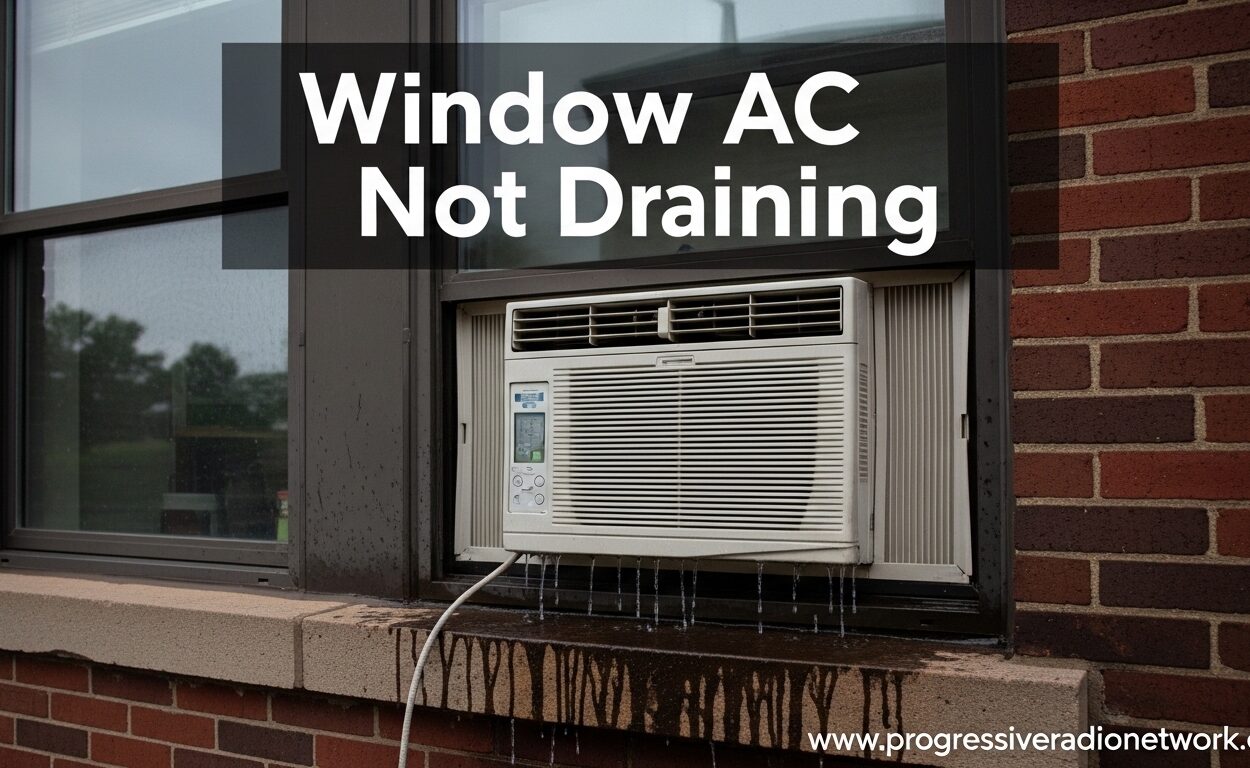
Dealing with a window AC not draining properly can turn a cool, comfortable summer into a frustrating mess of water damage and musty odors. When your window air conditioner stops draining water outside, it usually means something is blocking the drainage system or the unit isn’t installed correctly. In this guide, I’ll walk you through everything you need to know about why window AC units fail to drain and exactly how to fix the problem yourself.
How Window AC Drainage Works
Understanding how your window AC removes water helps you diagnose drainage problems faster. As your AC cools your room, it pulls warm air across cold evaporator coils. This process extracts moisture from the air, creating condensation that drips into a collection pan at the base of the unit.
Traditional window AC units have a drain hole at the back of this pan, allowing water to flow outside by gravity. Newer models use a different approach called a slinger ring design, which intentionally keeps some water in the pan to improve cooling efficiency. Both systems can develop drainage issues, but the causes and fixes differ significantly.
On average, a window AC can produce 3-9 gallons of water daily depending on humidity levels. This water needs somewhere to go, or you’ll face problems ranging from annoying leaks to serious water damage.
Why Your Window AC Not Draining
Several common culprits can stop your window AC from draining properly. Identifying which one affects your unit is the first step toward a fix.
Clogged Drain Hole – The most frequent cause is a blocked drain hole. Dirt, dust, algae, and mold accumulate over time, sealing off the small opening that allows water to escape. This is especially common in humid climates where algae growth thrives in the constant moisture.
Improper Installation Angle – Your window AC needs to tilt backward slightly for water to drain toward the drain hole. If the unit sits level or tilts forward, water pools in the pan instead of flowing outside. The correct angle is 2-3 degrees of backward tilt.
Missing Drain Plug – Some window AC units ship with a rubber plug in the drain hole for shipping purposes. If this plug wasn’t removed during installation, water has nowhere to go. I’ve seen this happen countless times with new installations.
Dirty Air Filter – A clogged air filter reduces airflow, which can cause the evaporator coils to freeze. When the ice melts, it produces more water than the drain system can handle, leading to overflow and indoor leaking.
Cracked Drain Pan – In older units, the drain pan itself may develop cracks or rust holes. This allows water to leak into your wall or window frame rather than draining outside properly.
Modern Window AC Design – Slinger Rings
Before you start hunting for a drain hole, it’s important to know that many modern window AC units don’t drain continuously like older models. These units use a slinger ring design where a plastic ring on the condenser fan blade picks up water from the drain pan and throws it against the hot condenser coils.
This design serves two purposes: it helps cool the condenser coils (improving efficiency) and evaporates much of the collected water. You’ll typically see water vapor rising from the outside of the unit rather than liquid water dripping. This is completely normal operation.
Slinger ring units usually have a secondary overflow drain hole that only activates when water levels get too high. If you’re not seeing water dripping from your newer unit during normal operation, this doesn’t necessarily mean something is wrong.
How to Locate Your Window AC Drain Hole
Finding the drain hole on your window AC can be tricky, especially on modern units. Here’s how to locate it step by step.
Step 1: Turn Off and Unplug – Always start by turning off the unit and unplugging it from the power source. Safety first when working around electrical components and water.
Step 2: Check the Exterior Back – Look at the back exterior portion of the unit. The drain hole is typically a small opening in the base, located on the outdoor side. It may be covered by a rubber plug or simply hidden by the cabinet.
Step 3: Remove the Cabinet – If you can’t locate the drain hole externally, you may need to remove the outer cabinet. This usually involves removing screws from the sides and back of the unit. Refer to your owner’s manual for specific instructions.
Step 4: Inspect the Base Pan – With the cabinet removed, look at the base pan. The drain hole should be visible at the lowest point of the pan, typically at the back corner. It’s usually 1/4 to 1/2 inch in diameter.
Step 5: Check for Plugs – Look for rubber or plastic plugs that may be blocking the hole. These are often the same color as the plastic and can be easy to miss at first glance.
How to Fix Window AC Not Draining
Once you’ve located the drain hole and identified the problem, here’s how to get your window AC draining properly again.
Cleaning a Clogged Drain Hole – Start by using a stiff wire, pipe cleaner, or cotton swab to gently clear any debris from the drain hole. Be careful not to damage the plastic or push the blockage further inside. I’ve found that a combination of mechanical clearing and flushing works best.
Using Vinegar Solution – Mix equal parts white vinegar and warm water. Pour this solution slowly into the drain pan and let it sit for 15-20 minutes. The vinegar helps dissolve algae and mineral buildup. Then flush with clean water to clear the loosened debris. Repeat this process monthly during peak cooling season to prevent future clogs.
Removing the Drain Plug – If you find a rubber plug in the drain hole, simply pull it out. Some plugs are designed to be removed while others should be left in place – check your manual to be sure. For units with slinger rings, the plug may be intentional.
Checking Air Filter – Remove and inspect your air filter. If it’s clogged with dust and debris, clean it or replace it. A dirty filter restricts airflow and can cause freezing, which leads to excess water when the ice melts. I recommend checking filters monthly during heavy use.
Leveling the Unit – Use a level to check your window AC’s angle. Adjust the installation so the unit tilts backward 2-3 degrees. This typically means placing shims under the front edge of the unit or adjusting the window bracket. Proper tilt ensures water flows toward the drain hole.
Manual Draining – For units with severe clogs or those without drain holes, you may need to manually drain the water. Use a wet/dry vacuum to suck water from the drain pan, or carefully tilt the unit backward to pour water out the back (place towels underneath first!). This is a temporary fix until you can properly address the underlying issue.
Proper Window AC Tilt for Drainage
The correct installation angle is critical for proper drainage, but many homeowners get this wrong. Your window AC should tilt backward at approximately 2-3 degrees – roughly a quarter bubble off level on a standard carpenter’s level.
This slight backward tilt ensures water flows toward the drain hole at the back of the unit. Too much tilt can cause other problems like fan noise or improper compressor operation, while too little tilt prevents proper drainage. I’ve seen units installed completely level or even tilted forward, which guarantees drainage problems.
If your unit is mounted in a window sill that prevents proper tilt, you may need to use shims or an adjustable bracket. Many window AC installation kits include a mounting bracket that allows you to achieve the correct angle. Don’t skip this step – proper tilt is essential for long-term trouble-free operation.
Signs Your Window AC Drain Is Clogged
Catching drainage problems early prevents water damage and more expensive repairs. Watch for these warning signs that your window AC drain needs attention.
Water Leaking Inside – The most obvious sign is water dripping or running into your room instead of outside. This typically indicates the drain pan is overflowing due to a clog or improper installation angle.
Gurgling Sounds – If you hear gurgling or bubbling noises when the AC runs, water may be trapped in the drain system. This sound occurs as air tries to pass through the blocked drain hole.
Musty Odors – Standing water in the drain pan creates an ideal environment for mold and bacteria growth. If you notice a musty smell when the AC runs, it likely means water isn’t draining properly.
Reduced Cooling Performance – A clogged drain can reduce cooling efficiency. When the drain pan overflows, water may contact internal components or the unit may work harder to compensate, reducing overall performance.
Visible Water in Pan – If you can see water collecting in the base pan when you look through the vents, it’s not draining as it should. While some water accumulation is normal (especially with slinger ring designs), the level should never reach the point of overflowing.
Preventing Window AC Drain Clogs
A little preventive maintenance goes a long way toward keeping your window AC draining properly season after season. These simple steps can help you avoid most drainage problems.
Monthly Filter Checks – Clean or replace your air filter every month during heavy use. A clean filter maintains proper airflow and prevents coil freezing, which reduces water load on the drain system.
Annual Deep Cleaning – At the start of each cooling season, remove the cabinet and clean the drain pan and drain hole thoroughly. Use a vacuum to remove debris, then flush with vinegar solution to kill algae and mold.
Keep Area Clear – Ensure the outdoor portion of the unit has clearance. Curtains, blinds, or other obstructions can prevent proper drainage and airflow. I recommend at least 6 inches of clearance around the unit.
Monitor Humidity Levels – High indoor humidity increases condensation production. Using a dehumidifier in conjunction with your AC can reduce water load and help prevent overflow issues.
Professional Maintenance – Consider having your window AC professionally serviced every 2-3 years. A technician can clean internal components you can’t easily access and identify potential problems before they become serious.
Frequently Asked Questions
Why is my AC window unit not draining?
Your window AC may not be draining due to a clogged drain hole from algae or debris buildup, improper installation angle (not tilted backward 2-3 degrees), a missing drain hole on newer slinger ring models, or a rubber shipping plug that was never removed from the drain.
What is the 3 minute rule for AC?
The 3 minute rule recommends waiting 3 minutes after turning off your AC before restarting it. This allows pressure in the refrigerant system to equalize, preventing compressor damage. While unrelated to drainage, following this rule extends your AC’s lifespan.
Why don’t window AC units have drain holes?
Modern window AC units often don’t have traditional drain holes because they use slinger ring designs. A slinger ring picks up water from the drain pan and throws it against hot condenser coils, where it evaporates. This improves efficiency and eliminates the need for continuous drainage.
Why is my window AC producing so much water?
Your window AC produces more water during periods of high humidity because it’s removing more moisture from the air. On extremely humid days, a window AC can produce 5-9 gallons daily. This is normal operation, not a sign of a problem.
How do I unclog my window AC drain hole?
To unclog a window AC drain hole, first turn off and unplug the unit. Use a stiff wire or pipe cleaner to mechanically clear the blockage, then flush with a mixture of equal parts white vinegar and warm water. Let it sit 15-20 minutes before flushing with clean water.
Should window AC be tilted?
Yes, window AC units should be tilted backward 2-3 degrees for proper drainage. This slight backward angle ensures condensation flows toward the drain hole at the back of the unit. Too much tilt can cause other problems, while level or forward tilt prevents drainage.
How much water should a window AC produce?
A typical window AC produces 3-9 gallons of water daily depending on humidity levels. In dry climates, you might see as little as 1-2 gallons. In very humid conditions, production can exceed 10 gallons. This range is normal and indicates proper dehumidification function.
Conclusion
Window AC not draining properly is a frustrating but usually solvable problem. Whether you’re dealing with a simple clog, improper installation angle, or the normal operation of a modern slinger ring design, understanding how your unit works makes troubleshooting much easier. Regular maintenance including monthly filter checks and annual drain cleaning can prevent most issues before they start.
If you’ve tried these solutions and your window AC still isn’t draining correctly, it may be time to consult a professional HVAC technician. They can diagnose more complex problems like cracked drain pans, refrigerant leaks, or compressor issues that require specialized tools and expertise. Taking action quickly when you notice drainage problems prevents water damage to your home and helps extend the life of your window air conditioner.



Leave a Comment