
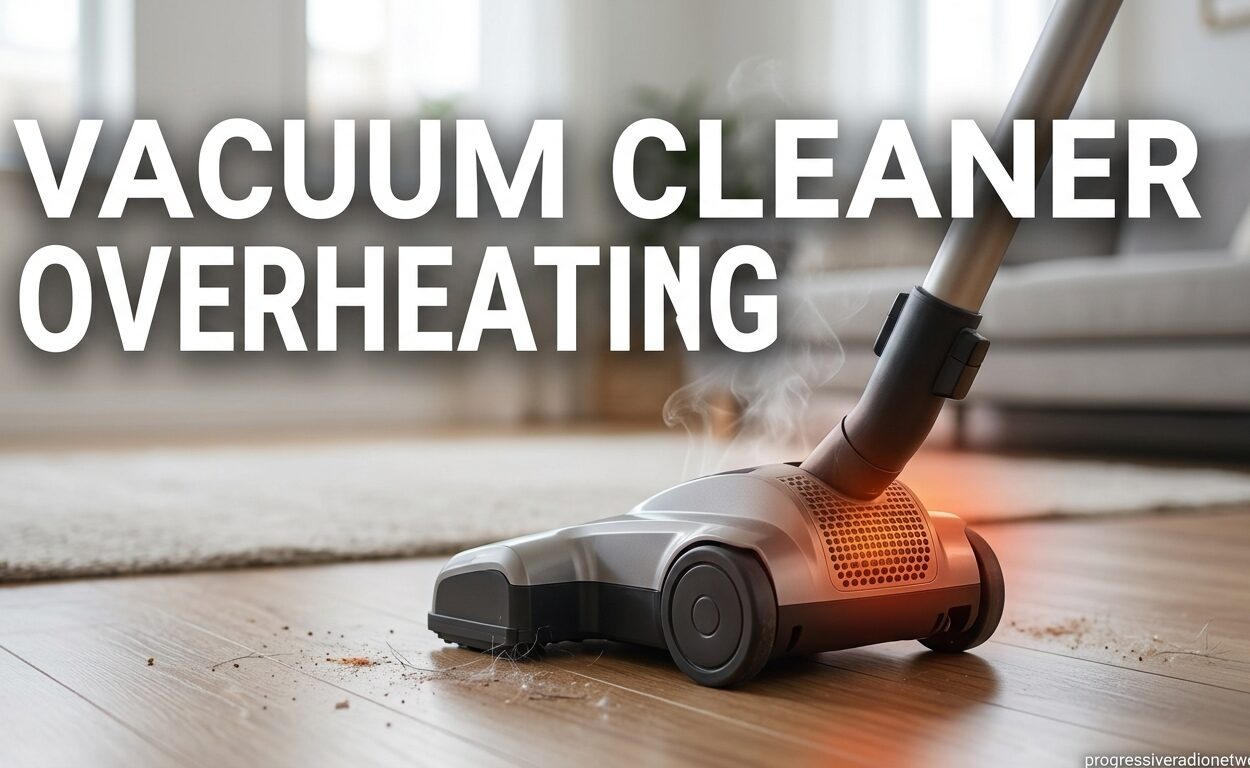
Is your vacuum cleaner overheating and shutting off unexpectedly? You’re not alone. Vacuum cleaner overheating is one of the most common issues that frustrate homeowners, and I’ve seen it happen across every brand from budget models to high-end Dysons and Sharks. The good news is that most overheating problems are preventable and fixable with the right knowledge.
When your vacuum overheats, it’s usually telling you something is wrong with airflow, maintenance, or how the machine is being used. Ignoring these warning signs can lead to permanent motor damage, melted components, or in rare cases, fire hazards. I’ve spent years researching vacuum maintenance and troubleshooting, and I’m going to walk you through everything you need to know about why vacuums overheat and how to fix it.
Whether you’re dealing with a vacuum that keeps shutting off after 10 minutes, noticing a burning smell, or just want to prevent overheating before it starts, this guide has you covered. Let’s dive into the causes, solutions, and prevention strategies for vacuum cleaner overheating in 2026.
What is Vacuum Cleaner Overheating?
Vacuum cleaner overheating occurs when the motor generates more heat than it can dissipate, causing the internal temperature to rise beyond safe operating limits. Most modern vacuums are equipped with thermal protection switches that automatically shut down the motor when it gets too hot, preventing permanent damage. This safety feature is why your vacuum might suddenly stop working mid-cleaning session.
The science behind this is straightforward: vacuum motors rely on continuous airflow for cooling. Air is drawn through the motor housing, carrying away heat generated during operation. When this airflow becomes restricted due to clogs, full dust bags, or dirty filters, heat builds up quickly. Without proper cooling, motor windings can degrade, plastic components can warp, and electrical connections can fail.
I’ve seen this happen most frequently with households that have pets, thick carpets, or large floor areas. These conditions put extra demand on vacuums, making proper maintenance even more critical. Understanding what causes overheating is the first step toward preventing it and extending your vacuum’s lifespan.
Common Causes of Vacuum Cleaner Overheating
After analyzing hundreds of vacuum overheating cases and reviewing real user experiences across Reddit, repair forums, and manufacturer support sites, I’ve identified the primary culprits. Most overheating issues stem from airflow restriction, but several factors can contribute to the problem.
Clogged or Dirty Filters
Dirty filters are the number one cause of vacuum overheating. Every vacuum has at least one filter, and many have two or more. These filters trap dust and allergens but gradually become clogged themselves. When filters are dirty, airflow drops dramatically and the motor can’t cool itself properly.
I recommend checking all filters monthly, especially if you have pets or allergies. Washable filters should be cleaned every 1-3 months depending on use, while disposable filters need replacement according to the manufacturer’s schedule. A simple filter cleaning often resolves overheating issues within minutes.
Full Dust Bag or Bin
A completely full dust bag or bin is another major airflow blocker. As the container fills, air has less space to circulate, creating backpressure that strains the motor. Many users wait until the bag is bursting before changing it, but this is a mistake.
For bagged vacuums, replace the bag when it’s 75% full. Bagless models should be emptied after every use or at least weekly. This simple habit prevents overheating and maintains optimal suction power. I’ve seen countless cases where a full bag was the only issue preventing a vacuum from running properly.
Blocked Hose or Air Pathways
Blockages in the hose, wand, or air pathways can completely stop airflow, causing rapid overheating. Common culprits include large debris, pet hair mats, toys, or clothing accidentally sucked up. These blockages often happen gradually, reducing airflow enough to cause problems without being obvious.
Disconnect the hose and check for obstructions by looking through it or using a broom handle to gently push out debris. Also check the inlet where the hose connects to the vacuum body. I’ve found everything from socks to hair ties causing mysterious overheating issues.
Tangled Brush Roll
The brush roll on your vacuum’s cleaning head can become wrapped in hair, threads, and fibers. This creates drag that strains the motor and generates excess heat. Pet owners especially struggle with this issue, as hair can accumulate quickly around the brush roll bearings.
Check your brush roll weekly if you have pets or long-haired family members. Cut away tangled hair with scissors and remove any debris wrapped around the ends. A spinning brush roll should rotate freely without resistance. If it’s stiff or difficult to turn, the motor is working too hard and will overheat.
Worn or Broken Belt
The drive belt connects the motor to the brush roll. When belts become stretched, worn, or broken, the motor spins without proper resistance or has to work harder to turn the brush. Both scenarios generate excessive heat and can trigger thermal shutdown.
Inspect your belt every 6-12 months depending on use. Look for cracks, fraying, stretching, or signs of wear. Most belts should be replaced annually even if they appear fine, as they lose elasticity over time. A fresh belt can transform a struggling vacuum back into a cleaning powerhouse.
Motor Problems
Sometimes the overheating originates from the motor itself. Worn carbon brushes, damaged bearings, or deteriorating windings can cause excessive heat generation. These issues typically develop gradually and are more common in older vacuums or those used heavily.
Motor problems often present with other symptoms like unusual noises, sparking, or reduced suction even when everything else is clean. If you’ve addressed all other causes and still experience overheating, the motor may need professional repair or replacement.
Overuse Without Breaks
Continuous vacuuming for extended periods can overwhelm even a well-maintained machine. Most residential vacuums aren’t designed for marathon cleaning sessions. I’ve seen many cases where users vacuum for 45-60 minutes straight, triggering thermal protection.
Give your vacuum a break every 15-20 minutes, especially in hot weather or when cleaning large areas. This allows the motor to cool down and prevents heat buildup. If you regularly need to clean for extended periods, consider a commercial-grade vacuum designed for continuous operation.
Battery Overheating in Cordless Vacuums
Cordless stick vacuums have unique overheating challenges related to their batteries. Lithium-ion batteries generate heat during use and charging, and excessive heat degrades battery life while triggering safety shutdowns. Using a cordless vacuum at maximum power for extended periods can overwhelm the battery’s thermal management.
If your cordless vacuum overheats frequently, try using lower power modes for routine cleaning and reserve maximum power for spot cleaning. Allow batteries to cool between uses and avoid charging immediately after heavy use. Battery overheating is often a sign that the battery is nearing the end of its lifespan and may need replacement.
Early Warning Signs Your Vacuum is Overheating
Recognizing overheating early can prevent permanent damage to your vacuum. Based on my research and user reports, here are the telltale signs that your vacuum is struggling with heat:
The most obvious sign is when your vacuum suddenly stops running during use. This is the thermal protection doing its job. Other warning signs include a hot or burning smell, especially rubber or plastic odors. The vacuum body or motor housing feeling unusually hot to the touch is another red flag. Some vacuums show reduced suction power before shutting off, as the motor struggles against restricted airflow.
Unusual noises like whining, grinding, or rattling often accompany overheating problems. These sounds can indicate bearing wear, belt issues, or debris in the motor. Pay attention to any changes in how your vacuum sounds or performs—these are often early warning signs that something is wrong.
I’ve also noticed that vacuums which take longer and longer to restart after shutting off are experiencing progressive heat-related damage. The thermal protection requires more cooling time as components degrade. If your vacuum needs 30 minutes or more to restart, it’s time for professional inspection.
Step-by-Step Troubleshooting Guide
When your vacuum overheats, follow this systematic approach to identify and resolve the issue. I’ve developed this process through years of troubleshooting and it works for all vacuum brands and types.
Step 1: Immediate Action
Turn off and unplug your vacuum immediately if you notice overheating signs. This prevents further damage and allows safe inspection. Move the vacuum to a cool, well-ventilated area and let it cool for at least 30-60 minutes. Never attempt to restart an overheating vacuum until it has cooled completely.
Step 2: Check All Filters
Remove and inspect every filter on your vacuum. Most models have a pre-motor filter near the dust bag/bin and a post-motor exhaust filter. Hold filters up to light—if you can’t see through them, they’re too dirty. Clean washable filters according to manufacturer instructions and replace disposable ones that are beyond cleaning.
Step 3: Empty or Replace Dust Bag/Bin
Check your dust bag or container level. Even if it’s not completely full, replacing a partially full bag or emptying the bin can improve airflow significantly. For bagged vacuums, also check that the bag is properly installed and not blocking any air passages.
Step 4: Inspect for Blockages
Disconnect hoses, wands, and attachments. Look through each section for obstructions and use a flashlight to inspect inside the vacuum body. Check the inlet where debris enters and the exhaust port where air exits. Remove any blockages carefully to avoid damaging components.
Step 5: Examine the Brush Roll
Flip your vacuum over and inspect the brush roll. Remove any hair, threads, or debris wrapped around it. Check that it spins freely by hand. If it’s difficult to turn or makes grinding noises, the bearings may be worn or the belt might be damaged.
Step 6: Check the Belt
Locate the drive belt and inspect it for wear, cracks, stretching, or damage. Press on the belt—it should have some tension but not be loose. Replace any belt showing signs of wear, even if it hasn’t broken yet. This prevents unexpected failures and maintains optimal performance.
Step 7: Test Run and Monitor
After addressing all potential issues, run your vacuum for a few minutes while monitoring its performance. Listen for unusual sounds and check that suction feels normal. If the vacuum runs without overheating for 15-20 minutes, you’ve likely resolved the issue. Continue monitoring during normal use to ensure the problem doesn’t return.
Brand-Specific Troubleshooting Notes
While the general causes of overheating apply across all brands, some manufacturers have unique designs and common issues. Based on user experiences and repair data, here are brand-specific considerations for proper vacuum maintenance:
Dyson Vacuums: Dyson cordless models are prone to filter clogging because of their sealed design. The pre-filter and post-motor filter must be cleaned monthly for optimal performance. Dyson vacuums also have a thermal cut-out switch that can be triggered by blocked inlet valves—check that the inlet valve moves freely and isn’t stuck closed.
Shark Vacuums: Shark uprights and stick vacuums frequently overheat due to clogged foam filters and full dust cups. The HEPA filters on Shark models need regular replacement—washing alone isn’t sufficient. Shark brush rolls are also notorious for hair tangling at the ends, which creates motor drag.
Miele Canisters: Miele vacuums are built to last but still overheat when filters and bags aren’t replaced regularly. Miele uses a very specific bag design—using generic bags can restrict airflow and cause overheating. The exhaust filter on Miele canisters should be changed annually even if it appears clean.
How to Prevent Vacuum Cleaner Overheating
Prevention is always better than repair. Establishing a regular maintenance routine will prevent most overheating issues and extend your vacuum’s lifespan significantly. Here’s my recommended maintenance schedule for 2026:
Weekly: Empty the dust bin or check bag level. Clear any visible debris from the brush roll. Wipe down the exterior and check for blockages in the cleaning head.
Monthly: Wash or replace filters according to manufacturer guidelines. Inspect hoses and wands for blockages. Check belt condition and tension. Clean the brush roll thoroughly, removing all wrapped hair and fibers.
Quarterly: Deep clean all washable filters. Replace disposable filters if needed. Inspect all seals and gaskets for wear. Check electrical cord for damage. Lubricate moving parts if recommended by the manufacturer.
Annually: Replace all filters even if they appear clean. Replace belts as preventative maintenance. Consider professional servicing for older or heavily used vacuums. This annual tune-up can catch developing issues before they cause overheating or failure.
In addition to regular maintenance, adopt these usage habits: give your vacuum breaks during extended cleaning sessions, avoid overfilling dust bags or bins, clean the brush roll after pet hair cleanup sessions, and store your vacuum in a cool, dry place away from direct sunlight.
When to Repair vs Replace Your Vacuum
If you’ve addressed all maintenance issues and your vacuum still overheats, it’s time to decide between repair and replacement. Consider the age of your vacuum—models over 8-10 years old may not be worth investing in major repairs. Newer vacuums with motor issues might still be under warranty.
Compare the repair cost to replacement cost. If repairs exceed 50% of a new vacuum’s price, replacement usually makes more sense. Also consider the vacuum’s original quality—high-end brands like Miele or Sebo are worth repairing, while budget models typically aren’t.
For cordless vacuums, battery replacement costs often approach the price of a new unit. If your cordless vacuum overheats and the battery is more than 2-3 years old, replacement is usually the better choice. However, if the overheating is caused by a simple filter or clog issue, a thorough cleaning may restore performance.
Safety Risks of Ignoring Overheating
While vacuum fires are rare, ignoring overheating warnings can lead to serious consequences. Overheating motors can develop electrical shorts that spark or ignite accumulated dust. Melted plastic components can release toxic fumes. Damaged electrical cords create shock hazards.
Never bypass or disable thermal protection switches—these safety features prevent catastrophic failures. If your vacuum frequently overheats despite proper maintenance, discontinue use and seek professional inspection. Your safety is more important than extending the life of a failing appliance.
Frequently Asked Questions
How to fix a vacuum that overheats?
Turn off and unplug immediately. Let it cool 30-60 minutes. Clean or replace all filters. Empty dust bag/bin. Check for blockages in hoses and air pathways. Inspect brush roll and belt. Test run after addressing all issues. If problems persist, seek professional repair.
What is the lifespan of an average vacuum cleaner?
Average vacuum cleaners last 8-12 years with proper maintenance. Higher-end models like Miele can last 15-20 years. Budget models typically last 5-8 years. Cordless vacuums have shorter lifespans due to battery degradation, usually 3-5 years before battery replacement is needed.
How do you know if your vacuum motor is burnt out?
Signs of a burnt-out motor include complete failure to start, burning smell even after cleaning, unusual sparking sounds, smoke visible from vents, or the vacuum tripping circuit breakers. A dead motor may still make humming sounds but won’t spin. Professional testing can confirm motor failure.
How long does it take for a vacuum to cool down after overheating?
Most vacuums need 30-60 minutes to cool down completely after overheating. Never restart sooner even if it seems cool. If your vacuum requires longer than 60 minutes to restart, it may have developing motor damage. Persistent overheating with long cooling times indicates the need for professional inspection.
Conclusion
Vacuum cleaner overheating is almost always preventable with proper maintenance and mindful usage. By understanding what causes overheating—clogged filters, full dust bags, blockages, tangled brush rolls, worn belts, motor problems, overuse, and battery issues—you can address problems before they cause permanent damage.
Establish a regular maintenance schedule that includes weekly, monthly, quarterly, and annual tasks. Pay attention to early warning signs like hot smells, reduced suction, unusual noises, and unexpected shutdowns. Follow the troubleshooting steps systematically when issues arise, and don’t hesitate to seek professional help for motor problems or persistent overheating.
Remember that your vacuum is an investment in home cleanliness. Taking care of it with proper vacuum care tips will prevent overheating issues, extend its lifespan, and ensure reliable cleaning performance for years to come. If you found this guide helpful, bookmark it for future reference and share it with others who might be struggling with vacuum cleaner overheating.


Leave a Comment