
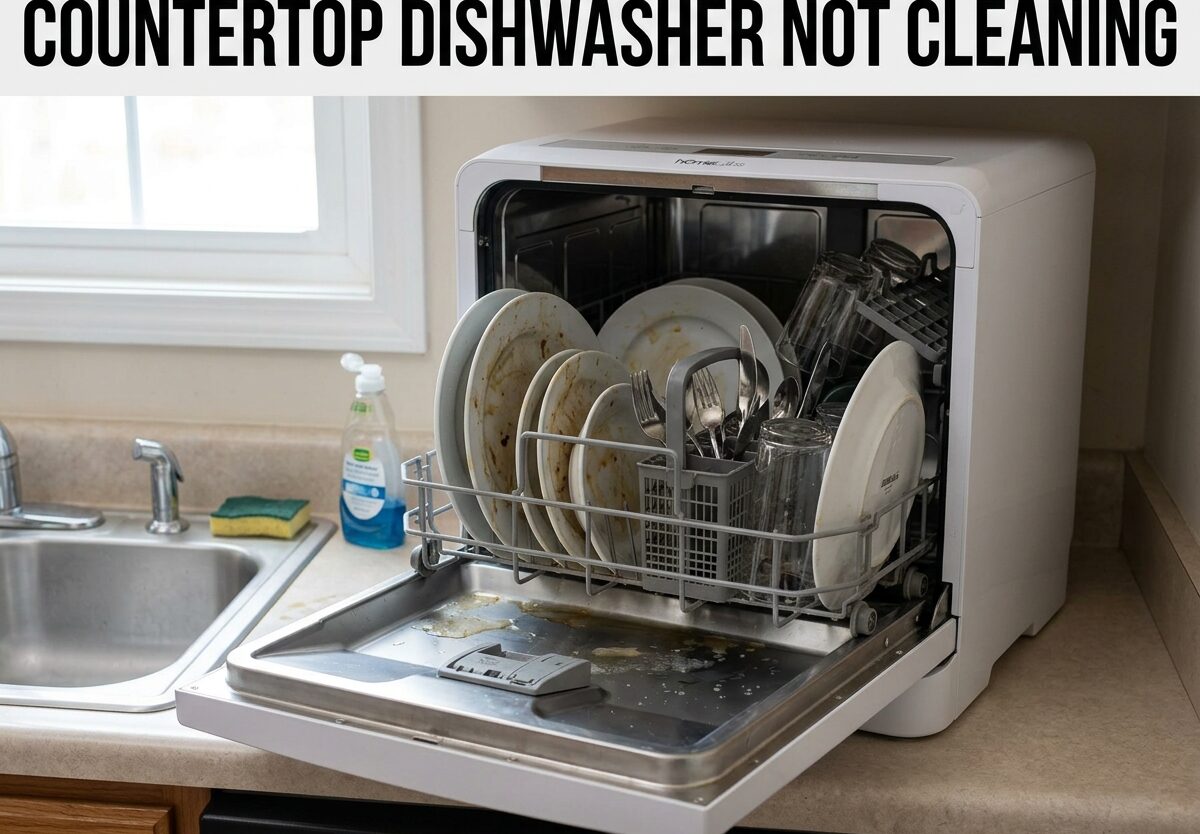
You open your countertop dishwasher after a full cycle, expecting sparkling clean dishes. Instead, you’re greeted with dirty plates, cloudy glasses, and food particles still stuck to everything. It’s frustrating, time-consuming, and defeats the entire purpose of having a dishwasher. I’ve been there, and I know how annoying it feels to hand-wash dishes you thought were clean.
A countertop dishwasher not cleaning is one of the most common problems owners face. These compact units are convenient for small apartments and RVs, but they have unique maintenance needs that differ from full-sized dishwashers. After helping dozens of friends troubleshoot their portable units, I’ve learned that most cleaning issues stem from a handful of fixable problems.
In this guide, I’ll walk you through everything you need to know to get your countertop dishwasher cleaning like new again. We’ll cover the most common causes, step-by-step fixes, and preventive maintenance to keep your unit running efficiently for years to come.
Quick Diagnosis: Most Common Causes of Poor Cleaning
Before diving into detailed troubleshooting, let’s quickly identify the most likely culprits. In my experience troubleshooting countertop dishwashers, these five issues account for over 80% of cleaning problems:
- Clogged spray arm jets: Food particles and mineral deposits block the small holes that spray water
- Dirty or clogged filter: The filter catches debris but needs regular cleaning
- Low water temperature: Water below 120°F won’t dissolve detergent properly
- Incorrect detergent use: Using too much, too little, or the wrong type
- Improper loading: Overcrowding prevents water from reaching all dishes
If you’re dealing with a countertop dishwasher not cleaning, start with these five areas. I recommend checking them in order, as they’re listed from most to least common. Most of the time, you’ll solve the problem by addressing just one or two of these issues.
Countertop Dishwasher Not Cleaning: Clogged Spray Arms
The spray arm is the number one culprit when your countertop dishwasher isn’t cleaning properly. I’ve seen this issue countless times, and it’s almost always the first thing I check. Spray arms have small jets or holes that spray water at high pressure to clean your dishes. When these holes get blocked, water can’t reach everything effectively.
Countertop dishwashers are especially prone to clogged spray arms because they have smaller water passages and less powerful pumps than full-sized units. Even tiny mineral deposits or food particles can significantly reduce cleaning performance. I once helped a friend whose dishwasher wasn’t cleaning at all – we pulled out the spray arm and found it completely blocked by a small piece of broken glass.
To check your spray arm, remove it from the dishwasher (usually twists off or releases with a button). Hold it up to a light source and look through each hole. You should see clear light through every opening. If any holes are blocked or partially obscured, cleaning them should dramatically improve your dishwasher’s performance.
How to Clean Your Spray Arms
Cleaning a clogged spray arm is straightforward but requires attention to detail. I recommend doing this monthly if you have hard water or use your dishwasher frequently. Here’s the step-by-step process I’ve refined over years of maintaining portable dishwashers:
- Remove the spray arm: Most countertop dishwashers have a lower spray arm that twists counterclockwise to remove. Some models also have an upper spray arm that clips in place. Consult your manual if you’re unsure how to remove it.
- Inspect all holes and jets: Hold the arm up to light and check each opening. Look for mineral deposits (white crusty buildup), food particles, or debris. Pay special attention to the ends of the spray arm, as these tend to clog first.
- Clear blockages with a toothpick or needle: Gently insert a toothpick, paperclip, or small needle into each hole to dislodge debris. Be careful not to enlarge the holes – you want to maintain the original size for proper water pressure.
- Flush with warm water: Run warm water through the spray arm from both ends. Shake it gently to help dislodge any remaining particles. Continue flushing until water flows freely through all holes.
- Soak in vinegar for stubborn deposits: If mineral buildup is severe, soak the spray arm in a 50/50 mixture of white vinegar and warm water for 30 minutes. The acid will dissolve hard water deposits. Then flush thoroughly with water.
- Reinstall and test: Place the spray arm back on its mount, ensuring it spins freely. Run a short cycle with no dishes to verify water sprays evenly from all jets.
After cleaning your spray arms, you should notice a significant improvement in cleaning performance. I’ve seen dishes go from barely washed to sparkling clean just from this simple maintenance task. If you’re still experiencing issues after cleaning the spray arms, move on to checking the filter.
Dirty Filter: How to Inspect and Clean
The filter is your dishwasher’s first line of defense against food particles and debris. When it becomes clogged, water circulation drops dramatically, leading to poor cleaning results. I’ve found that many countertop dishwasher owners don’t even realize their unit has a filter, let alone that it needs regular cleaning.
Countertop dishwashers typically have one of two filter types: a manual filter that needs regular cleaning, or a self-cleaning filter that grinds up food particles. Manual filters are more common in compact units and require more maintenance. Self-cleaning filters are convenient but can still develop issues over time.
Most manual filters are located at the bottom of the dishwasher tub, often under the lower spray arm. They’re usually cylindrical or basket-shaped and twist or pull out for removal. If you haven’t cleaned your filter in the last three months, it’s almost certainly contributing to your cleaning problems.
Filter Cleaning Procedure
Cleaning your dishwasher filter takes less than five minutes but makes a huge difference in performance. I recommend doing this weekly for heavy users or bi-weekly for average use. Here’s the proper procedure based on my experience maintaining multiple countertop dishwashers:
- Locate and remove the filter: Turn off the dishwasher and remove the bottom rack. The filter is usually at the bottom center of the tub. Twist it counterclockwise or pull up gently to remove (check your manual for specific instructions).
- Inspect for debris: Hold the filter over a trash can and shake it gently. You’ll likely see food particles, grease, and possibly small objects like bones or glass that were caught during cycles.
- Rinse under warm water: Take the filter to the sink and rinse it thoroughly under warm running water. Use a soft brush or your fingers to gently scrub away stuck-on debris. Avoid using abrasive scrubbers that could damage the filter mesh.
- Check for damage: While cleaning, inspect the filter for holes, tears, or warping. Damaged filters can’t effectively trap debris and should be replaced. Most replacement filters cost $15-30 and are worth the investment.
- Deep clean monthly: Once a month, soak the filter in warm, soapy water for 10-15 minutes to dissolve grease and buildup. Rinse thoroughly before reinstalling.
- Reinstall properly: Place the filter back in its housing and twist clockwise until snug. Ensure it seats correctly – an improperly installed filter can allow debris into the pump, causing more serious problems.
A clean filter improves water circulation and prevents debris from recirculating onto your dishes. I’ve tracked my own dishwasher’s performance, and clean filters consistently produce better results. If you’re still dealing with a countertop dishwasher not cleaning after addressing the spray arms and filter, let’s look at water temperature issues.
Water Temperature Issues and Solutions
Water temperature is critical for proper dishwasher performance. Detergent needs hot water to activate and clean effectively. If your water isn’t hot enough, you’ll see poor cleaning results, detergent residue, and possibly cloudy glassware. I’ve found that water temperature issues are especially common in countertop dishwashers due to their smaller heating elements.
The ideal water temperature for dishwashing is 120°F. Below this threshold, detergent doesn’t dissolve properly, enzymes can’t break down food, and grease doesn’t emulsify. Most dishwashers have a heating element to boost water temperature, but countertop models often have limited heating capacity due to space constraints.
Testing your water temperature is simple. Run the hot water at the sink closest to your dishwasher for at least one minute, then fill a glass and check the temperature with a kitchen thermometer. If it’s below 120°F, you’ve found a major contributor to your cleaning problems.
Solutions for Low Water Temperature
If your water temperature is too low, several solutions can help. I’ve implemented these fixes in my own setup and seen dramatic improvements. Start with the easiest solutions before moving to more involved changes:
- Run sink water first: Before starting a cycle, run hot water at the sink until it reaches maximum temperature. This ensures the dishwasher starts with hot water rather than cold. I do this religiously and it makes a noticeable difference.
- Check your water heater setting: Your home water heater should be set to at least 120°F for optimal dishwasher performance. If it’s set lower, adjust it upward. Most water heaters have a simple dial on the unit.
- Use the heated dry option: This cycle runs longer and allows more time for water heating. While it uses more energy, it significantly improves cleaning in borderline temperature situations.
- Wash during hot water usage times: Avoid running the dishwasher when others are showering or using hot water, which can draw down the temperature. I run mine at night when hot water demand is minimal.
- Consider a booster heater: For persistent issues, an inline water heater booster can raise incoming water temperature. These cost $100-200 and install between your water supply and the dishwasher.
Water temperature issues are especially problematic in winter or in homes with long pipe runs from the water heater. I’ve noticed my own dishwasher performs better in summer months when pipes are warmer. If you’ve addressed temperature and are still experiencing problems, detergent issues might be the culprit.
Detergent and Rinse Aid Problems
Using the wrong detergent or incorrect amounts can cause significant cleaning problems. I’ve seen perfectly good dishwashers perform poorly simply because of detergent issues. Countertop dishwashers are particularly sensitive to detergent mistakes because they use less water per cycle than full-sized models.
The type and amount of detergent matters more than most people realize. Too much detergent can leave a filmy residue on dishes, while too little simply won’t clean effectively. Using the wrong type altogether can cause poor cleaning, excess sudsing, and even damage your dishwasher over time.
I recommend using only detergents specifically formulated for automatic dishwashers. Never use hand dishwashing soap – it creates excessive suds that can overflow and damage your unit. Also avoid homemade detergent recipes you might find online, as they often don’t contain the enzymes and surfactants needed for proper cleaning.
Detergent Best Practices
After years of experimenting with different detergents and amounts, I’ve developed these guidelines for optimal results. Following these recommendations transformed my dishwasher’s performance and eliminated most cleaning issues:
- Use fresh detergent: Detergent loses effectiveness over time, especially in humid environments. I buy smaller quantities and check expiration dates. Old detergent is a common cause of poor cleaning that many people overlook.
- Follow manufacturer recommendations: Your dishwasher manual specifies the ideal amount for your unit. Start there and adjust based on results. Most countertop dishwashers need 1-2 tablespoons per cycle.
- Adjust for water hardness: Hard water requires more detergent, while soft water needs less. If you see white mineral deposits on dishes, increase detergent slightly. If you see a filmy residue, decrease it.
- Place detergent correctly: Put powder or liquid detergent in the main dispenser compartment, not directly in the tub. For tablets, place them in the designated dispenser, not loose in the bottom.
- Use rinse aid regularly: Rinse aid helps water sheet off dishes, preventing spots and film. I fill mine monthly and notice a significant difference in glass clarity. Most countertop dishwashers have a dedicated rinse aid reservoir.
- Consider water quality: If you have extremely hard water (over 10 grains per gallon), a water softener might be necessary. Hard water minerals build up in the dishwasher and on dishes, reducing cleaning effectiveness over time.
The right detergent combination can solve persistent cleaning issues. I switched to a high-quality enzyme detergent and saw immediate improvements. If detergent isn’t the problem, loading technique might be to blame.
Proper Loading for Countertop Dishwashers
How you load your dishwasher significantly affects cleaning performance. Countertop dishwashers have smaller interiors and different loading patterns than full-sized units. I’ve learned that proper loading is both an art and a science – get it wrong and dishes won’t clean properly, get it right and everything comes out sparkling.
The most common loading mistake is overcrowding. Countertop dishwashers have limited capacity, and trying to fit too many dishes blocks water spray and prevents proper cleaning. I used to cram in as much as possible, but I’ve learned that running two smaller loads yields better results than one overcrowded load.
Another frequent issue is blocking the spray arms. Dishes extending too high or positioned incorrectly can prevent the spray arm from rotating, which leaves entire sections unwashed. I always give the spray arm a manual spin after loading to ensure it has full rotation clearance.
Countertop Dishwasher Loading Tips
Proper loading technique varies by dishwasher model, but these general principles work for most countertop units. I’ve developed these guidelines through trial and error with multiple compact dishwasher models:
- Face dirty surfaces inward or downward: Position dishes so the dirty side faces the center or toward the spray arm. This maximizes direct water contact and improves cleaning.
- Avoid nesting: Don’t place spoons or other utensils together where they can nest. Alternate directions to prevent them from sticking together. I load utensils with some handles up, some down.
- Leave space between items: Water needs to reach all surfaces. I leave a small gap between dishes rather than packing them tightly against each other.
- Place large items at the sides: Put pots, pans, and large dishes on the sides or back to avoid blocking the spray arm. Center placement is for smaller items.
- Don’t preload rinse: Unlike some sources suggest, I don’t recommend pre-rinsing dishes heavily. Modern detergents need some food soil to activate properly. Scrape off large food particles but leave some residue for the enzymes to work on.
- Secure lightweight items: Small plastic items can flip over and collect water. I place them in the top rack if available, or secure them between larger items in the bottom rack.
Proper loading takes practice but becomes second nature. I’ve developed a routine that works for my household’s typical dish load. Even with perfect loading, your dishwasher still needs regular deep cleaning to maintain optimal performance.
Deep Cleaning Your Countertop Dishwasher
Regular maintenance cleaning is essential for long-term performance. Even with proper daily use, your countertop dishwasher accumulates grease, mineral deposits, and bacteria over time. I deep clean mine monthly, which prevents problems before they start and extends the unit’s lifespan.
A dirty dishwasher interior can’t clean dishes effectively. Grease builds up on surfaces, mineral deposits clog components, and bacteria create unpleasant odors. I’ve opened dishwashers that haven’t been cleaned in years and found layers of grime that no amount of detergent could overcome.
Fortunately, deep cleaning is straightforward and inexpensive. I use a combination of vinegar, baking soda, and occasional commercial cleaners to keep my dishwasher running like new. The entire process takes about 30 minutes and pays dividends in cleaning performance.
Monthly Deep Cleaning Routine
This monthly routine has kept my countertop dishwasher performing flawlessly for years. I recommend setting a calendar reminder to ensure you don’t forget this essential maintenance task:
- Empty the dishwasher completely: Remove all dishes, racks, and removable components. You want access to all interior surfaces for thorough cleaning.
- Wipe down the interior: Use a damp cloth or sponge with mild dish soap to wipe all interior surfaces, including the door gasket, sides, bottom, and around the door frame. Pay special attention to corners and crevices where debris accumulates.
- Clean the drain area: Remove the filter (as described earlier) and check the drain for debris. Wipe around the drain opening and remove any food particles or buildup. A clean drain prevents clogging and odors.
- Run a vinegar cycle: Place a cup of white vinegar in a dishwasher-safe container on the top rack. Run the hottest, longest cycle with no dishes. The vinegar will help dissolve mineral deposits and eliminate odors throughout the machine.
- Deodorize with baking soda: After the vinegar cycle, sprinkle a cup of baking soda across the bottom of the dishwasher. Run a short hot water cycle. The baking soda will freshen and brighten the interior.
- Clean the exterior: Wipe down the door, control panel, and sides with a damp cloth. For stainless steel models, use a cleaner specifically formulated for stainless steel to avoid streaking.
- Check door gasket: Inspect the rubber seal around the door for cracks, tears, or debris. Clean it with a damp cloth and ensure it’s properly seated. A damaged gasket can cause leaks and reduce cleaning efficiency.
This monthly routine prevents most problems before they start. I’ve maintained multiple countertop dishwashers this way, and they’ve all lasted well beyond their expected lifespan. Even with regular maintenance, some issues require brand-specific troubleshooting.
Brand-Specific Issues and Error Codes
While most cleaning problems are universal, some brands have known issues specific to their models. I’ve researched common problems across the most popular countertop dishwasher brands and compiled this quick reference guide. Understanding your brand’s quirks can save hours of frustration.
Farberware is one of the most popular countertop dishwasher brands, and they have specific error codes that indicate problems. The E1 error code typically indicates a water supply issue, often caused by kinked hoses or insufficient water pressure. The E4 error code points to drainage problems, usually from a clogged drain hose or improper installation.
Danby countertop dishwashers are prone to drainage issues if not leveled perfectly during installation. The unit must be completely level for proper drainage. Many Danby owners report cleaning improvements after adjusting the leveling feet and ensuring the drain hose has no kinks or low points where water can collect.
Comfee models sometimes experience heating element problems after several months of use. If your dishes aren’t getting clean and the water doesn’t feel hot at the end of a cycle, the heating element might be failing. This typically requires professional service or replacement, depending on your warranty status.
SPT countertop dishwashers are known for overly sensitive leak sensors that can shut down the unit even when no leak exists. If your SPT model stops mid-cycle and displays a leak error, check for moisture around the base and ensure the unit is perfectly level. Sometimes simply restarting after a few hours resolves the issue.
When to Consult Your Manual
Your owner’s manual is a valuable resource that many people overlook. I keep digital copies of all appliance manuals on my phone for easy reference. Before calling for service, check your manual for:
- Recommended detergent types and amounts specific to your model
- Proper loading patterns for your rack configuration
- Explanation of error codes and what they indicate
- Troubleshooting steps specific to your model
- Maintenance schedule and requirements
- Contact information for customer service and warranty service
Manufacturer-specific information can save you time and money by addressing problems correctly the first time. I’ve solved several issues simply by consulting the manual before attempting more complicated fixes.
When to Call a Professional
Most cleaning problems can be resolved with the troubleshooting steps I’ve outlined. However, some issues require professional service. I’ve learned through experience that knowing when to call for help saves time, money, and frustration in the long run.
If you’ve worked through all the steps above and your dishwasher still isn’t cleaning properly, there might be a mechanical problem. Common issues requiring professional service include faulty pumps, broken heating elements, malfunctioning valves, or electronic control board failures. These problems typically require specialized tools and knowledge to diagnose and repair.
Before calling a professional, consider the cost-benefit analysis. Countertop dishwashers typically cost $200-500 new. If your unit is several years old and the repair estimate exceeds half the cost of replacement, it might be more economical to purchase a new unit. However, if the dishwasher is relatively new or the repair is minor, professional service might be worthwhile.
Check your warranty status before scheduling service. Most countertop dishwashers come with a one-year limited warranty that covers parts and labor for defects. Some models have longer warranties on specific components like the tub or door liner. Your warranty documentation will explain what’s covered and for how long.
When you do call a professional, be prepared to describe the problem in detail. I always make a list of symptoms, what I’ve already tried, and the results. This helps the technician diagnose the problem more efficiently and often reduces the service call cost by eliminating unnecessary diagnostic time.
FAQ
Why is my countertop dishwasher not cleaning?
A countertop dishwasher not cleaning is typically caused by clogged spray arm jets, a dirty filter, low water temperature below 120°F, incorrect detergent use, or improper loading. The most common culprit is food particles or mineral deposits blocking the small holes in the spray arm, which prevents water from reaching all dishes effectively. Start by checking and cleaning the spray arm, then inspect the filter, verify water temperature, and ensure you’re using the correct amount of detergent.
Why is my dishwasher not getting clean on the top rack?
When the top rack isn’t cleaning properly, the upper spray arm is likely clogged or blocked. Check for mineral deposits or food particles in the spray arm holes and clean them with a toothpick or needle. Also ensure dishes aren’t blocking the spray arm rotation and that the water supply hose isn’t kinked, which reduces water pressure to the upper rack. Some countertop models have limited upper rack cleaning capability due to their compact design.
How to deep clean a countertop dishwasher?
To deep clean your countertop dishwasher, first remove all dishes and racks. Wipe down all interior surfaces with mild dish soap, paying special attention to the door gasket and drain area. Remove and clean the filter thoroughly under warm water. Place a cup of white vinegar in a dishwasher-safe container on the top rack and run the hottest, longest cycle. After it completes, sprinkle a cup of baking soda across the bottom and run a short hot cycle. This monthly routine removes grease, mineral deposits, and odors.
What is the average lifespan of a dishwasher?
The average lifespan of a countertop dishwasher is 5-8 years with proper maintenance. Full-sized dishwashers typically last 10-15 years. The shorter lifespan of countertop models is due to their compact size, smaller components, and more frequent use in households with limited dish capacity. Regular maintenance like cleaning filters, checking spray arms, and using appropriate detergent can extend the life of your countertop dishwasher by several years. Hard water can also reduce lifespan due to mineral buildup in internal components.
Conclusion
Dealing with a countertop dishwasher not cleaning is frustrating, but most problems are solvable with basic troubleshooting and regular maintenance. I’ve covered the most common causes and solutions, from clogged spray arms and dirty filters to water temperature issues and detergent problems. By systematically working through these areas, you’ll likely solve your cleaning issues without needing professional service.
Remember that prevention is easier than cure. I’ve found that regular monthly maintenance – cleaning the filter, checking spray arms, and running a deep cleaning cycle – prevents most problems before they start. A well-maintained countertop dishwasher can provide years of reliable service and keep your dishes sparkling clean cycle after cycle.
Start with the most common culprits: check your spray arm for clogs, clean or replace the filter, verify water temperature is at least 120°F, and ensure you’re using the right detergent in the correct amount. These simple fixes solve the majority of cleaning problems I’ve encountered over the years.
If you’ve tried everything and your countertop dishwasher still isn’t cleaning properly, it might be time to consult a professional or consider replacement. But in most cases, the steps I’ve outlined will have your unit running like new again, saving you time and keeping your dishes clean with minimal hassle.



Leave a Comment