
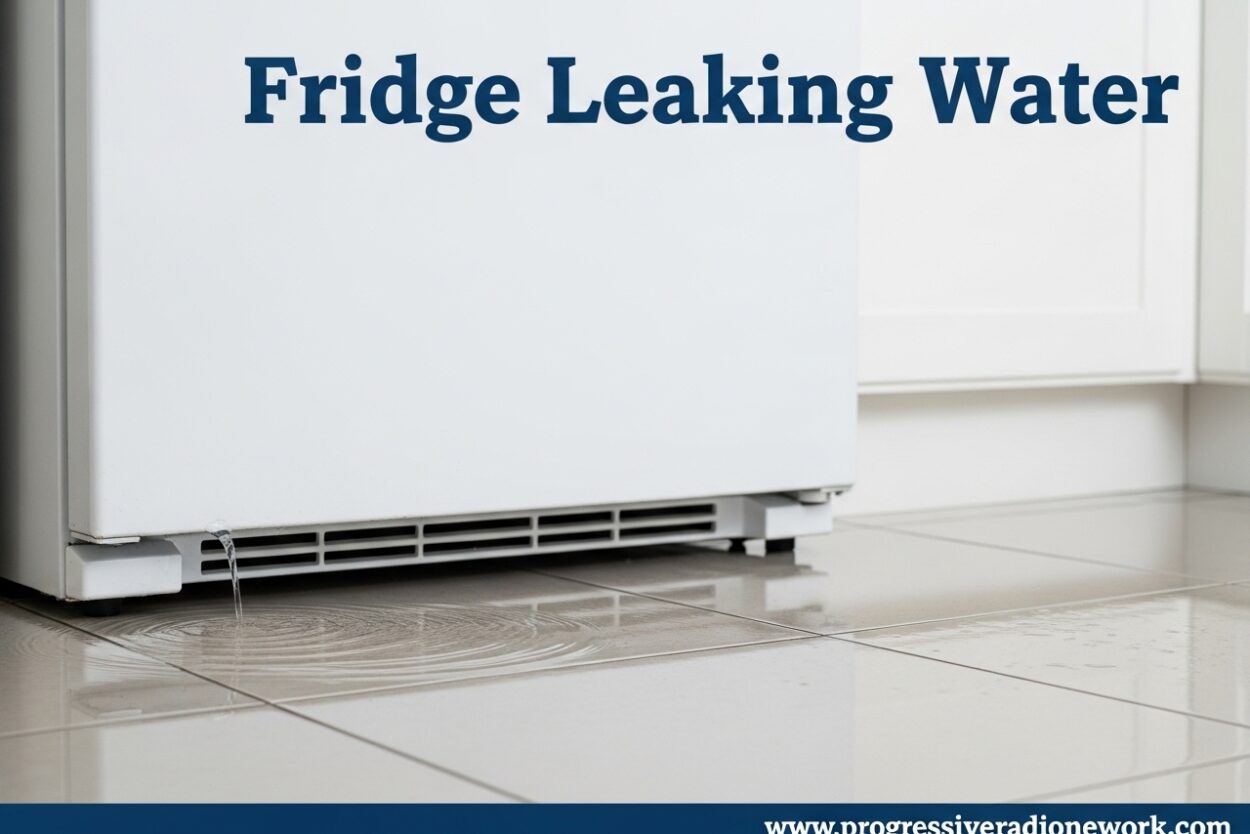
Water pooling under your refrigerator is one of those household problems that can quickly escalate from a minor annoyance to a major headache. I’ve dealt with my fair share of fridge leaking issues over the years, and I understand the frustration of discovering a puddle spreading across your kitchen floor.
A leaking fridge isn’t just messy—it can cause permanent floor damage, encourage mold growth, and in some cases create electrical hazards. The good news is that most fridge leaking problems have simple DIY fixes you can handle yourself without calling a professional.
In this guide, I’ll walk you through the eight most common causes of refrigerator leaks and show you exactly how to identify and fix each one. Whether your fridge is leaking from the bottom, inside the fresh food compartment, or from the freezer, you’ll find the solution here.
Safety First: Is Your Fridge Leak an Emergency?
Before we dive into troubleshooting, let’s address safety. A fridge leaking water might seem like a minor annoyance, but in certain situations, it can present real hazards that need immediate attention.
If water is pooling near the electrical components at the back of your refrigerator or has reached any electrical outlets, unplug your refrigerator immediately. Water and electricity don’t mix, and the risk of electrical shock is real. I’ve seen cases where homeowners ignored small leaks that eventually led to damaged flooring and costly repairs.
It’s also important to distinguish between a water leak and a refrigerant leak. If you notice an oily substance, a chemical smell, or hissing sounds coming from your fridge, stop what you’re doing and call a professional immediately. Refrigerant leaks require specialized equipment and certification to repair safely.
Water damage to your flooring is another serious concern. Prolonged exposure to moisture can warp hardwood, buckle laminate, and even seep into subflooring. If your fridge has been leaking for an extended period, you may need to assess floor damage once you’ve addressed the source of the leak.
Quick Diagnosis: Where is Your Fridge Leaking?
Identifying the location of your leak is the first step toward fixing it. Different leak locations point to different causes, so take a moment to assess where the water is coming from.
Leaking from the bottom front: This is the most common location and usually indicates a clogged defrost drain or a damaged drain pan. The water typically appears as a steady drip or small puddle directly under the refrigerator doors.
Water pooling inside the fridge: If you find water collecting in the bottom of the fresh food compartment (often under the crisper drawers), this points to a clogged defrost drain that’s backing up into the fridge rather than draining outside.
Leaking from the freezer: Ice or water on the freezer floor, or water dripping from the ice dispenser, suggests frozen drain lines or issues with the ice maker system.
Leaking from the water dispenser: If water drips continuously from the water dispenser or appears near the filter housing, the issue is likely with the water supply line, filter connection, or inlet valve.
Fridge Leaking Cause #1: Clogged Defrost Drain
The clogged defrost drain is the single most common cause of fridge leaking water, accounting for over 60% of all refrigerator leaks. I’ve personally fixed this issue three times across different refrigerators, and it’s always the same culprit.
Here’s what happens: your refrigerator automatically defrosts itself periodically to prevent ice buildup. During this defrost cycle, melted water flows through a small drain tube into a drain pan at the bottom of the fridge, where it evaporates. When this drain becomes clogged with food particles, ice, or debris, the water has nowhere to go but back into your fridge or onto your floor.
The defrost drain is typically located at the back of the freezer compartment, either on the floor or at the back wall. On side-by-side models, you’ll often find it behind a removable panel in the freezer. On French door models, check the back of the refrigerator compartment.
How to Fix a Clogged Defrost Drain
First, unplug your refrigerator for safety. Remove any items from your freezer and locate the drain hole—it’s usually a small opening about the size of a pencil.
The most effective DIY method I’ve found uses simple kitchen tools. Fill a turkey baster with hot (not boiling) water and flush it down the drain. Repeat this several times until the water flows freely. Many homeowners on appliance repair forums swear by this method, and I’ve had success with it every time.
For stubborn clogs, try using a pipe cleaner or a flexible drain brush to physically remove the blockage. Some people recommend mixing a small amount of baking soda with the hot water to help break down debris.
If the drain is frozen solid (which happens if your freezer temperature is set too low), turn off your freezer for 2-3 hours with the doors open to allow it to thaw naturally. Once thawed, flush with hot water to clear any remaining debris.
As a preventive measure, some appliance technicians recommend the “copper wire trick”—looping a piece of bare copper wire around the defrost heater and inserting the other end down the drain. The heat conducted by the wire helps prevent ice from forming in the drain. This is a clever DIY solution that many forum users have confirmed works well.
Fridge Leaking Cause #2: Damaged or Cracked Drain Pan
The drain pan (also called a drip pan or evaporator pan) sits at the bottom of your refrigerator and collects water from the defrost cycle. Under normal conditions, the water in this pan evaporates thanks to the heat from the compressor and condenser coils.
When this pan becomes cracked, warped, or damaged, water can leak directly onto your floor. I’ve seen drain pans deteriorate over time due to age, but they can also be damaged during cleaning or if something heavy falls through the refrigerator vents.
To check your drain pan, you’ll need to access the bottom of your refrigerator. On some models, the pan is accessible from the front by removing the grille. On others, you’ll need to pull the refrigerator away from the wall and access it from the back.
How to Fix Drain Pan Issues
If the pan is simply dirty or has debris causing overflow, clean it thoroughly with warm soapy water and rinse it well. Sometimes the pan fills up because the evaporation process isn’t working efficiently—this can happen if your refrigerator is in a very humid environment or if the compressor isn’t generating enough heat.
If the pan is cracked or damaged, replacement is usually necessary. Drain pans are model-specific, so you’ll need to find one made for your refrigerator make and model. They typically cost between $20-50 and are relatively easy to install yourself.
Before purchasing a replacement, double-check that water isn’t overflowing for another reason. A properly functioning drain pan should never be more than half full, as the water evaporates faster than it accumulates under normal conditions.
Fridge Leaking Cause #3: Frozen or Blocked Water Supply Line
If your refrigerator has a water dispenser or ice maker, it has a water supply line that delivers water from your home’s plumbing to the fridge. When this line freezes or becomes blocked, water can back up and leak from connection points.
Frozen water lines are particularly common in newer refrigerators and during winter months. The issue often stems from the refrigerator temperature being set too low, which causes water to freeze in the line before it reaches the dispenser.
A kinked supply line is another common problem. If your refrigerator was recently moved or installed, the water line may have been pinched or bent, restricting water flow and causing pressure to build up at connection points.
How to Fix Water Supply Line Issues
Start by checking your refrigerator’s temperature settings. The freezer should be set between 0-5°F (-18 to -15°C), and the fresh food compartment should be between 37-40°F (3-4°C). Settings colder than this can cause water lines to freeze.
For a frozen line, turn off the refrigerator for 4-6 hours with the doors open to allow the line to thaw completely. You can speed this process by using a hair dryer on a low setting, but be careful not to overheat any plastic components.
Inspect the water line where it connects to the refrigerator and where it connects to your home’s water supply. Look for kinks, bends, or damage. If the line is damaged, it will need to be replaced—a job that’s usually straightforward for DIY enthusiasts.
Some refrigerators have a water shut-off valve located behind the bottom grille or at the back of the unit. Make sure this valve is fully open and not partially restricting water flow.
Fridge Leaking Cause #4: Faulty Door Gasket or Seal
Your refrigerator door seals (also called gaskets) are responsible for keeping cold air in and warm air out. When these seals fail or become damaged, warm air enters the refrigerator and causes excess condensation, which can appear as a leak.
I’ve seen many cases where homeowners thought they had a serious plumbing issue, only to discover that a worn door seal was causing condensation that mimicked a leak. The good news is that door seal problems are usually easy to diagnose and fix.
Signs of a failing door gasket include visible cracks or tears, a seal that feels hard or brittle, condensation on the door frame, or frost buildup in the freezer. Another telltale sign is if your refrigerator runs more frequently than usual, as it struggles to maintain temperature.
How to Test and Fix Door Seal Issues
The classic test is the dollar bill trick, recommended by appliance technicians and homeowners alike. Close the door on a dollar bill (or any piece of paper) and try to pull it out. If it slides out easily with no resistance, your seal isn’t making proper contact. Test this at multiple points around the door.
Sometimes the seal simply needs cleaning. Food residue and spills can prevent the gasket from making full contact with the frame. Clean the seal with warm soapy water and a soft cloth, then dry it thoroughly. Apply a thin layer of petroleum jelly to help it maintain flexibility.
If the seal is physically damaged or has lost its elasticity, replacement is necessary. Door gaskets are model-specific but typically cost $30-80 and can be installed in about 15 minutes with just a screwdriver.
Pay special attention to the bottom corners of the door seal, as these are common failure points. If your refrigerator has a door hinge that’s sagging, it can prevent the seal from making proper contact—this may require hinge adjustment rather than seal replacement.
Fridge Leaking Cause #5: Improper Leveling
Your refrigerator needs to be level to function properly, but here’s something many people don’t know: the front should actually be slightly higher than the back. This slight tilt ensures that doors close automatically and that water flows toward the drain rather than pooling where it shouldn’t.
I’ve personally encountered this issue after moving into a new home. The refrigerator appeared level, but the slight backward tilt was causing water to pool in the wrong areas and eventually leak out the front door.
An unlevel refrigerator can cause problems in multiple ways. It can prevent the defrost drain from working correctly, cause water to pool in the bottom of the fridge, and even put strain on the compressor. Over time, this can lead to more serious mechanical issues.
How to Check and Fix Refrigerator Leveling
Use a carpenter’s level or download a leveling app on your smartphone. Place the level on top of the refrigerator from front to back and from side to side. The bubble should be slightly toward the back (indicating the front is higher) and centered left-to-right.
Most refrigerators have adjustable front legs that can be turned to raise or lower each corner. Use a wrench or pliers if they’re difficult to turn by hand. Some models also have rear leveling wheels that adjust from the front using a built-in mechanism.
The goal is a slight backward tilt—about 1/4 to 1/2 inch higher at the front. This ensures that doors close properly and that water flows toward the drain as designed. If your refrigerator has built-in wheels, make sure they’re locked in place after leveling.
After adjusting, check that the refrigerator doesn’t rock when you lean on it. If you have hard flooring, you may need to place a shim under one of the feet to achieve stability while maintaining the proper tilt.
Fridge Leaking Cause #6: Water Filter Connection Issues
If your refrigerator has a water filter, this is a potential leak source that often goes overlooked. The water filter is typically located in the upper right corner of the fresh food compartment, though some models have it in the base grille or at the back.
Water filter leaks usually happen for one of three reasons: the filter isn’t properly installed, the filter housing is damaged, or it’s time to replace the filter. I’ve seen cases where a filter that seemed fine was actually causing small leaks that went unnoticed until they created significant water damage.
When you install a new filter, you should hear it click into place and feel resistance when trying to remove it. If the filter turns too easily or doesn’t lock securely, it may not be seated properly.
How to Fix Water Filter Issues
Start by removing and reinstalling the filter. Make sure you’re using the correct filter for your specific model—aftermarket filters that don’t fit precisely can cause leaks. Line up the arrows or markings on the filter with those in the housing, then push firmly until it clicks.
Check the O-ring or rubber gasket on the filter housing. These can wear out over time and fail to create a proper seal. If the O-ring appears cracked, flattened, or damaged, it will need to be replaced.
If your refrigerator is leaking from the filter area and you recently replaced the filter, try the old filter (if available) to determine if the new filter is defective. I’ve encountered brand new filters that had manufacturing defects causing leaks.
Some refrigerators have a bypass plug that you can install instead of the filter. If the leak stops with the bypass plug installed, you know the issue is with the filter itself rather than the housing or connections.
Remember that water filters typically need replacement every 6 months. Using an old, clogged filter can reduce water flow and increase pressure, which may cause connections to leak.
Fridge Leaking Cause #7: High Humidity and Condensation
Sometimes what appears to be a leak is actually excessive condensation caused by environmental factors. This is particularly common during summer months, in humid climates, and in kitchens with poor ventilation.
Your refrigerator naturally produces condensation as part of the cooling process. Under normal conditions, this water is channeled to the drain pan and evaporates. However, when humidity levels are high or when warm air frequently enters the refrigerator, the system can become overwhelmed.
Common contributors to excess condensation include frequently opening the doors, storing hot or warm food in the refrigerator, and a room temperature that’s consistently above 80°F (27°C). I’ve noticed this issue becomes much worse during summer months in homes without air conditioning.
How to Reduce Condensation Issues
Let hot food cool to room temperature before placing it in the refrigerator. This not only reduces condensation but also saves energy and prevents other foods from warming up.
Minimize the time refrigerator doors are open. Decide what you need before opening the door, and avoid standing with the door open while you contemplate your options. This is especially important during humid weather.
Check that your refrigerator isn’t located near heat sources like ovens, dishwashers, or direct sunlight. Heat sources make your refrigerator work harder and increase internal condensation. If possible, provide at least 2-3 inches of clearance on all sides for proper airflow.
If you live in a particularly humid climate, consider using a dehumidifier in your kitchen. Reducing overall humidity will help your refrigerator operate more efficiently and reduce condensation-related leaks.
Ensure that your refrigerator’s temperature settings are appropriate for your environment. In very humid conditions, setting the refrigerator slightly colder (within the recommended range) can help reduce condensation.
Fridge Leaking Cause #8: Faulty Inlet Valve
The water inlet valve is the component that controls water flow into your refrigerator for the ice maker and water dispenser. When this valve fails or develops a leak, water can escape and pool under or around your refrigerator.
Unlike many of the other causes we’ve discussed, inlet valve problems are usually not DIY-friendly repairs. The valve is connected to your home’s water supply, and improper installation can lead to significant water damage.
Signs of a faulty inlet valve include water dripping from the valve itself, water leaking from the water line connections, inconsistent water flow to the dispenser, or ice cubes that are smaller than usual (indicating restricted water flow).
When to Call a Professional for Inlet Valve Issues
If you’ve identified that the inlet valve is the source of your leak, I recommend calling a professional appliance repair technician. The repair typically costs between $150-300 including parts, but a professional can ensure the job is done correctly and test for any additional issues.
A qualified technician will also check your water pressure, as high water pressure can cause inlet valves to fail prematurely. If your home’s water pressure is above 80 PSI, installing a pressure regulator may prevent future valve problems.
While some experienced DIYers may feel comfortable replacing an inlet valve themselves, be aware that you’ll need to shut off your home’s water supply, disconnect the water line, and properly seal all connections. Mistakes here can lead to flooding and significant water damage.
Prevention Tips: How to Stop Fridge Leaking Before It Starts
Now that we’ve covered the causes and fixes, let’s talk about prevention. Many fridge leaking issues can be avoided with simple maintenance routines that take just minutes each month.
Every month, pour a cup of hot water down the defrost drain to flush out any developing clogs. This simple preventive measure takes less than a minute and can save you hours of troubleshooting later. I’ve made this part of my monthly kitchen cleaning routine and haven’t had a drain clog since.
Inspect your door seals quarterly for signs of wear or damage. Clean them with warm soapy water and apply a thin coat of petroleum jelly to keep them flexible. The dollar bill test mentioned earlier is also worth doing every few months to catch seal issues early.
Keep the area under and around your refrigerator clean. Dust and debris can clog the drain pan opening and restrict airflow, which reduces evaporation. Vacuum or sweep under your refrigerator every few months, and clean the front grille of dust buildup.
Check your refrigerator’s temperature settings seasonally. In winter, you may need slightly warmer settings to prevent frozen drain lines. In summer, slightly cooler settings can help manage increased condensation from humidity.
Replace your water filter on schedule—typically every 6 months, or as recommended by your manufacturer. Mark your calendar so you don’t forget, as old filters can restrict flow and cause connection leaks.
Consider scheduling a professional inspection every 3-5 years, especially for refrigerators over 7 years old. A technician can identify developing issues before they become major problems and can perform maintenance tasks that are difficult for homeowners.
When to Call a Professional: DIY vs Pro Repair
Throughout this guide, I’ve emphasized DIY solutions because most fridge leaking issues are fixable without professional help. However, it’s important to recognize when a problem is beyond your skill level or requires specialized tools and knowledge.
You should call a professional if you’re dealing with a refrigerant leak, which requires EPA certification to repair legally and safely. Also seek professional help if the leak persists after you’ve tried DIY solutions, if you’re uncomfortable working with water supply lines, or if your refrigerator is still under warranty (DIY repairs may void coverage).
Cost is another consideration. As a general rule, if a repair will cost more than half the price of a new refrigerator and your unit is over 8 years old, replacement may be the smarter choice. Refrigerators typically last 10-15 years, so investing in major repairs for an aging unit often doesn’t make financial sense.
Professional repairs for common leaking issues typically cost between $100-400, depending on the problem and your location. This usually includes the service call fee, labor, and parts. Get quotes from multiple technicians and ask about warranty on their work—most reputable repair services offer at least a 90-day warranty on repairs.
Remember that water damage can be far more expensive than professional repair. If you’re unsure about the source of the leak or uncomfortable attempting repairs, the cost of a professional service call is minimal compared to potential floor replacement or electrical repairs.
FAQ
Why would my fridge be leaking water underneath?
The most common cause is a clogged defrost drain that prevents water from properly draining to the evaporator pan. Other causes include a cracked drain pan, frozen water supply line, or improper leveling. Start by checking the defrost drain at the back of your freezer compartment.
Is it worth fixing a leaking refrigerator?
In most cases, yes. Common leaks like clogged drains or damaged seals are inexpensive to fix and add years to your refrigerator’s life. However, if your fridge is over 10 years old and the repair cost exceeds half the price of a new unit, replacement may be more economical.
Is a fridge leaking water dangerous?
It can be. Water near electrical components creates shock risk, and prolonged leaks can damage flooring and cause mold growth. If water reaches electrical outlets or the back of the refrigerator where the compressor is located, unplug the unit immediately. Refrigerant leaks are also dangerous and require professional repair.
Where is my defrost drain on my fridge?
The defrost drain is typically located at the back of the freezer compartment. On side-by-side models, look behind a removable panel at the bottom back of the freezer. On French door refrigerators, check the back wall of the refrigerator compartment. It appears as a small hole about the size of a pencil.
How do I know if my fridge leak is serious?
Signs of a serious leak include water reaching electrical components, an oily substance (indicating refrigerant leak), hissing sounds, continuous leaking even when the refrigerator is off, or leaks accompanied by cooling problems. These situations require immediate professional attention to prevent safety hazards or complete system failure.
Why is my GE refrigerator leaking water?
GE refrigerators commonly leak due to clogged defrost drains, particularly on models with the drain located behind the freezer back panel. The drain tube can also become disconnected or develop cracks. Check the defrost drain first, then inspect the water line connections if your model has an ice maker or water dispenser.
Is it normal for a fridge to leak water inside?
Small amounts of condensation are normal, but visible water pooling inside is not. If you notice water collecting in the bottom of the fresh food compartment or under crisper drawers, your defrost drain is likely clogged and backing up into the refrigerator rather than draining properly.
Conclusion
Dealing with a fridge leaking water is frustrating, but in most cases, the problem has a straightforward solution. By systematically working through these eight common causes, you can identify and fix the issue yourself without the expense of a professional service call.
Remember to start with safety—if water is near electrical components or you suspect a refrigerant leak, unplug your refrigerator and call a professional. For most other leaks, begin with the defrost drain, as it’s the culprit in over 60% of cases.
The turkey baster method for clearing clogged drains works surprisingly well and has saved me hundreds of dollars in repair costs over the years. Similarly, simple fixes like adjusting door seals or leveling your refrigerator can resolve persistent leaks without any special tools or expertise.
Don’t ignore even small leaks. What starts as a minor drip can quickly escalate into floor damage, mold problems, or more serious refrigerator issues. Address leaks promptly, perform preventive maintenance monthly, and your refrigerator should provide reliable service for years to come.

Leave a Comment