
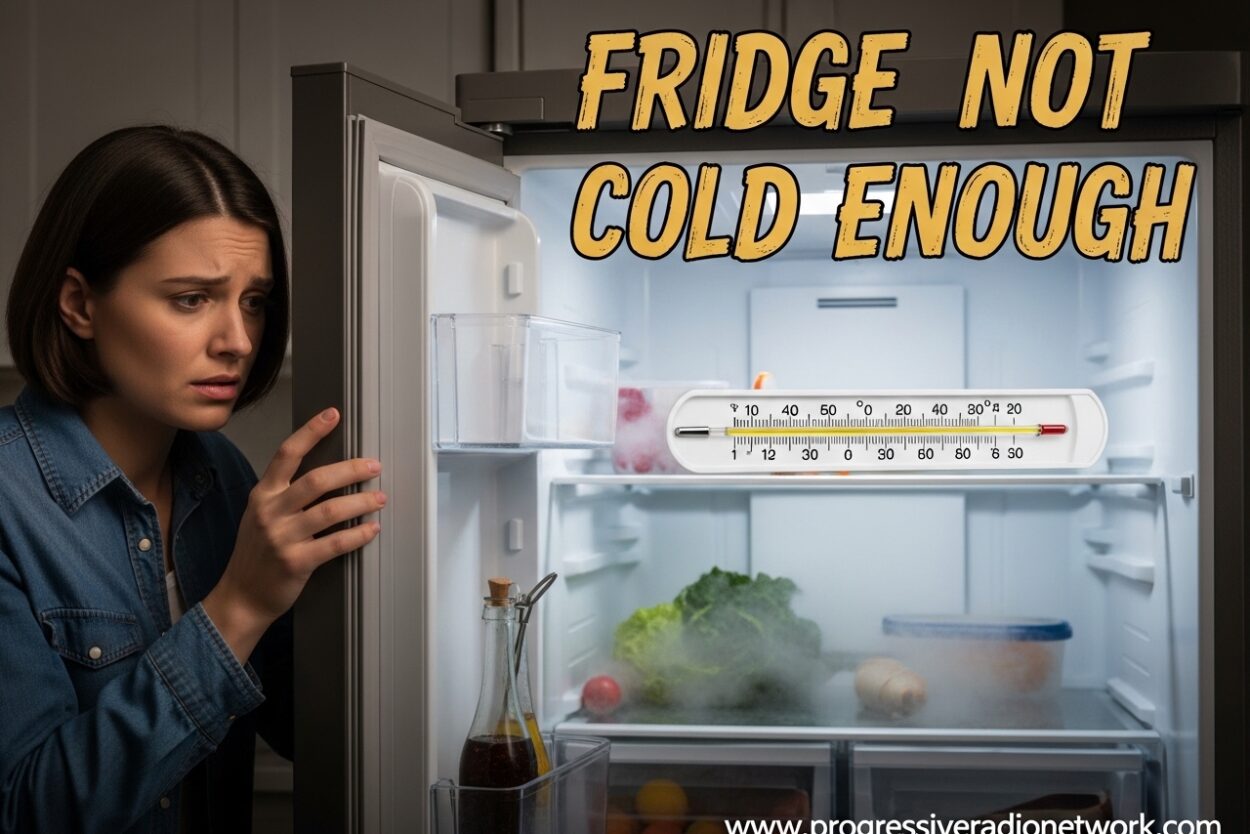
You open your refrigerator expecting a cool blast of air, but instead, you’re met with disappointment. The milk seems warmer than it should, and last night’s leftovers don’t feel properly chilled. A fridge not cold enough is more than just an annoyance—it’s a food safety concern that needs immediate attention.
After troubleshooting refrigerators for over 15 years, I’ve found that most cooling issues stem from a handful of common causes. The good news is that you can resolve many of these problems yourself without calling a technician. In this guide, I’ll walk you through everything you need to know about diagnosing and fixing a refrigerator that isn’t maintaining proper temperature.
Before we dive into the solutions, let’s establish what “cold enough” actually means for your refrigerator.
What Temperature Should Your Refrigerator Be?
The ideal refrigerator temperature range is between 33°F and 40°F (0.5°C to 4.5°C). Anything above 40°F puts your food in the danger zone where bacteria multiply rapidly. Your freezer should maintain 0°F (-18°C) for optimal food preservation.
I recommend using an appliance thermometer rather than trusting your refrigerator’s built-in display. These can be inaccurate by several degrees. Place the thermometer in a glass of water on the middle shelf for the most accurate reading of the actual food temperature.
If your refrigerator is running warmer than 40°F, you need to take action. Let’s start with a quick diagnostic checklist before diving into specific problems.
Quick Diagnostic Checklist: Start Here First
Before you start taking things apart, run through these quick checks. I’ve seen many people waste hours troubleshooting when the problem was something simple:
1. Verify the power source is connected. It sounds obvious, but I’ve been called to homes where the fridge was simply unplugged. Check that the plug is secure in the outlet and that no circuit breakers have tripped.
2. Check the temperature control settings. Someone may have accidentally bumped the dial or adjusted the digital controls. Verify the setting is where it should be—typically around the middle of the range.
3. Inspect the door seals. Look for visible gaps, tears, or debris preventing the door from closing properly. Run your hand around the door edge when closed to feel for cold air escaping.
4. Listen for the compressor. Put your ear near the bottom back of the refrigerator. You should hear a steady hum when the compressor is running. Silence means the compressor isn’t engaging.
5. Check for airflow obstruction. Make sure items aren’t blocking the interior vents. Overstuffing prevents proper air circulation.
If these basic checks don’t reveal the problem, let’s move on to the most common causes of a refrigerator not cooling properly.
Fridge Not Cold Enough? Dirty Condenser Coils Could Be the Culprit
Dirty condenser coils are the number one cause of refrigerator cooling problems I encounter. These coils, typically located on the back or bottom of your refrigerator, release heat extracted from inside the fridge. When coated in dust, pet hair, and debris, they can’t release heat efficiently.
Symptoms of dirty condenser coils:
- Refrigerator runs constantly but can’t reach proper temperature
- Compressor is louder than normal
- Exterior of refrigerator feels hot to the touch
- Energy bills have increased noticeably
How to clean condenser coils:
Start by unplugging your refrigerator or turning off the circuit breaker. Locate the coils—on most models, they’re behind a kick plate at the bottom front or on the back of the unit. You’ll need a vacuum with a narrow attachment, a coil cleaning brush (available at hardware stores), and a flashlight.
Use the brush to gently loosen dust and debris from the coils, working in the direction of the fins to avoid bending them. Follow up with the vacuum to remove the loosened material. For heavy buildup, you may need to repeat this process a few times.
I recommend cleaning your condenser coils every 6-12 months, or more frequently if you have pets. This simple maintenance task can prevent most cooling issues and extend your refrigerator’s lifespan by years.
Blocked Air Vents: A Common Overlooked Cause
Your refrigerator relies on proper airflow to maintain consistent temperature throughout the compartment. Cold air circulates from the freezer through vents into the fresh food section. When these vents become blocked, temperature distribution suffers.
Common causes of vent blockage:
- Overpacked refrigerator shelves
- Large items placed directly in front of vents
- Ice buildup in the vent openings
- Food containers touching the back wall
How to fix airflow issues:
Start by removing items from directly in front of all interior vents. Leave at least 2-3 inches of clearance for air to circulate properly. If you notice ice buildup in or around the vents, you may have a defrost system issue (more on that later).
Organize your refrigerator with space between items rather than packing everything tightly. Cold air needs to flow around food items to cool them effectively. The crisper drawers and door shelves are designed for specific items—use them as intended to maximize airflow through the main compartment.
Check the vents themselves for any obstructions like packaging materials or foreign objects. I’ve found everything from children’s toys to wayward grocery receipts blocking refrigerator vents during service calls.
Door Gasket Problems: When Your Fridge Can’t Hold Cold Air
The rubber door gaskets (seals) create an airtight barrier when your refrigerator door closes. Over time, these seals can degrade, tear, or become dirty, allowing cold air to escape and warm air to enter. A faulty door gasket forces your refrigerator to work harder while struggling to maintain temperature.
Signs your door gaskets need attention:
- Visible cracks, tears, or gaps in the rubber
- Gasket feels hard or brittle rather than pliable
- Condensation or mold growth around the door opening
- Door doesn’t seem to close properly or pops open
Testing your door seals:
Try the dollar bill test: close the door on a dollar bill (or any piece of paper) and pull it out. You should feel resistance as the seal grips the paper. Test multiple locations around the door perimeter. If the paper slides out easily anywhere, your seal isn’t making proper contact.
How to fix door gasket issues:
Start by cleaning the gaskets thoroughly with warm, soapy water. Sometimes buildup of food residue or sticky spills prevents proper sealing. Dry completely and test again with the dollar bill.
If cleaning doesn’t solve the problem, check for proper door alignment. Your refrigerator should be level front-to-back and side-to-side. Use a level on the top edge and adjust the leveling legs if needed. Misaligned doors can prevent even the best seals from working properly.
For torn or severely degraded gaskets, replacement is necessary. Most refrigerator door gaskets cost between $30-80 and can be replaced in about 15 minutes with basic tools. Check your model number to ensure you purchase the correct replacement gasket.
Temperature Control Settings: Understanding Your Thermostat
Your refrigerator’s temperature controls regulate when the compressor runs and for how long. Improper settings can cause your refrigerator to run too cold or not cold enough. Understanding how these controls work is essential for proper troubleshooting.
Analog dial controls (1-5 or 1-9 scale):
On manual thermostats, higher numbers mean colder temperatures. Most refrigerators work best set to the middle range (around 4 or 5 on a 1-9 scale). Setting the control to the maximum doesn’t make your refrigerator cool faster—it just makes it run longer and potentially freeze items in the fresh food section.
Digital temperature controls:
Modern refrigerators with digital displays allow precise temperature setting. These use sensors to monitor actual temperature and adjust compressor operation accordingly. If your digital display shows the desired temperature but the actual inside temperature differs, you may have a sensor problem rather than a control issue.
Seasonal adjustments:
You may need to adjust your refrigerator settings seasonally, especially if the appliance is in a garage or unconditioned space. During hot summer months, set the control slightly colder to compensate for higher ambient temperatures. In winter, you may need to reduce the setting to prevent freezing.
After adjusting settings, wait 24 hours before evaluating the results. Refrigerators need time to stabilize after changes. Frequent adjustments can actually make temperature regulation worse.
Freezer Works But Fridge Not Cold? Here’s Why
This specific symptom—cold freezer but warm refrigerator—is one of the most common cooling complaints. It indicates that your cooling system is working, but cold air isn’t reaching the fresh food section properly.
The most likely culprit: damper control failure.
Most refrigerators use a damper (also called an air diffuser) to regulate airflow from the freezer into the refrigerator compartment. This motorized door opens and closes based on temperature settings. When the damper fails closed, cold air stays trapped in the freezer while the refrigerator section warms up.
Other causes of this symptom:
- Frozen evaporator coils preventing proper air transfer
- Defrost system malfunction causing ice buildup
- Blocked air duct between freezer and refrigerator
- Malfunctioning refrigerator temperature sensor
How to diagnose:
Start by manually defrosting your refrigerator by unplugging it for 24 hours with doors open (after removing all food). If the problem resolves after this manual defrost but returns within a few days, you have a defrost component failure.
Listen for the damper operation—on some models, you can hear the damper motor when it adjusts. If you never hear this sound or the damper appears stuck when visually inspecting through the vent opening, the damper assembly may need replacement.
This repair typically requires disassembling the interior panel and costs between $100-200 for professional service. The parts alone usually run $30-80 if you’re comfortable with DIY repair.
Evaporator Fan Problems: When Your Fridge Can’t Circulate Cold Air
The evaporator fan circulates cold air from the freezer coils throughout your refrigerator. When this fan fails, cold air remains trapped near the coils, and the rest of the compartment warms up despite the cooling system working properly.
Symptoms of evaporator fan failure:
- Freezer is cold but refrigerator section is warm
- No sound of air circulating when refrigerator door is opened
- Frost buildup on freezer back panel
- Compressor runs but refrigerator doesn’t cool evenly
Testing the evaporator fan:
Open the freezer door and listen for the fan sound. On most models, the fan should run when the compressor is running (you’ll hear the compressor as a steady hum from the back). If the compressor is running but you hear no fan sound, the fan motor may have failed.
Visually inspect the fan blade through any access openings. Look for ice buildup that might be preventing rotation, or any foreign objects that might be obstructing the blade. Sometimes packaging or food items can fall and block the fan.
Repair considerations:
Evaporator fan motors typically cost $30-80 and can be replaced by a confident DIYer. However, accessing the fan often requires significant disassembly of freezer interior panels. If you’re not comfortable with this level of repair, expect to pay $150-250 for professional service.
Leveling and Installation Issues: Foundation Problems Affect Cooling
Your refrigerator needs to be properly level for doors to seal correctly and components to function properly. An unlevel refrigerator can cause door alignment issues that prevent the gaskets from sealing, allowing cold air to escape.
Signs of leveling problems:
- Door doesn’t stay closed or pops open on its own
- Refrigerator rocks or wobbles
- Visible gap between door and frame when closed
- Uneven gaps around door edges
How to level your refrigerator:
Place a level on top of the refrigerator, first front-to-back, then side-to-side. Most refrigerators have adjustable leveling legs at the front corners. Use a wrench to turn the legs clockwise to raise that corner or counterclockwise to lower it.
The front should be slightly higher than the back—this helps the door close properly under its own weight. Aim for about 1/4 to 1/2 inch higher at the front. The refrigerator should be perfectly level side-to-side.
Beyond leveling, ensure proper clearance around your refrigerator. Most models require at least 1 inch of clearance on sides and back, and 2-3 inches at the top for proper ventilation. Enclosed spaces or tight cabinets can trap heat and prevent efficient operation.
Hot Weather Considerations: Why Your Fridge Struggles in Summer
Your refrigerator works harder in hot weather to maintain proper internal temperature. The compressor runs longer cycles to compensate for higher ambient temperatures, which can reveal marginal problems that weren’t noticeable during cooler months.
Summer refrigerator challenges:
- Garage refrigerators can face temperatures exceeding 100F
- Kitchens without air conditioning add extra heat load
- More frequent door opening during summer activities
- Higher humidity makes defrost systems work harder
Hot weather solutions:
If possible, position your refrigerator away from direct sunlight and heat sources like ovens or dishwashers. Provide maximum ventilation clearance around the unit. During extreme heat waves, slightly lower your temperature setting to help the refrigerator maintain safe food temperatures.
For garage refrigerators, consider a garage-ready model designed to operate in wider temperature ranges. Standard refrigerators typically aren’t designed to handle garage temperature extremes and may fail prematurely in these conditions.
If your refrigerator only struggles during the hottest months, the cooling system itself may be fine—just overwhelmed by environmental conditions. Improved ventilation and temperature settings usually solve this seasonal problem.
How to Reset a Refrigerator That Is Not Cooling
Sometimes a simple reset can resolve refrigerator cooling issues, especially after power outages or if the control board has become confused. Reset procedures vary by manufacturer and model, but most follow a similar pattern.
Basic reset procedure:
Start by unplugging your refrigerator or turning off the circuit breaker for 5-10 minutes. This allows the control system to fully power down and reset when power is restored. For models with electronic displays, this often clears error codes and resets the control board.
After restoring power, wait 24 hours before evaluating temperature performance. The refrigerator needs this time to stabilize and reach proper operating temperatures. Avoid adjusting settings during this initial period.
Manufacturer-specific resets:
Some brands have specific reset procedures involving button combinations. For example, many Samsung refrigerators can be reset by holding specific buttons simultaneously. Consult your owner’s manual for model-specific instructions if the basic power reset doesn’t resolve the problem.
When reset doesn’t work:
If a reset provides only temporary improvement or no improvement at all, you have a hardware problem rather than a control issue. Proceed with the troubleshooting steps in this guide to identify the specific component failure.
When to Call a Professional: Recognizing Serious Problems
Many refrigerator cooling problems are DIY-friendly, but some issues require professional expertise or specialized tools. Knowing when to call a technician can save you time, money, and potential injury from handling refrigerants or electrical components.
Call a professional for these issues:
- Compressor failure (typically costs $400-700 to repair)
- Refrigerant leaks (require EPA-certified technician)
- Sealed system repairs (beyond DIY capability)
- Circuit board/control board failures
- Complex multiple-component failures
Evaluating repair vs. replacement:
As a general rule, if repair costs exceed half the cost of a new refrigerator and your unit is over 8-10 years old, replacement makes more financial sense. Modern refrigerators are significantly more energy-efficient, so upgrading can reduce your operating costs substantially.
Finding qualified service:
Look for factory-authorized service providers for your specific brand. These technicians have access to genuine parts and specialized training. Always get a written estimate before authorizing any repair work, and ask about warranty on both parts and labor.
Warning Signs of a Failing Refrigerator
Recognizing these warning signs early can help you address problems before they result in complete failure or food loss:
Unusual noises: Clicking, buzzing, grinding, or rattling sounds indicate component problems. Normal refrigerator operation produces a gentle hum and occasional clicking when the compressor starts.
Constant running: If your refrigerator runs continuously without cycling off, it’s struggling to maintain temperature. This increases wear and energy consumption while indicating a cooling system problem.
Frost buildup patterns: Light frost is normal, but thick ice accumulation indicates a defrost problem. Frost on the back freezer panel typically means evaporator coil issues.
Water leaks: Puddles inside or outside your refrigerator indicate clogged defrost drains or broken water lines for ice makers. These problems worsen over time and should be addressed promptly.
Temperature inconsistency: If temperatures fluctuate wildly or different areas of the refrigerator show dramatically different temperatures, you have airflow or sensor problems that will worsen without intervention.
Frequently Asked Questions
How do I fix my refrigerator not getting cold enough?
Start with the basics: check that the refrigerator is plugged in and the circuit breaker hasn’t tripped. Verify temperature controls are set correctly—typically around the middle setting on manual dials or 35-38F on digital displays. Clean the condenser coils located at the bottom or back of the unit, as dirty coils are the most common cause of cooling problems. Ensure nothing is blocking interior air vents, and check door seals for proper closure using the dollar bill test. If these steps don’t resolve the issue, you may have a component failure requiring professional repair.
How do you reset a refrigerator that is not cooling?
Unplug your refrigerator or turn off the circuit breaker for 5-10 minutes to allow the control system to fully reset. For models with electronic displays, this clears error codes and resets the control board. After restoring power, wait 24 hours before evaluating temperature performance. Some brands have specific reset procedures involving button combinations—check your owner’s manual for model-specific instructions. If the basic power reset doesn’t work, you likely have a hardware problem rather than a control issue.
What are the signs of a failing fridge?
Listen for unusual noises like clicking, buzzing, grinding, or rattling—normal operation produces only a gentle hum. Watch for the compressor running constantly without cycling off, which indicates cooling system problems. Check for excessive frost buildup, especially on the back freezer panel. Look for water leaks inside or outside the unit. Notice if temperatures fluctuate wildly or if different areas show dramatically different temperatures. Food spoiling faster than expected is another clear warning sign.
Should a fridge be on 1 or 5?
The right setting depends on your specific refrigerator’s scale, but most refrigerators work best set to the middle range. For a 1-5 scale, setting 3 or 4 is typically ideal. For a 1-9 scale, aim for 4 or 5. Higher numbers make the refrigerator colder, but setting it to maximum doesn’t cool faster—just makes it run longer. Use an appliance thermometer to verify actual temperature is between 33-40F regardless of the number setting. Adjust seasonally if needed: slightly lower in summer, slightly higher in winter.
Conclusion
A fridge not cold enough doesn’t have to mean expensive repairs or replacement. Most cooling issues stem from simple, fixable causes like dirty condenser coils, blocked vents, or worn door gaskets. Start with the basic troubleshooting steps in this guide, work through the systematic checks, and you’ll likely identify and resolve the problem yourself.
Prevent future problems by cleaning condenser coils every 6-12 months, checking door seals periodically, and avoiding overstuffing your refrigerator. These simple maintenance habits can add years to your refrigerator’s lifespan and prevent most cooling issues before they start.
When DIY solutions don’t work, don’t hesitate to call a professional. Complex problems like compressor failure or refrigerant leaks require specialized expertise and tools. Knowing when to seek professional help can actually save you money in the long run by preventing further damage.
Take action on cooling problems promptly—food safety depends on it. With this guide, you have the knowledge to diagnose and fix most refrigerator cooling issues yourself, keeping your food fresh and your appliance running efficiently for years to come.


Leave a Comment