
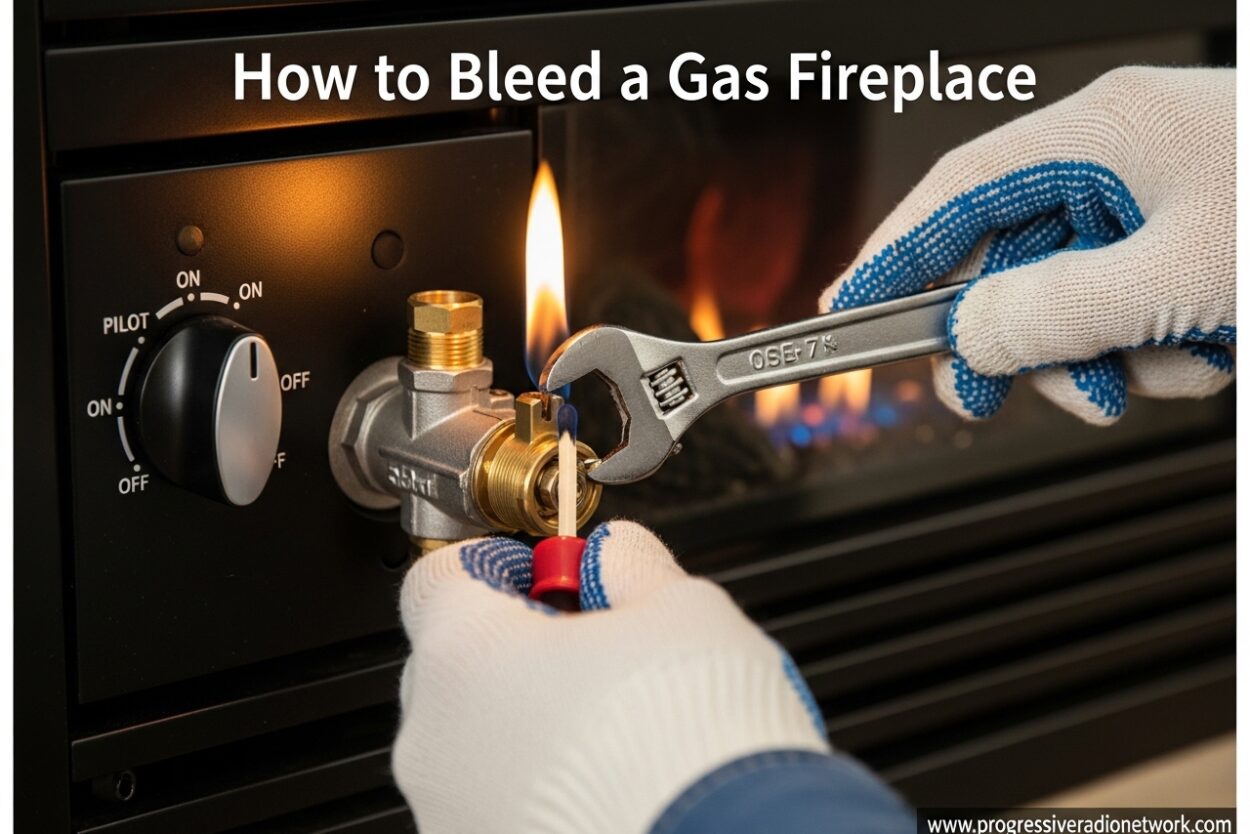
If you’ve ever tried to light your gas fireplace after months of disuse only to find the pilot light won’t stay lit, you likely need to bleed gas fireplace air from the line. This common issue frustrates many homeowners, especially at the start of heating season when fireplaces haven’t been used for extended periods. The good news is that bleeding air from your gas line is usually a straightforward process you can complete yourself in about 5-10 minutes with minimal tools.
Understanding how to properly bleed your gas fireplace saves you the cost of a service call and ensures your fireplace operates safely and efficiently. I’ve walked through this process dozens of times over the years, and I’ll share everything you need to know about identifying air in your gas line, bleeding it out safely, and troubleshooting when things don’t go as planned.
What Does It Mean to Bleed a Gas Fireplace?
Bleeding a gas fireplace simply means removing trapped air from the gas line so that pure gas can flow to the pilot light and burner. When air gets trapped in the line, it prevents gas from reaching the ignition point, causing the pilot to sputter, fail to light, or go out repeatedly after initially igniting.
Think of your gas line like a drinking straw. If there’s an air bubble in the straw, liquid won’t flow properly until you flush out that air. The same principle applies to your gas fireplace line. Air naturally enters gas lines through normal use and when gas service is interrupted.
You’ll typically need to bleed your gas fireplace line after:
- Extended periods of non-use (several months or more)
- Having your gas service turned off and restored
- Running out of propane and getting a refill
- Installing a new gas line or fireplace unit
- Any maintenance work on your gas system
Why Air Gets Trapped in Gas Lines
Air enters gas lines through several common scenarios. Understanding these helps you prevent the issue and recognize when bleeding is necessary. The most frequent cause is simple: when gas flows through the line, it can create small pockets of air behind it, especially in longer runs or lines with multiple bends and elevation changes.
When you turn off your gas fireplace for the season, any remaining gas in the line eventually dissipates or is used up, leaving empty space that fills with air. The longer the fireplace sits unused, the more air accumulates. This is why seasonal startup issues are so common.
For propane users, running out of fuel completely guarantees air will enter the line. When the tank is empty, the remaining gas pressure drops to zero, allowing air to flow back in. Even after refilling, that air sits in the line between the tank and your fireplace.
Natural gas lines connected to municipal service typically experience fewer air issues because the continuous pressure from the utility company helps maintain gas in the line. However, if your service was shut off for any reason, or work was done on the gas main in your area, air can still enter the system.
Signs You Have Air in Your Gas Line
Recognizing the symptoms of air in your gas line helps you diagnose the problem quickly and decide whether bleeding will solve it. The most obvious sign is difficulty lighting or keeping the pilot lit, but there are several other indicators to watch for.
Pilot light behavior: When air is in the line, the pilot may spark repeatedly without igniting, or it might light briefly then immediately go out. You might notice the flame appearing weak or yellow instead of the strong blue flame that indicates proper combustion. Sometimes the pilot will cycle on and off repeatedly.
Delayed ignition: If you hear clicking from the igniter for longer than usual before the pilot catches, or if you need to hold the pilot button down for an extended period, air is likely present in the line. The gas is pushing the air out before reaching the ignition point.
Burner issues: In some cases, the pilot lights successfully but the main burner won’t ignite. Or the burner might light unevenly, with some flames appearing higher than others. This indicates air is still present further down the line beyond the pilot assembly.
Unusual sounds: Listen for hissing or popping sounds when attempting to light the fireplace. These noises occur when gas and air mix in the line, creating unstable flow patterns. A properly flowing gas line should operate almost silently.
If you experience these symptoms repeatedly after attempting to bleed the line, the issue might be something other than air, such as a faulty thermocouple or gas valve problem. I’ll cover troubleshooting in more detail later.
Tools and Safety Precautions
Before beginning any gas fireplace maintenance, safety must be your top priority. Working with gas lines carries inherent risks, and proper precautions prevent dangerous situations. The good news is that bleeding a gas line is relatively safe when done correctly, and you likely already have everything you need on hand.
Tools needed:
- Flashlight (to see inside the fireplace compartment)
- Long-reach lighter or matches (if your igniter isn’t working)
- Small mirror (optional, helps visibility in tight spaces)
- Patience (the most important tool – bleeding can take 5-10 minutes)
Most gas fireplaces can be bled using just the built-in igniter and controls. You rarely need additional tools, which makes this an accessible DIY project for most homeowners.
Safety checklist BEFORE starting:
- Ensure the room is well-ventilated – open windows if possible
- Check for the smell of gas around the fireplace area
- Verify the fireplace damper is open (if applicable)
- Clear the area around the fireplace of flammable materials
- Know the location of your gas shut-off valve
- Keep a fire extinguisher nearby as a precaution
Important safety warning: If you smell gas (a rotten egg odor added to natural gas and propane for detection), do NOT attempt to light the fireplace or perform any maintenance. Leave the area immediately, call your gas company from outside your home, and do not re-enter until they’ve given the all-clear. Gas leaks are extremely dangerous and require professional attention.
When in doubt about any aspect of gas fireplace maintenance, it’s always safer to call a licensed professional. The cost of a service call is negligible compared to the risks of improperly working with gas lines.
How to Bleed a Gas Fireplace: Step-by-Step
Follow this step-by-step process to bleed air from your gas fireplace line safely and effectively. I’ve included timing estimates to help set your expectations – this process typically takes between 5-15 minutes depending on how much air is in the line and the length of your gas run.
Step 1: Locate the gas valve control knob
Find the gas valve control knob, usually located behind or below the fireplace glass door. It typically has three positions: OFF, PILOT, and ON. The knob may be behind a removable access panel. Use your flashlight to clearly see the control and its current position.
Step 2: Turn the knob to OFF
Rotate the knob to the OFF position and wait at least 5 minutes. This allows any residual gas in the line to dissipate and ensures you’re starting with a clean slate. This waiting period is critical for safety – don’t skip it.
Step 3: Turn the knob to PILOT
After the waiting period, turn the knob to the PILOT position. You’ll typically need to push the knob in and rotate it simultaneously. Once in the PILOT position, continue holding the knob down – this manually opens the gas valve to allow flow to the pilot assembly.
Step 4: Press and hold the igniter button
While continuing to hold the gas valve knob down, press the igniter button repeatedly. You’ll hear a clicking sound as the spark igniter attempts to light the pilot. Continue this process for up to 2 minutes. The air is being pushed out by gas flowing through the line – this is the bleeding process in action.
Step 5: Observe the pilot flame
Once the pilot lights, watch the flame carefully while still holding the gas valve knob down. At first, you may see intermittent sparking or a weak, yellowish flame. Continue holding the knob down for an additional 30-60 seconds after the pilot appears stable. This ensures all remaining air has been purged from the line.
Step 6: Release the gas valve knob slowly
If the pilot stays lit for at least 30 seconds after releasing the knob, you’ve successfully bled the air from the line. If the pilot goes out, repeat steps 2-5. Some stubborn air pockets may require two or three complete cycles to fully purge.
Step 7: Turn the knob to ON
With the pilot now burning steadily, turn the gas valve knob to the ON position. This activates the main burner control. You can now use your fireplace’s normal operation method (wall switch, remote, or thermostat) to ignite the main burner and verify complete functionality.
Step 8: Test the fireplace operation
Activate the main burner and observe the flames. They should ignite quickly and burn evenly across the burner with a steady blue flame. If you notice delayed ignition at the main burner, continue running the fireplace for 5-10 minutes to clear any remaining air pockets in the larger burner lines.
The entire process typically takes 5-15 minutes from start to finish. Most of this time is spent actively bleeding the line in steps 4-6. Be patient during this process – rushing can cause you to think the line is clear when it actually still contains air.
Special Considerations for Propane Fireplaces
Propane fireplaces sometimes require additional bleeding steps compared to natural gas units. Propane is stored as a liquid and must convert to gas before flowing through the line, which can introduce additional air during tank refills.
If you’ve recently had your propane tank refilled, you may need to bleed the line for longer periods – up to 15 minutes in some cases. The air must travel from the tank through the regulator and into your fireplace, which is a longer journey than most natural gas lines.
For propane systems with multiple appliances (fireplace, stove, furnace, etc.), you may need to bleed the line at each appliance individually. Start with the appliance furthest from the tank and work your way back.
Troubleshooting Common Problems
Even after following the bleeding procedure carefully, you may encounter issues. These troubleshooting steps address the most common problems homeowners face when attempting to bleed their gas fireplace.
Pilot still won’t light after 3 bleeding attempts
If you’ve completed the full bleeding process three times and the pilot still won’t ignite, you likely have an issue beyond air in the line. Check these components:
- Spark igniter: Listen for the clicking sound. If no clicking occurs, the igniter battery may be dead (in electronic systems) or the igniter electrode may be dirty or misaligned. Clean the electrode with a soft cloth and ensure proper positioning near the pilot tube.
- Gas supply: Verify your main gas valve is open. For propane users, check that your tank has fuel and the tank valve is open. Some propane systems have a secondary shut-off at the regulator – ensure both valves are open.
- Thermocouple: This safety sensor detects when the pilot is lit and allows gas to flow. If faulty, it will shut off gas even when the pilot is burning. A professional should test and replace the thermocouple if needed.
- Pilot tube: The small tube delivering gas to the pilot may be clogged with debris or spider webs. Use compressed air to gently clear any blockages.
Pilot lights but main burner won’t ignite
This situation indicates the pilot line is clear but air remains in the main burner line. Let the pilot burn for 10-15 minutes to heat the thermocouple thoroughly, then attempt to ignite the main burner again. The continuous gas flow to the pilot helps purge the larger burner line.
If this doesn’t work, check your fireplace’s operation method. Some units require a specific sequence – for example, turning on a wall switch, pressing a remote button, or rotating a separate control knob. Consult your owner’s manual for the exact procedure.
Pilot lights but goes out when you release the knob
This is typically a thermocouple issue, not an air problem. The thermocouple generates a small electrical current when heated by the pilot flame, telling the gas valve it’s safe to stay open. If it’s dirty, misaligned, or failing, it won’t generate enough voltage.
Try cleaning the thermocouple tip with fine sandpaper or a steel wool pad. Ensure the pilot flame is directly touching the thermocouple tip when lit. If cleaning and repositioning don’t solve the problem, the thermocouple likely needs replacement – a job for a qualified technician.
Strange odors or sounds during operation
After successfully bleeding the line, any unusual smells or sounds warrant immediate attention. A slight gas odor when first lighting is normal and should dissipate quickly. However, a persistent rotten egg smell indicates a leak and requires professional service immediately.
Hissing sounds typically indicate gas escaping where it shouldn’t – turn off the fireplace and your gas supply, then call a professional. Popping or rumbling sounds when the burner ignites suggest delayed combustion, often caused by debris in the burner ports or incorrect gas pressure.
When to Call a Professional
While bleeding a gas fireplace is generally a DIY-friendly task, certain situations require professional expertise. Knowing when to call a technician saves time, prevents frustration, and ensures your safety.
Call a professional if:
- You smell gas at any point during or after the process
- The fireplace has been modified from its original configuration
- You’re uncomfortable working with gas appliances
- The bleeding process doesn’t resolve the issue after 3-4 attempts
- Your fireplace is part of a complex multi-appliance gas system
- The unit is still under warranty and DIY work might void coverage
- You notice physical damage to gas lines, valves, or components
- The fireplace hasn’t been serviced in over 2 years
Professional HVAC technicians charge between $100-200 for a service call, which typically includes full inspection, cleaning, and testing of your gas fireplace. For many homeowners, this cost provides peace of mind and ensures the entire system is operating safely, not just the gas line.
Annual professional servicing is recommended for all gas fireplaces. A technician will clean the pilot assembly, check gas pressure, inspect ventilation, test safety systems, and verify proper combustion. This regular maintenance prevents many issues that lead to air in the line and other operational problems.
Preventing Future Air Buildup
While some air in the line is unavoidable, especially after seasonal disuse, you can minimize the frequency of bleeding through these preventive measures:
- Run your gas fireplace for 15-20 minutes monthly, even during warm months
- Keep the pilot lit year-round if your model allows (consumes minimal gas)
- Schedule annual professional maintenance before heating season
- Address any gas supply issues promptly rather than letting the system sit idle
FAQ
For propane users, monitoring your tank level and refilling before it runs completely empty prevents the massive air intrusion that occurs when a tank is depleted.
Learning to properly bleed your gas fireplace is a valuable homeowner skill that saves time and money while ensuring your fireplace operates safely and reliably. With practice, you’ll recognize the signs of air in the line and complete the bleeding process efficiently, keeping your fireplace ready whenever you need its warmth and ambiance.
How long does it take to bleed air from a propane line?
How do I know if my gas line has air in it?
Can gas fireplaces cause headaches?
How to burp a gas line?
Conclusion
Regular maintenance and understanding how to properly bleed your gas fireplace line ensures years of reliable, safe operation. Whether you’re preparing for winter or troubleshooting unexpected issues, knowing when and how to bleed your gas fireplace is an essential skill for any gas fireplace owner.




Leave a Comment