
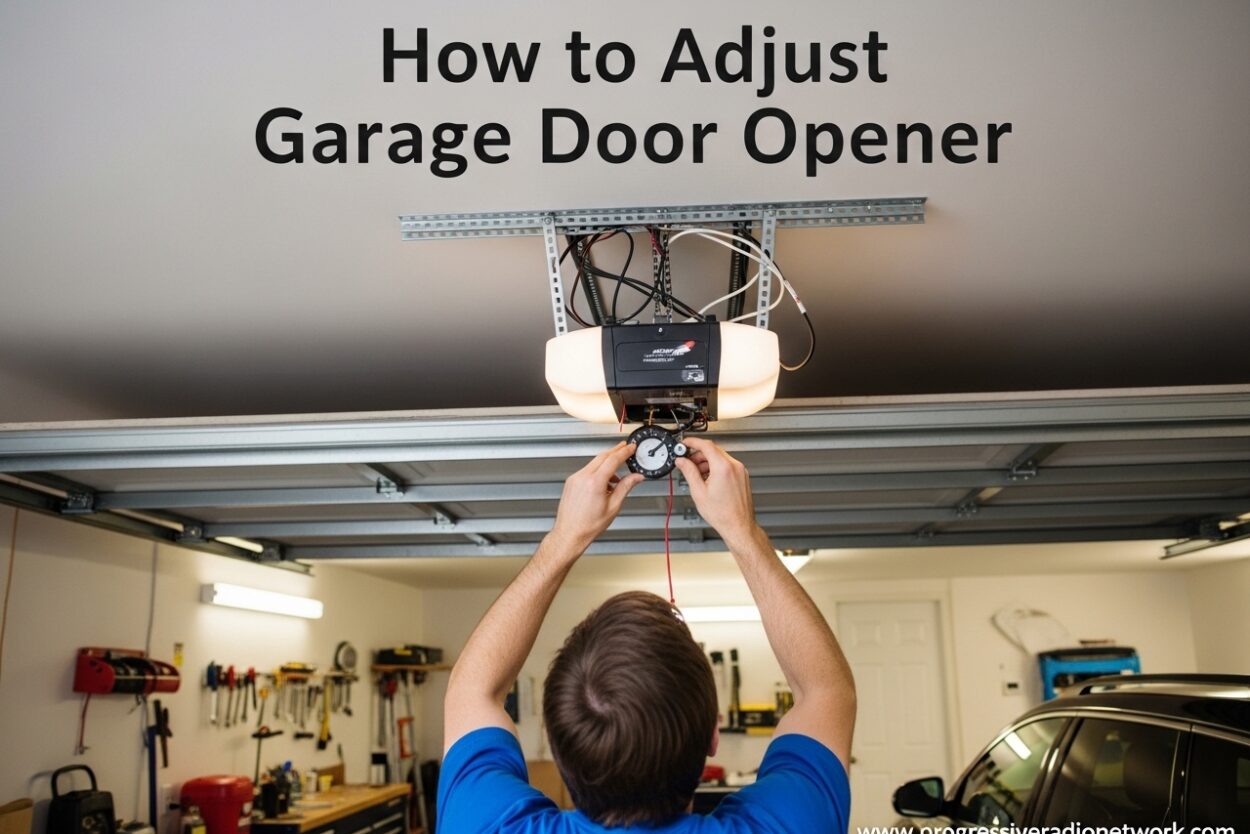
If your garage door reverses before hitting the floor, closes too hard, or won’t open fully, learning how to adjust garage door opener settings can solve these frustrating problems. I’ve adjusted dozens of garage door openers over the years, and most issues come down to two simple settings: travel limits and force sensitivity.
A properly adjusted garage door opener isn’t just about convenience – it’s a safety issue. When your door doesn’t close completely, it leaves your home vulnerable. When it closes with too much force, it could damage property or injure someone.
In this guide, I’ll walk you through the exact steps to adjust your garage door opener safely, whether you have a Chamberlain, LiftMaster, Genie, or Craftsman model. Most adjustments take less than 15 minutes and require only a stepladder and a flathead screwdriver.
Understanding Your Garage Door Opener
Garage door openers use a motor to move a trolley along a rail system, which pulls or pushes your door open and closed. The motor relies on two critical settings that determine how your door operates.
Travel limits control exactly how far the door moves during each cycle. The UP limit tells the opener when to stop opening, while the DOWN limit tells it when to stop closing. When these settings drift over time, your door might not open fully or could slam down too hard.
Force settings determine how much power the motor uses to move the door. If the force is set too high, the door won’t reverse when it hits an obstruction. If it’s too low, the door might stop partway through its cycle because it thinks something is blocking it.
Modern openers also include safety sensors (photo-eyes) near the floor that detect objects in the door’s path. These sensors must be aligned properly for the door to close safely. Understanding these three components – travel limits, force settings, and safety sensors – is key to troubleshooting most garage door opener issues.
The type of drive system you have doesn’t change the adjustment process much. Chain drives, belt drives, and screw drives all use similar adjustment screws and settings. The main difference is noise level during operation, not how you adjust the limits and force.
Safety Precautions Before You Begin
Before making any adjustments to your garage door opener, you need to take some important safety precautions. I’ve seen homeowners skip these steps and create bigger problems or put themselves at risk.
First, disconnect the power to your garage door opener. You can either unplug it from the ceiling outlet or flip the circuit breaker that serves your garage. Never work on the opener while it’s connected to power, even if the door appears stationary.
Clear the area around your garage door. Remove cars, bicycles, tools, and especially children and pets from the garage area. During testing, the door will move unexpectedly, and you don’t want anyone in its path.
Know where your emergency release cord is located – it’s the red handle hanging from the rail. This cord disconnects the door from the opener so you can operate it manually. If something goes wrong during adjustment, you may need to use this cord to safely lower or raise the door.
Critical warning: If your garage door uses torsion springs (the horizontal springs mounted above the door), do NOT attempt to adjust them. Torsion springs are under extreme tension and can cause serious injury if they break or are mishandled. Leave spring work to professionals. This guide covers only the opener motor adjustments, which are safe for DIY work.
Finally, test the door’s balance before adjusting the opener. Pull the emergency release cord to disconnect the opener, then manually lift the door halfway. A balanced door should stay in place. If it falls or rises, you have a spring problem that a professional should fix – adjusting the opener won’t help.
Signs Your Garage Door Opener Needs Adjustment
How do you know if your opener needs adjustment? Look for these common warning signs that tell you something is off with your travel limits or force settings.
Door reverses before closing completely: This is one of the most frustrating issues. You press the close button, the door starts down, then suddenly reverses back up. This usually means the DOWN travel limit is set too high, or your safety sensors are misaligned.
Door closes with excessive force: A healthy garage door should slow slightly before hitting the floor and make gentle contact. If your door slams down hard, the DOWN force setting is probably too high, and the DOWN travel limit might need adjustment too.
Door doesn’t open fully: When your door stops before it’s fully open, you might still have to duck under it. This indicates the UP travel limit needs adjustment. The opener thinks it’s opened far enough, but it hasn’t.
Door opens too far and hits the header: If you hear banging when the door reaches its fully open position, the UP travel limit is set too high. Over time, this can damage your door, opener, and garage door track.
Jerky or uneven movement: When your door shakes, lurches, or moves unevenly during its cycle, the force settings may be mismatched to your door’s weight. This is especially common after seasonal temperature changes that affect door flexibility.
Loud unusual noises: Grinding, screeching, or whirring sounds often indicate the opener is straining. This could mean the force is set too high, or there’s a mechanical issue with the chain, belt, or drive screw that needs attention.
How to Adjust Garage Door Opener Travel Limits
Adjusting travel limits is the most common garage door opener fix. This process determines exactly how far your door opens and closes. Every garage door opener manufacturer uses limit adjustment screws, though their location may vary slightly.
Locating the limit adjustment screws: On most opener models (Chamberlain, LiftMaster, Craftsman), you’ll find these screws on the side or back of the motor unit. There are typically two screws labeled with arrows – one pointing UP (or OPEN) and one pointing DOWN (or CLOSE). On Genie models, you may find a single knob with UP and DOWN positions.
The adjustment rule is simple but important: one complete turn equals approximately 2 inches of door travel. Turn the screw clockwise to increase travel, counter-clockwise to decrease travel. Small adjustments make a noticeable difference, so start with just a quarter or half turn.
Step 1: Adjust the UP Travel Limit
Start with the door in the closed position. Press the wall button to open the door and observe where it stops.
If the door doesn’t open far enough, use a flathead screwdriver to turn the UP (OPEN) limit screw clockwise. Start with a 1/4 turn, then test the door again by closing and reopening it. Continue making small adjustments until the door opens fully without hitting the header.
If the door opens too far and hits the garage header, turn the UP limit screw counter-clockwise in 1/4 turn increments. Test after each adjustment until the door stops at the correct height – ideally about 1-2 inches from the header to prevent impact.
Step 2: Adjust the DOWN Travel Limit
With the door fully open, press the close button and observe where it stops.
If the door stops before reaching the floor, leaving a gap, turn the DOWN (CLOSE) limit screw clockwise in 1/4 turn increments. Test after each adjustment until the door closes completely and makes gentle contact with the floor.
If the door hits the floor too hard or reverses before closing, turn the DOWN limit screw counter-clockwise. This tells the opener to stop earlier in the travel cycle. Continue adjusting until the door closes smoothly and seals properly.
Brand-Specific Notes for Travel Limits
Chamberlain and LiftMaster: These brands are owned by the same company and use identical adjustment procedures. Look for the blue and yellow plastic casing on the motor unit with clearly labeled limit screws. Some newer models have digital controls rather than screws – consult your manual for the programming sequence.
Genie: Older Genie models use a single screw that rotates between UP and DOWN positions. Pull the screw out to switch between UP and DOWN adjustment modes. Newer Genie models have a limit knob on the side that you rotate with your fingers – no screwdriver needed.
Craftsman: Most Craftsman openers are manufactured by Chamberlain, so the adjustment process is identical. Look for the limit screws on the side of the motor unit. Craftsman’s professional series may have slightly different locations, but the adjustment principle remains the same.
After adjusting both UP and DOWN limits, run your door through several complete cycles. Watch each operation carefully to ensure the door moves smoothly and stops at the correct positions. If the door still isn’t operating correctly, the issue may be with force settings rather than travel limits.
How to Adjust Garage Door Opener Force Settings
Force settings control how much power your garage door opener uses to move the door. When set correctly, the door should open and close smoothly while still reversing when it encounters an obstruction. The force adjustment is about finding the right balance between power and safety.
Locating the force adjustment controls: Like travel limit screws, force controls are located on the motor unit. You’ll typically find two adjustment knobs or screws – one for UP force and one for DOWN force. They’re often labeled with arrows showing which direction increases or decreases force. On some models, these are color-coded (commonly blue for DOWN force, orange or purple for UP force).
The force setting works differently than travel limits. Instead of controlling WHERE the door stops, force settings control HOW HARD the opener works to get there. The factory sets these controls to a midpoint, but seasonal temperature changes, door wear, and component aging can throw off the calibration.
Adjusting the DOWN Force Setting
Start with the door fully open. The DOWN force controls how much power the opener uses when closing the door.
If your door reverses unexpectedly during closing, the DOWN force might be set too low. Increase it slightly by turning the adjustment control clockwise about 1/8 of a turn. Test the door by closing it completely.
If your door closes with excessive force or doesn’t reverse when it hits an obstruction, the DOWN force is too high. Turn the adjustment control counter-clockwise to decrease it. After each adjustment, you must perform the safety reversal test.
The Critical 2×4 Reversal Test
This test is essential for verifying your force adjustments are safe. Place a 2×4 piece of wood flat on the floor in the center of the garage door opening. Then press the close button.
When the door contacts the 2×4, it should immediately reverse direction and open back up. If it doesn’t reverse, your DOWN force is set too high – decrease it immediately and test again. This reversal feature is a critical safety requirement, and your door MUST pass this test.
Adjusting the UP Force Setting
The UP force controls how much power the opener uses when opening the door. Start with the door closed and observe it as it opens.
If the door starts to open but stops partway and reverses back down, the UP force may be too low. Increase it slightly by turning the adjustment clockwise about 1/8 turn, then test again.
If the door opens but strains or makes unusual noises, the UP force might be set too high. Decrease it in small increments. You want enough force to reliably open the door, but not so much that the opener is working harder than necessary.
After adjusting force settings, run your door through 5-10 complete cycles. The movement should be smooth in both directions without hesitation or straining. If you can’t find a force setting that works properly, your door may have a balance issue or mechanical problem that requires professional attention.
Safety Sensor Alignment and Testing
Safety sensors (also called photo-eyes) are the small devices mounted on each side of your garage door, about 6 inches above the floor. They beam an invisible light across the door opening. If something breaks this beam while the door is closing, the opener reverses the door to prevent injury or damage.
Misaligned sensors are one of the most common reasons garage doors won’t close. When sensors aren’t properly aligned with each other, the opener thinks something is blocking the door path and refuses to close.
Checking Sensor Alignment
First, check the indicator lights on each sensor. Most sensors have a small LED that shows power and alignment status. A green or solid light typically means good alignment, while yellow, red, or blinking lights indicate misalignment or obstruction.
Visually inspect both sensors to ensure they’re pointing directly at each other. If one sensor has been bumped or knocked out of position, gently bend its mounting bracket until it faces its counterpart. The sensors should be at the same height and angle.
Cleaning the Sensors
Dirt, cobwebs, and debris on the sensor lenses can block the photo-eye beam even when sensors are properly aligned. Use a clean, soft cloth to gently wipe the lens on each sensor. Avoid using harsh cleaners or paper products that might scratch the lens.
After cleaning, check the indicator lights again. If they’ve changed from blinking to solid, you’ve solved the problem. Test the door by pressing the close button.
Testing Sensor Function
To verify your sensors are working correctly, open the door fully, then press the close button. While the door is closing, wave your hand or foot between the sensors. The door should immediately reverse direction.
If the door doesn’t reverse when you break the beam, your sensors may be faulty or improperly wired. Check that the sensor wires are securely connected at both the sensor and the motor unit. Look for any damage to the wires along their path.
Important: Never bypass or disconnect your safety sensors. They’re a required safety feature, and operating a garage door without them puts your family at risk. If you can’t get your sensors working properly, call a professional technician.
Troubleshooting Common Garage Door Opener Issues
Even after adjusting travel limits and force settings, some problems persist. Here are the most common issues I encounter and how to resolve them.
Door bounces back up repeatedly: If your door starts closing then immediately reverses, first check your safety sensors. Misaligned sensors cause this issue more than anything else. If the sensors are aligned and clean, your DOWN travel limit might be set too far – try decreasing it slightly.
Door stops halfway in either direction: This usually indicates a force setting problem. If it happens when opening, increase the UP force. If it happens when closing, increase the DOWN force slightly. However, if the door makes unusual sounds, stop – there may be a mechanical issue with the door or opener.
Door won’t close at all: When you press the button and nothing happens, first check if the opener motor is running. If the motor runs but the door doesn’t move, you may have disconnected the trolley (check the emergency release cord). If the motor doesn’t run at all, check power to the unit and your wall-mounted control.
Opener runs but door doesn’t move: This typically means the emergency release cord was pulled, disconnecting the door from the opener. Pull the cord toward the door to reconnect it, or manually move the trolley until it engages with the opener arm.
Remote works but wall button doesn’t: The wall button may have failed or lost its wiring connection. Check the wires attached to the back of the button. If they’re secure but the button still doesn’t work, replace the button – they’re inexpensive and widely available.
Adjustments don’t fix the problem: If you’ve tried adjusting travel limits and force settings without success, the issue may not be with the opener itself. Worn rollers, frayed cables, damaged tracks, or failing springs can all mimic opener problems. A professional inspection can identify these mechanical issues.
When to Call a Professional
DIY garage door opener adjustment is safe and straightforward for most issues. However, some problems require professional expertise and equipment. Recognizing when to call a technician can save you time, money, and potential injury.
Torsion spring issues: If you suspect a problem with your torsion springs (the horizontal springs above the door), call a professional immediately. These springs are under extreme tension and can cause serious injury if mishandled. Signs of spring problems include the door being extremely heavy to lift manually, gaps appearing in the spring coils, or loud bangs from the spring area.
Cable problems: Frayed, broken, or tangled cables should only be repaired by professionals. The cables are under high tension and are connected to the spring system. Attempting to repair cables yourself can result in serious injury.
Door off track: If your garage door has come off its track, don’t attempt to force it back. The door’s weight makes it dangerous to handle, and you may cause further damage. A professional can safely realign the door and identify why it came off track in the first place.
Repeated failures after adjustment: If you adjust travel limits and force settings but the same problem keeps returning, there may be an underlying mechanical issue. Worn gears, failing capacitors, or motor problems can cause symptoms that mimic adjustment issues.
Old opener needing replacement: Garage door openers typically last 10-15 years. If your opener is approaching this age and requires frequent adjustments, replacement may be more cost-effective than continued repairs. Modern openers also offer improved safety features, battery backup, and smart home integration.
Maintenance Tips to Reduce Adjustment Needs
Regular maintenance can prevent many adjustment issues and extend your opener’s lifespan. I recommend performing these simple maintenance tasks every 3-6 months.
Lubricate moving parts: Apply a silicone-based garage door lubricant to the door’s hinges, rollers, and tracks. Avoid using WD-40 or other petroleum-based products, which can attract dirt and cause rollers to stick. Also lubricate the opener’s chain or screw drive according to your owner’s manual.
Test safety features monthly: Place a 2×4 on the floor and verify the door reverses when it contacts the wood. Also test the photo-eye sensors by breaking the beam with your hand while the door is closing. These tests take seconds and ensure your safety systems are working properly.
Keep sensors clean: Wipe the photo-eye lenses with a soft cloth monthly. Dust, cobwebs, and debris can accumulate and interfere with the safety beam. Keeping the sensors clean prevents many common closure problems.
Inspect hardware visually: Check for loose bolts, frayed cables, or worn rollers. Tighten loose hardware with a socket wrench. Addressing small issues early prevents them from becoming larger problems that require professional repair.
Listen for unusual sounds: Normal garage door operation is relatively quiet. Grinding, squeaking, or banging sounds indicate problems that need attention. Early diagnosis of unusual noises can prevent more serious damage to your door or opener.
Frequently Asked Questions
Can you adjust a garage door opener yourself?
Yes, you can safely adjust travel limits and force settings on most garage door openers. These DIY adjustments fix common issues like doors not closing completely, reversing unexpectedly, or opening too far. However, always disconnect power before adjusting and never attempt to repair torsion springs, which are under dangerous tension.
Why does my garage door only open 1/4 before going back down?
This is almost always a safety sensor misalignment issue. When the photo-eye sensors can’t see each other, they think something is blocking the door path and won’t allow closing. Check that both sensors have solid indicator lights (not blinking) and are pointing directly at each other. Clean the sensor lenses and ensure nothing is blocking the beam path.
How do I adjust the speed of my garage door opener?
Most residential garage door openers don’t have adjustable speed settings. The door speed is determined by the motor’s design. However, if your door seems slower than usual, check for binding tracks, worn rollers, or lack of lubrication. These issues can make the door operate more slowly than normal. Professional openers typically operate at 7-8 inches per second and this speed is not changeable.
What causes a garage door to bounce back when closing?
A garage door that bounces back during closure typically has either misaligned safety sensors or an over-sensitive DOWN force setting. First check that both photo-eye sensors are aligned and their LED lights are solid. If sensors are properly aligned, try slightly increasing the DOWN force setting – but always perform the 2×4 reversal test afterward to ensure safety.
How often should I adjust my garage door opener?
You shouldn’t need to adjust your garage door opener regularly. Factory settings typically work fine for years. However, seasonal temperature changes can affect door flexibility and may require minor annual adjustments. If you find yourself needing adjustments frequently (monthly or more often), there may be an underlying mechanical issue that needs professional inspection.
Conclusion
Learning how to adjust garage door opener settings is a valuable DIY skill that saves money and keeps your garage operating safely. Most issues come down to travel limits (how far the door moves) and force settings (how hard it pushes), both of which you can adjust yourself with basic tools.
Remember the golden rule: one complete turn of a limit screw equals about 2 inches of travel. Make small adjustments, test after each change, and always perform the 2×4 reversal test to verify safety. When in doubt, call a professional – especially for spring or cable issues.
With proper adjustment and regular maintenance, your garage door opener should provide years of reliable service. Adjust it once correctly, perform basic maintenance every few months, and you’ll avoid most common garage door problems before they start.



Leave a Comment