
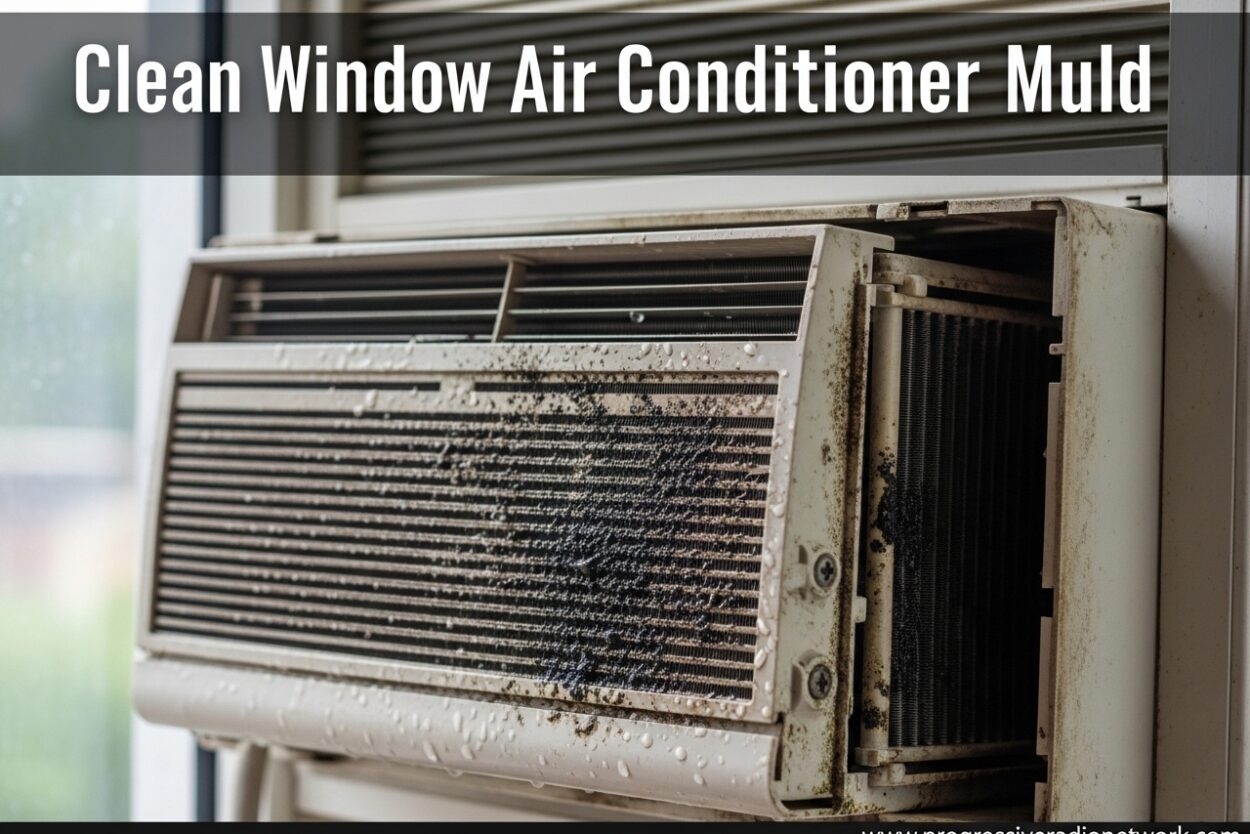
If you’ve noticed a musty smell coming from your window air conditioner or spotted dark patches around the vents, you’re likely dealing with mold growth. Learning how to clean window air conditioner mold safely is essential for your health and the longevity of your cooling unit.
I’ve dealt with moldy window AC units in both my home and rental properties, and I know how concerning it can be. The good news is that most cases of window air conditioner mold can be cleaned effectively with the right supplies and techniques. In this guide, I’ll walk you through everything you need to know to tackle this problem safely.
Is Mold in Your Window Air Conditioner Dangerous?
Yes, mold in your window air conditioner can pose real health risks. When your AC unit circulates air through moldy components, it distributes mold spores throughout your living space. These spores can trigger allergic reactions, respiratory issues, and other health problems.
Common symptoms of mold exposure include coughing, wheezing, nasal congestion, and throat irritation. People with asthma or mold allergies may experience more severe reactions. Children, elderly individuals, and those with compromised immune systems are particularly vulnerable to mold-related health issues.
Beyond health concerns, mold can reduce your AC’s efficiency and potentially damage internal components. The mold growth can block airflow, cause unpleasant odors, and shorten the lifespan of your unit. Addressing the problem promptly is important for both your health and your wallet.
What Causes Mold in Window Air Conditioners
Mold thrives in window air conditioners because these units create the perfect breeding ground: moisture, warmth, and organic material. Understanding what causes mold growth can help you prevent it from returning.
The primary culprit is condensation. As your AC cools warm air, moisture collects on the evaporator coils and drips into the drain pan. If this water doesn’t drain properly or if humidity levels are high, standing water creates ideal conditions for mold. Dust, pollen, and other debris that accumulate in the unit provide the organic material mold needs to grow.
Seasonal storage is another common cause. When you cover your window AC for winter or store it in a damp space, any remaining moisture can lead to mold growth during the off-season. Units that aren’t cleaned regularly are more susceptible to mold problems.
Supplies You’ll Need to Clean Window Air Conditioner Mold
Before starting the cleaning process, gather the right supplies. Having everything ready will make the job smoother and safer.
Safety Gear:
- N95 mask or respirator (critical for mold protection)
- Latex or nitrile gloves
- Safety goggles
- Old clothes you don’t mind getting dirty
Cleaning Solutions:
- 3% hydrogen peroxide (best for styrofoam parts)
- White vinegar
- Water
- Mild dish soap
- Bleach (optional, use with caution)
Tools:
- Soft-bristle brush or old toothbrush
- Scrub brush with medium bristles
- Spray bottle
- Clean rags or microfiber cloths
- Screwdriver (for removing panels if needed)
- Shop vacuum (optional but helpful)
- Bucket or large container
- Fin comb (optional, for bent coils)
Which Cleaning Solution Kills Mold Best?
Not all cleaning solutions are equally effective or safe for window air conditioner components. The right choice depends on which parts you’re cleaning and the severity of the mold growth.
Hydrogen Peroxide (Recommended): A 50/50 mixture of 3% hydrogen peroxide and water is highly effective at killing mold while being gentle on AC components. This is especially important for styrofoam parts inside the unit, which can be damaged by harsher chemicals like bleach. Hydrogen peroxide breaks down into water and oxygen, leaving no harmful residue.
White Vinegar: Vinegar is a natural mold killer that’s safe for most AC parts. Mix one part white vinegar with two parts water and add a few drops of dish soap. Let the solution sit for 20 minutes before scrubbing. Vinegar is particularly good for preventing mold regrowth.
Bleach Solution: The CDC recommends using 1 cup of bleach per gallon of water for mold disinfection. While effective, bleach can damage styrofoam components and some plastics. It’s also harsher to work with and requires excellent ventilation. Use bleach only for heavily contaminated metal parts, never on styrofoam.
Commercial Mold Removers: Products like CLR, RMR-86, or HomeArmor can be effective but follow label directions carefully. Some may be too harsh for certain AC components.
Clean Window Air Conditioner Mold: Step-by-Step Guide
Follow these steps to thoroughly clean mold from your window air conditioner. Most units can be cleaned without removing them from the window, though deep cleaning may require removal.
Step 1: Preparation and Safety
Start by turning off the AC unit and unplugging it from the electrical outlet. If the unit has been running recently, wait at least 30 minutes for it to cool down completely. Set up your work area with good ventilation – open windows and use fans if possible.
Put on your safety gear before beginning. The N95 mask is crucial as it protects you from inhaling mold spores during cleaning. Lay down drop cloths or plastic sheeting below the unit to catch any debris or cleaning solution.
Take photos of the unit’s current state, especially any visible mold growth. This will help you identify areas that need extra attention and document your progress.
Step 2: Remove and Clean the Filter
The air filter is often the first place mold appears and is the easiest to clean. Locate the filter access panel on the front of the unit. Most filters slide out easily, though some may require removing a screw or clipping mechanism.
Take the filter outside if possible. Vacuum off loose dust and debris using a shop vacuum or regular vacuum with a hose attachment. For washable filters, rinse them with warm water and mild dish soap. Don’t use bleach or harsh chemicals on filters as this can damage the material.
Let the filter air dry completely in sunlight if possible – UV rays help kill remaining mold spores. If the filter is disposable or heavily damaged, replace it with a new one. Most window AC filters cost between $15-30 and should be replaced every 1-3 months during use.
Step 3: Clean Accessible Exterior Components
With the filter removed, you’ll have access to the front grille and vent areas. Use your vacuum with a brush attachment to remove loose dust and debris from these areas. Pay special attention to corners and crevices where mold tends to accumulate.
Spray your chosen cleaning solution (hydrogen peroxide mixture is recommended) onto a soft cloth or directly onto the surfaces. Wipe down all accessible plastic and metal parts, including the front grille, side vents, and control panel area. For stubborn mold spots, use a soft-bristle brush to gently scrub the area.
Use cotton swabs dipped in cleaning solution to reach tight spaces and around buttons or knobs. Be careful not to let liquid drip into electrical components or the control panel.
Step 4: Clean Visible Interior Areas
Looking through the front opening where the filter was located, you’ll see the evaporator coils and possibly the fan blades. These areas commonly harbor mold growth but can be cleaned without removing the entire unit.
Use a flashlight to inspect these areas thoroughly. Spray your cleaning solution onto the coils and fan blades, being careful not to oversaturate. Let the solution sit for 10-15 minutes to penetrate the mold.
Use a soft-bristle brush or coil brush (available at hardware stores) to gently clean the coils. Work in the direction of the fins to avoid bending them. The fins are delicate aluminum and can be easily damaged, so use light pressure.
For areas you can’t reach with a brush, use compressed air to blow out dust and debris. You can also use a vacuum with a crevice attachment to remove loosened material.
Step 5: Clean the Drip Pan and Drain
The drip pan and drain line are prime locations for mold growth. If your unit has an accessible drip pan, carefully remove it and clean it outside with your cleaning solution and a scrub brush.
For units where the drip pan isn’t easily removable, use a wet-dry vacuum to remove standing water and debris from the pan area. Flush the drain line with a mixture of equal parts water and vinegar to kill mold inside the drain.
If the drain is clogged, use a stiff wire or pipe cleaner to clear the blockage. A clogged drain causes water to back up, creating more mold problems. Some users report success using a shop vac to suction out clogged drains.
Step 6: Address Mold on Styrofoam Parts
Many window AC units contain styrofoam components for insulation. These can be challenging to clean because harsh chemicals like bleach will damage or dissolve the styrofoam. This is where hydrogen peroxide shines.
Use a 50/50 mixture of hydrogen peroxide and water with a few drops of dish soap. Apply this solution to the styrofoam parts using a spray bottle or cloth. Let it sit for 15-20 minutes to penetrate the mold.
Gently scrub with a soft brush or sponge. Avoid abrasive scrubbers that can damage the styrofoam surface. Rinse with clean water using a spray bottle – don’t pour water directly onto styrofoam as it can become waterlogged.
Allow styrofoam parts to dry completely before reassembly. This may take several hours or overnight depending on humidity levels.
Step 7: Optional Deep Cleaning (Unit Removal)
For severe mold growth or if you want the most thorough cleaning possible, you may need to remove the unit from the window. This allows access to all interior components but requires more effort and safety precautions.
Window AC units are heavy (typically 40-80 pounds) and awkward to handle. Have someone assist you with removal. Disconnect any electrical connections and remove the mounting hardware. Carefully lift the unit out of the window, keeping it level to avoid spilling water from inside.
Once removed, place the unit on a drop cloth outdoors or in a well-ventilated area. Remove the outer casing using a screwdriver. This will expose the internal components including the condenser coils, fan, and compressor.
Clean all interior surfaces with your chosen cleaning solution. A pressure washer on a gentle setting can be effective for outdoor cleaning, but avoid directly spraying electrical components. Let the unit dry completely for at least 24 hours before reassembly and reinstallation.
Step 8: Drying and Reassembly
After cleaning, all components must be completely dry before reassembly to prevent new mold growth. Allow at least 4-6 hours for drying, longer if humidity is high. A fan can help speed up the drying process.
Once everything is dry, reassemble the unit in reverse order of disassembly. Make sure all parts are securely fastened and that no cleaning cloths or tools were left inside. Reinstall the filter once it’s completely dry.
Plug the unit back in and run it on fan-only mode for 30 minutes to ensure everything is working properly and to circulate air through the newly cleaned components. You may notice a slight chemical smell initially, which should dissipate quickly.
How to Prevent Mold From Returning
Preventing mold growth is much easier than dealing with it after it appears. Regular maintenance and smart habits can keep your window AC mold-free for years.
Clean or Replace Filters Monthly: This is the single most effective prevention step. A clean filter traps dust and debris before they can accumulate in the unit. Set a reminder on your phone to check filters monthly during cooling season.
Use a Dehumidifier: Keeping indoor humidity below 50% significantly reduces mold risk. In humid climates, run a dehumidifier in the same room as your window AC. Many units have built-in humidity controls – use them if available.
Run the Fan Mode: After using the AC for cooling, switch to fan-only mode for 10-15 minutes. This helps dry out any remaining moisture inside the unit before you turn it off completely.
Seasonal Maintenance: At the end of cooling season, clean the unit thoroughly before storing it. If leaving the unit in place year-round, cover it with a breathable cover designed for AC units. Avoid plastic covers that trap moisture.
Proper Installation: Ensure your unit is installed with a slight downward tilt toward the outside. This promotes proper drainage and prevents water from pooling inside. Check that the drainage holes aren’t blocked by debris or insects.
Regular Inspections: Every few weeks, visually inspect your AC unit for signs of mold growth. Catching mold early makes it much easier to clean and prevents the spread of spores throughout your home.
When to Replace vs Clean Your Window AC Unit
While most moldy window AC units can be successfully cleaned, there are situations where replacement is the better choice. Knowing when to cut your losses can save money and ensure better air quality.
If mold covers more than one-third of the unit’s interior surfaces, replacement is often recommended. At this level of contamination, cleaning may not be fully effective, and mold may have penetrated porous materials that can’t be adequately cleaned.
Units over 10 years old with significant mold issues may not be worth the cleaning effort. Older units are less energy efficient anyway, and the cost of professional cleaning might be better applied toward a newer, more efficient model.
Consider replacement if you’ve attempted cleaning multiple times and mold keeps returning. This could indicate a design flaw or drainage issue that won’t be resolved by cleaning alone.
Professional cleaning typically costs $100-200 for window units. If your unit is basic and under $300 new, replacement might make more economic sense than professional cleaning.
Frequently Asked Questions
Is it possible to clean mold out of a window AC unit?
Yes, most window AC units with mold can be cleaned effectively using the right supplies and techniques. For light to moderate mold growth, hydrogen peroxide or vinegar solutions work well. Severe cases may require professional cleaning or replacement, especially if mold covers more than one-third of the unit.
What kills mold better, bleach or vinegar?
For most window AC cleaning purposes, hydrogen peroxide is actually the best choice as it kills mold effectively without damaging styrofoam components. Between bleach and vinegar, both can kill mold but work differently. Vinegar penetrates porous materials better and prevents regrowth, while bleach disinfects surfaces quickly but can damage some AC parts. The CDC recommends 1 cup of bleach per gallon of water for mold disinfection on non-porous surfaces.
How long do mold spores stay in the air after cleaning?
Mold spores can remain airborne for several hours after disturbing them during cleaning. This is why wearing an N95 mask during the cleaning process is essential. After cleaning, open windows and run fans to ventilate the area. Using an air purifier with a HEPA filter can help capture airborne spores. Most spores will settle within 2-3 hours, but it’s best to wait 24 hours before running the AC if possible.
Can you clean a window AC without removing it from the window?
Yes, most window AC units can be effectively cleaned without removal. You can access and clean the filter, front grille, vent areas, evaporator coils, fan blades, and drip pan through the front and side access panels. Only for severe mold growth deep inside the unit or for annual deep cleaning would you need to remove the unit from the window.
Is it safe to run AC after cleaning mold?
Yes, it’s safe to run your AC after thoroughly cleaning mold from it, provided all components are completely dry first. Run the unit on fan-only mode for 30 minutes initially to circulate air and dry any remaining moisture. You may notice a slight chemical smell initially from cleaning products, which should dissipate quickly. If mold returns within a few weeks, you may have missed some contaminated areas or have a drainage issue.
Conclusion
Learning to clean window air conditioner mold is an essential skill for maintaining healthy indoor air quality and extending the life of your cooling unit. With the right supplies, safety precautions, and techniques, most mold problems can be resolved in a single afternoon.
Remember that hydrogen peroxide is your best bet for cleaning mold without damaging delicate styrofoam components. Regular maintenance, especially monthly filter cleaning, will prevent most mold issues from developing in the first place.
If you’re dealing with extensive mold growth or have health concerns about DIY mold removal, don’t hesitate to contact a professional HVAC technician. Your health and safety are worth the investment in professional cleaning when the situation warrants it.
By following this guide to clean window air conditioner mold, you’ll enjoy fresher air, better cooling performance, and peace of mind knowing your AC unit is clean and safe for your family.





Leave a Comment