
Keeping your central air conditioning system running efficiently doesn’t require an HVAC degree. This central AC maintenance guide breaks down exactly what you need to do, when to do it, and which tasks are better left to professionals. I’ve maintained my own home’s AC system for over 15 years, and following these routines has helped me avoid costly repairs while keeping my energy bills in check.
Regular maintenance prevents efficiency loss, reduces energy costs by up to 15%, extends system lifespan, and helps avoid expensive emergency repairs during peak cooling season. A well-maintained central AC can last 15-20 years, while neglected systems often fail within 10 years.
Understanding Your Central AC System
Before diving into maintenance tasks, it helps to understand what you’re working with. Your central air conditioning system consists of two main units connected by copper refrigerant lines. The indoor unit houses the evaporator coil and blower fan, while the outdoor unit contains the condenser coil and compressor.
Here’s how it works: refrigerant circulates between the indoor and outdoor coils, absorbing heat from your home’s air and releasing it outside. The blower fan pushes conditioned air through ductwork to each room. When these components get dirty or worn, efficiency drops dramatically. A dirty coil alone can reduce system efficiency by 30% or more.
The key components every homeowner should know: evaporator coil (absorbs heat indoors), condenser coil (releases heat outdoors), compressor (pumps refrigerant), expansion valve (regulates refrigerant flow), blower motor (moves air through ducts), and thermostat (controls temperature settings).
Central AC Maintenance Guide: Essential Tasks
This central AC maintenance guide covers the most critical tasks for keeping your system running smoothly. I recommend tackling these in order, starting with the simplest monthly tasks and working up to annual professional inspections.
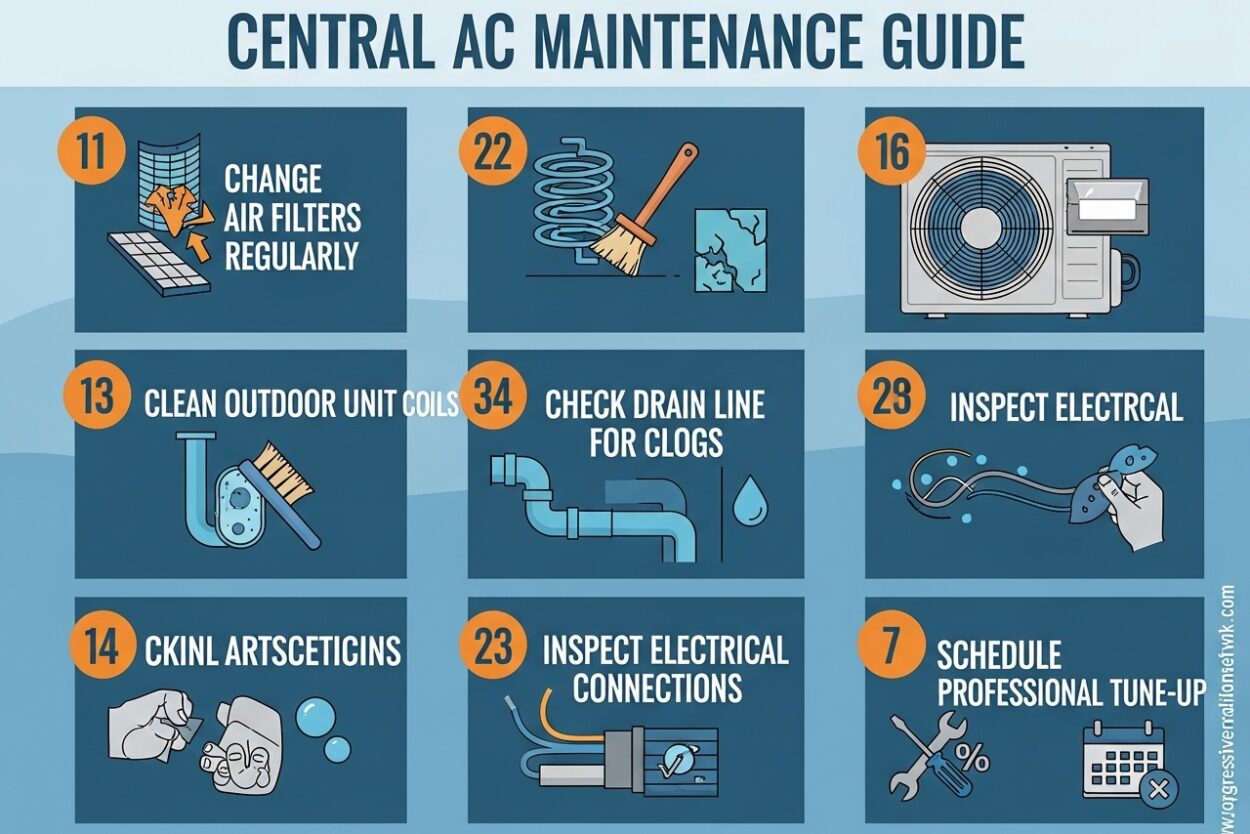
Filter maintenance is the single most important DIY task. A clogged filter restricts airflow, forcing your system to work harder and potentially causing ice to form on the evaporator coil. Check your filter monthly during cooling season and replace it every 1-3 months depending on factors like pets, dust levels, and usage. Pleated filters with a MERV rating of 8-11 offer the best balance between filtration and airflow.
The evaporator coil inside your indoor unit needs annual attention. Over time, dust and debris accumulate on the coil surfaces, reducing heat transfer efficiency. You can access this coil by removing the access panel on your indoor unit or air handler. Use a soft brush or vacuum with a brush attachment to gently clean the coil fins. For deeper cleaning, a no-rinse coil cleaner spray can work wonders—just spray it on and let it foam away debris.
Your outdoor condenser coil faces even harsher conditions. Leaves, grass clippings, cottonwood seeds, and dirt all conspire to clog the aluminum fins. I make it a habit to visually inspect my outdoor unit weekly during spring and summer. Clear any debris from around the unit (maintain at least 2 feet of clearance), then use a garden hose to gently spray the coil fins from the inside out. Avoid high-pressure washers as they can bend the delicate fins.
The condensate drain line carries away moisture pulled from your home’s air. When this line clogs with algae, mold, or debris, water can back up and cause damage to your system or home. Locate the drain line (usually a PVC pipe near your indoor unit) and flush it annually with a mixture of 1 cup white vinegar followed by hot water. For stubborn clogs, a wet/dry vacuum can suck out the blockage.
Thermostat optimization often gets overlooked but can significantly impact comfort and efficiency. If you have an older manual thermostat, consider upgrading to a programmable or smart model. These allow you to set back temperatures when you’re away or sleeping, potentially saving 10% on cooling costs. Place thermostats away from heat sources, direct sunlight, and drafts for accurate readings.
DIY Maintenance Tasks You Can Handle
Not every maintenance task requires a service call. I’ve saved hundreds of dollars over the years by handling these tasks myself. Here’s what you can safely DIY:
Monthly: Check and replace air filters as needed. This takes 30 seconds but prevents the majority of AC problems. Inspect your outdoor unit for debris accumulation. Clear leaves, grass, and other materials from around the unit. Listen for unusual sounds when the system starts.
Quarterly: Clean the outdoor condenser coil with a garden hose. Straighten any bent coil fins using a fin comb (available at hardware stores for under $10). Check insulation on refrigerant lines—if the foam insulation is cracked or missing, replace it to prevent condensation and energy loss.
Annually: Clean the evaporator coil using a soft brush or coil cleaner. Flush the condensate drain line with vinegar and water. Test your thermostat accuracy using a separate thermometer. Lubricate any accessible ports on the blower motor (check your manual). Clean the blower fan blades if accessible.
Capacitor testing is another DIY-friendly task that many homeowners overlook. The start capacitor and run capacitor provide the electrical jolt needed to start your compressor and fan motors. A failing capacitor often causes clicking sounds or slow-starting motors. You can test capacitors with a multimeter (capacitors should be discharged first for safety) and replace them yourself for about $20 versus $150-200 for a service call.
Monitor your system’s performance throughout the cooling season. Note any changes in airflow, unusual sounds, or increased energy consumption. Early detection of problems prevents small issues from becoming expensive repairs. I keep a simple log of when I perform maintenance tasks and any changes I notice in system performance.
When to Call a Professional
While DIY maintenance saves money, some tasks require professional training, tools, and equipment. I schedule an annual professional tune-up in early spring before peak cooling season. This typically costs $65-150 depending on your location and service provider, but it pays for itself in improved efficiency and prevented breakdowns.
Professional maintenance should include checking refrigerant levels and pressure. Only EPA-certified technicians can legally handle refrigerants due to environmental regulations. Low refrigerant indicates a leak that should be repaired before recharging—the $5,000 rule suggests that if repair costs exceed $5,000, replacement might be more cost-effective for an aging system.
Your technician should also inspect and tighten all electrical connections. Loose connections can cause components to fail or create fire hazards. They’ll measure voltage and current on motors, check belt tension and alignment (if applicable), and lubricate all moving parts. The blower motor and other components often have sealed bearings, but some models require periodic lubrication.
Ductwork inspection is another professional task. Leaking ducts can waste 20-30% of your cooling energy. A professional can seal leaks, insulate ducts in unconditioned spaces, and ensure proper airflow to each room. They should also check your evaporator coil’s temperature differential—the difference between return air and supply air should be 14-20 degrees for proper operation.
Consider a professional inspection if you notice any warning signs: ice forming on refrigerant lines, warm air from vents, unusual noises (clicking, buzzing, grinding), frequent cycling on/off, or higher than normal energy bills. These symptoms indicate problems that will worsen without attention.
Many manufacturers require annual professional maintenance to maintain warranty coverage. Keep records of all service visits—the $150 annual maintenance fee could save you thousands if a major component fails under warranty.
Common AC Problems and Warning Signs
Even with regular maintenance, problems can arise. Recognizing warning signs early prevents minor issues from becoming major repairs. I’ve learned to pay attention to these red flags:
Reduced cooling performance is often the first sign of trouble. If your AC runs constantly but can’t maintain temperature, check the simple things first (filters, thermostat settings) before calling a professional. Frozen evaporator coils appear as ice on the refrigerant line at the indoor unit. This typically indicates low refrigerant or restricted airflow—turn off the system and call a technician.
Unusual sounds tell you a lot about your AC’s health. Clicking on startup often indicates a failing capacitor. Buzzing sounds suggest electrical issues or loose parts. Grinding or screaming noises point to bearing problems in the blower motor. Hissing sounds might indicate a refrigerant leak. Don’t ignore these sounds—addressing them early can prevent more extensive damage.
Higher energy bills without increased usage indicate declining efficiency. This often results from dirty coils, low refrigerant, or aging components. Compare your summer bills year-over-year to spot trends. A 10% increase might signal the need for professional attention.
Frequent cycling (short cycling) means your AC turns on and off more often than normal. This wastes energy and wears out components prematurely. Causes include an oversized system, dirty filters, low refrigerant, or a failing thermostat. Short cycling reduces both comfort and system lifespan.
Water leaks around your indoor unit often indicate clogged condensate drains or frozen coils. While some condensation is normal, pooling water suggests a problem that needs attention to prevent water damage and mold growth.
Seasonal Maintenance Schedule
Spring (Before Cooling Season): Replace air filters, clear debris from outdoor unit, test thermostat operation, schedule professional maintenance, inspect refrigerant line insulation, check condensate drain flow.
Summer (Peak Season): Check filters monthly, monitor system performance, keep outdoor unit clear of debris, note any changes in sounds or performance, adjust thermostat for energy savings when away.
Fall (End of Season): Clean outdoor condenser coil thoroughly, flush condensate drain, replace filters, note any issues for spring repair, cover outdoor unit if desired (in harsh climates).
Winter (Off-Season): Keep outdoor unit clear of leaves and snow, check insulation on refrigerant lines, avoid running AC when outdoor temperature is below 60 degrees (can damage compressor), plan for spring maintenance.
Frequently Asked Questions
What maintenance is required for central air conditioning?
Central AC maintenance includes monthly filter changes, annual coil cleaning, regular condensate drain flushing, thermostat calibration, outdoor unit debris clearance, and annual professional inspection. These tasks maintain efficiency and prevent costly breakdowns.
What is the $5,000 rule for HVAC?
The $5,000 rule suggests that if repair costs exceed $5,000, replacing your HVAC system might be more cost-effective than repairing it, especially for systems over 10 years old. This guideline considers both immediate repair costs and future savings from a more efficient system.
How often should your central air conditioner be serviced?
Schedule professional HVAC service annually, preferably in spring before peak cooling season. Perform DIY maintenance monthly during cooling season, including filter checks and outdoor unit inspections. This schedule prevents problems and maintains optimal efficiency.
What are the common problems with central air conditioners?
Common central AC problems include clogged air filters, dirty coils, low refrigerant levels, frozen evaporator coils, faulty capacitors, clogged condensate drains, thermostat malfunctions, and electrical connection failures. Regular maintenance prevents most of these issues.
Can I clean my central AC myself?
Yes, homeowners can safely handle filter changes, outdoor unit cleaning, evaporator coil brushing, condensate drain flushing, and basic troubleshooting. Leave refrigerant handling, electrical repairs, and component replacement to certified HVAC professionals.
How much does AC maintenance service cost?
Professional AC maintenance typically costs $65-150 for an annual tune-up. Emergency repairs range from $150-500 depending on the issue. DIY maintenance costs minimal dollars for filters and cleaning supplies, saving homeowners hundreds annually in service calls.
Conclusion
Following this central AC maintenance guide will keep your system running efficiently for years to come. The small investment of time and money in regular maintenance pays off through lower energy bills, fewer repairs, and extended system life. Start with the monthly filter check—it takes 30 seconds but prevents the majority of AC problems. Schedule that annual professional tune-up before summer hits, and your central AC will reward you with reliable, efficient cooling when you need it most.



Leave a Comment