
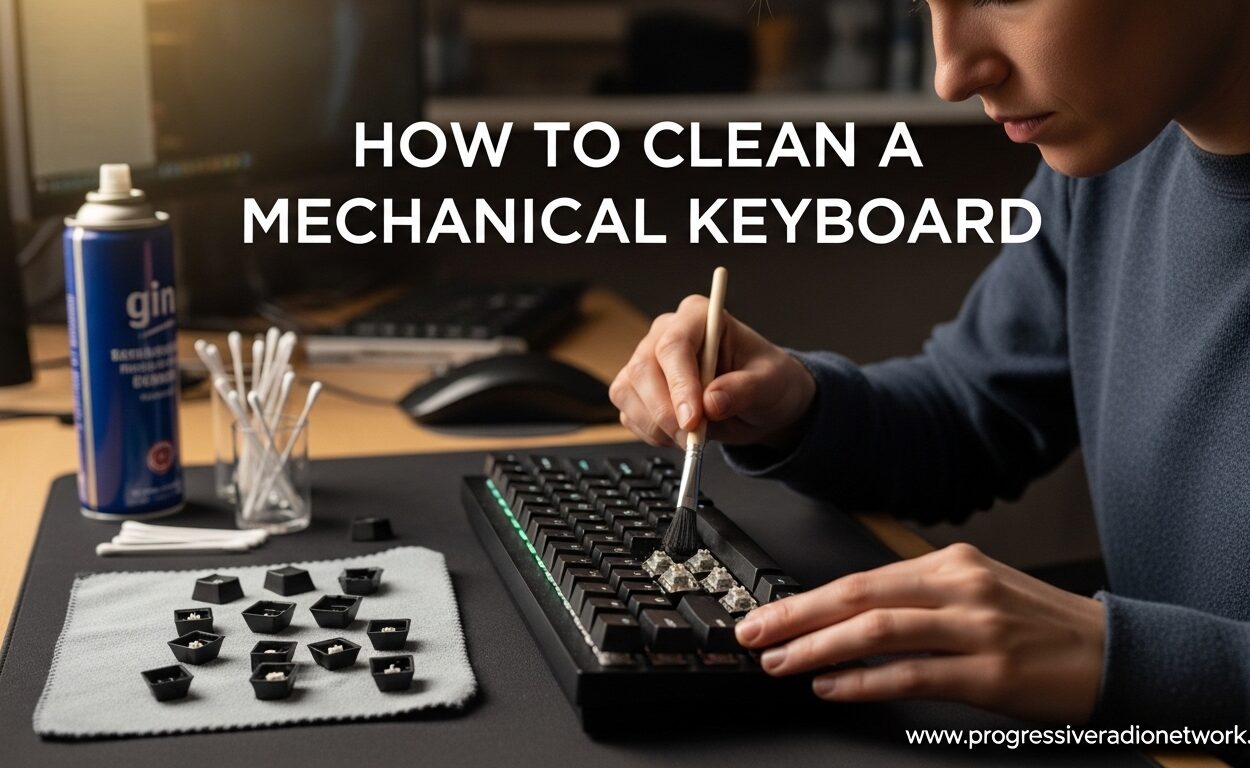
Your mechanical keyboard is probably disgusting. I do not mean that as an insult. I mean that as a fact of life for anyone who types more than a few hours a day. Dead skin cells, crumbs from that sandwich you ate three weeks ago, and enough dust to fill a small vacuum bag have all found their way between your keycaps. The good news is that you can clean mechanical keyboard without ruining it, and I am going to show you exactly how.
To clean a mechanical keyboard without ruining it, first unplug the keyboard and remove the keycaps using a keycap puller. Blow away loose debris with compressed air or a compact desk vacuum. Wipe the keyboard plate with a microfiber cloth dampened with isopropyl alcohol. Soak the keycaps in warm, soapy water for 15-20 minutes, rinse thoroughly, and let them dry completely for at least 4 hours before reassembling.
In this guide, I will walk you through everything I have learned from cleaning dozens of mechanical keyboards over the past five years. You will get two methods: a 5-minute quick clean for regular maintenance and a full deep clean that makes your board look brand new. I will also cover what not to do, because ruining a keyboard is easier than you might think.
Critical Safety Precautions Before You Start
Let me be blunt. The fastest way to destroy a mechanical keyboard is to clean it while it is plugged in or use the wrong cleaning agents. Before you touch a single keycap, follow these non-negotiable rules.
Always unplug your keyboard before cleaning. Water and electricity do not mix, and even a small amount of moisture can short circuit your keyboard’s PCB if power is flowing through it. This includes USB passthrough ports. If your keyboard has a detachable cable, remove it completely.
Never use WD-40 on your mechanical keyboard. I see this question constantly in Reddit threads, and the answer is always the same. WD-40 leaves a sticky residue that attracts dust and can damage plastic components. It is not a cleaner; it is a water displacer with lubricating properties that will ruin your switches over time.
Avoid harsh chemicals like bleach, ammonia-based cleaners, or window cleaning sprays. These can damage keycap legends, strip protective coatings, and corrode metal components in your switches. Stick to isopropyl alcohol or mild dish soap for safe cleaning.
Let everything dry completely before reassembly. This is where most people ruin their keyboards. Even a drop of water left on a switch can cause it to malfunction or fail entirely. I recommend waiting at least 4 hours, though overnight drying is the safest approach.
Tools and Supplies You’ll Need
You do not need expensive specialized equipment to clean a mechanical keyboard properly. Most of these items are already in your home or cost less than $15 total.
Essential tools: A keycap puller (wire style preferred), can of compressed air or a compact desk vacuum, microfiber cloths, cotton swabs or Q-tips, and a small bowl for soaking keycaps.
Cleaning agents: Isopropyl alcohol (70% concentration is ideal), mild dish soap, and warm water. The 70% alcohol concentration matters because higher percentages evaporate too quickly to dissolve oils, while lower percentages leave too much moisture behind.
Optional but helpful: A soft-bristled paintbrush (toothbrushes can leave bristles stuck in switches), tweezers for removing stubborn debris, a phone or camera for documenting your keycap layout, and a strainer for rinsing keycaps efficiently.
If you do not have a keycap puller, you can use a bent paperclip or guitar pick, but be extra careful. The $5 investment in a proper wire puller is worth protecting your keycaps from scratches and your switches from damage.
Quick Clean Method (5 Minutes – No Keycap Removal)
Sometimes you just need to remove visible debris and get back to work. This method takes five minutes and requires no disassembly. I do this twice a week on my daily driver keyboard.
Step 1: Unplug your keyboard completely. I cannot stress this enough. Even for a quick clean, power must be disconnected.
Step 2: Hold your keyboard upside down over a trash can and shake it gently. You will be amazed how much debris falls out. Tap the back firmly but not violently to dislodge loose particles.
Step 3: Use compressed air or a vacuum to blow or suck debris from between the keys. Keep the nozzle at an angle rather than straight down to push debris out rather than deeper into the switches. Work in a pattern from one side to the other.
Step 4: Dampen a microfiber cloth with a small amount of isopropyl alcohol. Wipe down all exposed keycap surfaces and the keyboard frame. Do not let liquid pool anywhere; the cloth should be barely damp, not wet.
Step 5: Use a cotton swab dipped in alcohol to clean the edges of keycaps and gaps between keys where your cloth cannot reach. Change swabs frequently as they pick up dirt.
Let the keyboard air dry for 10-15 minutes before plugging it back in. This method handles surface grime and loose debris but will not remove sticky residue or deep-clean your switches.
Deep Clean Method (Complete Restoration)
Once a month, or whenever your keys start feeling sticky or unresponsive, it is time for a deep clean. This process takes about 45 minutes of active work plus 4 hours of drying time. The results are worth every minute.
Step 1 – Unplug and Document Your Layout
Disconnect your keyboard from your computer. Remove any USB cables completely rather than just unplugging from the computer end.
Take a photo of your entire keyboard before removing a single keycap. This is the trick that will save you hours of frustration during reassembly. Standard layouts are mostly predictable, but if you have a custom keycap set, function row variations, or non-standard bottom rows, that photo is your lifeline. I learned this the hard way after spending two hours trying to remember where my alternate function keys went.
Clear a clean workspace with good lighting. You will be handling many small pieces, and dropping a keycap on a dark carpet is a special kind of frustration.
Step 2 – Remove Keycaps Safely
Use your keycap puller to remove keycaps one by one. Position the wire puller so it grips the keycap evenly on opposite corners. Pull straight up with gentle, steady pressure. Do not twist or yank; this can damage the switch stem underneath.
Be extra careful with larger keys like spacebar, shift, enter, and backspace. These have stabilizer bars underneath that can be damaged if you pull unevenly. For stabilized keys, position your puller to grip the keycap at the edges closest to the stabilizer stems, not the center.
Some enthusiasts remove stabilizers completely for cleaning, but that requires additional knowledge about reassembly. For most users, leaving stabilizers in place and cleaning around them is the safer approach. If a stabilizer does come loose, stop and research your specific keyboard’s stabilizer type before proceeding.
Store removed keycaps in a bowl or container where they will not get lost. I like to sort mine roughly by row as I remove them, which makes reassembly faster.
Step 3 – Clean the Keycaps
Fill a bowl with warm water and add a few drops of mild dish soap. Submerge all your keycaps completely. Let them soak for 15-20 minutes to loosen oils and grime. For heavily soiled keycaps, a 30-minute soak works better.
After soaking, agitate the keycaps gently in the water. Use your fingers or a soft cloth to wipe each keycap, paying special attention to the sides and the interior cavity where finger oils accumulate. For textured or engraved legends, a soft toothbrush can help, but be gentle to avoid scratching.
Rinse thoroughly with clean water. A kitchen strainer works perfectly for this; dump the keycaps in, run water through them, and shake off excess. You want zero soap residue remaining, as it can make keys feel sticky when you type.
Spread keycaps on a clean towel to dry. Position them cavity-down so water drains out rather than pooling inside. They must dry completely before reassembly, which takes at least 4 hours. I usually let mine dry overnight to be absolutely certain.
Step 4 – Clean the Keyboard Plate and Switches
With keycaps removed, you can see the keyboard plate, switches, and all the accumulated horror between them. Start with dry methods before introducing any moisture.
Use compressed air or a vacuum to remove loose debris. Work at multiple angles to dislodge particles from different sides of the switches. If using compressed air, use short bursts rather than sustained spraying to avoid pushing moisture into switches. If vacuuming, use a brush attachment and low suction to avoid damaging components.
Dampen a microfiber cloth with isopropyl alcohol and wipe the entire exposed plate surface. Get between the switches as much as possible. The alcohol evaporates quickly and sanitizes while it cleans. For stubborn grime, let the alcohol sit for 30 seconds before wiping.
Use cotton swabs dipped in alcohol to clean between switches and around stabilizers. This is tedious but important for a thorough clean. Change swabs as they get dirty; a dirty swab just moves grime around. Be aware that cotton fibers can occasionally get stuck in switch housings; tweezers help remove these if needed.
If your keyboard has RGB lighting visible through the plate, be extra gentle around those areas. The LEDs themselves are sealed, but aggressive scrubbing near them is unnecessary risk.
For keyboards with exposed USB-C ports or other connectors, avoid getting any liquid near these openings. A dry cotton swab can clean port areas safely.
Step 5 – Dry Everything Completely
After cleaning with alcohol, let your keyboard plate air dry for at least 30 minutes. Alcohol evaporates quickly, but switches can trap small amounts inside their housings. Position the keyboard at an angle to help any trapped moisture drain out.
Verify your keycaps are completely dry before proceeding. Shake each one and listen for water droplets. Any moisture trapped inside a keycap will end up in your switches during reassembly.
Do not rush this step. I have seen too many Reddit posts from people who reassembled after an hour of drying only to find half their keys unresponsive. Water damage is not covered under most keyboard warranties, and a replacement PCB often costs as much as a new keyboard.
Step 6 – Reassemble Your Keyboard
Refer to the photo you took before disassembly. Start with the bottom row and work your way up, or follow whatever pattern makes sense for your layout.
Press each keycap straight down onto its switch stem until you feel it click into place. Do not force it; if a keycap is not seating properly, check that you are aligning it with the correct switch. Stabilized keys may require slightly more pressure to engage both the switch stem and stabilizer stems.
Test each key as you install it by pressing it a few times. It should feel consistent with neighboring keys and return to its original position smoothly. If a key feels sticky or does not return properly, remove it and check for moisture or debris.
Once all keycaps are installed, do a final visual check. All keys should sit at roughly the same height. If one looks higher or lower than its neighbors, it may not be fully seated.
Wait an additional hour after reassembly before plugging in your keyboard. This gives any residual moisture from handling time to evaporate. Then reconnect and test every single key using an online keyboard tester or typing test.
Preventive Maintenance Schedule
Regular maintenance prevents the need for intensive deep cleaning and helps maintain your typing speed and accuracy. Here is the schedule that works for me and most keyboard enthusiasts.
Daily: Shake out loose debris by turning your keyboard upside down. Takes 10 seconds and prevents buildup.
Weekly: Perform the quick clean method described above. Wipe down surfaces with alcohol and use compressed air between keys. This prevents oils from transferring to switches.
Monthly: Deep clean time. Remove keycaps, soak them, clean the plate thoroughly. If you are a light user, you might stretch this to every six weeks.
Seasonally: Full inspection. Check for switch wear, stabilizer rattle developing, or keycap shine. This is also a good time to consider whether any components need replacement or lubrication.
Heavy users, gamers, and anyone who eats at their desk should lean toward the more frequent end of these ranges. Pet owners may need to clean more often due to fur and dander accumulation.
Emergency Spill Cleanup Guide
If you just spilled coffee, soda, or water on your mechanical keyboard, stop reading and act now. Speed matters more than technique in spill situations.
Immediately: Unplug the keyboard. Do not pause to shut down gracefully; yank that cable. Every second with power connected increases the risk of permanent damage.
Within 30 seconds: Turn the keyboard upside down to drain the liquid. Shake it gently to remove as much liquid as possible from the interior.
Within 2 minutes: Remove all keycaps if you have a puller nearby. This exposes the plate and allows air to reach more surface area for drying. If you cannot remove keycaps quickly, focus on draining instead.
Within 5 minutes: Pat dry all visible surfaces with paper towels or a cloth. Do not rub vigorously; blot to absorb liquid without pushing it deeper.
Drying phase: Leave the keyboard upside down for at least 24 hours. Some enthusiasts recommend placing it in a container with rice or silica gel packets, though opinions vary on effectiveness. The key is time and airflow.
Sticky liquids like soda or coffee require cleaning after drying. Once the keyboard is completely dry, follow the deep clean method above. The sugar residue will cause sticking if not removed.
Unfortunately, some spills cause immediate permanent damage. If keys do not work after thorough drying and cleaning, you may need switch replacement or a new keyboard. This is why that immediate unplugging step is so critical.
Frequently Asked Questions
What’s the best way to clean a mechanical keyboard?
The best way to clean a mechanical keyboard is the deep clean method: unplug the keyboard, remove all keycaps with a keycap puller, soak keycaps in warm soapy water for 15-20 minutes, clean the keyboard plate with isopropyl alcohol and cotton swabs, let everything dry completely for at least 4 hours, then reassemble.
Is WD-40 good for cleaning keyboards?
No, WD-40 should never be used on mechanical keyboards. It leaves a sticky residue that attracts dust and can damage plastic components over time. Use 70% isopropyl alcohol instead for safe cleaning.
Can I use Q-tips to clean my keyboard?
Yes, cotton swabs or Q-tips work well for cleaning between switches and around stabilizers when dipped in isopropyl alcohol. However, be aware that cotton fibers can occasionally get stuck in switch housings, so change swabs frequently and check for loose fibers.
How often should I clean my mechanical keyboard?
For optimal performance, do a quick surface clean weekly using compressed air and alcohol wipes. Perform a deep clean with keycap removal every 4-6 weeks for heavy users, or every 2-3 months for light users. Daily users who eat at their desks should clean more frequently.
Can I put keycaps in the dishwasher?
While some enthusiasts report success with dishwasher cleaning, it is not recommended. Dishwasher detergents are harsh and can damage keycap legends or plastic. The high heat can also warp ABS plastic keycaps. Hand washing with mild dish soap and warm water is safer and more effective.
Final Thoughts
Cleaning a mechanical keyboard without ruining it is not complicated, but it does require patience and attention to detail. The most important rules are simple: always unplug first, never use harsh chemicals, and let everything dry completely before reassembly.
A clean keyboard feels better to type on, lasts longer, and is more hygienic. With the maintenance schedule outlined above, you can keep your mechanical keyboards for programming, gaming, or writing in top condition for years to come.
Take a photo before you start your first deep clean. Trust me on this one. And remember that 4-hour drying time is a minimum, not a suggestion. Your keyboard will thank you with years of reliable service.



Leave a Comment