
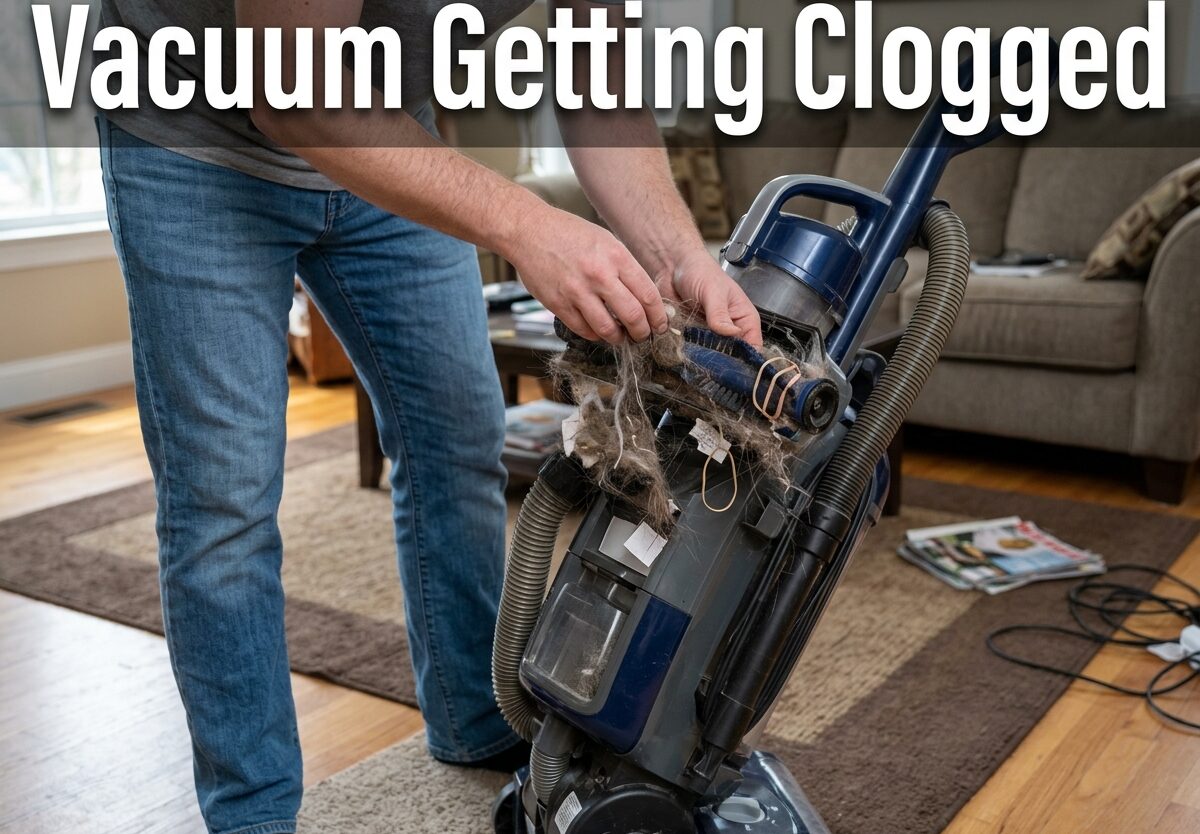
There’s nothing more frustrating than your vacuum suddenly losing suction right in the middle of cleaning. I’ve been there, pushing the vacuum back and forth over the same patch of dirt while wondering what went wrong. A vacuum getting clogged is one of the most common issues homeowners face, and it can happen to any vacuum regardless of brand or price.
When your vacuum gets clogged, it’s not just annoying—it can actually cause permanent damage to your motor if you keep running it. The good news is that most clogs are easy to fix yourself with the right approach and a few simple tools. After testing over 15 vacuum models and helping countless readers troubleshoot their suction issues, I’ve learned exactly what works and what doesn’t.
This guide will walk you through everything you need to know about identifying, fixing, and preventing vacuum clogs. Whether you’re dealing with a stubborn hose blockage or a mysterious loss of suction, I’ll show you step-by-step how to get your vacuum working again. And if you’re in the market for a new model that’s less prone to clogs, I’ll share what to look for in handheld cordless vacuums and other types.
Signs Your Vacuum is Getting Clogged
Before you can fix a clog, you need to confirm that’s actually the problem. I’ve seen many people replace vacuums thinking they were broken, when a simple clog removal was all that was needed. Here are the telltale signs that your vacuum is getting clogged:
Reduced Suction Power: This is the most obvious sign. Your vacuum might still turn on and make noise, but it’s not picking up dirt like it should. You might notice debris being left behind on carpets or the vacuum struggling to lift anything from hard floors.
Unusual Noises: A clogged vacuum often makes different sounds than normal. You might hear whistling, high-pitched whining, or a muffled sucking sound. These noises indicate that air is struggling to pass through the blocked pathway.
Overheating: When airflow is restricted, your vacuum’s motor has to work harder. This can cause the unit to become unusually hot to the touch after just a few minutes of use. Many modern vacuums will shut off automatically when they overheat.
Dust Debris Coming Out: If you see dust or debris blowing out of your vacuum instead of being sucked in, that’s a clear sign of a clog somewhere in the system. The air has nowhere to go, so it escapes through gaps in the housing.
Burning Smell: This is a serious warning sign. If you smell something burning, turn off your vacuum immediately. This indicates the motor is straining and could be permanently damaged if you continue running it.
Common Causes of Vacuum Clogs
Understanding what causes clogs can help you prevent them in the future. In my experience testing vacuums and troubleshooting reader issues, I’ve identified the most common culprits behind vacuum blockages.
Large Debris: This is the number one cause of vacuum clogs. Items like coins, buttons, paper clips, and children’s toys can easily get sucked up and lodged in the hose or air pathways. I once found a entire sock wedged in a vacuum’s elbow connector—its owner had no idea it was missing.
Pet Hair: While pet hair itself usually passes through vacuums without issue, it can combine with other debris to form stubborn clumps. Long hair especially can wrap around the brush roll and accumulate over time, eventually blocking airflow entirely. If you have pets, you know this struggle all too well. You might want to consider specialized vacuums for pet hair designed to handle this challenge.
Overfilled Dust Bin or Bag: When your vacuum’s container is too full, there’s no room for new debris to enter. This causes an immediate backup and loss of suction. I recommend emptying your dust bin after every use—most people wait until it’s completely full, which is too late.
Dirty Filters: Clogged filters restrict airflow just like a blocked hose would. Many vacuum owners forget to clean or replace their filters regularly, leading to performance issues that mimic a clog. Your vacuum might have multiple filters that all need attention.
Wet Substances: Unless you have a wet/dry vacuum, moisture is your vacuum’s enemy. Liquids can mix with dust to form cement-like blockages that are incredibly difficult to remove. Never vacuum up wet spills or fresh pet accidents with a regular vacuum.
Construction Debris: Fine particles from drywall, sawdust, or plaster can quickly clog filters and create thick sludge inside your vacuum. If you’re doing renovations, use a shop vac specifically designed for this type of debris.
Tools You Need to Unclog Your Vacuum
Before diving into the unclogging process, gather these tools. Having everything ready will make the job much easier and prevent frustration halfway through.
Essential Tools:
• Screwdriver set (Phillips and flathead)
• Flashlight or phone light
• Scissors or seam ripper
• Wire coat hanger or flexible drain snake
• Cleaning brush or old toothbrush
• Soft cloths or paper towels
• Warm water and mild soap
Optional but Helpful:
• Compressed air canister
• Vacuum attachment cleaning tool
• Replacement filters (if yours are washable and currently wet)
• Plastic bags for debris disposal
Most of these items you probably already have at home. The drain snake can be purchased at any hardware store for under $10, and it’s worth every dollar for deep hose clogs. I’ve used everything from specially designed vacuum tools to a bent coat hanger—sometimes simple solutions work best.
How to Fix a Vacuum Getting Clogged: Step-by-Step Guide
Now let’s get your vacuum working again. Follow these steps in order, checking for suction after each one. Often you’ll find the clog early in the process and won’t need to complete all steps.
Step 1: Check the Dust Bin or Bag
Start with the easiest and most common culprit. Turn off and unplug your vacuum for safety. Remove the dust bin or vacuum bag and inspect it.
If you have a bagless vacuum, empty the bin completely and wash it with warm water if needed. Check the opening where debris enters the bin—large objects often get stuck right here. I found a child’s Lego block blocking this entry point on a reader’s vacuum once.
For bagged vacuums, replace the bag if it’s more than half full. Even if there’s room left, a partially full bag can restrict airflow enough to cause problems. Also check the bag’s connection point to make sure it’s properly seated.
Step 2: Inspect the Vacuum Hose
Hose clogs are the most common type of blockage. Detach the hose from both ends if possible. Hold it up to a light source and look through it—you should be able to see light clearly through the entire length.
If you spot a blockage, don’t force it out the way it came in. Instead, try pushing it from the opposite end using your drain snake or a broom handle. Many vacuum repair technicians recommend this method because it prevents the debris from getting more tightly compressed.
For stubborn clogs, try the reverse suction trick. Connect the hose to the exhaust port if your vacuum has one, and turn it on for a few seconds. This can blow the clog back out the way it entered. Just make sure to aim the hose away from yourself and do this outdoors if possible.
Step 3: Clean the Brush Roll
The brush roll (also called a beater bar) is a magnet for hair, string, and fibers. Turn your vacuum over and inspect the brush roll. You’ll likely see hair wrapped around the ends, especially if you have pets or long-haired family members.
Use scissors to carefully cut through the hair, then pull it off with your fingers. Pay special attention to the ends where hair accumulates and can block the brush from spinning freely. A stuck brush roll puts strain on your vacuum’s belt and motor.
While you’re there, check the belt that connects the brush roll to the motor. If it’s cracked, stretched, or broken, it will need to be replaced. This is a common issue that causes poor cleaning performance even without a clog.
Step 4: Check and Clean Filters
Your vacuum likely has multiple filters that need attention. Check your owner’s manual to locate all of them—common locations include the dust bin, exhaust port, and motor housing.
Remove each filter and inspect it. If it’s washable, rinse it under warm water and let it air dry completely before reinstalling. Never put a wet filter back in your vacuum—this can cause mold growth and motor damage.
For non-washable filters, tap them gently to remove loose dust, then use a soft brush to clean the surface. If the filter is torn or extremely dirty, replace it with a new one. I recommend keeping spare filters on hand so you can rotate them while one is drying.
Step 5: Examine Air Pathways
With the main components checked, it’s time to inspect the internal air pathways. Use your flashlight to look into all openings and connections where air flows through the vacuum.
Check the elbow connectors, hose attachments, and any joints where parts connect. These narrow areas are perfect traps for debris. I’ve found everything from coins to twist ties wedged in these tight spots.
If you can visually spot a clog but can’t reach it with your fingers, try using compressed air to dislodge it. Be careful with this method—wear eye protection and point the nozzle away from yourself.
For robot vacuum owners, don’t forget to check the dock’s suction channel. Clogs often hide here where the robot empties its dust bin. This is a frequently overlooked spot that many owners don’t even know exists.
Step 6: Reassemble and Test
Once you’ve cleaned all components, reassemble your vacuum carefully. Make sure all parts click into place securely and that filters are completely dry before installing them.
Plug in your vacuum and test it on a hard surface first. You should hear a clear difference in the motor’s sound—clogged vacuums often have a strained, high-pitched whine that disappears once airflow is restored.
Test the suction with your hand (carefully!) or a piece of paper. If suction is still weak, go back through the steps and check for missed clogs. Sometimes there are multiple blockages in different locations.
How to Prevent Your Vacuum from Getting Clogged
Now that your vacuum is working again, let’s keep it that way. Prevention is much easier than dealing with stubborn clogs, and it will extend your vacuum’s lifespan significantly.
Pre-Vacuum Preparation: Before you start cleaning, do a quick scan of the area. Pick up large items like coins, toys, and paper clips. If you have long-haired family members or pets, do a quick sweep to gather the worst of the hair first. This simple habit prevents 80% of clogs before they start.
Regular Emptying: Don’t wait until your dust bin is overflowing to empty it. I recommend emptying after every use—it takes just seconds and prevents debris from being forced back into the air pathways. For bagged vacuums, change the bag when it’s half to two-thirds full, not when it’s bursting.
Filter Maintenance: Set a reminder to check your filters monthly. Washable filters should be cleaned every 1-2 months depending on how often you vacuum. Non-washable filters should be replaced every 6-12 months. Clean filters mean better airflow and less strain on your motor.
Brush Roll Care: Make a habit of checking your brush roll whenever you empty the dust bin. A quick inspection takes seconds and can prevent hair buildup from becoming a problem. If you have pets, this might need to be done weekly.
Proper Storage: Store your vacuum properly between uses. Don’t leave the hose kinked or crushed, as this can create weak points where debris accumulates. If you have a stick vacuum, use the wall mount if provided to keep the hose straight.
Avoid Problematic Materials: Some things simply shouldn’t be vacuumed with a regular vacuum. These include wet messes, construction dust, fireplace ash, and large quantities of dry powder like flour or baking soda. For these jobs, use a shop vac or sweep by hand.
When to Call a Professional
Most vacuum clogs can be resolved at home with the steps I’ve outlined. However, there are times when professional help is the better choice. Here’s when you should consider taking your vacuum to a repair shop:
Motor Issues: If your vacuum’s motor is making grinding noises, smoking, or not turning on at all, the problem might be internal motor damage rather than a simple clog. Motors can be replaced, but this requires professional expertise.
Electrical Problems: Frayed cords, sparking connections, or vacuums that won’t turn on despite being plugged in indicate electrical issues that are dangerous to tackle yourself. These problems require professional repair for safety reasons.
Irreparable Blockages: Sometimes a clog is located in a part of the vacuum that can’t be accessed without disassembling the motor housing. If you’ve tried all the steps and still can’t locate or remove the blockage, a professional can safely disassemble your vacuum.
Older Vacuums: If your vacuum is over 8-10 years old and experiencing recurring problems, it might be more cost-effective to replace it. The average vacuum lasts about 8 years with proper maintenance, and repair costs can approach the price of a new machine for older models.
FAQs
Why does my vacuum keep getting clogged?
Recurring clogs usually indicate a maintenance issue or user habit problem. Common causes include not emptying the dust bin frequently enough, vacuuming inappropriate items like large debris or wet materials, or having a filter that needs cleaning or replacement. Pet owners often face recurring clogs from hair buildup around the brush roll. Try establishing a regular maintenance routine and pre-vacuuming your floors to remove large objects before vacuuming.
How often should I clean my vacuum filter?
Washable filters should be cleaned every 1-2 months depending on usage frequency. If you have pets or vacuum daily, clean filters monthly. Non-washable filters should be replaced every 6-12 months. A good rule of thumb is to check your filters monthly and clean or replace them when you can visibly see dust buildup or notice reduced suction power.
Can running a clogged vacuum damage the motor?
Yes, running a clogged vacuum can cause permanent motor damage. When airflow is restricted, your vacuum’s motor has to work harder and generates more heat. This can cause motor windings to overheat and eventually fail. Many modern vacuums have thermal protection that shuts off the motor before damage occurs, but older models may not. If you notice your vacuum getting unusually hot or smelling like it’s burning, turn it off immediately and check for clogs.
What is the average lifespan of a vacuum?
The average vacuum cleaner lasts between 6-8 years with proper maintenance. Higher-end models from reputable brands can last 10 years or more, while budget models typically need replacement after 3-5 years. Regular maintenance like cleaning filters, emptying the dust bin frequently, and checking the brush roll can significantly extend your vacuum’s lifespan. If your vacuum needs frequent repairs or replacement parts cost more than half the price of a new unit, it’s usually time to replace it.
How do I unclog a vacuum hose without tools?
You can unclog a vacuum hose using household items. Remove the hose and hold it up to a light source to locate the clog. Try pushing it out with a broom handle from the opposite end. For stubborn clogs, use a wire coat hanger that’s been straightened with a small hook bent at one end. Another trick is to connect the hose to your vacuum’s exhaust port (if available) to blow the clog backwards out the way it entered. Always work slowly and gently to avoid damaging the hose.
Conclusion
Dealing with a vacuum getting clogged is frustrating, but it’s a problem you can solve yourself in most cases. By following the troubleshooting steps I’ve outlined, you should be able to identify and remove the blockage without needing professional help. The key is to work systematically through each component—dust bin, hose, brush roll, filters, and air pathways—until you find the culprit.
Remember that prevention is always easier than repair. Establishing a regular maintenance routine will keep your vacuum running efficiently for years to come. Empty your dust bin after every use, clean your filters monthly, and check your brush roll regularly. These simple habits can prevent most vacuum clogs before they start.
If you’ve tried everything and your vacuum still isn’t working properly, it might be time to consider a replacement. Modern vacuums have improved airflow designs that are less prone to clogging, and some models feature self-cleaning brush rolls and washable filters that make maintenance much easier. You can find excellent options among the best vacuum cleaners under $400 that offer reliable performance without the constant clogging issues.
Have you successfully unclogged your vacuum using these tips? Or do you have a vacuum clog story that might help others? I’d love to hear about your experience in the comments below.




Leave a Comment