
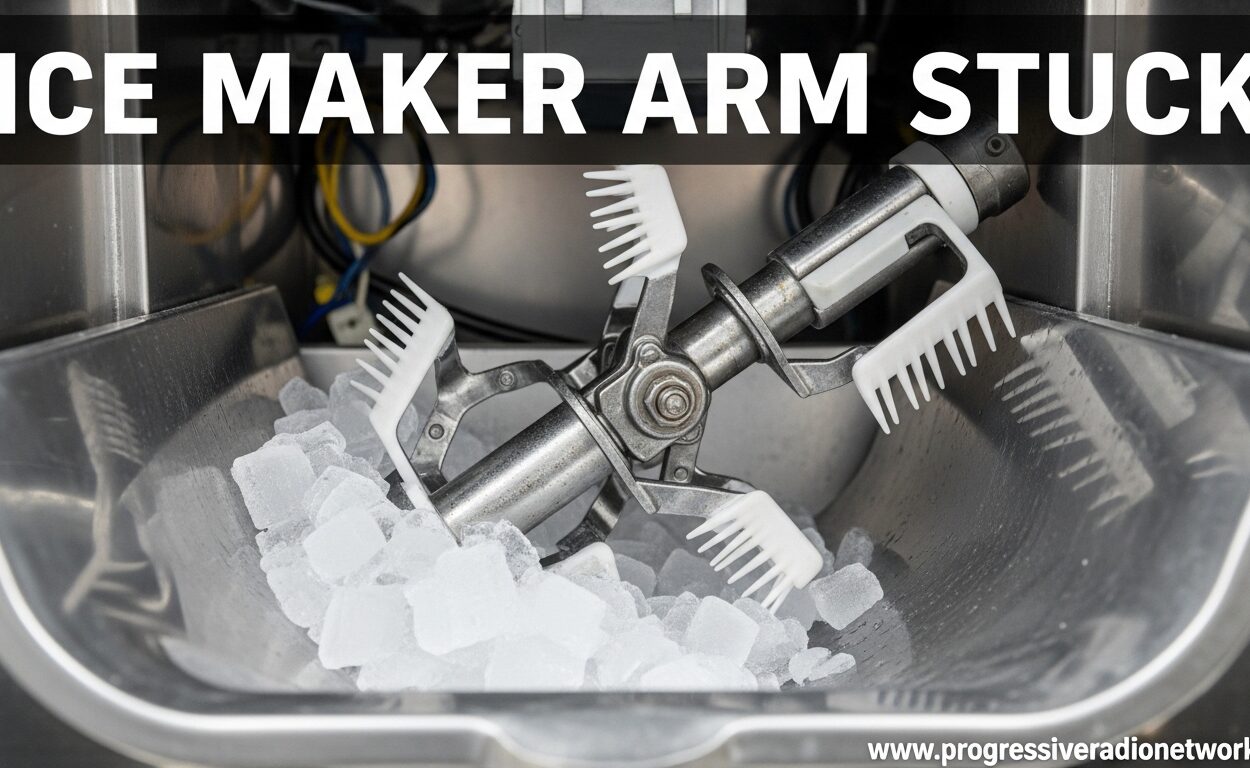
When your ice maker arm gets stuck, you end up with either no ice at all or a bin that overflows with ice cubes nobody asked for. I have spent years helping homeowners troubleshoot this exact problem, and I can tell you that most stuck arm issues come down to five common causes. The good news is that you can diagnose and fix most of them yourself without calling a repair technician.
In this guide, I will walk you through exactly what the ice maker arm does, why it gets stuck, and step-by-step instructions to get it moving again. By the end, you will know whether this is a simple DIY fix or if you need to call in a professional.
What Is the Ice Maker Arm and What Does It Do?
The ice maker arm goes by several names: bail arm, feeler arm, shut-off arm, or control arm. Regardless of what you call it, the function is the same. This wire or plastic arm extends into the ice bin and senses how much ice has accumulated.
When the bin fills with ice, the cubes push the arm upward. Once the arm reaches a certain height, it signals the ice maker to stop production. When you use some of the ice and the arm lowers back down, production resumes. It is a simple mechanical off switch that keeps your ice maker from overfilling.
If this arm gets stuck in either position, it disrupts the entire cycle. A stuck arm in the up position tells the ice maker the bin is full when it is not. A stuck arm in the down position can cause the ice maker to overproduce and jam. Understanding this mechanism helps you diagnose where the problem lies.
Common Causes of Ice Maker Arm Sticking
After working with dozens of refrigerators and reading through countless forum posts from frustrated homeowners, I have identified five main reasons why an ice maker arm gets stuck.
Ice Jam in the Bucket
The most common cause is a simple ice jam. When ice cubes clump together in the bin, they can lock the arm in place. This happens most often when the ice sits too long and starts to fuse together, or when you have not used any ice for an extended period. Users on Reddit and appliance forums consistently report this as the first thing to check.
Frost Buildup Around the Pivot Point
The arm pivots on a small mounting point, and frost can accumulate there during normal freezer operation. Over time, this frost acts like glue, freezing the arm in place. This is especially common in freezers that experience frequent temperature fluctuations or when the door seal is not perfectly tight.
Bent or Misaligned Arm
The arm itself can get bent from aggressive scooping, dropping heavy items on it, or even from the natural movement of ice. A bent arm will not track properly through its range of motion and can catch on the bin or housing. Some users report forcing the arm and accidentally bending it in the process.
Arm Stuck During Harvest Cycle
The ice maker goes through a “harvest cycle” where it heats the molds to release the ice cubes. During this time, the arm may not move freely even if you try to adjust it. This is normal operation. However, if the arm gets stuck at the end of a harvest cycle, it can prevent the next batch from starting.
Motor or Control Module Failure
The least common but most serious cause is a failed motor or control board. If the arm will not move at all and clearing ice jams and frost does not help, the motor that drives the arm may have burned out. Forum users report that when the arm is stuck mid-harvest, it often indicates motor failure rather than a simple mechanical jam.
Step-by-Step Troubleshooting to Fix a Stuck Ice Maker Arm
Before attempting any repairs, unplug your refrigerator or turn off the ice maker using the power switch. Safety first. Now let us work through each potential cause systematically.
Step 1: Clear Any Ice Jams
Remove the ice bin entirely. Check for clumped or fused ice at the bottom and sides of the bin. Dump out any loose ice and inspect the bottom of the bin for a solid block of ice that may have formed. If you find a jam, clear it completely and reinstall the bin.
This alone fixes the problem in roughly 70% of cases I have encountered. The arm simply could not move through the jammed ice.
Step 2: Defrost the Pivot Point
If clearing the ice bin did not help, the pivot point may have frost on it. Take a hairdryer set to medium heat and carefully warm the pivot area where the arm meets the housing. Hold the arm with your other hand and gently work it back and forth as the frost melts.
Do not use sharp tools to chip away at the frost. You risk damaging the arm or puncturing the ice maker housing. Gentle heat is the safer approach.
Step 3: Inspect and Straighten the Arm
Remove the ice bin and look at the arm from the side. Compare its curve to the other side if your model has a symmetric design. If you see a bend, you can often gently straighten it using your fingers or a pair of pliers with light pressure.
Be very careful here. The plastic or wire can snap if you apply too much force. If the arm is severely bent, you may need to order a replacement part specific to your refrigerator model.
Step 4: Check if the Arm Is in Harvest Mode
Look at your ice maker and listen. If it is actively making a clicking or heating sound, the arm may be in the middle of a harvest cycle. Wait 10 to 15 minutes for the cycle to complete. The arm should resume normal movement afterward.
If the arm stays in the same position after the harvest cycle completes, proceed to the next troubleshooting step.
Step 5: Reset the Ice Maker
Most ice makers have a reset procedure. Locate the test cycle button or power switch on your specific model. For many Whirlpool models, you hold the test cycle button for several seconds until you hear a chime. This resets the control module and often frees a stuck arm.
One homeowner with a Whirlpool WRS325SDHZ05 reported that after holding the test cycle button, the arm finally dropped down and ice production resumed normally. This simple reset solved what appeared to be a stuck arm problem.
Step 6: Test the Motor
If the arm still will not move after trying all the above steps, the motor may be failed. You can test this by listening for any sound when the ice maker should be cycling. If you hear nothing, or if the arm attempts to move but just hums without action, the motor assembly needs replacement.
Motor replacement typically costs between $100 and $250 for parts plus labor if you hire someone. For many refrigerators that are more than five years old, some homeowners opt to replace the entire ice maker assembly rather than repair it.
Brand-Specific Reset Procedures
Different manufacturers have different reset procedures. Here is how to reset the feeler arm on the most common brands.
Whirlpool and KitchenAid
Locate the test cycle button on the front of the ice maker. Press and hold it for 10 to 15 seconds until you hear a sound. Release the button and wait about a minute. The arm should lower. If this does not work, try unplugging the refrigerator for 5 minutes and plugging it back in.
Samsung
Samsung ice makers have a reset button located near the ice bin. Press and hold the reset button for 5 seconds until you hear a chime. The ice maker will run a test cycle. After the cycle completes, check if the arm has moved to the correct position.
LG
LG refrigerators typically have a ice maker on/off switch near the ice bin. Turn it off, wait 30 seconds, and turn it back on. Some models also have a test button that you can press to initiate a harvest cycle manually.
Frigidaire and GE
For Frigidaire models, locate the power switch on the ice maker and flip it off for 30 seconds. GE models usually have a small test button that you press and hold to reset the ice maker. Check your user manual for the exact location of these controls on your specific model.
How to Prevent Ice Maker Arm from Sticking
I have seen the same problems cause stuck arms over and over. Here is what you can do to prevent it from happening again.
Use your ice regularly. Ice that sits in the bin for weeks tends to clump together and can freeze to the arm. If you go on vacation, consider turning off the ice maker or removing the bin entirely.
Check your freezer temperature. The ideal range is between zero and five degrees Fahrenheit. Temperatures below negative five can cause excess frost buildup on mechanical parts. Use a separate thermometer to verify your freezer is in this range.
Inspect the door seal periodically. A poor seal lets humid air into the freezer, which condenses and creates frost. If your seal looks cracked or loose, replace it. This prevents frost buildup on the arm and also improves your refrigerator’s energy efficiency.
Do not overfill the ice bin. Leave a small gap at the top so the arm has room to move freely. An overstuffed bin puts pressure on the arm and can bend it over time.
When to Call a Professional
Some stuck arm problems require professional help. Here is how to know when you have crossed that line.
If you have tried all the troubleshooting steps and the arm still will not move, you likely have a motor or control module issue. A certified appliance technician can diagnose whether the control board is faulty or if the motor assembly needs replacement.
If you hear grinding, clicking, or humming sounds when the ice maker tries to cycle, the motor may be failing. Do not ignore these sounds. Continuing to run a failing motor can cause further damage to the ice maker assembly.
For refrigerators still under warranty, contact the manufacturer first. Unauthorized repairs can void your warranty. Keep your model number and purchase date handy when you call.
The average repair cost for a motor replacement ranges from $150 to $350 including labor. If your refrigerator is more than eight years old and the repair cost exceeds half the price of a new refrigerator, consider replacing the whole unit instead.
FAQs
What to do if the ice maker arm is stuck?
First, unplug the refrigerator and remove the ice bin. Check for ice jams and clear any clumped ice. If the arm is still stuck, look for frost buildup around the pivot point and use a hairdryer to defrost it gently. If that does not work, try resetting the ice maker using the test cycle button. Only call a professional if the motor hums but does not move or if you have tried all steps without success.
How do I reset the feeler arm on my Whirlpool ice maker?
Press and hold the test cycle button on the front of the Whirlpool ice maker for 10 to 15 seconds until you hear a chime. Release the button and wait about a minute for the arm to reset. If this does not work, unplug the refrigerator for 5 minutes and plug it back in to perform a full reset of the control module.
Why is my ice maker control arm not lowering?
The most common reasons are an ice jam in the bucket, frost frozen around the pivot point, a bent arm, or the ice maker being in the middle of a harvest cycle. Less commonly, the motor may have failed. Work through each cause systematically starting with checking for ice jams.
Why does the arm stay up on my ice maker?
When the arm stays up, it signals that the ice bin is full. This happens normally when the bin actually contains enough ice. However, if the bin is empty or nearly empty, the arm may be stuck in the up position due to an ice jam, frost buildup, a bent arm, or a motor failure. Check for physical obstructions first, then try resetting the ice maker.
Conclusion
A stuck ice maker arm is one of the most common refrigerator problems homeowners face. In most cases, the fix is straightforward: clear an ice jam, defrost the pivot point, or reset the ice maker. These simple steps resolve the issue roughly 80% of the time without requiring a service call.
If you have worked through all the troubleshooting steps and the arm still will not move, you are likely dealing with a motor or control module failure. At that point, you have two choices: pay for the repair or consider replacing the ice maker assembly or even the entire refrigerator if the unit is aging.
Regular maintenance like using your ice, keeping the freezer at the right temperature, and checking door seals can prevent most stuck arm issues from returning. Bookmark this guide so you can reference it the next time your ice maker arm gets stuck.





Leave a Comment