
I love how modern kitchens continue to evolve, and the microwave grill function is one of those game-changing features that transforms a simple appliance into a versatile cooking tool. Learning how to use microwave grill functionality opens up quick meal possibilities that would otherwise require a full oven or outdoor grill.
When I first discovered my microwave had a grill setting, I was skeptical. After testing it extensively for several weeks, I found it delivers impressive results for everything from crispy bacon to perfectly seared chicken breasts. The microwave grill works by combining traditional microwave heating with a dedicated heating element that browns and crisps food from above.
This guide will walk you through everything you need to know about using microwave grill function effectively. You’ll learn which foods work best, essential accessories you need, and safety tips to get perfect results every time.
What is a Microwave Grill and How Does It Work
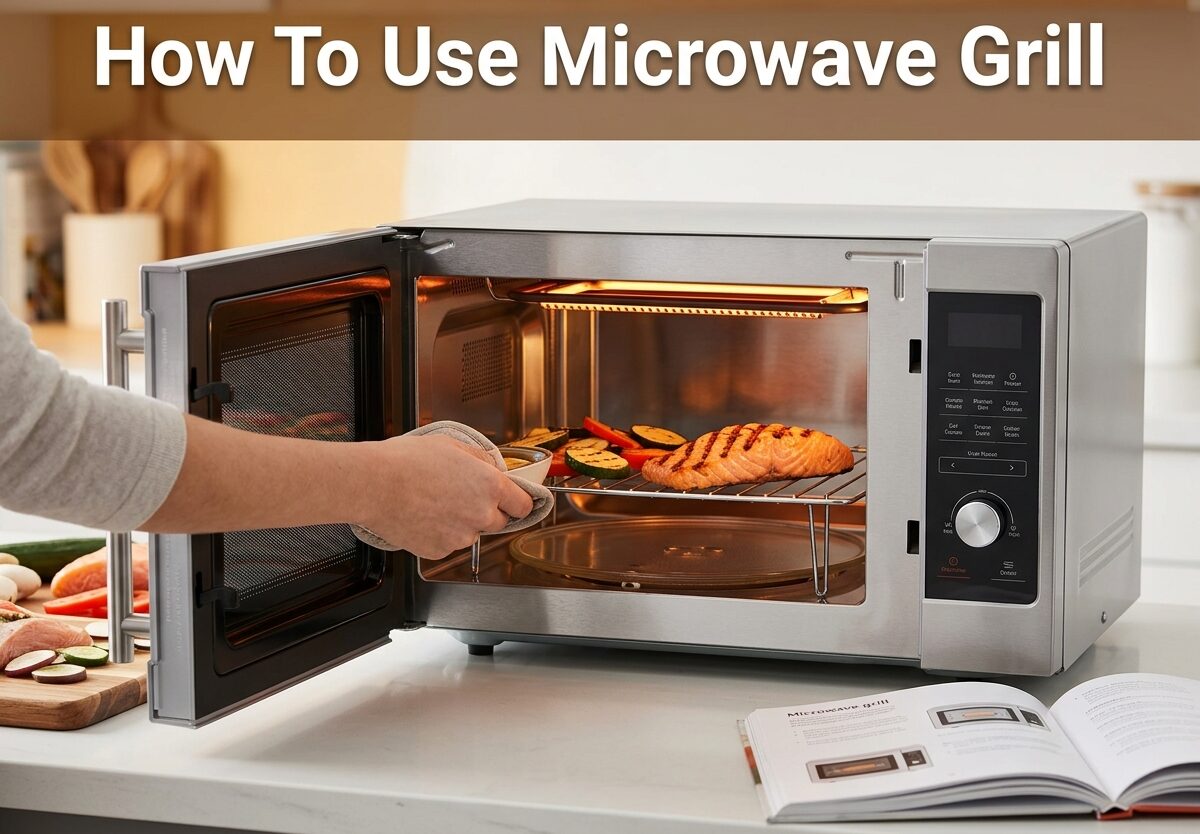
A microwave grill is a microwave oven equipped with an additional heating element, typically quartz or metal, positioned at the top of the cooking chamber. This heating element allows the appliance to sear, brown, and grill food directly, similar to how a broiler works in a conventional oven.
The magic happens through combination cooking. Standard microwave mode uses electromagnetic waves to agitate water molecules inside food, cooking from the inside out. The grill mode activates the top heating element to produce direct radiant heat that browns and crisps the surface. Some advanced models even offer combination modes that use both simultaneously for faster, more even cooking.
Most microwave grills reach temperatures between 400-500°F when in grill mode, which is hot enough to create that desirable grilled texture and appearance. The quartz heating element heats up quickly and provides consistent radiant heat across the cooking surface.
What makes microwave grilling unique is the speed advantage. You can achieve grilled results in a fraction of the time it takes with a traditional oven, making it ideal for busy weeknights or quick meals.
How To Use Microwave Grill: Step-by-Step Guide
Follow these steps to get the best results from your microwave grill function:
Step 1: Prepare Your Food
Season your food as desired before placing it in the microwave. Thin cuts of meat, vegetables, and other items work best. Pat foods dry with paper towels for better browning – excess moisture can prevent that grilled texture you want.
Step 2: Set Up Your Accessories
Place the grill rack on the glass turntable if your model includes one. The rack elevates food closer to the heating element for better searing. If your microwave has a crisping tray or air fry basket, use it according to manufacturer instructions. Always place a microwave-safe dish underneath to catch drippings.
Step 3: Select Grill Mode
Close the door and press the Grill or Microwave+Grill button on your control panel. Some models may require you to select the cooking time first, then choose the mode. If available, set the power level – medium-high typically works well for most grilling tasks.
Step 4: Start Cooking
Begin with shorter times and check progress frequently. A good starting point is 3-5 minutes for thin cuts of meat, adjusting based on thickness and desired doneness. The turntable will rotate food for even exposure to the heating element.
Step 5: Flip Halfway Through
Carefully open the door using oven mitts – the rack and tray will be extremely hot. Flip your food halfway through the cooking process to ensure even browning on both sides. This is crucial for achieving that authentic grilled appearance.
Step 6: Check for Doneness
Use a meat thermometer to ensure meat reaches safe internal temperatures. Chicken should reach 165°F, while beef and pork should reach 145°F. Visual cues like browning and crisping are also good indicators that your food is ready.
Step 7: Let It Rest
Remove food carefully and let it rest for 2-3 minutes before serving. This allows juices to redistribute and ensures better texture and flavor.
Essential Accessories for Microwave Grilling
The right accessories make a significant difference in microwave grilling results. Most microwaves with grill function come with specialized equipment designed to work safely and effectively with the heating element.
The grill rack is the most essential accessory. This metal rack elevates food closer to the heating element for better searing and browning. It’s typically designed to work only in grill or combination modes – never use it during standard microwave-only operation as it can cause arcing and damage.
A crisping tray is another valuable tool. These specially designed trays help absorb excess moisture while promoting even browning on the bottom of foods. They’re perfect for achieving that crispy texture on items like pizza, chicken wings, or frozen foods.
Some newer models include an air fry basket, which works similarly to a crisping tray but with a mesh design that allows hot air to circulate more freely. This can help achieve crispy results with less oil needed.
Always use microwave-safe, ovenproof dishes underneath your rack or tray to catch any drippings. Glass or ceramic dishes work well. Avoid plastic containers as they may melt under grill mode temperatures.
Best Foods for Microwave Grilling
Not all foods are created equal when it comes to microwave grilling. Thin, quick-cooking items work best since the grill function produces intense but relatively short-duration heat.
Chicken
Thin chicken breasts, tenders, and thighs grill beautifully in the microwave. They cook quickly and develop a nice browned exterior. Aim for cuts under 1 inch thick for best results.
Pork
Pork chops and thin pork cutlets work well. The grill function can give you that seared exterior while cooking the interior quickly. Marinating beforehand adds flavor and moisture.
Beef
Thin steaks, burgers, and beef skewers are excellent candidates. The high heat creates a nice crust while the microwave energy cooks the meat efficiently. Avoid thick cuts as they may cook unevenly.
Bacon and Sausage
Bacon cooks beautifully in microwave grill mode – it crisps up nicely with less mess than pan-frying. Sausage links and patties also work well, developing that grilled appearance and texture.
Fish and Seafood
Fillets of salmon, tilapia, and white fish grill well. The quick cooking time prevents the fish from drying out. Shrimp and scallops also work excellently, developing nice char marks in just a few minutes.
Vegetables
Slice vegetables like zucchini, bell peppers, onions, eggplant, and asparagus before grilling. They develop a nice char and cook quickly. Brush with a little oil for better browning.
Avoid These Foods
Thick cuts of meat, whole poultry, and dense vegetables may cook unevenly. Large roasts and whole birds are better suited for traditional ovens or outdoor grills.
Microwave Grill Cooking Times Reference
Here’s a quick reference guide for approximate cooking times. Always adjust based on your specific microwave model and food thickness:
Chicken
– Chicken breasts (boneless, 1/2 inch): 4-6 minutes
– Chicken tenders: 3-5 minutes
– Chicken thighs (boneless, 3/4 inch): 5-7 minutes
Beef and Pork
– Thin steaks (1/2 inch): 3-5 minutes per side
– Burgers (1/2 inch): 4-6 minutes total
– Pork chops (3/4 inch): 5-7 minutes
– Sausage links: 6-8 minutes
Bacon and Sausage
– Bacon strips: 3-5 minutes
– Breakfast sausage patties: 4-6 minutes
– Italian sausage links: 6-8 minutes
Fish and Seafood
– Fish fillets (1/2 inch): 3-5 minutes
– Salmon fillets: 4-6 minutes
– Shrimp: 3-4 minutes
– Scallops: 3-5 minutes
Vegetables
– Sliced zucchini or squash: 3-4 minutes
– Bell pepper slices: 3-4 minutes
– Asparagus spears: 3-5 minutes
– Onion slices: 3-4 minutes
These times are starting points. Always check for doneness with a thermometer for meats and visual cues for vegetables and seafood.
Pro Tips for Perfect Results
After extensive testing with various foods and techniques, I’ve discovered several tips that consistently deliver better microwave grilling results:
Preheat When Possible
Some models offer a preheat function for grill mode. Using it gives you a head start on browning and helps achieve that seared exterior more effectively.
Don’t Overcrowd
Leave space between food items on the rack. Overcrowding prevents proper airflow and heat distribution, leading to uneven cooking.
Use Seasoning Wisely
Dry rubs and seasonings without sugar work best. Sugary marinades can burn quickly under the intense grill heat. Apply sauces and glazes after grilling instead.
Let It Rest
This simple step makes a huge difference. Letting meat rest for 2-3 minutes allows juices to redistribute, resulting in juicier, more flavorful results.
Clean Immediately
Wipe down the interior and accessories while they’re still warm. Food splatters are easier to remove before they harden, and regular cleaning prevents buildup that can affect performance.
Experiment with Combination Modes
If your microwave offers combo settings (microwave + grill), try them for thicker items. The microwave energy cooks from within while the grill element browns the exterior.
Use a Thermometer
This is the most reliable way to ensure food is cooked properly. Visual cues alone can be misleading, especially with different microwave models.
Safety Tips and Common Mistakes to Avoid
Safety should always come first when using microwave grill function. The heating element becomes extremely hot, and improper use can damage your appliance or create hazards.
Why Metal Racks Can’t Be Used in Microwave-Only Mode
This is the most important safety rule to understand. The metal grill rack is specifically designed to work with the grill heating element and can only be used during grill or combination cooking modes. Using it during standard microwave-only operation causes arcing – sparks that can damage the magnetron and create a fire hazard. Always remove the metal rack when using pure microwave functions.
Use Oven Mitts
The grill rack, crisping tray, and any dishes underneath become extremely hot during operation. Never touch them with bare hands immediately after cooking. Always use proper heat protection.
Avoid Overheating
Never run the grill function for extended periods without food. The intense heat can damage the appliance. Only operate the grill when food is present and within recommended time limits.
Proper Ventilation
Microwave grilling produces steam and smoke similar to traditional grilling. Ensure your microwave’s ventilation system is working properly and consider running your kitchen exhaust fan during operation.
Don’t Use Damaged Accessories
Inspect your grill rack and other accessories regularly. Any damage, warping, or wear should prompt replacement to ensure safe operation.
Watch for Smoke
While some smoke is normal during grilling, excessive smoke indicates a problem. Stop cooking immediately if you notice unusual smoke or burning odors.
Allow Cooling Before Cleaning
While cleaning while warm is recommended, never attempt to clean while still hot. Let components cool sufficiently to avoid burns.
Microwave Grill vs Traditional Grilling
Understanding how microwave grilling compares to other methods helps you choose the right approach for each meal:
Speed
Microwave grilling wins hands down. Most items cook in 3-8 minutes compared to 10-20 minutes on a stovetop or 15-30 minutes in an oven. This makes it ideal for quick weeknight meals.
Flavor Profile
Traditional grilling provides that authentic smoky flavor from charcoal or gas. Microwave grilling focuses on texture – you get great browning and crisping but won’t get the same smoky notes. Marinades and seasonings become more important for flavor depth.
Convenience
No outdoor setup, no propane tanks, no weather concerns. Microwave grilling works regardless of rain, snow, or outdoor conditions. It’s also perfect for apartment dwellers without outdoor space.
Cleanup
Much easier than traditional grilling. No scraping grill grates, no dealing with ash or grease traps. Most components can be cleaned in the sink or dishwasher.
Versatility
Microwave grilling is more limited in terms of what you can cook effectively. Thick cuts, large roasts, and items requiring slow cooking are better suited for traditional methods.
FAQs
How to cook with a microwave grill?
Prepare your food, place it on the grill rack, select grill mode, cook for 3-8 minutes depending on food type, flip halfway through, and check for doneness with a thermometer.
How does a grill in the microwave work?
A microwave grill uses a quartz or metal heating element at the top of the cooking chamber to produce radiant heat that browns and crisps food surfaces, while microwave energy cooks from within.
What can you grill in a microwave grill?
Best options include thin chicken breasts, pork chops, beef steaks, bacon, sausage, fish fillets, and sliced vegetables like zucchini, peppers, and asparagus.
Is a microwave grill combo worth it?
Yes, especially for small kitchens or quick meals. It delivers grilled results in a fraction of the time of traditional methods and works regardless of weather or outdoor space limitations.
Why can’t you use a microwave grill rack during microwave mode?
The metal rack causes arcing and sparks when exposed to microwave energy alone, which can damage the magnetron and create fire hazards. Only use it with grill or combination modes.
Can you bake in a microwave with grill?
Baking is limited in microwave grills. While some convection microwaves with grill can bake simple items, standard microwave grills lack the consistent all-around heat needed for proper baking.
How long does it take to grill in a microwave?
Most items cook in 3-8 minutes total. Thin cuts of meat take 3-6 minutes, while thicker items like sausage or chicken thighs may take 5-8 minutes.
Conclusion
Learning how to use microwave grill functionality opens up convenient cooking possibilities that save time without sacrificing quality. With the right technique and understanding of your appliance, you can achieve impressive grilled results right in your kitchen.
The key is to start with appropriate foods, use the correct accessories, and follow safety guidelines carefully. Thin cuts of meat, vegetables, seafood, and bacon all work beautifully with this method.
After using my microwave grill for several months, I’ve found it’s become an essential part of my cooking routine. It fills that gap between quick microwaving and full oven cooking, delivering results that are closer to traditional grilling than I initially expected.
Whether you have limited kitchen space, want quick meal options, or simply want to get more from your microwave, the grill function is worth exploring. Start with simple recipes like bacon or chicken breasts, and gradually experiment with more complex dishes as you become comfortable with the technique.
Remember to always prioritize safety, use proper accessories, and adjust cooking times based on your specific model. With practice, you’ll be amazed at what you can create with your microwave grill.





Leave a Comment