
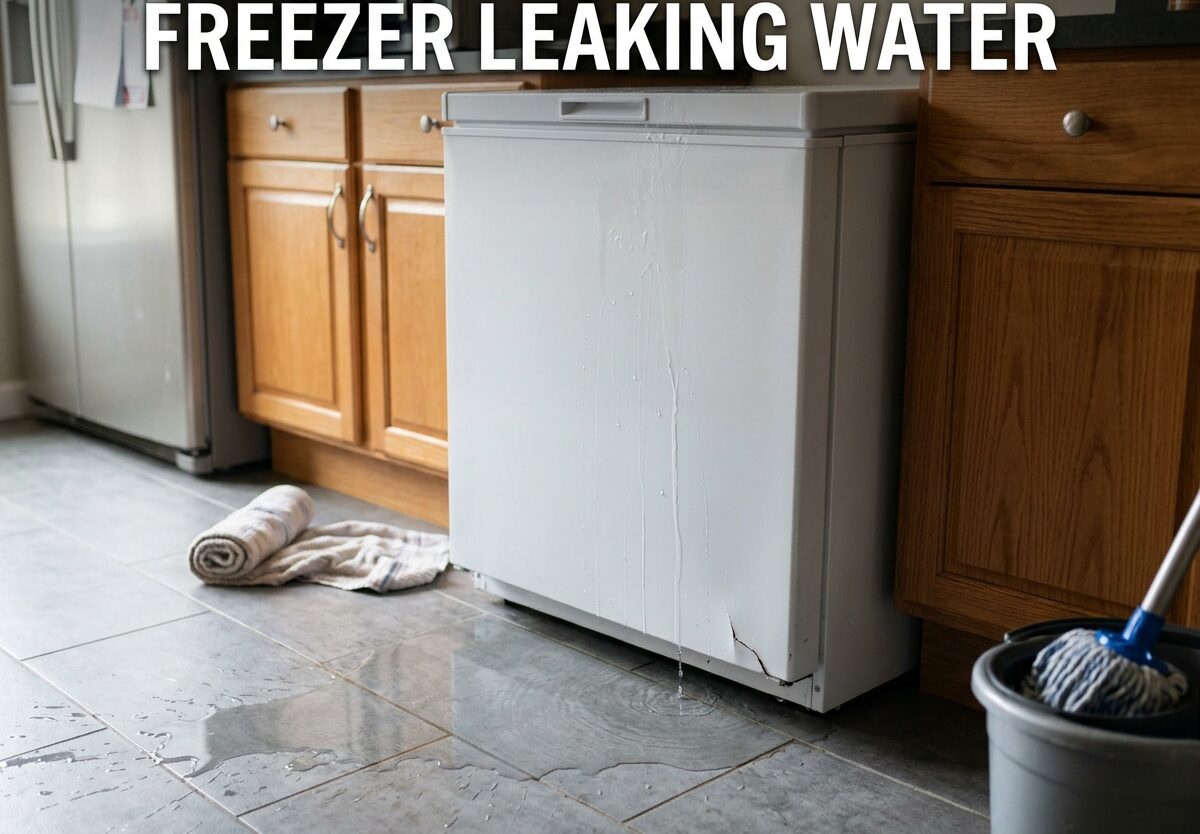
Walking into your kitchen to find a puddle of water under your freezer is frustrating. I’ve been there, and I know the first thought that runs through your mind: Is my food ruined? How much will this cost to fix? The good news is that most freezer leaking problems have simple DIY solutions you can handle in under an hour.
A leaking freezer is typically caused by one of six issues: a clogged defrost drain, cracked drain pan, damaged door seal, temperature problems, ice maker issues, or improper leveling. I’ll walk you through each cause, show you exactly how to diagnose the problem, and provide step-by-step instructions to fix it yourself.
Before we dive in, here’s an important safety note: Water and electricity don’t mix. If you notice water near electrical components or a burning smell, unplug your freezer immediately and call a professional.
Quick Diagnostic Checklist
Use this checklist to identify your specific issue fast. Your water leak location tells you a lot about the cause.
- Water inside the freezer bottom: Clogged defrost drain (most common)
- Water under the freezer: Cracked drain pan or improper leveling
- Water on the floor in front: Door seal damage or high humidity
- Water leaking from ice maker area: Water line or valve issues
- Ice buildup on freezer floor: Defrost drain frozen shut
- Water only when freezer runs: Condensation from door seal issues
How the Defrost Cycle Works
Understanding how your freezer normally handles water helps you spot when something goes wrong. Modern freezers run automatic defrost cycles every 8-24 hours. During this cycle, a heating element warms the evaporator coils just enough to melt frost buildup.
This melted water flows through a small drain hole at the back of the freezer interior, down a drain tube, and into a drain pan underneath the unit. A fan blows air over the pan, causing the water to evaporate. The entire system is sealed and designed to handle this moisture without any leaks.
When any part of this system fails, water ends up where it shouldn’t. A clogged drain, cracked pan, or breach in the door seal disrupts the flow and causes your freezer leaking problem.
1. Clogged or Frozen Defrost Drain
A clogged defrost drain is the number one cause of freezer leaking water. I see this issue in about 70% of cases. The drain hole at the back of your freezer floor can become blocked with food particles, ice, or debris.
Symptoms: Water pooling at the bottom of the freezer interior, ice buildup on the freezer floor, water eventually overflowing onto the floor.
Tools needed: Turkey baster, hot water, small wire or pipe cleaner, towels.
How to fix it:
- Remove all food from the freezer and store it in a cooler with ice
- Unplug the freezer or turn off the power at the circuit breaker
- Locate the drain hole at the back center of the freezer floor (it may be hidden under a plastic panel)
- Clear any visible debris with a small wire or pipe cleaner
- Fill a turkey baster with hot (not boiling) water and flush the drain repeatedly
- Continue flushing until water flows freely through the drain
- Mix a solution of 1 tsp baking soda in 2 cups hot water and flush again to prevent future clogs
- Plug the freezer back in and wait 24 hours before refilling with food
Prevention: Clean your defrost drain every 6 months. Avoid placing food directly over the drain hole. Keep the freezer temperature at 0°F (-18°C) or below to prevent excessive ice buildup.
2. Cracked or Overflowing Drain Pan
The drain pan sits underneath your freezer and catches water from the defrost cycle. Over time, these plastic pans can crack from age, or they can overflow if the defrost cycle produces too much water.
Symptoms: Water directly under the freezer, visible water dripping from the bottom of the unit, water damage to flooring.
How to locate it: Remove the kick plate at the bottom front of your freezer (some models). For others, you’ll need to pull the unit away from the wall and access from the back.
How to fix it:
- Unplug the freezer and pull it away from the wall
- Locate the drain pan underneath the unit (usually a shallow plastic tray)
- Inspect the pan for cracks or damage
- If cracked, note the make and model number and order a replacement (typically $15-40)
- If overflowing, check if the pan is full of debris and clean it out
- Ensure the pan is sitting level and properly positioned
- Replace the pan, plug in the freezer, and check for leaks after 24 hours
Cost estimate: DIY repair costs $15-40 for a new drain pan. Professional replacement runs $100-200 including parts and labor.
3. Damaged Door Seal or Gasket
The rubber door seal (gasket) keeps warm air out and cold air in. When it fails, warm humid air enters the freezer, creating excess condensation that can leak out. This is a common cause of freezer leaking water that many people overlook.
Symptoms: Condensation inside the freezer, visible frost buildup on door edges, higher energy bills, water on the floor in front of the unit.
How to test your seal:
- Close the freezer door on a dollar bill
- Pull the bill out – you should feel resistance
- Test around the entire door perimeter
- If the bill slides out easily anywhere, your seal is compromised
How to fix it:
- Clean the gasket with warm soapy water and a soft cloth
- Inspect for cracks, tears, or compressed areas
- If dirty only: Apply a thin layer of petroleum jelly to the seal and close the door for 24 hours to restore pliability
- If damaged: Note your freezer model number and order a replacement gasket ($30-80)
- Soak the new gasket in warm water for 10 minutes to make it flexible
- Remove the old gasket (usually held by screws or clips)
- Install the new gasket starting at the top and working your way around
Tip: Keep your door seal clean and avoid overloading the freezer door, which can warp the seal over time.
4. Temperature Setting Too High
Sometimes the simplest explanation is the correct one. If your freezer temperature is set too high, the defrost cycle won’t work properly, leading to ice buildup and eventual leaking.
Symptoms: Soft or melted food, excessive frost, water pooling at the bottom, freezer runs constantly.
How to check:
- Place an appliance thermometer in the freezer
- Let it sit for at least 8 hours or overnight
- Check the reading – it should be 0°F (-18°C) or below
- Compare to your freezer’s built-in temperature display (often inaccurate)
How to fix it:
- Locate the temperature control (inside the freezer or on the door panel)
- Lower the setting by one degree at a time
- Wait 24 hours between adjustments for the temperature to stabilize
- Recheck with your thermometer until you reach 0°F or below
- If the temperature won’t adjust properly, your thermostat may need replacement ($50-150 DIY)
5. Ice Maker or Water Line Problems
If your freezer has an ice maker, the water supply line or components could be the source of your leak. These issues are specific to freezers with automatic ice makers and water dispensers.
Symptoms: Water leaking specifically from the ice maker area, water only when ice maker cycles, visible water on the freezer door.
Common causes:
- Loose water line connection
- Cracked water line
- Faulty water inlet valve
- Ice maker overfilling
How to diagnose and fix:
- Pull the freezer away from the wall
- Locate the water supply line (usually a copper or plastic tube)
- Check all connections for tightness
- Inspect the line for kinks, cracks, or damage
- If the connection is loose, tighten it with a wrench
- If the line is damaged, shut off the water supply and replace the line ($20-50)
- Check the water inlet valve where the line enters the freezer – if leaking, replacement is needed ($40-80)
- For ice maker overfilling issues, the fill level adjustment may need calibration
Emergency fix: If you can’t immediately fix the issue, shut off the water supply valve (usually behind the refrigerator) to prevent further leaking.
6. Freezer Not Level
An improperly leveled freezer can cause water to pool and drain incorrectly. This is especially common after moving to a new home or installing a new appliance.
Symptoms: Water pooling on one side, door doesn’t close smoothly, unusual noises when running.
How to check:
- Place a level on top of the freezer (front to back and side to side)
- The freezer should be level side-to-side
- It should have a slight tilt backward (front slightly higher than back) to help the door close properly
How to fix it:
- Have someone help you carefully tip the freezer back
- Locate the leveling legs at the front corners (threaded feet)
- Turn the legs clockwise to raise that corner, counter-clockwise to lower
- Adjust until the freezer is level side-to-side
- Create a slight backward tilt (about 1/4 inch higher at the front)
- Lower the freezer and check with your level again
- Test the door – it should close smoothly without assistance
Safety Hazards and Warning Signs
A leaking freezer isn’t just a nuisance – it can create serious safety hazards in your home. Water near electrical components increases fire risk, and standing water can damage your flooring and promote mold growth.
Immediate safety concerns:
- Fire hazard: Water contacting electrical components can cause short circuits and fires. If you see water near the compressor, electrical connections, or notice a burning smell, unplug immediately.
- Slip hazard: Water on the floor creates a slip risk, especially on smooth kitchen floors. Clean up water immediately and place towels down until the issue is resolved.
- Mold growth: Persistent moisture under or around your freezer can lead to mold within 24-48 hours, creating respiratory health risks.
- Floor damage: Standing water can warp hardwood, bubble laminate, and damage grout lines in tile.
When to unplug immediately:
- You see water dripping onto electrical components
- You smell burning or notice smoke
- The freezer feels hot to the touch on the exterior
- You hear unusual buzzing, clicking, or sizzling sounds
Don’t attempt any DIY repairs if you experience these warning signs. Call a professional appliance repair technician immediately.
When to Call a Professional
Many freezer leaking problems are DIY-friendly, but some situations require professional expertise. Knowing when to call a pro can save you money and prevent bigger problems.
DIY-friendly repairs:
- Clogged defrost drain
- Drain pan replacement
- Door seal cleaning and replacement
- Temperature adjustments
- Leveling the freezer
- Tightening water line connections
Call a professional for:
- Compressor issues (repair cost: $300-600)
- Sealed system problems (repair cost: $200-500)
- Multiple issues occurring simultaneously
- Freezer over 10 years old with major problems
- Electrical issues or burning smells
- Refrigerant leaks
Cost comparison:
- DIY drain cleaning: $0-10 (hot water, turkey baster)
- DIY door seal replacement: $30-80 (part only)
- Professional service call: $75-150 (diagnostic fee)
- Professional drain repair: $150-250
- Complete freezer replacement: $500-2,000+ depending on size and features
If your freezer is over 12-15 years old and requires a repair over $400, replacement may be more cost-effective in the long run.
Preventive Maintenance Tips
Regular maintenance prevents most freezer leaking problems. I recommend adding these tasks to your home maintenance calendar.
Monthly:
- Wipe down door seals with warm soapy water
- Check for any water accumulation under the unit
- Ensure temperature is maintaining at 0°F or below
- Remove ice buildup on freezer walls
Every 6 months:
- Clean the defrost drain with hot water
- Vacuum dust from condenser coils (usually at the back or bottom)
- Check that the freezer remains level
- Inspect the drain pan for cracks or debris
- Test door seal with the dollar bill test
Annually:
- Defrost and clean the entire freezer thoroughly (if manual defrost)
- Inspect and replace water filters if applicable
- Check all water line connections for tightness
- Consider professional maintenance for units over 5 years old
Best practices:
- Don’t overstuff the freezer – air needs to circulate
- Avoid placing warm food directly into the freezer
- Keep the freezer at least 3 inches from the wall for proper ventilation
- Don’t prop the freezer door open for extended periods
- Address small leaks immediately before they become big problems
Frequently Asked Questions
Why is my freezer leaking water from underneath?
Water leaking from underneath is typically caused by a cracked drain pan, an unlevel freezer, or a disconnected water line. The drain pan underneath your freezer collects defrost water and can crack from age. If your freezer isn’t level, water may spill out instead of properly draining. Check the drain pan first by accessing it from the front kick plate or back of the unit, then verify the freezer is level using a spirit level.
Is a leaking fridge a fire hazard?
Yes, a leaking freezer can be a fire hazard if water reaches electrical components or the compressor. Water conducts electricity and can cause short circuits that lead to electrical fires. If you notice water dripping onto electrical parts, a burning smell, smoke, or the freezer feels unusually hot to the touch, unplug it immediately and call a professional. Never attempt repairs on a freezer with electrical water damage.
Can a leaking freezer be fixed?
Most freezer leaking problems can be fixed DIY style in under an hour. Clogged defrost drains, cracked drain pans, damaged door seals, and temperature issues are all repairable without professional help. The most common fix (clogged drain) costs nothing if you have a turkey baster and hot water. Even replacing a door seal or drain pan typically costs $15-80 for parts. However, if the leak is caused by compressor failure or sealed system issues, professional repair or replacement may be necessary.
What are the signs of a dying refrigerator?
Signs your freezer or refrigerator is failing include: Food spoiling faster than normal, excessive frost buildup, the unit running constantly without cycling off, unusual noises (clicking, buzzing, sizzling), higher than normal energy bills, water leaks that return after repair, and the exterior feeling hot to the touch. If your freezer is over 12-15 years old and experiencing multiple problems, replacement is often more cost-effective than repair.
Conclusion
Dealing with a freezer leaking water is stressful, but most issues have simple solutions you can handle yourself. The key is identifying the root cause quickly using the diagnostic checklist, then following the appropriate repair steps.
Remember that clogged defrost drains cause the majority of leaking issues, and flushing with hot water usually solves the problem immediately. For other causes like damaged seals, cracked drain pans, or temperature issues, the fixes are still straightforward and affordable.
Safety should always come first. If you notice water near electrical components, burning smells, or any of the warning signs I mentioned, unplug your freezer and call a professional appliance repair technician.
By following the preventive maintenance tips I’ve outlined, you can avoid most freezer leaking problems in the future. A few minutes of maintenance every few months can save you hours of frustration and hundreds of dollars in repairs.
Have you successfully fixed a leaking freezer before? What was the cause? Share your experience in the comments below to help others facing the same issue.

Leave a Comment