
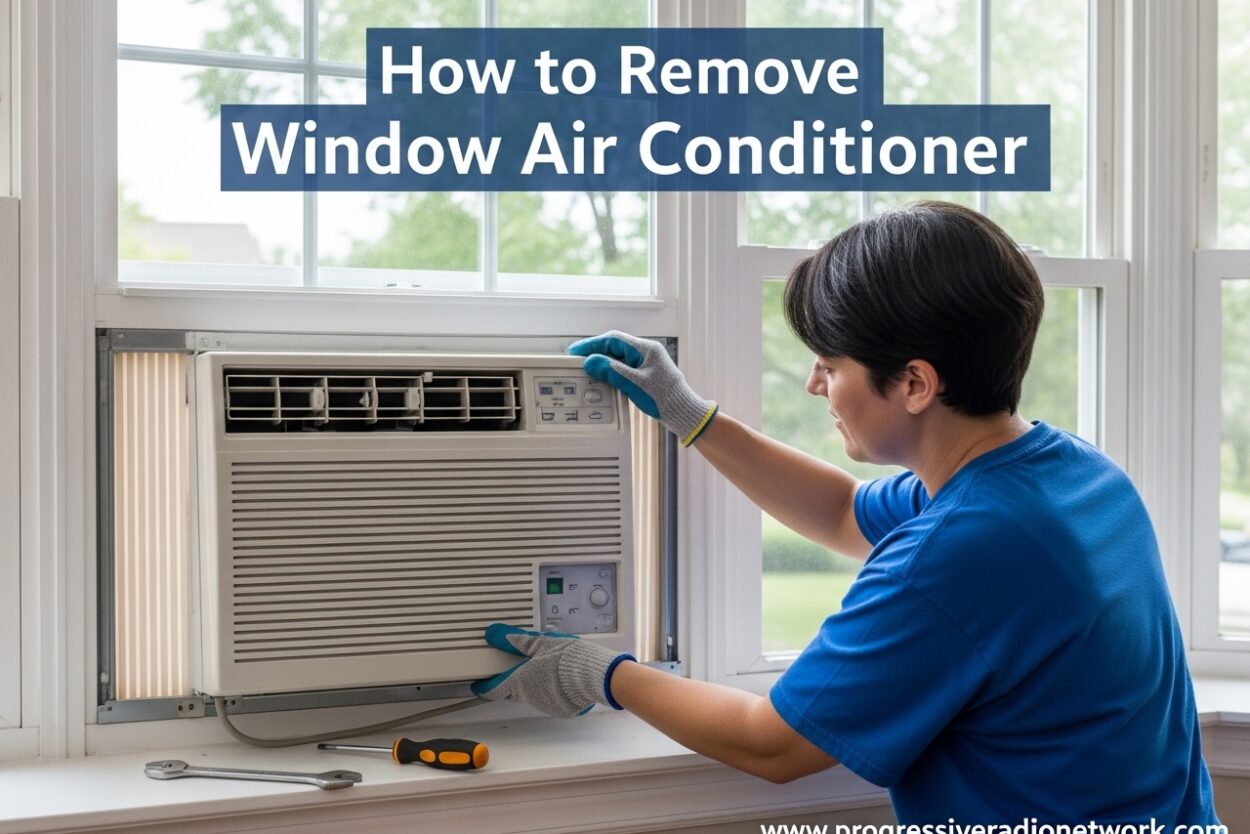
Learning how to remove window air conditioner units properly protects your investment and prepares your home for winter. I’ve removed dozens of window AC units over the years, and I’ll walk you through the entire process from preparation to storage.
Window AC units can weigh anywhere from 50 to 100 pounds, and removing them incorrectly can damage your window, your walls, or even cause injury. The right tools, proper technique, and knowing what to expect makes all the difference.
This guide covers everything you need to know about how to remove window air conditioner units safely, whether you’re a homeowner preparing for winter or a renter needing to uninstall before moving out.
Why Remove Your Window Air Conditioner
Removing your window AC before winter isn’t just about freeing up your window view. There are several important reasons to tackle this project before temperatures drop.
Cold drafts entering through AC vents can significantly increase your heating costs. Those accordion panels and mounting frames are never perfectly sealed, allowing warm air to escape and cold air to infiltrate your home.
Weather exposure damages window AC units over time. Snow, ice, and freezing temperatures can crack the plastic casing, damage internal components, and reduce the unit’s lifespan by years.
Removing and storing your window AC properly extends its life and ensures it’s ready to cool efficiently when summer returns. A well-maintained unit can last 10-15 years instead of just 5-7.
When to Remove Your Window AC
The ideal time to remove your window air conditioner is when outdoor temperatures consistently drop below 62 degrees Fahrenheit. This typically falls between late September and early November, depending on your location.
Don’t wait until the first frost forecast. Removing your AC before winter weather arrives gives you time to properly clean it and store it in a controlled environment.
If you live in a region with mild winters where you occasionally need cooling, you might consider leaving it installed with proper winterization. However, most climates benefit from complete removal.
Tools and Materials You’ll Need
Before you begin removing your window AC unit, gather these essential tools and materials:
Essential Tools:
– Screwdriver set (both Phillips and flat-head)
– Pliers or adjustable wrench
– Utility knife
– Putty knife or paint scraper (for stuck units)
– Tape measure
Protection Materials:
– Work gloves (protect hands from sharp metal edges)
– Safety glasses
– Drop cloth or plastic sheeting
– Old towels or rags (at least 4-6)
– Bucket or shallow pan for water drainage
Optional But Helpful:
– Cordless drill with screwdriver bits
– Step stool or ladder
– Second person for assistance
– Camera or phone (for documentation before removal)
Safety Precautions Before You Start
Safety should be your top priority when removing a window air conditioner. These units are deceptively heavy and awkward to handle.
Most window AC units weigh between 50-100 pounds, with some larger models exceeding 120 pounds. Never attempt to remove a heavy unit alone if you can avoid it. Having a helper significantly reduces the risk of injury and damage.
Always unplug the unit before beginning any work. Wait at least 30 minutes after unplugging to allow any electrical charge to dissipate.
If you’re working on an upper floor, ensure the window area is clear and consider securing the unit with a rope or strap as a safety precaution while removing hardware.
Protect your floors from water drainage and debris. Place drop cloths, plastic sheeting, or thick towels directly under the window before starting.
How to Remove Window Air Conditioner: Step-by-Step Guide
Step 1: Preparation and Protection
Clear the area around your window AC unit. Move furniture, rugs, and any items that could be damaged by water or debris. Place your drop cloth or thick towels on the floor directly beneath the window.
Take photos of the installation from multiple angles. This documentation is invaluable for reinstallation in spring and for renters who need to prove the unit wasn’t damaged during removal.
Locate and unplug the unit from the electrical outlet. If the cord runs through the window, note how it’s positioned so you can route it properly during reinstallation.
Step 2: Remove Front Cover and Filter
Most window AC units have a removable front panel or grille. Look for tabs, screws, or clips holding it in place. Gently pull or unscrew to remove the front cover.
Remove the air filter and set it aside for cleaning. Most filters are washable, but check your unit’s manual for specific cleaning instructions.
Set the cover and filter in a safe location where they won’t get damaged. These plastic parts can crack easily if stepped on or dropped.
Step 3: Disconnect and Drain
Some window AC units have a drain plug or hole at the bottom rear. Position your bucket or shallow pan underneath before removing any plugs.
Tip the unit slightly backward (toward the outside) to allow condensation to drain outside rather than into your home. This is a pro tip I learned after mopping up water spills on multiple occasions.
Use towels to soak up any remaining water in the drip pan. Window AC units can hold surprising amounts of water even when they appear dry.
Step 4: Remove Mounting Hardware
Locate all screws securing the unit to the window frame. These are typically found on the top rail, bottom rail, and sometimes on the side channels or L-brackets.
Some units have exterior screws that can only be accessed from outside. If you’re on an upper floor, use extra caution when reaching outside to remove these screws.
Carefully remove any screws from the accordion panels that extend to the window jambs. These panels help seal the unit but must be detached before removal.
Set all screws and hardware in a container or baggie. Keeping them organized makes reinstallation much easier.
Step 5: Lift Out the Unit
This is where having a helper becomes crucial. Position yourself on opposite sides of the unit if possible.
Open the window fully to provide maximum clearance. Carefully slide the unit forward while maintaining a firm grip. The unit will be front-heavy, so be prepared for the weight distribution.
Lift the unit straight out of the window opening. Avoid twisting or turning, which can cause strain on your back and increase the risk of dropping the unit.
Move slowly and communicate with your helper. Count down before lifting, and ensure you’re both ready to move together.
Step 6: Clean and Prepare for Storage
Once the unit is removed, immediately wipe down the exterior with a damp cloth. Remove any leaves, debris, or dirt from the vents and coils.
Clean or replace the air filter according to the manufacturer’s instructions. A clean filter ensures optimal performance when you reinstall the unit.
Allow the unit to dry completely before storage. Any remaining moisture can lead to mold growth and damage during storage.
How to Remove a Window AC by Yourself
Sometimes you don’t have a helper available. While I recommend two people for most AC removals, solo removal is possible with the right technique.
First, assess the unit’s weight honestly. If it’s over 70 pounds or you’re not confident in your ability to lift it safely, call a friend or hire help. Your back and the unit are both worth more than the cost of assistance.
For lighter units or confident solo removals, create a stable platform at window height. A sturdy table or work surface can help you slide the unit out rather than lifting it completely.
Consider using a furniture dolly or hand truck. Position it at window height, slide the unit onto it, then carefully lower it to the ground.
For upper-floor apartments, lower the unit using a rope rated for the weight. Never carry a heavy AC unit down stairs alone—your visibility and balance will be compromised.
Cleaning Your Window AC Before Storage
Proper cleaning before storage prevents mold growth, maintains efficiency, and extends your unit’s lifespan. A dirty AC unit stored for months can develop unpleasant odors and reduced performance.
Vacuum the exterior fins and coils using a brush attachment. Work gently to avoid bending the delicate metal fins. Clean fins allow for better airflow and cooling efficiency.
Wipe down the plastic casing with a mild soap solution. Avoid harsh chemicals or abrasive cleaners that could damage the finish.
Clean the air filter thoroughly. Most washable filters can be rinsed with warm water and mild detergent, then air-dried completely before reinstalling.
Inspect the unit for any damage, loose parts, or wear. Addressing minor issues now prevents bigger problems when you reinstall in spring.
How to Store Your Window Air Conditioner
Proper storage is just as important as proper removal. How you store your window AC during the off-season affects its performance and longevity.
Always store window AC units upright. Never lay them on their side or back, as this can cause compressor oil to migrate and damage internal components. If you must lay it down for transport, stand it upright as soon as possible and wait 24 hours before operating.
Choose a dry, temperature-controlled storage location. Basements, climate-controlled garages, and indoor storage areas are ideal. Avoid damp areas where moisture can cause rust and electrical issues.
Cover the unit with a breathable cloth or specialized AC cover. Plastic tarps can trap moisture and promote mold growth. A cotton sheet or purpose-made cover allows airflow while keeping dust away.
Keep all components together. Store the unit, filter, mounting hardware, and manual in the same area. This makes spring reinstallation much smoother.
What If You Can’t Remove Your Window AC?
Sometimes removal isn’t an option. Perhaps the unit is too heavy, permanently installed, or you’re in a rental where removal isn’t allowed. In these cases, winterizing becomes essential.
Install a waterproof AC cover designed for your unit’s dimensions. These covers protect against snow, ice, and debris while allowing some ventilation to prevent moisture buildup.
Seal the gap between the unit and window with weatherstripping or foam tape. This prevents cold drafts and reduces heat loss through the installation opening.
Consider using removable caulk around the exterior perimeter. This creates a weather-tight seal that can be removed in spring without damaging the unit or window frame.
Wrap the exterior with plastic sheeting for additional protection, especially if the unit faces prevailing winds or heavy snow accumulation.
Troubleshooting Common Removal Issues
Sometimes window AC units don’t cooperate. After helping friends and family remove dozens of units, I’ve encountered most common problems.
Unit Stuck by Paint or Caulk: Run a utility knife or putty knife around the perimeter where the unit meets the window frame. Carefully cut through any paint or caulk holding it in place. Work slowly to avoid damaging the window frame.
Rusted or Stripped Screws: Apply penetrating oil and let it sit for 15-20 minutes. Use properly fitting screwdrivers to avoid stripping further. For completely stripped screws, use screw extractor bits or drill out carefully.
Accordion Panels Stuck: These panels can become bent or stuck over time. Gently work them back and forth to loosen. If they’re severely damaged, you may need to unscrew them completely from the unit.
Unit Won’t Slide Forward: Check for hidden screws or brackets. Some installations have security brackets or additional fasteners not immediately visible. Look inside the unit through the vents for any obstructions.
Window Won’t Open Fully: Remove the bottom sash if possible. Some windows allow you to tilt the sash inward for cleaning—this feature can provide the clearance needed for removal.
Reinstalling Your Window AC in Spring
When warm weather returns, reinstalling your window AC properly ensures efficient cooling and prevents damage to your window or the unit.
Start by cleaning the window and frame thoroughly. Remove any old caulk, weatherstripping, or debris from the previous installation.
Refer to the photos you took during removal. These will show you exactly how the unit was positioned and how the accordion panels should extend to the window jambs.
Install any mounting brackets or rails according to the manufacturer’s instructions. These provide crucial support and security for the unit.
Lift the unit into position with assistance. Center it in the window opening and extend the accordion panels to fill the gaps between the unit and window frame.
Secure all screws and fasteners, but don’t overtighten. The unit needs slight flexibility for thermal expansion and contraction.
Test the unit before completing the installation. Plug it in and run it briefly to ensure it operates correctly. Then complete any final sealing or weatherstripping.
Disposing of an Old Window AC Unit
If you’re replacing an old window AC rather than storing it, proper disposal is important for environmental and legal reasons.
Window air conditioners contain refrigerants that must be recovered before disposal. Never throw an AC unit in regular trash or leave it for curbside pickup.
Contact your local waste management facility about appliance recycling programs. Many municipalities offer free or low-cost recycling for air conditioners.
Some appliance retailers offer haul-away services when you purchase a new unit. This convenient option ensures proper disposal and saves you the trouble of transport.
Scrap metal yards may accept window AC units, but verify they have proper refrigerant recovery equipment. This is often the easiest disposal option for non-working units.
Special Considerations for Renters and Apartments
Renters face unique challenges when removing window AC units. Documentation and communication become especially important.
Document the unit’s condition before removal with photos or video. This protects you from potential disputes about damage that may have existed before your removal.
Check your lease agreement about AC removal responsibilities. Some landlords require professional removal, while others expect tenants to handle seasonal removal and storage.
For upper-floor apartments, prioritize safety. Never attempt to remove a heavy AC unit from a window above the first floor without proper assistance or equipment.
Consider hiring a professional service for apartment removal, especially if you lack storage space or the unit is particularly heavy or difficult to access.
If you’re moving out, clarify whether the AC unit stays with the apartment or belongs to you. This prevents disputes and ensures proper planning.
Frequently Asked Questions
How much does a window air conditioner weigh?
Most window air conditioners weigh between 50-100 pounds, with compact units as light as 40 pounds and large models exceeding 120 pounds. Always check your specific unit’s weight in the manual or manufacturer’s website before attempting removal.
Can one person remove a window AC unit?
While possible for smaller units under 60 pounds, I strongly recommend having a helper. Window ACs are awkward to lift alone, especially through a window. If you must remove it solo, use a furniture dolly, create a support platform, or hire professional help for heavier units.
Should I remove my window AC if I have a cover?
Yes, removing the unit is still better than covering it in place. Covers protect against some elements but don’t prevent heat loss through the unit, drafts around mounting hardware, or potential damage from freezing temperatures inside the unit. Removal and indoor storage is optimal for unit longevity and energy efficiency.
What if my AC unit is stuck in the window?
Start by cutting through any paint or caulk with a utility knife. Apply penetrating oil to rusted screws and wait 15-20 minutes. Check for hidden security brackets or additional screws. If still stuck, the unit may be screwed into a mounting sleeve that requires different removal techniques. Consider professional help if you’re unable to safely free the unit.
How long does it take to remove a window AC?
For most people, removing a window air conditioner takes 30-60 minutes. This includes gathering tools, removing covers and hardware, lifting out the unit, and basic cleanup. First-time removals may take longer, while experienced DIYers can complete the job in under 30 minutes. Allow extra time if cleaning before storage.
Do I need to remove the mounting bracket when removing my AC?
Not necessarily. Many window AC installations use a separate mounting bracket or support that can remain in place. However, removing the bracket provides better weather protection and a cleaner appearance. Check if your unit uses a separate bracket by looking underneath after removing the main unit. Leave it if it’s difficult to remove or if you’ll reinstall soon.
Conclusion
Learning how to remove window air conditioner units properly is a valuable DIY skill that protects your investment and prepares your home for seasonal changes. With the right tools, safety precautions, and step-by-step approach, you can complete this project confidently.
Remember that most window AC units are heavy and awkward to handle. Don’t hesitate to ask for help, especially for upper-floor installations or units over 70 pounds. Your safety is worth more than the cost of hiring assistance.
Proper cleaning and storage before winter ensures your unit will be ready to cool efficiently when summer returns. Taking the time now to remove and store your AC correctly extends its lifespan and saves money on energy costs.
Whether you’re preparing for winter, moving to a new home, or just performing seasonal maintenance, following this guide will help you remove your window air conditioner safely and effectively. If you’re looking for ways to reduce noise from your AC unit or other appliances in your living space, check out our guide to noise cancelling headphones that can help create a more peaceful environment.





Leave a Comment