
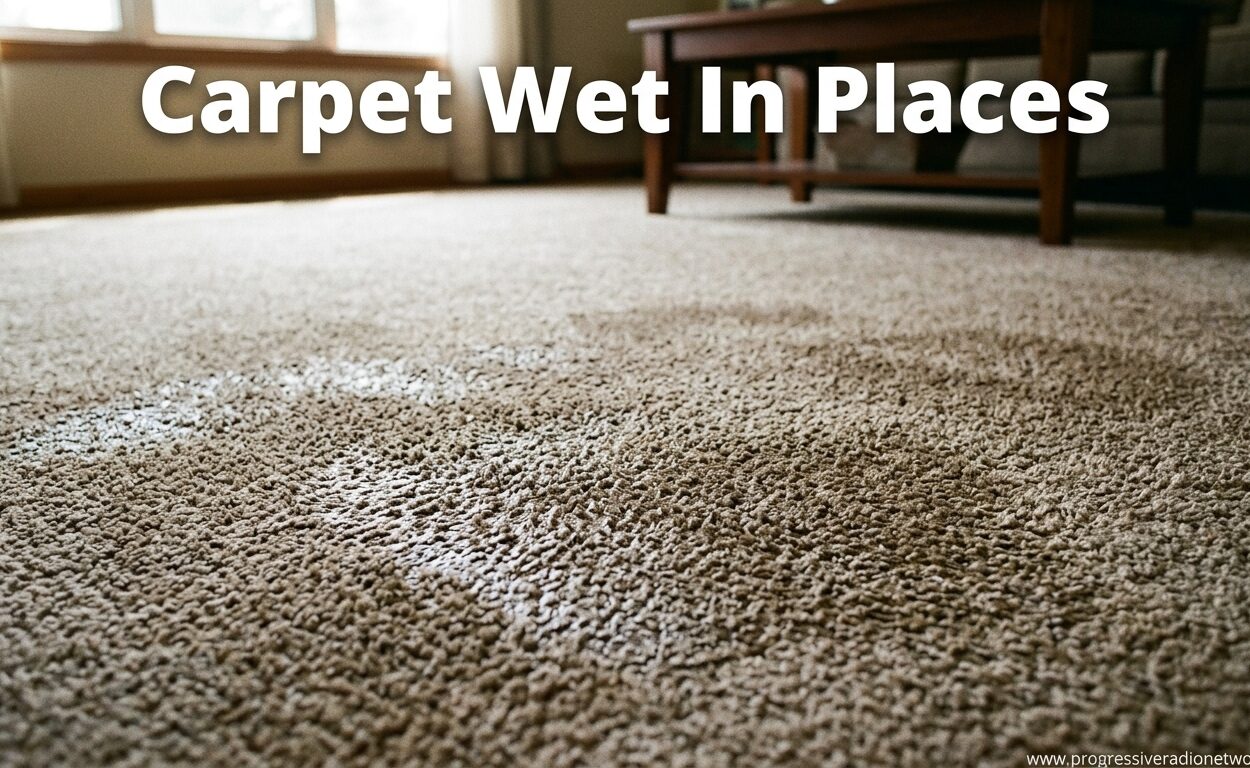
You walk across your bedroom floor and feel a sudden squish under your sock. Looking down, you notice a dark, damp spot spreading across the carpet. No spilled drinks, no visible leaks, just unexplained moisture that seems to appear from nowhere. This frustrating scenario happens to countless homeowners and renters, turning peaceful living spaces into sources of anxiety and potential health hazards.
Carpet wet in places without an obvious source is more than just an annoyance. I’ve seen how mysterious damp spots can lead to mold growth within 24-48 hours, compromising indoor air quality and causing structural damage that costs thousands to repair. Understanding why your carpet feels damp and knowing exactly how to respond can mean the difference between a quick cleanup and a major restoration project.
In this comprehensive guide, I’ll walk you through the eight hidden causes of wet carpet spots, teach you how to identify the moisture source, explain the serious health risks involved, and provide a step-by-step drying protocol. Whether you’re dealing with a small damp patch or widespread moisture, you’ll learn when to handle it yourself and when to call in professionals.
Why Is My Carpet Wet In Places: Common Causes
When carpet becomes wet in specific areas without an obvious spill, hidden moisture sources are almost always to blame. I’ve investigated hundreds of these cases over the years, and the culprit typically falls into one of eight categories. Understanding these causes helps you identify the source faster and choose the right solution.
Hidden Plumbing Leaks Behind Walls
Pipes running inside walls or beneath floors can develop tiny leaks that drip water continuously onto carpet below. These pinhole leaks might not show any visible signs until significant damage has occurred. I’ve seen cases where a supply line leak behind a wall went undetected for months, slowly saturating carpet padding and creating the perfect environment for mold growth.
Signs of hidden plumbing leaks include warm spots on the floor (for hot water lines), the sound of running water when no fixtures are in use, and unexplained increases in your water bill. The moisture pattern often appears near walls or along plumbing routes, helping you narrow down the location.
Appliance Malfunctions
Your refrigerator, washing machine, and dishwasher all have water connections that can fail. I’ve found that slow refrigerator ice maker leaks are among the most common culprits for carpet wet in places. A tiny crack in the plastic supply line can drip water continuously for weeks before anyone notices.
Washing machine drain hoses that become clogged or disconnected can spill water directly onto nearby carpet during drain cycles. Similarly, dishwasher door seals degrade over time, allowing water to escape during the wash cycle and create damp spots on adjacent flooring.
HVAC Condensation Issues
Air conditioning units produce significant condensation during operation. When drain lines become clogged with algae or debris, this water backs up and overflows onto the floor below. I’ve seen this happen frequently with attic-mounted AC units where dripping water follows the path of least resistance down through ceilings and into carpet.
High-efficiency furnaces and humidifiers can also cause problems when condensation drains fail or when humidity settings are too high for your space. The resulting moisture accumulates around floor vents or underneath the unit itself.
High Humidity and Condensation
In homes with poor ventilation, especially in basements or ground-floor rooms, moisture from the air can condense directly onto carpet fibers. This phenomenon occurs most often during summer months when warm, humid air contacts cooler surfaces like concrete slabs beneath carpet.
I’ve documented cases where carpet in finished basements becomes chronically damp due to this condensation effect, even without any active water leak. The problem worsens when furniture blocks airflow, creating pockets of stagnant, humid air that deposit moisture into carpet backing and padding.
Foundation and Subfloor Moisture
Hydrostatic pressure from groundwater can force moisture through concrete foundations and directly into carpet from below. This issue typically affects ground-level spaces and basements, particularly after heavy rainfall or in areas with high water tables.
When vapor barriers beneath slabs are damaged or missing, water vapor continuously migrates upward through concrete and accumulates in carpet materials. The dampness often appears in patterns that follow foundation walls or appear as random spots where concrete is more porous.
Pet Accidents and Spills
Not all moisture comes from building systems. Pet accidents, especially those that occur in hidden areas under furniture or behind closed doors, can create persistent wet spots. I’ve investigated numerous cases where mysterious damp spots turned out to be repeated pet marking in the same location.
The challenge with pet urine is that it continues to attract moisture from the air long after the initial accident, creating chronically damp areas that resist drying. The ammonia smell might be masked by carpet deodorizers, making identification difficult without proper testing.
Roof or Window Leaks
Water entering from above often travels along framing members before dripping onto carpet far from the actual entry point. A small roof leak might not show visible stains until water has migrated twenty feet along a ceiling joist and finally saturates carpet in a distant corner of a room.
Window leaks are particularly sneaky because water can enter behind siding and run down inside walls before emerging at floor level. The resulting damp carpet often appears directly beneath windows or along exterior walls, helping identify the likely source.
Groundwater Seepage
In areas with poor drainage or high seasonal water tables, groundwater can seep through foundation walls and directly affect carpet at perimeter walls. This issue worsens during spring thaw or after extended rainfall, creating seasonal patterns of dampness that might disappear during dry months.
I’ve seen cases where carpet along exterior walls becomes wet every spring like clockwork, only to dry out completely during summer when the water table drops. Understanding these seasonal patterns helps identify whether the source is truly groundwater or something else entirely.
How to Identify the Source of Wet Carpet
Finding the cause of carpet wet in places requires systematic investigation. I recommend starting with the simplest, least invasive methods before calling in professionals. The following diagnostic steps have helped me identify moisture sources in hundreds of cases, saving homeowners from unnecessary repairs and helping them address the right problem the first time.
Visual Inspection Techniques
Start by examining the pattern and location of the damp area. Carpet wet in places near walls suggests plumbing or foundation issues, while central room dampness points toward HVAC or appliance problems. Look for discoloration on walls or ceilings that might indicate water traveling from above.
Pay attention to timing. Does the dampness appear after running the dishwasher, during rain events, or primarily during humid summer months? These patterns provide valuable clues about the moisture source. I always ask clients to note when they first noticed the problem and whether it waxes and wanes with certain activities or weather conditions.
Touch and Smell Test
Carefully feel the carpet and subfloor around the damp area. Is the moisture limited to the carpet surface, or has it soaked through to the padding beneath? Press down firmly to see if water seeps up, indicating saturation of the underlying materials.
Your nose provides valuable information too. Musty odors suggest long-standing moisture and potential mold growth. The smell of sewage or dirty water points toward plumbing drain issues rather than fresh water supply leaks. Chemical or cleaner smells might indicate recent cleaning attempts rather than an active moisture problem.
Water Meter Test for Hidden Leaks
When you suspect a hidden plumbing leak but can’t locate it, the water meter test provides definitive answers. Turn off all water-using appliances and fixtures in your home, then locate your water meter and note the reading.
Wait two hours without using any water, then check the meter again. Any movement during this period indicates water is flowing somewhere in the system, confirming a hidden leak that requires professional investigation. I’ve used this simple test countless times to prove to homeowners that their mystery moisture problem stems from plumbing rather than humidity or condensation.
Moisture Meter Usage
Moisture meters provide objective measurements of wetness that help track the extent of damage and verify successful drying. Pin-style meters penetrate carpet and pad to measure moisture content at various depths, while pinless meters scan larger areas without damage.
I recommend taking readings in multiple locations to establish baseline moisture levels in dry areas, then comparing these to the wet spots. This comparison helps determine whether moisture is spreading and whether drying efforts are working. Many professional water damage companies offer free moisture inspections, providing valuable information without commitment.
When to Call a Professional Inspector
Some situations require professional expertise beyond what DIY methods can provide. Call a water damage restoration company or plumber if you notice: warm spots indicating hot water line leaks, multiple wet areas suggesting widespread issues, or moisture that returns immediately after drying attempts.
Professional inspectors use thermal imaging cameras to see temperature differences behind walls, acoustic listening devices to pinpoint leak locations, and fiber optic cameras to inspect inside pipes. These tools can identify moisture sources that would otherwise remain hidden, potentially saving thousands in unnecessary repairs.
Health Risks of Wet Carpet
The damp spot under your foot represents more than just a flooring problem. I’ve witnessed firsthand how wet carpet creates a cascade of health and structural issues that escalate quickly if not addressed properly. Understanding these risks motivates prompt action and helps you prioritize drying efforts effectively.
Mold Growth Timeline
Mold spores exist everywhere in your environment, just waiting for the right conditions to germinate. Wet carpet provides everything they need: moisture, organic material (carpet fibers and backing), and moderate temperatures. Under these ideal conditions, mold can begin growing within 24 to 48 hours of initial wetting.
I’ve seen visible mold colonies develop in as little as three days when carpet remains saturated, though the real danger begins before you can see anything. Microscopic mold growth starts immediately, releasing spores and mycotoxins into your air that can trigger allergic reactions and respiratory issues.
Mildew and Odor Problems
Even before visible mold appears, bacteria begin multiplying in wet carpet materials, producing that characteristic musty odor we associate with dampness. These odors aren’t just unpleasant—they’re evidence of biological activity that degrades indoor air quality.
Once established, these odors penetrate deeply into carpet fibers and padding, becoming nearly impossible to remove without professional treatment. I’ve worked with homeowners who tried everything from carpet powders to steam cleaning, only to find that the musty smell returns as soon as humidity rises again.
Respiratory Health Concerns
Exposure to mold and dampness-related allergens can cause a range of health issues, especially in sensitive individuals. Common symptoms include nasal stuffiness, throat irritation, coughing, wheezing, and eye irritation. Those with asthma or mold allergies may experience more severe reactions.
Children, elderly individuals, and people with compromised immune systems face particular risks from prolonged exposure to damp indoor environments. I always advise extra caution when carpet wet in places affects bedrooms or other areas where people spend extended time sleeping or working.
Structural Damage to Subfloors
Moisture doesn’t stop at carpet surface level. Given time, water penetrates through carpet backing and saturates the padding underneath, eventually reaching the subfloor. Particle board and plywood subfloors warp and delaminate when exposed to persistent moisture, creating uneven surfaces and structural weakness.
In severe cases, I’ve seen subfloor damage require complete removal and replacement, adding thousands to restoration costs. Concrete subfloors can also be affected, with prolonged moisture causing efflorescence (salt deposits) and gradual degradation of the concrete itself.
Warning Signs to Watch For
Beyond obvious wetness, watch for these danger signs: carpet discoloration or darkening that doesn’t match the original color, buckling or rippling of carpet seams, musty odors that develop or worsen, increased allergy symptoms among household members, and visible mold growth on carpet backing or nearby walls.
Any of these signs indicate that moisture damage has progressed beyond simple wetness and requires immediate attention. Document these conditions with photos if you’re dealing with insurance claims or landlord responsibilities.
Step-by-Step Guide to Dry Wet Carpet
Proper drying technique makes the difference between saving your carpet and requiring complete replacement. I’ve developed this seven-step process through years of experience and countless water damage restorations. Follow these steps carefully for the best chance of full recovery.
Step 1: Stop the Water Source
Before any drying begins, you must identify and stop whatever is causing the moisture. Shut off water supply lines if you suspect plumbing leaks. Unplug appliances that might be leaking. Place containers under active drips to prevent further spreading while you arrange repairs.
For ceiling leaks from above, place a tarp or plastic sheeting over the affected area to redirect water until repairs can be made. This step seems obvious, but I’ve seen countless cases where homeowners began drying efforts while water was still coming in, wasting time and effort on a futile process.
Step 2: Remove Standing Water
Any visible water sitting on carpet surface must be removed immediately. Use towels to blot up as much moisture as possible, changing them frequently as they become saturated. For larger areas, a wet/dry vacuum cleaner designed for water extraction can remove gallons quickly.
Work from the outside edges toward the center to prevent spreading water into previously dry areas. Don’t rub or scrub the carpet, which can damage wet fibers and drive moisture deeper into the backing. Instead, use a blotting or pressing motion to lift water out.
Step 3: Extract Moisture from Carpet and Padding
The most critical step is removing moisture from carpet padding, which acts like a sponge and holds water long after surface fibers feel dry. Professional grade extraction equipment works best, but home wet vacuum for carpet drying can help in less severe cases.
For wall-to-wall carpet, pull back corners and edges to allow air circulation beneath. If possible, lift the entire carpet to extract water from the padding directly. This extra effort dramatically improves drying success and reduces the chance of mold development underneath.
Step 4: Improve Air Circulation
Maximum airflow is essential for evaporation. Position box fans to blow air across the carpet surface, preferably aiming them so air flows under lifted carpet edges as well. Open windows if outdoor humidity is lower than indoor levels, but keep them closed during humid or rainy weather.
Run air conditioning to remove humidity from the air, which accelerates evaporation from wet materials. In winter, running your furnace also helps, though you’ll need to balance heating costs against drying urgency.
Step 5: Deploy Dehumidification
Dehumidifiers pull moisture from the air, creating a drying gradient that encourages water to evaporate from carpet and padding. Place the unit as close to the wet area as possible, closing doors and windows to create a contained drying environment.
Empty the collection tank frequently—a dehumidifier can extract several gallons of water per day from a severely wet room. I recommend running dehumidifiers continuously for at least 24-48 hours after carpet feels dry to the touch, ensuring deep moisture is fully removed.
Step 6: Monitor Drying Progress
Use a moisture meter if available to track drying progress objectively. Without equipment, pay attention to how the carpet feels and smells over time. Properly drying carpet should feel progressively drier each day, with musty odors diminishing rather than worsening.
Lift carpet edges periodically to check padding moisture levels. If after 48-72 hours of aggressive drying you still feel dampness in the padding, consider whether professional intervention is needed. Lingering moisture at this stage almost guarantees future mold problems.
Step 7: Sanitize and Prevent Future Issues
Once fully dry, treat the area with an antimicrobial spray designed for carpets to kill any remaining mold spores or bacteria. For carpet wet in places caused by sewage backup or flooding, this sanitization step is non-negotiable for health safety.
After cleaning, use a robot vacuum for home cleaning or regular vacuum to restore carpet texture and remove any residue from cleaning products. Schedule professional carpet cleaning if stains or odors persist after complete drying.
DIY vs Professional Water Damage Restoration
Deciding between DIY drying and professional restoration depends on multiple factors. I’ve worked both sides of this equation and can help you make the right choice for your situation. Consider this comparison when planning your response to wet carpet.
Cost Comparison
DIY drying typically costs between $50-200 for equipment rentals (wet/dry vacuum, fans, dehumidifier) plus cleaning supplies. Your investment is primarily time and effort, with costs scaling based on equipment rental duration and the size of affected area.
Professional restoration ranges from $500-3000 depending on severity, with insurance often covering portions when the cause is sudden and accidental (like burst pipes rather than gradual maintenance issues). This higher cost includes specialized equipment, expertise, and guaranteed results that prevent more expensive problems down the road.
When DIY Is Appropriate
Small areas (less than 10 square feet), fresh moisture (discovered within 24 hours), clean water sources (supply lines rather than sewage), and accessible locations make good candidates for DIY drying. If you’re comfortable handling basic home repairs and have time to monitor the process carefully, you can successfully manage many minor incidents.
I also recommend DIY for financially constrained situations where professional help isn’t feasible. Just understand that you’re accepting higher risk of incomplete drying and potential future problems when choosing this route.
When to Call Professionals
Larger areas (over 30 square feet), moisture present for more than 48 hours, contaminated water sources (sewage, floodwater), or situations affecting multiple rooms require professional expertise. Hidden moisture sources, repeated wetting episodes, and health concerns among household members also warrant professional assessment.
Professionals bring industrial-strength equipment that dramatically speeds drying time. What might take a week with fans and dehumidifiers can often be accomplished in 2-3 days with professional air movers and desiccant dehumidifiers.
Insurance Claim Considerations
Most homeowner insurance policies cover sudden water damage but exclude gradual maintenance issues. Document everything thoroughly with photos and videos from the moment you discover the problem. Contact your insurance company promptly, as many policies require notification within a specific timeframe.
Professional restoration companies typically work directly with insurance adjusters, providing documentation and justification for their services. Their detailed moisture reports and drying logs help ensure you receive full coverage for covered losses.
Renter and Landlord Communication
For renters, notify your landlord immediately upon discovering carpet wet in places, documenting the issue with dated photos. Follow up with written notice if verbal communication doesn’t prompt quick action. Most jurisdictions require landlords to address water damage issues that affect habitability.
Keep records of all communication and any personal expenses incurred due to the problem (like temporary lodging if bedrooms become uninhabitable). Understanding your rights and the landlord’s responsibilities helps ensure prompt resolution.
Prevention Tips to Keep Carpet Dry
Once you’ve resolved your immediate moisture problem, prevention becomes the priority. I’ve compiled these proven strategies based on hundreds of successful interventions. Implementing these measures significantly reduces the likelihood of recurring wet carpet issues.
Regular Appliance Maintenance
Inspect water supply lines to refrigerators, washing machines, and dishwashers annually, replacing any showing signs of wear or cracking. Upgrade rubber supply hoses to braided stainless steel versions, which burst much less frequently. Clean refrigerator condensate drains and ensure proper positioning of drain pans.
Never run washing machines or dishwashers when you’re away from home for extended periods. A burst hose can flood your home with hundreds of gallons of water in just a few hours. Install water leak detectors near appliances for early warning of problems.
Humidity Control Strategies
Maintain indoor humidity between 30-50% using air conditioning during humid months and supplemental dehumidification in problem areas. Use exhaust fans during showers and when cooking to remove moisture-laden air before it condenses on surfaces.
In basements or ground-level spaces prone to dampness, consider a permanently installed dehumidifier with automatic drainage. These units maintain consistent humidity levels year-round without requiring daily attention.
Proper Ventilation
Ensure adequate airflow throughout your home, especially in carpeted areas. Move furniture away from walls periodically to allow air circulation behind large pieces. Avoid blocking heating/cooling vents with rugs or furniture, which creates pockets of stagnant, humid air.
In bathrooms and kitchens, run exhaust fans during moisture-producing activities and for 20-30 minutes afterward. Consider upgrading to higher-capacity fans if existing units struggle to keep up with normal use.
Foundation Waterproofing
For ground-level spaces experiencing seepage issues, exterior foundation waterproofing provides lasting solutions. This might include regrading soil away from the foundation, installing French drains, or applying waterproof membranes to foundation walls.
Interior drainage systems and sump pumps can also manage groundwater issues effectively. Consult with waterproofing specialists to determine which approach addresses your specific situation, as solutions vary based on soil conditions, water table levels, and foundation construction.
Routine Carpet Inspections
Make it a habit to visually inspect carpeted areas monthly, especially along exterior walls and near plumbing fixtures. Look for discoloration, texture changes, or musty odors that might indicate developing problems. Early detection allows simpler, less expensive repairs before damage spreads.
Pay special attention to carpet under and behind furniture, where problems can develop unnoticed. Moving furniture occasionally for cleaning provides opportunities for thorough inspection of these hidden areas.
Why is my carpet wet in one spot?
Carpet wet in one spot typically indicates a localized moisture source like a pinhole plumbing leak, appliance malfunction, or pet accident. Hidden pipe leaks behind walls often create single damp spots where water drips continuously onto carpet below. Check for patterns near walls, under appliances, or along plumbing routes to identify the source.
How long can carpet stay wet before mold?
Mold can begin growing on wet carpet within 24-48 hours under ideal conditions. While visible colonies might take 3-5 days to appear, microscopic mold growth starts almost immediately once moisture, warmth, and organic material are present. Quick action within the first 24 hours significantly reduces mold risk and improves chances of saving the carpet.
Why is my floor wet with no leak?
Wet flooring without visible leaks often stems from condensation, groundwater seepage, or subfloor moisture. High humidity causes water vapor to condense on cool surfaces like concrete slabs beneath carpet. Hydrostatic pressure from saturated soil can force moisture through foundations even without rain. A moisture meter helps determine whether water comes from above or below.
How quickly can mold grow under wet carpet?
Under optimal conditions of moisture, warmth, and organic material, mold spores begin germinating within 24 hours. Visible colonies typically appear within 3-5 days, though black mold may develop more slowly. The real danger begins immediately as mold releases spores into the air before becoming visible. Prompt drying within 24-48 hours is critical for prevention.
Should I pull up wet carpet to dry the padding?
Yes, lifting wet carpet to expose the padding dramatically improves drying success and prevents hidden mold growth. Carpet padding acts like a sponge, holding moisture long after surface fibers feel dry. Pulling back corners and edges, or removing the carpet entirely, allows air circulation and direct extraction of water from padding materials.
Can I use regular fans to dry wet carpet?
Regular household fans help but aren’t as effective as professional air movers designed for water damage restoration. Box fans and ceiling fans improve surface evaporation but struggle to move air through carpet backing and padding. For best results, combine regular fans with a dehumidifier and lift carpet edges to allow airflow underneath.
Will wet carpet always develop mold problems?
Not all wet carpet develops mold, but the risk increases significantly after 48 hours of moisture exposure. Quick drying within 24 hours, proper sanitization, and maintaining indoor humidity below 50% greatly reduces mold risk. Carpet contaminated with sewage or floodwater poses higher risks and often requires replacement regardless of drying speed.
How do I know if carpet moisture is from above or below?
Test by touching both the carpet surface and the subfloor if accessible. Moisture from above (plumbing leaks, spills) typically wets the carpet surface first, while subfloor moisture from below feels damp at the bottom of the carpet pad. Look for patterns: dampness near walls suggests foundation issues, while wet areas near appliances indicate plumbing problems. A moisture meter provides definitive answers.
Conclusion: Taking Action on Wet Carpet
Carpet wet in places demands immediate attention, but with the right knowledge and tools, most situations can be resolved successfully. The key is identifying the moisture source quickly, implementing proper drying techniques, and taking preventive measures to avoid recurrence. Remember that mold can begin growing within 24-48 hours, making prompt action essential for protecting both your home and your health.
Whether you handle drying yourself or call in professionals, document everything with photos and detailed notes. This documentation proves invaluable for insurance claims, warranty coverage, and working with landlords on rental property issues. If you notice recurring problems despite your best efforts, don’t hesitate to seek professional assessment—some hidden leaks require specialized detection equipment beyond typical DIY capabilities.
By understanding the eight common causes of mysterious wet spots, following the step-by-step drying protocol, and implementing preventive measures, you can protect your home from the damaging effects of unwanted moisture. Your flooring investment deserves proper care, and your family’s health depends on maintaining a dry, mold-free living environment.




Leave a Comment