

You start a dryer cycle expecting 45 minutes. Twenty minutes later, you notice the display now shows 65 minutes. An hour passes, and the time has climbed again. If your dryer keeps adding time, you are not imagining things, and you are not alone in experiencing this frustrating issue.
This problem ranks among the most common complaints we see from homeowners with modern dryers. The good news is that most causes are fixable without calling a repair technician. This guide walks you through everything you need to know about why your dryer keeps adding time and how to stop it.
How Sensor Dry Cycles Work
Before diving into problems, understanding how your dryer operates helps explain why time adjustments happen in the first place. Most modern dryers use what manufacturers call “sensor dry” or “automatic dry” cycles instead of simple timed cycles.
Inside the drum, near the lint trap, you will find two metal strips called sensor bars. These bars detect moisture levels in your clothing by measuring the conductivity between them. Wet clothes conduct more electricity than dry clothes, so the dryer knows when your laundry is still damp.
When the sensors detect moisture, the dryer continues running and may add time to ensure clothes reach the desired dryness level. This is intentional and designed to prevent under-drying. The dryer automatically adjusts based on what it senses, which means some time fluctuation is normal behavior, not a malfunction.
The problem arises when the dryer adds time excessively or continuously. If you notice your dryer keeps adding time until cycles run two or three times longer than expected, something is interfering with the normal sensing process.
Top Causes of Extended Drying Time
Clogged Lint Trap and Vent
A clogged lint trap is the most common cause of extended drying cycles we encounter. When lint accumulates on the trap mesh, airflow restriction forces the dryer to work harder and longer to dry each load.
Forum users report cleaning their lint traps thoroughly and seeing immediate improvements, with some cycles dropping from three hours to under one hour. This simple maintenance task makes a massive difference because proper airflow is essential for efficient drying.
Even if you clean the lint trap after every load, lint can build up in the vent hose and exterior vent hood over time. This buildup restricts exhaust airflow just as effectively as a clogged trap.
Dirty Moisture Sensors
The sensor bars detect moisture through direct contact with your clothing. Over time, fabric softener residue, dryer sheet residue, and lint buildup coat these sensors, reducing their sensitivity.
When sensors cannot accurately detect moisture levels, they default to assuming clothes are still wet. The dryer keeps running and adding time in an attempt to reach dryness that the sensors cannot confirm has been achieved.
Cleaning sensor bars with a soft cloth and isopropyl alcohol typically restores proper function. Some users in appliance repair communities report this single step resolved their extended drying time problems completely.
Obstructed Exhaust Duct
The exhaust duct carries moist air from the dryer to the exterior of your home. Blockages anywhere along this path cause similar problems to a clogged lint trap: restricted airflow, longer drying times, and excessive heat buildup.
Ductwork can become obstructed by accumulated lint, debris, or even small animals nesting in exterior vents. If your dryer keeps adding time despite a clean lint trap, the exhaust system deserves investigation.
Disconnecting the duct from the dryer and checking for obstructions, then verifying the exterior vent opens freely, often reveals the culprit. Some homeowners discover significant lint compaction in the ductwork that requires professional cleaning.
Overloading the Dryer
Stuffing too many clothes into the drum prevents proper tumbling and airflow. When garments pack together tightly, moisture cannot escape efficiently, and the sensors register persistent dampness even after extended cycles.
Most dryer manufacturers recommend filling the drum to approximately three-quarters capacity for optimal performance. This allows clothes to tumble freely and ensures heated air reaches all surfaces.
Splitting large loads into smaller batches typically cuts drying time significantly while also reducing wear and tear on your clothing. Your dryer works more efficiently when given manageable loads to process.
Faulty Components
If cleaning and maintenance do not resolve the issue, a failing component may be to blame. Several electrical parts can cause symptoms that manifest as the dryer adding time repeatedly.
A faulty thermistor, which monitors temperature, can send incorrect readings to the control board. The board responds by extending heating cycles, thinking clothes need more warmth to dry properly.
The control board itself can malfunction, sending inconsistent signals to various dryer systems. This sometimes manifests as unpredictable time adjustments during cycles.
Timer motors in older dryers can wear out, causing cycles to run longer than settings indicate. However, timer issues are less common in modern dryers with electronic controls.
Step-by-Step Troubleshooting Guide
Follow these steps in order, starting with the simplest solutions before moving to more complex diagnostics.
Step 1: Clean the lint trap thoroughly. Remove the lint trap and wash it with warm water and dish soap. Scrub both sides with a soft brush to remove all residue. Allow it to dry completely before reinstalling. Do this even if you clean it regularly, as residue buildup can occur over time.
Step 2: Clean the moisture sensor bars. Locate the two metal strips inside the drum near the lint trap opening. Wipe them down with a cotton ball or soft cloth dampened with isopropyl alcohol. Allow the area to air dry before running a test cycle.
Step 3: Check the exhaust vent. Disconnect the dryer from the vent hose. Look inside both the dryer exhaust port and the vent hose for lint accumulation. Clean as needed, and ensure the exterior vent hood opens freely when the dryer runs.
Step 4: Verify load size and distribution. Remove half your current load and run the dryer with a smaller, properly sized batch. Observe whether the drying time normalizes. If it does, overloading was the issue.
Step 5: Test with a timed dry cycle. Run a timed cycle instead of sensor dry to determine if the problem is sensor-related or affects all cycles. If timed cycles also run long, the issue is likely airflow or heating related rather than sensor malfunction.
Brand-Specific Notes
Samsung dryers often include SmartThinkQ connectivity that displays real-time cycle updates. Users report seeing time adjustments happen in the app during extended cycles. Samsung recommends cleaning sensor bars with a dry cloth monthly and using the Drum Clean cycle to maintain interior cleanliness.
LG dryers use a similar sensor bar system located near the lint filter. LG’s support documentation emphasizes using the Sensor Dry function for energy efficiency but notes that dirty sensors cause extended cycles. Their tech sheets suggest cleaning sensors with a soft brush every six months.
Whirlpool dryers incorporate automatic dryness adjustments in their automatic cycles. Whirlpool’s official documentation confirms that time increases during automatic cycles are normal when moisture is detected. However, if time increases excessively, they recommend testing the vent with their Dryer Vent Testing Kit.
Warning Signs of Dangerous Situations
Some symptoms indicate problems beyond simple inconvenience. Stop using your dryer immediately and disconnect power if you notice any of these warning signs.
If the dryer exterior becomes unusually hot to the touch during operation, this indicates excessive heat buildup that creates a fire hazard. Combined with lint accumulation, overheated dryers have caused residential fires.
A burning smell during operation, especially if accompanied by visible smoke, means power down the appliance immediately. This could indicate an electrical issue or lint that has ignited inside the venting system.
When the dryer runs but produces no heat at all, a heating element failure has likely occurred. While not immediately dangerous, this indicates component failure that requires professional attention.
Excessive vibration or shaking during cycles can indicate a blower wheel problem or internal component failure. These mechanical issues can worsen over time and eventually cause more serious damage.
Any visible scorch marks on clothing after drying, or a consistently burning smell coming from specific items, suggests the heating element is malfunctioning and potentially scorching clothes directly.
Maintenance Tips to Prevent Issues
Preventive maintenance keeps your dryer running efficiently and safely. Establishing a regular cleaning routine prevents most of the problems discussed above.
Clean the lint trap after every single load. This takes thirty seconds and dramatically improves airflow and safety. Remove all visible lint, and wash the trap monthly to remove fabric softener residue.
Inspect and clean the dryer vent annually. Either do this yourself if you have the tools and experience, or hire a professional dryer vent cleaning service. This task often costs less than one hundred dollars and significantly reduces fire risk.
Leave the dryer door open between uses. This allows moisture to evaporate from the drum and prevents mold growth. It also helps the interior dry completely after wet loads.
Check the exterior vent hood regularly to ensure it opens properly when the dryer runs and closes when off. This prevents pests from entering the vent system.
Every six months, clean the moisture sensors with isopropyl alcohol to maintain their sensitivity. This quick task takes under five minutes and ensures accurate moisture detection.
Ensure your dryer is level. An unlevel dryer can cause excessive noise, vibration, and uneven drying. Adjust the leveling feet as needed to stabilize the appliance.
Frequently Asked Questions
Why does my dryer keep adding more time?
How do I reset my dryer sensor?
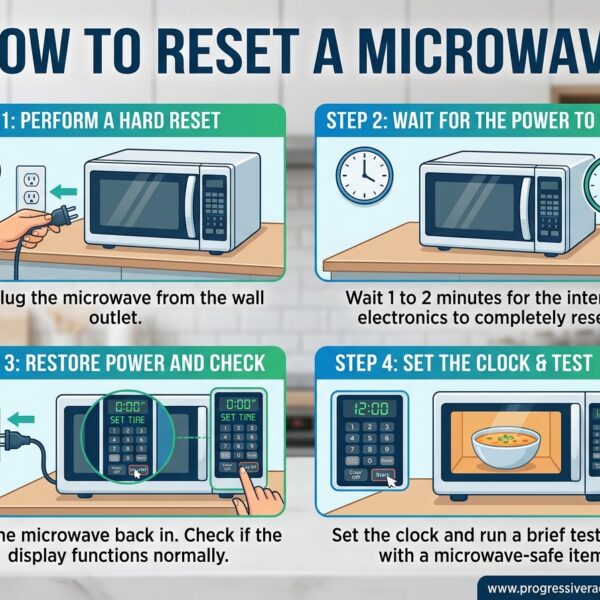
To reset your dryer sensor, first clean the sensor bars with isopropyl alcohol and a soft cloth. Unplug the dryer for one minute, then plug it back in. Run a test cycle with completely dry towels to verify the sensor is functioning properly.
What are the symptoms of a bad dryer control board?
A faulty dryer control board may cause cycles to behave erratically, including adding time unexpectedly, failing to start, stopping mid-cycle, or not responding to control panel inputs. If cleaning sensors and vents does not resolve time-adding issues, the control board may need professional diagnosis and replacement.
What are the warning signs of a dryer fire?
Warning signs of a dryer fire include a burning smell during operation, excessive heat on the dryer exterior, visible smoke, clothes coming out scorched, and the dryer trip-switching repeatedly. If you notice any of these signs, stop using the dryer immediately and disconnect power.
Conclusion
A dryer keeps adding time because its sensors are detecting what they interpret as wet clothing. In most cases, the fix involves simple maintenance: cleaning the lint trap, cleaning the sensor bars, and checking the exhaust vent for obstructions.
Regular maintenance prevents these issues from developing. Clean your lint trap after every load, clean sensors every six months, and inspect the vent system annually. These small tasks keep your dryer running efficiently and extend its lifespan considerably.
If you have completed all troubleshooting steps and your dryer still keeps adding time, professional repair may be necessary. Control board replacement or heating element repair typically costs between one hundred fifty and three hundred fifty dollars depending on your dryer brand and model. For dryers over ten years old, consider whether repair costs justify replacement with a more energy-efficient model.
The key takeaway is that most drying time problems are preventable or fixable without professional service. Start with the simplest solutions first, and work your way through the troubleshooting steps systematically. Your dryer should return to normal operation once the underlying cause is addressed.



Leave a Comment