
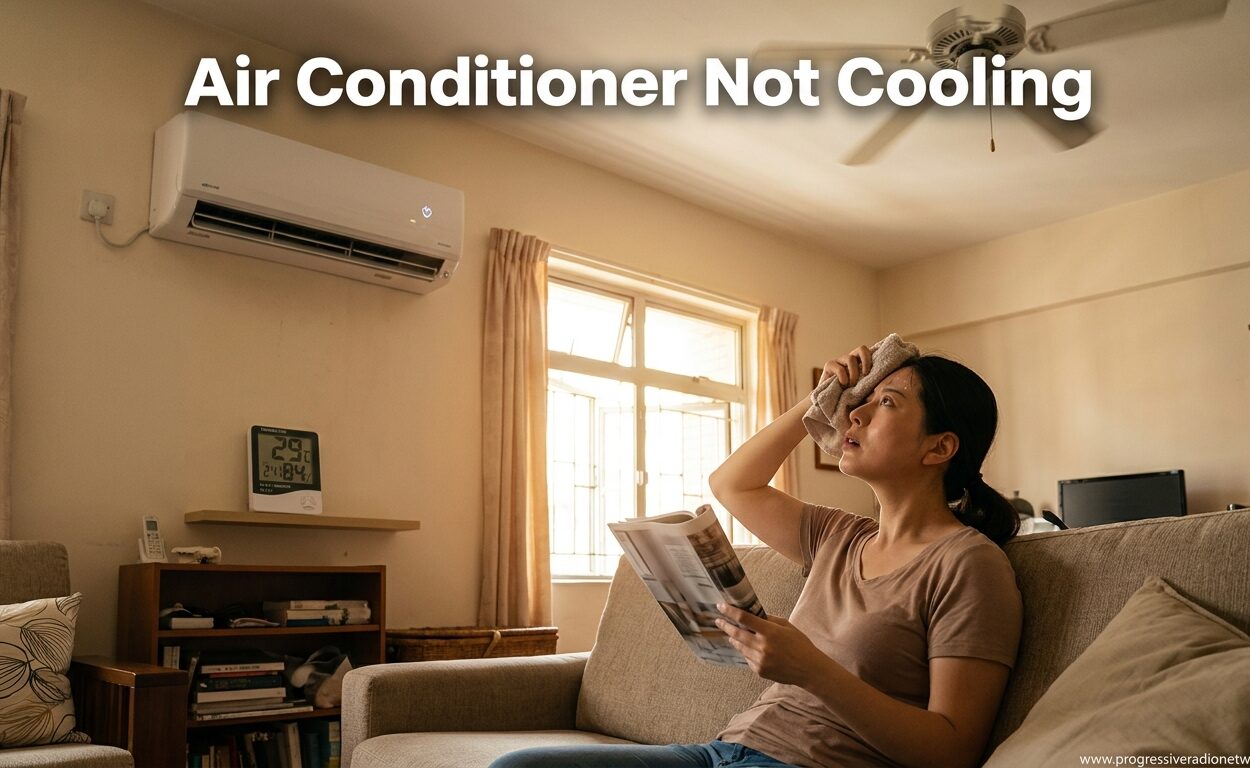
There’s nothing worse than a sweltering summer day with an AC that won’t cool. You hear the hum of the compressor, feel air coming from the vents, but the temperature won’t budge. An air conditioner not cooling is one of the most frustrating homeowner experiences, especially when temperatures outside are climbing past 90 degrees.
I’ve spent 15 years in HVAC service, and I’ve seen this scenario thousands of times. The good news is that most AC cooling problems have straightforward solutions. In fact, nearly 70% of AC not cooling issues can be resolved with basic troubleshooting or simple maintenance tasks you can handle yourself.
In this guide, I’ll walk you through everything you need to know about why your AC isn’t cooling and what to do about it. We’ll cover quick diagnosis steps, the 7 most common causes, DIY fixes you can try safely, when to call a professional, and even how to decide between repair and replacement.
Quick Diagnosis: 5 Checks in 5 Minutes
Before we dive deep into potential problems, let’s run through a quick diagnostic checklist. These five checks take less than five minutes and identify the most common reasons for an air conditioner not cooling.
1. Check Your Thermostat Settings
It sounds obvious, but start here. Make sure your thermostat is set to COOL mode, not HEAT or OFF. Verify the temperature setting is at least 5 degrees below the current room temperature. I’ve been to countless service calls where the only issue was an incorrect thermostat setting or dead batteries.
2. Inspect Your Air Filter
A clogged air filter is the number one cause of AC not cooling. Pull out your filter and hold it up to a light source. If you can’t see light through it, it’s restricting airflow and needs replacement. This simple check takes 30 seconds and solves nearly 40% of cooling problems.
3. Check Your Circuit Breaker
Your AC has two breakers: one for the indoor unit and one for the outdoor condenser. If either breaker has tripped, your system may run but won’t cool properly. Look for breakers in the middle position or labeled OFF, and reset them if needed.
4. Look at Your Outdoor Unit
Walk outside and visually inspect your condenser unit. Is it covered in leaves, grass clippings, or debris? Are the sides blocked by shrubbery or stored items? Your outdoor unit needs clear airflow to release heat. A blocked condenser can reduce cooling efficiency by up to 30%.
5. Verify Your Vents Are Open
Walk through your home and check that supply vents are fully open. Closed vents in multiple rooms can create pressure problems that reduce overall cooling performance. Also, make sure no vents are blocked by furniture, curtains, or rugs.
7 Common Reasons Your AC Is Not Cooling
Now that we’ve covered the quick checks, let’s dive deeper into the seven most common causes of AC not cooling. I’ll explain each problem, how to diagnose it, and what you can do about it.
1. Dirty or Clogged Air Filter (Most Common)
A dirty air filter restricts airflow across your evaporator coils, which causes multiple problems. First, reduced airflow means less air gets cooled. Second, the restricted airflow can cause evaporator coils to freeze over, completely blocking cooling. Third, your system works harder and runs longer, increasing energy bills and wear on components.
Most homeowners forget about their air filters until problems develop. For optimal performance, check your filter monthly and replace it at least every 90 days. If you have pets or allergies, you may need to replace it every 30-60 days. Filters cost $15-50 and take two minutes to change.
Solution: Replace your air filter with the correct size and type for your system. Most systems use 1-inch thick filters, but some require 4-5 inch media filters. Check your system manual or existing filter for the correct dimensions.
2. Thermostat Set Incorrectly
Thermostat problems range from dead batteries to incorrect settings to faulty sensors. A common issue is the fan setting. If your fan is set to ON instead of AUTO, the blower runs continuously but doesn’t necessarily produce cooled air. This can make it feel like your AC isn’t cooling even when it’s working properly.
Another thermostat issue involves placement. If your thermostat is located near a heat source like direct sunlight, a lamp, or kitchen appliances, it may think your home is cooler than it actually is. This causes the AC to shut off prematurely.
Some thermostats also have a deadband setting that prevents short cycling. If this is set too wide, your AC may stop cooling before reaching your target temperature.
Solution: Check that your thermostat fan is set to AUTO, not ON. Replace batteries if needed. Consider upgrading to a programmable or smart thermostat for more accurate temperature control. If your thermostat is poorly located, a technician can relocate it.
3. Blocked Outdoor Condenser Unit
Your outdoor condenser unit releases the heat absorbed from inside your home. If it can’t release this heat efficiently, your entire cooling cycle suffers. The condenser needs at least two feet of clearance on all sides for proper airflow.
Common obstructions include overgrown shrubs, fallen leaves, grass clippings from mowing, stored items like bicycles or lawn furniture, and even accumulated dirt on the coil fins themselves. I’ve seen condenser units completely buried in vegetation, reducing efficiency by 50% or more.
The condenser coil itself can also become dirty. Over time, dirt, dust, pollen, and debris accumulate on the aluminum fins. This acts like a blanket, preventing heat transfer. A dirty coil can increase energy consumption by up to 30%.
Solution: Clear away any vegetation, debris, or stored items from around your outdoor unit. Trim shrubs to provide at least two feet of clearance. For dirty coils, you can carefully clean them with a garden hose and coil cleaner spray. Be gentle with the fragile aluminum fins.
4. Frozen Evaporator Coils
Your evaporator coils contain cold refrigerant that absorbs heat from your home’s air. When something goes wrong, these coils can ice over, sometimes completely blocking airflow. A frozen coil means zero cooling, even though your system continues running.
Several factors cause frozen coils: dirty air filters (restricting airflow), low refrigerant levels, blower motor problems, or even running your AC when outdoor temperatures are below 60 degrees. You might suspect frozen coils if you see ice on the refrigerant lines connecting your indoor and outdoor units.
Frozen coils are a progressive problem. As ice builds, airflow decreases further, which causes more ice. Eventually, the entire coil can become a block of ice. If you continue running the system in this state, you can damage the compressor.
Solution: Turn off your AC immediately and switch the fan to ON. This helps melt the ice faster. It may take several hours for the coils to completely thaw. Once thawed, address the root cause before running the AC again. This usually means replacing filters or calling a technician to check refrigerant levels.
5. Refrigerant Leak
Your AC system relies on refrigerant to absorb and release heat. It’s a closed system that shouldn’t need refrigerant added under normal conditions. If your refrigerant is low, you have a leak that needs to be repaired.
Low refrigerant symptoms include reduced cooling performance, ice forming on refrigerant lines, hissing sounds from the unit, and longer run times. Unfortunately, many technicians simply add refrigerant without finding and fixing the leak, which is a temporary solution at best.
Refrigerant leaks can occur anywhere in the system: at connection points, in the coils, or even in the compressor. Finding small leaks requires specialized equipment and patience. Some leaks are tiny and may take months to show noticeable effects on cooling performance.
Solution: Refrigerant issues require professional service. A qualified technician will locate and repair the leak, then recharge the system to the correct refrigerant level. Expect to pay $200-600 for leak detection, repair, and recharge depending on the leak location and refrigerant type.
6. Compressor Problems
The compressor is the heart of your AC system. It circulates refrigerant between indoor and outdoor units, creating the pressure difference needed for cooling. Compressor problems range from minor electrical issues to complete failure.
Early signs of compressor trouble include unusual noises (clicking, buzzing, rattling), hard starting (difficulty starting up), frequent cycling on and off, and reduced cooling capacity. A failing compressor may run but not circulate refrigerant effectively, resulting in warm air from your vents.
Compressors can fail due to age, electrical problems, refrigerant issues, or lack of maintenance. The average compressor lasts 12-15 years with proper care. Unfortunately, compressor replacement is expensive, often leading to the question of repair vs. replace for the entire system.
Solution: Compressor problems require professional diagnosis. Sometimes the issue is a simple starting component (capacitor or relay) that costs $150-400 to replace. If the compressor itself has failed, replacement costs $1,500-2,500. This is where the Rule of 5000 becomes important for decision-making.
7. Electrical Issues or Bad Capacitor
Your AC has several electrical components that can fail and cause cooling problems. The most common is a bad capacitor. Capacitors store energy and provide the boost needed to start motors. There are separate capacitors for the compressor and the condenser fan motor.
When a capacitor fails, you might notice the compressor trying to start but failing, or the fan not spinning at all. Sometimes a bad capacitor causes intermittent operation that seems like a cooling problem. Capacitors typically fail after 5-7 years of service.
Other electrical issues include loose wiring connections, blown fuses, tripped breakers, and failed relays. These problems can cause your AC to run erratically, shut down unexpectedly, or fail to cool properly.
Solution: Electrical issues are dangerous and should be handled by professionals. Capacitor replacement is a relatively inexpensive repair ($150-400) that often resolves AC not cooling problems. A technician can test all electrical components and ensure safe, reliable operation.
Step-by-Step DIY Troubleshooting Guide
If your AC is not cooling, follow these steps in order. Start with the simplest, safest checks before moving to more complex troubleshooting.
Step 1: Verify the Problem
Make sure your AC is actually running. Listen for the compressor outdoors and the blower indoors. Check that air is flowing from the vents. Measure the temperature at a supply vent. It should be 15-20 degrees cooler than room temperature. If there’s no temperature difference, you have a confirmed cooling problem.
Step 2: Check the Thermostat
Verify your thermostat is set to COOL mode with the fan on AUTO. Set the temperature 5 degrees below current room temperature. Replace batteries if needed. If you have a digital thermostat, check for error codes or blank displays that might indicate power problems.
Step 3: Inspect and Replace the Air Filter
Locate your air filter (usually in the return air duct, blower compartment, or a wall-mounted grille). Remove it and check its condition. If dirty, replace it with the correct size filter. Note the airflow direction arrow on the filter frame and install the new filter with the arrow pointing toward the blower.
Step 4: Check the Circuit Breakers
Find your electrical panel and locate the breakers for your AC system. There should be two: one for the indoor unit and one for the outdoor unit. If either is tripped (in the middle position), turn it fully OFF, then back ON. If it trips again immediately, you have an electrical problem that needs professional service.
Step 5: Inspect the Outdoor Unit
Walk outside and examine your condenser unit. Clear away any debris, leaves, or vegetation from around the unit. Look for obstructions within two feet of the unit. Check that the condenser fan is spinning when the AC is running. If the fan isn’t spinning but the compressor is humming, you may have a bad fan motor or capacitor.
Step 6: Check for Frozen Coils
Look at the refrigerant lines connecting your indoor and outdoor units. If you see ice or frost, you have frozen evaporator coils. Turn off the AC immediately and turn the fan to ON. Let the system thaw for 4-6 hours before troubleshooting further. Frozen coils usually indicate low airflow (dirty filter) or low refrigerant.
Step 7: Clear the Condensate Drain
A clogged condensate drain can cause your AC to shut down due to a safety switch. Locate the drain line (usually a PVC pipe near your indoor unit) and use a wet/dry vacuum to clear any blockages. Pour a cup of white vinegar down the drain monthly to prevent algae growth.
Step 8: When to Call a Professional
Stop troubleshooting and call a technician if you notice: refrigerant leaks (hissing sounds, oily residue), electrical problems (burning smell, tripping breakers), compressor failure (no cooling, humming sound), or if you’ve completed all DIY steps without improvement. Continuing to run a malfunctioning AC can cause more expensive damage.
Window AC and Portable AC: Special Considerations
While central AC problems are most common, window units and portable ACs have their own unique issues. If you have a window air conditioner not cooling, here are the specific things to check.
Window AC Issues:
Window units can develop problems similar to central AC, but they have some unique challenges. The most common issue is improper installation. If your window unit isn’t sealed properly, hot air from outside enters around the unit, making it seem like it’s not cooling. Check the foam insulation panels and ensure a tight seal around all edges.
Window units also have their air filters, often located behind the front grille. These filters are smaller and clog faster than central AC filters. Remove the front panel and check the filter monthly. Window unit filters are usually washable rinse with water and let dry completely before reinstalling.
Another window AC issue is the exterior side becoming dirty. Since half the unit hangs outside, the condenser coil can accumulate dirt, pollen, and debris. Carefully clean the exterior coil with a garden hose and coil cleaner, being careful not to bend the aluminum fins.
Portable AC Issues:
Portable air conditioners have unique challenges because they’re all-in-one units. The most common portable AC problem is improper venting. The exhaust hose must be vented directly outside through a window or wall. If the hose is too long, has kinks, or vents into an attic or drop ceiling, the unit won’t cool effectively.
Check that the exhaust hose is as short and straight as possible. Every bend and extra foot of hose reduces efficiency. The hose should be insulated to prevent heat transfer. Also verify the window venting kit is properly sealed with no gaps.
Portable units also generate condensation that must be drained. Most units have an internal reservoir or drain hose. If the reservoir is full, the unit may stop cooling. Empty the drain tank or ensure the drain hose is properly connected and flowing.
Like window units, portable ACs have air filters that need regular cleaning. These are usually washable foam filters behind the air intake grille. Clean them monthly for optimal performance.
Repair or Replace? The Rule of 5000
When facing a major AC repair, how do you decide whether to fix or replace? HVAC professionals use the Rule of 5000 as a guideline. Here’s how it works: multiply the repair cost by the age of your equipment in years. If the result exceeds 5000, replacement is usually the better investment.
For example, if your 10-year-old AC needs a $1,500 compressor repair, the calculation is 1,500 x 10 = 15,000. Since 15,000 exceeds 5,000, replacement makes more sense. However, if your 5-year-old unit needs a $400 capacitor repair, that’s 400 x 5 = 2,000, well below 5,000, so repair is the logical choice.
This rule accounts for several factors. Older equipment is more likely to have additional problems soon. Newer systems are significantly more energy-efficient, often reducing cooling costs by 20-30%. And new equipment comes with warranties, providing peace of mind.
Consider also the refrigerant type. Systems made before 2010 likely use R-22 refrigerant, which is being phased out and has become extremely expensive. If an older R-22 system develops a refrigerant leak, conversion to modern R-410A or replacement is usually required anyway.
Modern AC units typically last 15-20 years with proper maintenance. If your system is less than 10 years old and repair costs are reasonable, fixing usually makes sense. For systems over 12 years old needing major repairs, replacement often provides better long-term value.
What AC Repairs Actually Cost
Understanding repair costs helps with decision-making and prevents overcharging. Here are typical price ranges for common AC repairs in 2026.
DIY-Friendly Repairs:
Air filter replacement: $15-50 depending on size and quality (MERV rating). This is the most cost-effective maintenance task you can perform yourself.
Thermostat replacement: $50-250 for the unit, plus $50-150 for professional installation if needed. Basic programmable thermostats start around $50, while smart thermostats range from $150-250.
Professional Repairs:
Capacitor replacement: $150-400 including parts and labor. This is one of the most common AC repairs and typically takes less than an hour.
Contactor replacement: $150-350 for parts and labor. The contactor is the electrical switch that controls power to the compressor and fan motor.
Refrigerant recharge: $200-600 depending on the refrigerant type and amount needed. This includes leak detection, repair, and recharging the system.
Compressor replacement: $1,500-2,500 for parts and labor. This is one of the most expensive repairs and often leads to the replacement decision.
Full system replacement: $4,000-10,000 including the outdoor unit, indoor coil, refrigerant lines, and installation. Higher-efficiency units and complex installations cost more.
Get multiple quotes for major repairs and always ask if the repair comes with a warranty. Most reputable contractors offer at least a 1-year labor warranty on repairs.
Preventive Maintenance: Stop Problems Before They Start
The best way to avoid AC not cooling problems is through regular preventive maintenance. Most cooling issues develop gradually and can be prevented with simple maintenance tasks.
Monthly Maintenance:
Check your air filter monthly and replace it when dirty. This single task prevents 40% of AC problems. During peak cooling season, you may need to replace filters monthly. Keep at least two spare filters on hand so you’re never tempted to delay replacement.
Clear debris from around your outdoor unit. After storms or lawn mowing, remove leaves, grass clippings, and other debris from the condenser area. Maintain at least two feet of clearance around the unit.
Seasonal Maintenance:
In spring, before cooling season begins, schedule a professional tune-up. A technician will clean coils, check refrigerant levels, test electrical components, lubricate moving parts, and identify potential problems before they cause failures. This service typically costs $100-150 and pays for itself in improved efficiency and prevented breakdowns.
Professional maintenance also includes checking refrigerant levels, testing thermostat accuracy, inspecting electrical connections, measuring temperature drop across the coil, and checking the condensate drain. Annual tune-ups can extend equipment life by several years and reduce energy costs by 5-15%.
DIY Maintenance Tasks:
Keep your outdoor unit level. If the concrete pad settles or shifts, the unit may not drain properly. Level the pad if needed to prevent water accumulation.
Clean the condenser coil annually. Use a garden hose to gently wash dirt and debris from the aluminum fins. For heavy buildup, use a commercial coil cleaner following the product instructions. Be careful not to bend the fragile fins.
Clear your condensate drain monthly. Pour a cup of white vinegar down the drain line to kill algae and prevent clogs. If the drain is already clogged, use a wet/dry vacuum to clear the blockage.
Test your system before peak cooling season. Run your AC for a few hours in spring when temperatures are moderate. This gives you time to address any problems before you need the system desperately.
Invest in a programmable or smart thermostat. These devices can reduce cooling costs by 10-20% by automatically adjusting temperatures when you’re away or sleeping. Many also provide maintenance reminders and filter change notifications.
FAQ
Why is my AC running but not cooling down?
The most common reasons your AC runs but doesn’t cool include a dirty air filter restricting airflow, incorrect thermostat settings, a blocked outdoor condenser unit, frozen evaporator coils, or low refrigerant levels. Start by checking and replacing your air filter, then verify the thermostat is set to COOL mode with fan on AUTO. If these don’t solve the problem, check for ice on refrigerant lines and clear debris from your outdoor unit.
How to fix an AC not blowing cold air?
Start with these quick fixes: replace a dirty air filter, verify thermostat settings are correct, check that circuit breakers haven’t tripped, clear debris from the outdoor condenser unit, and ensure supply vents are open and unobstructed. If these don’t resolve the issue, check for frozen coils (ice on refrigerant lines) and turn off the AC to thaw them. For problems persisting after these steps, you likely have a refrigerant leak, compressor issue, or electrical problem requiring professional service.
How do I reset my central AC?
To reset your central AC, first turn off the thermostat. Then locate the circuit breaker for your AC unit and turn it OFF. Wait 5 minutes to allow the system to fully power down. Turn the breaker back ON, wait 3 minutes, then turn your thermostat back on. Some systems also have a reset button on the outdoor unit near the refrigerant lines. If your AC has a reset button, press it once after the power cycle. If these steps don’t work, you may have a more serious issue requiring professional diagnosis.
Should I turn off AC if it’s not cooling?
Yes, you should turn off your AC if it’s not cooling and you suspect frozen coils or a refrigerant leak. Continuing to run the system with frozen coils can damage the compressor. Look for ice or frost on the refrigerant lines connecting your indoor and outdoor units. If you see ice, turn off the AC immediately and switch the fan to ON to help thaw the coils. If you hear hissing sounds or see oily residue near connections, you may have a refrigerant leak and should turn off the system to prevent compressor damage.
Why does my AC take so long to get cold?
Extended cooling times can result from dirty air filters, dirty outdoor coils, undersized equipment, or heavy heat load. A dirty filter reduces airflow, making your system work longer to cool your home. Dirty outdoor coils can’t release heat efficiently, slowing the cooling process. On extremely hot days, even properly functioning ACs run longer. However, if your AC consistently takes hours to reach the set temperature, check your filter and outdoor unit first. You may also need to address heat gain through windows, poor insulation, or internal heat sources.
Does cleaning AC filter make it colder?
Yes, cleaning or replacing a dirty AC filter will make your system produce colder air. A clean filter allows proper airflow across the evaporator coils, enabling efficient heat transfer. When filters are dirty, restricted airflow causes several problems: reduced cooling capacity, longer run times, higher energy bills, and can cause evaporator coils to freeze. Most homeowners notice improved cooling within an hour of replacing a clogged filter. For optimal performance, check filters monthly and replace them at least every 90 days, or every 30-60 days if you have pets or allergies.
Can a dirty filter cause AC not to cool?
Yes, a dirty filter is the single most common cause of AC not cooling. A clogged filter restricts airflow across your evaporator coils, which prevents proper cooling. The restricted airflow can cause evaporator coils to freeze over, completely blocking cooling. Your system also runs longer and works harder, increasing energy consumption and wear on components. In fact, nearly 40% of AC cooling problems are caused by dirty air filters. Most filters cost $15-50 and take two minutes to replace, making this the most cost-effective DIY maintenance task you can perform.
Why is my AC not cooling enough to reach set temperature?
If your AC runs but never reaches your thermostat setting, possible causes include an undersized unit, extremely high outdoor temperatures, dirty air filter, dirty outdoor coils, refrigerant leak, or duct problems. Start by replacing your air filter and clearing debris from your outdoor unit. Measure the temperature difference between supply air and return air, it should be 15-20 degrees. If the difference is less, you may have a refrigerant or compressor issue. Also check for leaky ducts that are losing cooled air before it reaches your living spaces. On extremely hot days, ACs may struggle to reach very low setpoints.
Conclusion
An air conditioner not cooling is frustrating, but most problems have straightforward solutions. Start with the basics: check your thermostat settings, replace a dirty air filter, verify breakers haven’t tripped, and clear debris from your outdoor unit. These simple steps resolve 70% of AC cooling problems.
For more complex issues like refrigerant leaks, compressor problems, or electrical failures, don’t hesitate to call a professional. Continuing to run a malfunctioning AC can cause more expensive damage. Use the Rule of 5000 when facing major repairs to make an informed decision about repair versus replacement.
Remember that preventive maintenance is the best defense against cooling problems. Replace your air filter monthly, schedule annual professional tune-ups, and keep your outdoor unit clear of debris. These simple tasks extend equipment life, improve efficiency, and prevent most AC not cooling issues before they occur.
If your AC is still not cooling after trying the DIY troubleshooting steps in this guide, contact a qualified HVAC technician. They have the tools and expertise to diagnose complex problems and get your cooling system running efficiently again.


Leave a Comment