
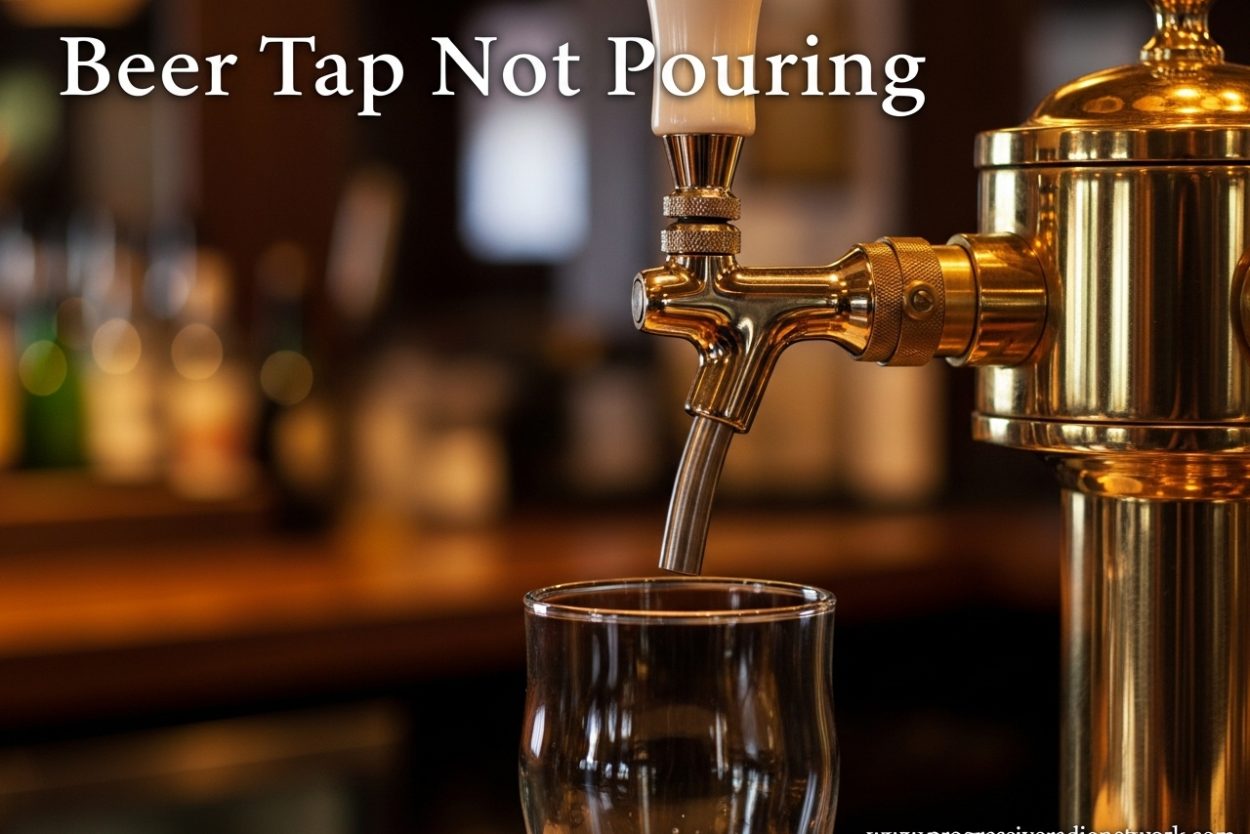
Nothing ruins a party faster than a beer tap not pouring when you have guests waiting. I’ve been there – standing in front of my kegerator, wondering why the perfectly cold keg won’t dispense a single drop. After troubleshooting countless draft beer systems over the years, I’ve learned that most beer tap problems have simple fixes you can handle yourself.
This guide covers every reason your beer tap might stop working, from the obvious (empty CO2 tank) to the hidden issues (check ball stuck, dip tube clog). I’ll walk you through step-by-step diagnostics so you can get your draft beer flowing again in minutes, not hours.
Quick Diagnosis: 5 Most Common Reasons Your Beer Tap Won’t Pour
- Your CO2 tank is empty or the regulator is turned off
- The keg coupler isn’t fully engaged or seated properly
- Beer temperature is too warm (above 40°F causes flow issues)
- CO2 pressure is too low or the regulator isn’t working
- The beer line or dip tube is clogged with sediment or hop debris
Beer Tap Not Pouring: Complete Troubleshooting Guide
When your beer tap stops pouring, start with the basics before diving into complex diagnostics. I recommend checking these in order, as they account for 80% of all beer tap problems I’ve encountered. Each section builds on the previous one, so work through them systematically.
Check Your Gas Supply First
The CO2 tank is the heart of your draft beer system. Without pressurized gas, beer cannot flow from the keg to the faucet. First, check if your CO2 tank has gas by looking at the regulator gauge.
If the high-pressure gauge reads zero, your tank is empty. This happens more often than you’d expect – especially in busy bars or after long periods of non-use. A typical 5lb CO2 tank lasts about 4-6 kegs, but this varies based on how often you pour and whether there are any leaks in the system.
If the gauge shows pressure but you’re still not getting beer, verify the shutoff valve on the regulator is open. I can’t tell you how many times I’ve spent 20 minutes troubleshooting only to find someone accidentally turned off the gas. Look for the valve handle – when parallel to the gas line, it’s open. When perpendicular, it’s closed.
Also check that the gas line from the regulator to the keg coupler isn’t pinched, kinked, or disconnected. I’ve seen gas lines get caught behind kegerators, creating a sharp bend that prevents CO2 from reaching the keg. Trace the line from the regulator all the way to the coupler, ensuring it’s straight and securely connected.
Verify the Keg Has Beer
It sounds obvious, but make sure your keg isn’t empty. A beer tap not pouring is often just an empty keg. You can check by lifting the keg – full kegs weigh around 160 pounds while empty ones weigh about 30 pounds. Or, if your kegerator has a clear door, look for the keg level indicator line.
If you’re unsure, try tapping the side of the keg with a plastic mallet or your knuckles. A full keg will have a dull, solid sound while an empty keg will sound hollow and resonant. I’ve seen multiple people spend hours troubleshooting their system only to discover they simply ran out of beer.
Another tell-tale sign is when beer starts coming out as foam and then stops completely. This indicates the keg is nearly empty – you’re getting the last bit of beer mixed with CO2. In this case, time to swap in a fresh keg.
Check Keg Coupler Engagement
The keg coupler connects your beer and gas lines to the keg. If it’s not properly engaged, beer won’t flow even with full CO2 pressure. I’ve found this is one of the most common issues, especially for people new to keg systems or when switching between different keg types.
To check the coupler, pull it out from the keg and look at the probe (the metal piece that inserts into the keg). It should be clean and free of debris. Then reinsert it firmly and twist clockwise until it locks in place. You should feel or hear a distinct click when properly engaged.
For D-system couplers (the most common type), you’ll need to push down while twisting. S-system couplers require a pull-and-twist motion. If you’re unsure which type you have, look for the letter stamped on the coupler body.
I recommend pulling on the coupler gently after engaging to ensure it’s locked. It should not pull off without significant force. If it comes off easily, the locking mechanism may be worn or damaged, requiring replacement.
CO2 Pressure Issues: How to Fix and Prevent
CO2 pressure problems are a leading cause of beer tap not pouring issues. The ideal pressure range for most draft beers is 12-15 PSI at sea level. Too little pressure and beer won’t flow. Too much pressure and you’ll get nothing but foam.
Check your regulator’s low-pressure gauge. If it reads below 10 PSI, beer won’t have enough push to reach the faucet. Turn the adjustment screw clockwise to increase pressure. Make small adjustments (about 1 PSI at a time) and wait 10-15 minutes between changes to see the effect.
If the gauge reads above 20 PSI, beer may be over-carbonated and blocked in the line. Turn the adjustment screw counterclockwise to reduce pressure. You may also need to vent some pressure from the keg using the pressure relief valve on the coupler.
Elevation affects CO2 pressure. If you live above 1,000 feet, you’ll need slightly higher pressure to compensate for thinner air. A good rule of thumb is to add 0.5 PSI for every 1,000 feet of elevation. I’ve seen systems in Denver (5,280 feet) running at 15-16 PSI work perfectly while the same setup at sea level would over-carbonate.
Regulator failure is another possibility. If adjusting the screw has no effect on the gauge reading, the regulator may be faulty. Listen for hissing sounds, which indicate a leak. You can spray soapy water on regulator connections – bubbles will reveal any leaks.
Temperature Problems: The 36-38°F Sweet Spot
Temperature is critical for proper beer flow. Draft beer should be served between 36-38°F for optimal taste and pour. When beer gets too warm (above 40°F), CO2 comes out of solution, creating foam that blocks the beer flow.
Check your kegerator temperature using a reliable thermometer. I don’t recommend relying solely on the built-in dial, as these are often inaccurate by several degrees. Place a glass of water inside the kegerator and measure its temperature after 24 hours for the most accurate reading.
If beer is too warm, first check that your kegerator door seals properly. Worn door gaskets let warm air in, causing temperature fluctuations. Run your hand around the door edge – if you feel cool air escaping, replace the gasket.
Also ensure adequate air circulation around the keg. Don’t pack the kegerator too full, as this prevents cold air from reaching all parts of the beer. Leave at least 2 inches of clearance on all sides of the keg.
Frozen beer lines are the opposite problem. If your kegerator temperature gets too low (below 34°F), beer can freeze in the lines, especially in tower dispensers. You’ll notice beer starts slow, then stops completely as ice builds up. Simply raising the temperature gradually over several hours will resolve this.
Dip Tube Clogs: The Hidden Problem
The dip tube is the plastic or metal tube inside the keg that draws beer from the bottom. When it gets clogged, beer stops flowing even with full CO2 pressure. This is especially common with homebrew and hoppy beers that contain sediment.
Homebrewers frequently deal with hop pellet clogs. NEIPAs and other heavily dry-hopped beers leave hop particles that settle in the dip tube, creating a blockage. I’ve seen multiple forum posts where brewers thought they had a bad keg when it was actually a hop clog.
Symptoms of a dip tube clog include: slow pour that gets worse over time, beer stopping mid-pour, or no flow despite pressure in the system. Sometimes you’ll hear a hissing sound as CO2 tries to push through the blockage.
To clear a dip tube clog, first try back-flushing. Disconnect the beer line from the coupler and use the CO2 line to force gas backward through the beer out post. Set pressure to 20-25 PSI and hold for 5-10 seconds. This often dislodges clogs without needing to tap a new keg.
For stubborn clogs, you may need to tap a different keg to confirm the issue. If the new keg pours fine, the problem is definitely in the original keg. Unfortunately, there’s no way to access the dip tube without tapping the keg, so severely clogged kegs often need to be transferred to a new vessel.
Prevention is key for dip tube clogs. Use a hop bag for dry-hopping, let beer cold-crash before kegging, and consider using a floating dip tube if you brew with lots of hops regularly.
Clogged Beer Lines: Diagnosis and Solutions
Beer lines can become clogged over time with beer stone, yeast, mold, or sediment. A clogged line will cause slow pouring that gradually gets worse, eventually stopping completely. I’ve seen beer lines go from perfect flow to no flow over the course of a single keg.
Symptoms of clogged beer lines include: consistently slow pours across multiple kegs, off-flavors in the beer, or visible sediment in the line. You may also notice the beer line feels heavy or has visible buildup when disconnected.
Cleaning beer lines is essential maintenance. For home systems, clean lines every 2 weeks or when changing kegs. For commercial systems, clean every week or according to local health codes. Use a dedicated beer line cleaner – not just water – to dissolve beer stone and kill bacteria.
The cleaning process is straightforward: disconnect the beer line from the keg, run cleaning solution through the line (I recommend circulating it for 15-20 minutes), then flush thoroughly with water. Never use bleach or harsh chemicals, as these can damage line material and affect beer taste.
If cleaning doesn’t restore flow, the line may need replacement. Vinyl beer lines should be replaced every 1-2 years, while barrier lines last 3-5 years. Signs you need new lines include cracks, discoloration, or persistent bad flavors that don’t go away after cleaning.
Check Ball and Coupler Issues
The check ball is a small metal ball inside the keg coupler that prevents beer from flowing backward. When this ball gets stuck, beer cannot exit the keg. I’ve seen check balls get stuck from debris, beer stone, or simply from sitting too long without use.
To test for a stuck check ball, remove the coupler from the keg and shake it gently. You should hear a rattling sound – that’s the check ball moving freely. If you don’t hear anything or the sound is muffled, the ball may be stuck.
A stuck check ball often happens when beer dries inside the coupler. The residue acts like glue, trapping the ball in place. This is especially common in systems that sit idle for weeks or months. I recommend tapping a keg at least once a month to keep everything lubricated.
To fix a stuck check ball, remove the coupler probe (usually unscrews) and clean the ball housing with warm water and a soft brush. Be gentle – don’t use metal tools that could damage the seating surface. Rinse thoroughly and reassemble.
If the check ball is damaged or the seat is worn, the entire coupler may need replacement. Couplers typically cost $20-40 and are worth replacing every few years to prevent issues during service.
Faucet and Tap Handle Problems
The beer faucet is the final component in the dispensing system. If it’s stuck, broken, or dirty, beer won’t pour even when everything else works perfectly. I’ve seen faucets that looked fine from the outside but were completely blocked inside.
Check that the tap handle moves freely. If it’s stiff or won’t open fully, the faucet may be dirty or damaged. Never try to force a stuck handle – you’ll likely break something. Instead, remove the handle and inspect the faucet internals.
Faucet maintenance is often overlooked but critical for good pours. Remove the faucet from the tower every few months and clean all components with warm water and mild soap. Pay special attention to the check ball inside the faucet – it can get stuck just like the coupler check ball.
Look for signs of wear on the faucet body. Cracks, corrosion, or worn threads indicate it’s time for replacement. Standard beer faucets cost $15-25 and should last 5-10 years with proper maintenance.
For tower dispensers, also check that the beer line isn’t kinked where it enters the tower. I’ve seen lines get twisted during installation, creating a partial blockage that only becomes apparent after the system has run for a while.
Step-by-Step Fixes for Beer Tap Not Pouring
Tools You’ll Need
- Screwdriver (for faucet removal)
- Adjustable wrench (for coupler connections)
- Beer line cleaning kit
- Thermometer (for temperature checking)
- Soapy water spray bottle (for leak detection)
- Clean container (for line cleaning)
Diagnostic Flowchart
Follow this sequence to diagnose your beer tap problem efficiently. Start at the beginning and work through each step until you identify the issue. This systematic approach saves time and prevents you from replacing parts that aren’t broken.
Step 1: Check CO2 tank – is it empty? If yes, refill or replace. If no, proceed.
Step 2: Check regulator – does it show pressure? Is the valve open? If no, fix the issue. If yes, proceed.
Step 3: Check keg – is it empty? If yes, replace. If no, proceed.
Step 4: Check coupler engagement – is it properly locked? If no, re-engage. If yes, proceed.
Step 5: Check temperature – is beer between 36-38°F? If too warm, adjust. If correct, proceed.
Step 6: Try a different keg – if it pours, the issue is the original keg. If no pour continues, proceed.
Step 7: Inspect beer line – is it clogged? Clean or replace if needed.
Step 8: Check faucet – is it working properly? Clean or replace if needed.
Fix 1: Reset Your CO2 System
If your CO2 system is acting up, a simple reset often solves the problem. Start by turning off the main tank valve and releasing all pressure from the regulator using the pressure relief valve. Wait 2-3 minutes, then slowly reopen the tank valve.
Set the regulator to your target pressure (12-15 PSI for most beers) and wait 10 minutes. This gives the system time to stabilize. Check for leaks by spraying soapy water on all connections – bubbles indicate a problem.
If pressure continues to drop without any beer pouring, you likely have a leak somewhere in the system. Common leak points include regulator connections, keg coupler seals, and hose clamps. Tighten connections and replace any damaged washers or O-rings.
Fix 2: Clear a Clogged Dip Tube
For dip tube clogs, start with the back-flush method. Disconnect the beer line from the coupler and move the gas line to the beer out post. Set pressure to 20-25 PSI and pulse the gas in short bursts.
Listen for the sound of debris clearing – you’ll hear a change in tone when the blockage releases. After 5-10 seconds of pulsing, reconnect everything normally and try pouring. Repeat if necessary.
If back-flushing doesn’t work, try tapping a different keg temporarily. This confirms whether the problem is the keg or the system. If the new keg pours fine, you’ll need to deal with the clogged keg – either by transferring beer to a new vessel or accepting that the remaining beer is lost.
Fix 3: Re-engage the Keg Coupler
For coupler engagement issues, start by completely removing the coupler from the keg. Inspect the probe for damage or debris and clean it with a soft cloth if needed. Check the O-rings for cracks or wear – replace if damaged.
Realign the coupler with the keg opening and push firmly. For D-system couplers, push down and twist clockwise 90 degrees until it locks. For S-system, pull up and twist. You should feel a distinct resistance followed by a click when properly engaged.
Test the engagement by gently pulling on the coupler – it should not come off without significant force. If it feels loose, the locking mechanism may be worn and the coupler should be replaced.
Fix 4: Adjust Temperature
Temperature issues require patience. Never make drastic temperature changes quickly, as this can shock the beer and create more problems. Adjust the kegerator thermostat 1-2 degrees at a time and wait 24 hours for the system to stabilize before checking again.
If beer is too warm, also check for door seal issues and ensure proper airflow. A small fan inside the kegerator can help distribute cold air more evenly, especially in larger models or towers.
For frozen lines, simply raise the temperature slightly and wait. Don’t try to force beer through a frozen line – this can damage the faucet or cause leaks. Allow 12-24 hours for lines to completely thaw before attempting to pour again.
Fix 5: Clean the Faucet
Faucet cleaning is simple but often neglected. Remove the faucet from the tower by unscrewing the coupling nut. Disassemble all parts – handle, shaft, check valve, and body. Soak in warm water and mild cleaner for 10-15 minutes.
Use a soft brush to clean all internal surfaces, paying special attention to the check ball and its seating area. Rinse thoroughly with clean water and reassemble. Lubricate moving parts with food-grade silicone if recommended by the manufacturer.
When reinstalling, make sure the faucet is oriented correctly for proper drainage. Most faucets should be installed with a slight downward angle to prevent beer from pooling inside.
Fix 6: Replace Beer Line
If cleaning doesn’t restore flow, replace the beer line. Measure the length and diameter of your existing line before purchasing – most home systems use 3/16″ ID line while commercial systems use 1/4″ or 5/16″ line.
Cut the new line to the same length as the old one. Use a sharp tubing cutter for clean cuts – jagged ends can cause leaks or turbulence. Connect to both the coupler and faucet using proper hose clamps or push-fit connections depending on your system.
After installation, run several gallons of water through the line to flush out any manufacturing residue. Then sanitize with beer line cleaner before tapping a fresh keg.
When to Call a Professional
Most beer tap problems are DIY-friendly, but some situations require professional help. Call a technician if you experience multiple simultaneous failures (like several taps stopping at once), persistent issues that return after fixes, or problems with commercial-grade equipment you’re not qualified to service.
Also seek professional help for regulator problems beyond simple adjustments, CO2 tank issues, or complex commercial systems with long trunk lines. The cost of professional service is often less than replacing expensive components that you might damage through improper troubleshooting.
Preventive Maintenance: Stop Beer Tap Problems Before They Start
Preventing beer tap issues is easier than fixing them. I recommend establishing a regular maintenance schedule based on your usage. For home systems, clean beer lines every 2 weeks and perform a full system check monthly. Commercial systems should follow local health codes, which typically require weekly line cleaning.
Temperature monitoring should happen daily. I keep a thermometer in my kegerator and check it each time I pour beer. Early detection of temperature drift prevents most foaming and flow issues before they become serious problems.
Replace CO2 tank washers and O-rings annually, even if they look fine. These degrade over time and can cause slow leaks that gradually reduce pressure. A $2 washer replacement is much cheaper than wasting CO2 or dealing with a failed system during a party.
Document your system settings – ideal pressure, temperature, and line length. This reference helps you quickly identify when something changes and makes troubleshooting easier. I keep a small notebook in my kegerator for this purpose.
Frequently Asked Questions
Why is my beer tap not pouring?
Beer tap not pouring is usually caused by empty CO2 tank, keg coupler not engaged, temperature issues, low CO2 pressure, or clogged beer lines. Start by checking gas supply, then verify keg has beer and coupler is properly locked.
How to fix a stuck beer tap?
First check if the faucet handle moves freely. Remove and clean faucet internals, inspect for debris or damage. Lubricate with food-grade silicone if needed. If the problem persists, the faucet may need replacement.
What is the 3:30-300 rule for beer?
The 3:30-300 rule is a guideline for draft beer systems: maintain 3 PSI of CO2 pressure for every 10 PSI of line resistance, keep beer at 30-38°F, and maintain 300 feet of elevation adjustment. This ensures proper carbonation and flow.
How do you force carbonate in a keg?
Force carbonation involves setting CO2 pressure to 30-40 PSI, shaking or rolling the keg for 20-30 minutes, then reducing pressure to serving level (12-15 PSI) and letting the beer rest for 24-48 hours. This rapidly carbonates beer compared to natural conditioning.
Conclusion
Dealing with a beer tap not pouring can be frustrating, but most issues are straightforward to diagnose and fix yourself. By systematically checking each component of your draft beer system, you can identify the problem and get back to enjoying fresh draft beer quickly.
Remember that preventive maintenance is the best medicine. Regular cleaning, temperature monitoring, and system checks will prevent most beer tap problems before they start. Keep a small toolkit handy, document your system settings, and don’t be afraid to troubleshoot – you’ll learn more about your system with each issue you resolve.
The next time your beer tap stops working, work through this guide step by step. Most of the time, you’ll find a simple fix that takes just minutes. And for the rare times you need professional help, you’ll have the knowledge to explain the problem clearly to a technician, saving time and money on repairs.

Leave a Comment