
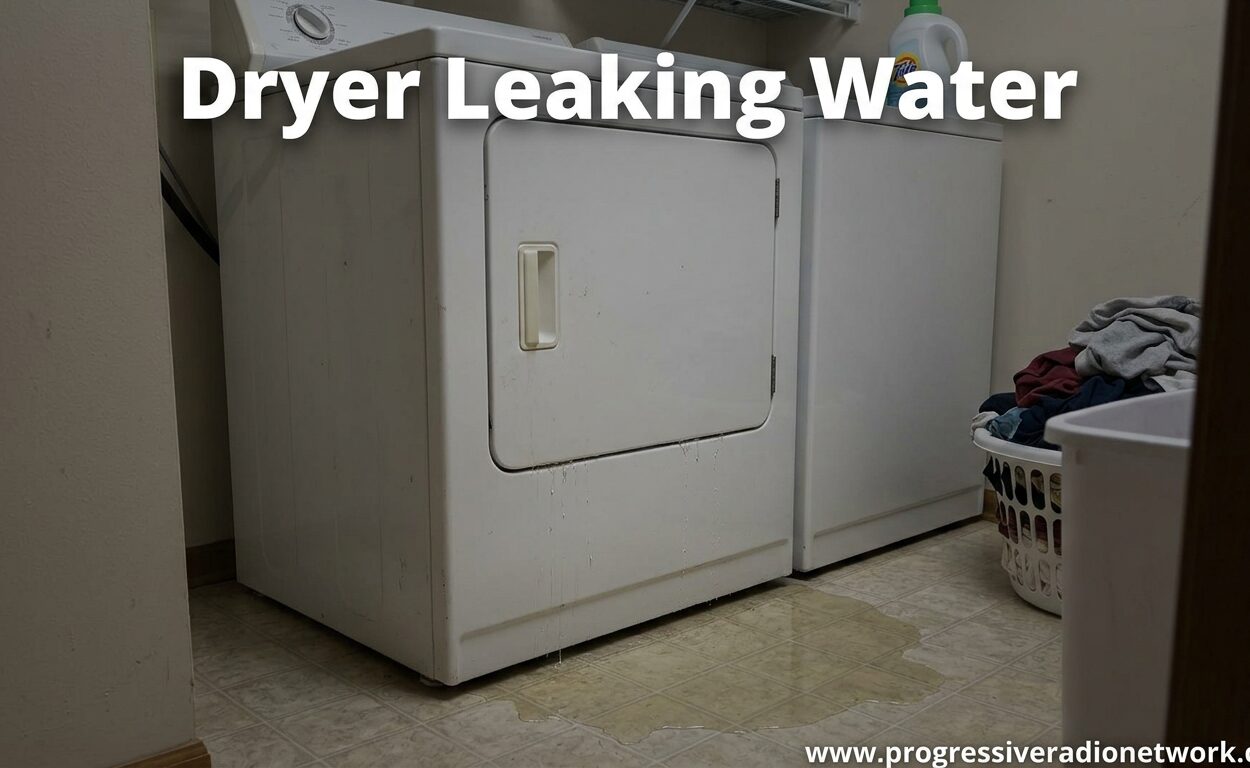
Finding a puddle under your dryer is one of the most confusing appliance problems you can face. I remember the first time I saw water pooling beneath my own machine. I stood there staring at it because dryers do not have water lines, so where on earth was it coming from?
The answer is simpler than you think. Dryers pull gallons of water out of your clothes every cycle.
That moisture turns into humid air and normally exits through the exhaust vent. When something blocks that path, the water has nowhere to go except back into the drum or onto your floor.
In this guide, I will walk you through every common cause of a dryer leaking water. I will also show you how to diagnose the problem safely, fix what you can yourself, and know exactly when to call a professional. We have drawn on real repair stories from homeowners, plus our own troubleshooting experience, to make sure you get answers that actually work.
If you are also dealing with other laundry room issues, our guide on troubleshooting washer problems may help you tackle the full picture.
Let’s figure out what is going on.
Why Is My Dryer Leaking Water?
A dryer leaking water is almost always caused by trapped moisture that cannot escape the vent system. Your wet clothes release water during the drying cycle. The heating element turns that water into steam, and the exhaust vent is supposed to carry it outside.
When the vent is blocked, the humid air cools down too quickly. That cooling turns the steam back into liquid water. The water then drips down inside the dryer, collects in the drum, or leaks out through the door seal and onto your floor.
Even gas dryers and electric dryers can leak water this way. The source is not a plumbing line. It is the moisture from your clothes that has found the wrong exit.
A Clogged Exhaust Vent Is the Most Common Cause
A clogged exhaust vent is the single biggest reason homeowners find water under their dryer. Lint, dust, and even bird nests can block the vent hose over time. Once airflow is restricted, the humid air has no path to the outside.
The trapped moisture first condenses inside the vent duct. From there it runs back down the pipe and into the dryer cabinet. You may notice the leak gets worse with larger loads because more water is being removed from the clothes.
Long vent runs make the problem worse. If your dryer sits more than 25 feet from the exterior wall, the air has more time to cool inside the pipe. We have seen cases where a 30-foot vent run caused constant puddles even though the lint screen was clean.
Fixing this starts with disconnecting the vent hose from the dryer. Clean the hose with a vent brush, then clear the exterior vent hood.
Check that the flapper on the outside opens fully when the dryer runs. If it barely moves, you still have a blockage somewhere.
Condensation Buildup Inside the Exhaust Duct
Cold weather creates a perfect environment for condensation inside your dryer vent. When the humid air from your dryer hits a cold duct in an unheated garage, attic, or crawlspace, it cools instantly. That rapid cooling turns steam into water droplets almost on contact.
We hear about this constantly from readers in winter months. One homeowner told us their dryer only leaked water in January and February.
The rest of the year it was completely dry. The problem was a vent run through an unheated attic where temperatures dropped below freezing.
Insulating the vent duct can help reduce this temperature shock. You can also reroute the vent through a heated space if possible. Another option is to shorten the vent run, since every extra foot of cold pipe increases the chance of condensation.
Attic venting and basement installations are especially prone to this issue. If your dryer vents into a crawlspace, the same rules apply. Cold air meeting humid air equals water, and that water will find its way back to your dryer or your floor.
A Worn Door Seal or Drum Felt Lets Moisture Escape
The door seal and drum felt are the rubber or fabric gaskets that keep air and moisture inside the drum. Over years of use, these seals wear out, fray, or develop gaps. When that happens, humid air escapes through the door instead of going out the vent.
Water will often pool directly in front of the dryer when the door seal is bad. You may also see streaks running down the front panel after each cycle. The drum felt seal at the back of the drum can cause similar leaks, though the puddle usually forms underneath the machine instead.
Replacing a door seal is a manageable DIY repair on most Whirlpool, Samsung, and LG models. You can order the specific gasket for your model number and install it with basic hand tools. The drum felt is a bit more involved because you usually need to remove the front or rear panel to reach it.
If you are not comfortable disassembling the dryer, this is a good point to call a technician. A poor seal will also reduce drying efficiency because hot air escapes instead of circulating through the clothes.
An Unlevel Dryer Creates Puddles on One Side
An unlevel dryer can cause water to collect in one corner and then leak out during the spin or tumble motion. If your leveling legs are uneven, even a small amount of condensation inside the drum will run to the low side and drip through the door or cabinet seams.
The leak is usually concentrated on one side, which is a strong clue. Several homeowners on repair forums have described exactly this pattern.
An LG dryer owner reported a small puddle forming only at the bottom-front-right corner after a few loads. The fix was simply adjusting the front legs until the unit was perfectly flat.
You can check level with a bubble level or even a phone app. Place the level on top of the dryer front to back and side to side.
Adjust the threaded feet at each corner until the bubble sits in the center. Run a test cycle and check if the puddle returns.
Sometimes the floor itself is uneven, especially in older homes with settled foundations. In those cases, placing a thin rubber pad under the low foot can fix the issue without major adjustments.
A Damaged or Dirty Lint Filter Traps Moisture
A cracked lint filter or a screen that does not seat properly can force moist air back into the dryer cavity. The lint filter is the first line of defense for airflow. If it is damaged, lint bypasses the screen and clogs the internal ductwork.
Even a clean filter can cause problems if it is warped. High heat over years of use can distort the plastic frame. When the filter no longer creates a tight seal, humid air sneaks around the edges and condenses on the cooler metal surfaces inside the cabinet.
Check your lint screen for cracks, melted spots, or bent edges. Remove it and hold it up to a light.
If you see gaps where the mesh meets the frame, it is time for a replacement. Most manufacturers sell replacements for under 30 dollars, and the swap takes about 30 seconds.
Also make sure you are cleaning the lint filter after every single load. A screen packed with lint restricts airflow, which increases humidity inside the machine and raises the risk of condensation leaks.
Steam Cycle and Water Supply Connection Problems
Steam dryers have a small water inlet hose that feeds the steam generator. If that hose connection loosens, or if the rubber washers inside wear out, you can get a slow drip that looks like a leak from the dryer base. The leak may only appear when the steam cycle runs.
Check the inlet hose where it connects to the dryer and to your household water supply. Tighten the fittings gently with a wrench, but do not overtighten because that can strip the threads.
Replace the hose washers if they look flat or cracked. These washers cost pennies and can save you from a service call.
Some steam dryers also develop condensation around the steam nozzle inside the drum. If the nozzle is clogged with mineral deposits from hard water, the steam condenses into water droplets instead of dispersing evenly. You can clean the nozzle with a small brush and white vinegar.
If your dryer is leaking during the steam cycle but not during regular drying, the problem is almost certainly related to the water supply or the steam valve. That narrows your search significantly.
Condenser Dryer Water Tank and Drain Hose Issues
Ventless condenser dryers collect water in a removable tank or pump it out through a drain hose. If the tank is full and the overflow sensor fails, water will spill onto the floor. If the drain hose slips out of the standpipe or drain outlet, the same thing happens.
We have read multiple reports from Beko and Fisher & Paykel owners who found puddles after the drain hose worked itself loose during vibration. A simple zip tie or hose clamp can prevent this from happening again.
The condensate pump can also fail on heat pump dryers and condenser models. When the pump dies, the water cannot reach the drain or tank.
It backs up into the internal reservoir and leaks through the base of the machine. Replacing a condensate pump is usually a job for a technician, though some handy homeowners do it themselves.
Check your user manual to see whether your model uses a tank or a drain hose. Empty the tank after every load if you have one. If you use a drain hose, inspect the connection point at the start of each month.
How to Diagnose a Dryer Leaking Water Step by Step
Start every diagnosis by unplugging the dryer or turning off the gas valve. Safety comes first. You should never work on an appliance while it is connected to power or gas.
Step 1: Look at the location of the puddle. Water directly under the vent hose connection points to a vent blockage. Water in front of the door suggests a door seal issue.
Water on one side only usually means the dryer is not level.
Step 2: Remove the lint filter and inspect it. Check for cracks, warping, or heavy buildup. Clean it thoroughly and reseat it firmly.
If it does not sit flush, order a replacement.
Step 3: Disconnect the vent hose from the back of the dryer. Shine a flashlight into the hose and the dryer outlet. Look for packed lint or obvious obstructions.
Shake the hose outside to clear loose debris. If you have a vent brush, run it through the full length of the hose.
Step 4: Check the exterior vent hood. Make sure the flap opens freely when the dryer runs. Look for lint packed around the louvers.
If the hood is damaged, replace it with a louvered model that does not use mesh screens, because mesh traps lint.
Step 5: Inspect the door seal and drum felt. Look for tears, gaps, or flattened areas. Run your finger around the seal to feel for cracks.
If you see daylight through the door when it is closed, the seal is definitely failing.
Step 6: Check if the dryer is level. Use a bubble level on the top surface. Adjust the legs at each corner until the machine is flat.
Tighten the lock nuts so the legs do not shift during vibration.
Step 7: Run a small test load with the vent hose temporarily connected. Watch for new leaks. If the leak stops, your vent cleaning fixed the issue.
If it persists, move on to seal replacement or call a professional.
For more appliance repair tips, you can also read our washing machine troubleshooting guide. It covers common vibration and noise issues that sometimes appear alongside dryer leaks.
When You Should Call a Professional Repair Service
You can handle vent cleaning, lint filter replacement, and leveling on your own. But some situations require a trained technician.
If you smell gas near a gas dryer, stop immediately and call a professional. Gas leaks are dangerous and should never be a DIY project.
Electrical issues inside the dryer cabinet also need expert attention. If you open the back panel and see burned wires, melted connectors, or scorched components, do not attempt repairs yourself. The risk of shock or fire is too high.
Replacing a drum felt seal, a condensate pump, or an internal steam valve usually requires disassembling the dryer. If you are not comfortable removing panels and handling small springs, it is worth the service call. Most appliance repair visits cost between 100 and 200 dollars, plus parts.
If your dryer is leaking water and also not drying clothes at all, the problem may be a failed heating element or thermal fuse. A professional can test these components with a multimeter and replace them safely. Continuing to run a wet dryer with a blown thermal fuse can create a fire hazard.
Trust your comfort level. There is no shame in calling a pro when the repair goes beyond basic maintenance.
How to Prevent Your Dryer from Leaking Water
Prevention is much easier than cleanup. Clean your lint filter after every single load. A 30-second habit saves you hours of troubleshooting later.
Inspect the vent hose at least twice a year. If you dry a lot of heavy fabrics or pet bedding, check it quarterly.
Remove the hose, shake it out, and look through it to make sure light passes through. If you see any crushed sections, replace the hose because kinks trap moisture.
Run a level check on the dryer every six months. Vibration slowly shifts leveling legs over time. A quick adjustment prevents the one-sided puddle problem before it starts.
If your vent runs through an unheated space, consider insulating the duct. Foam pipe insulation is inexpensive and easy to wrap around the vent hose. It reduces the temperature shock that causes winter condensation.
Do not overload the dryer. A packed drum reduces airflow and increases humidity.
The manufacturer lists a load capacity for a reason. Stick to it, and your clothes will dry faster with less risk of leaks.
Keep your appliance maintenance schedule simple. Pair dryer checks with your other household upkeep. For example, when you look at dishwasher issues, you can also review our dishwasher troubleshooting guide to keep every appliance in good shape.
Frequently Asked Questions
Why is my dryer leaking water from underneath?
The most common reason is a clogged exhaust vent. When humid air cannot escape, it condenses back into water inside the vent duct and drips down into the dryer cabinet. A blocked vent, a damaged door seal, or an unlevel dryer can all cause water to collect underneath the unit.
How to fix tumble dryer leaking water?
Start by unplugging the dryer. Clean the lint filter, disconnect the vent hose and clear it with a brush, check the exterior vent hood, and inspect the door seal for gaps. If the dryer is not level, adjust the legs. For condenser dryers, empty the water tank and check the drain hose connection.
Why is there water on the floor in front of my dryer?
Water in front of the dryer usually means the door seal is worn or the machine is not level. A bad door seal lets humid air escape through the front, where it condenses and drips onto the floor. An unlevel dryer can also cause internal condensation to pool at the front and leak out.
Can electric dryers leak water?
Yes. Both electric and gas dryers can leak water because the water comes from the clothes, not from a plumbing line. As the dryer heats wet fabric, the water turns to steam. If the exhaust vent is blocked or the vent path is too cold, that steam condenses back into liquid and leaks out.
Conclusion
A dryer leaking water is frustrating, but it is rarely a catastrophic failure. In most homes, the cause is a clogged exhaust vent or a simple condensation issue that you can fix in an afternoon.
I always tell people to start with the lint filter and the vent hose. Those two checks solve the majority of leaks without costing a dime. If the problem persists, move through the door seal, leveling, and steam connection checks before you decide to call a repair technician.
Remember that dryers are designed to remove water from fabric. When that water cannot escape through the vent, it will find another path. Your job is to give it the right path again.
Take a few minutes this weekend to inspect your dryer. In 2026, this is still the most common repair we guide readers through, and most find the cause within the first 30 minutes.
You will likely solve it quickly, and you will avoid the floor damage that comes from ignoring a slow leak. If you need help with other home appliances, bookmark our site for more practical guides.




Leave a Comment