
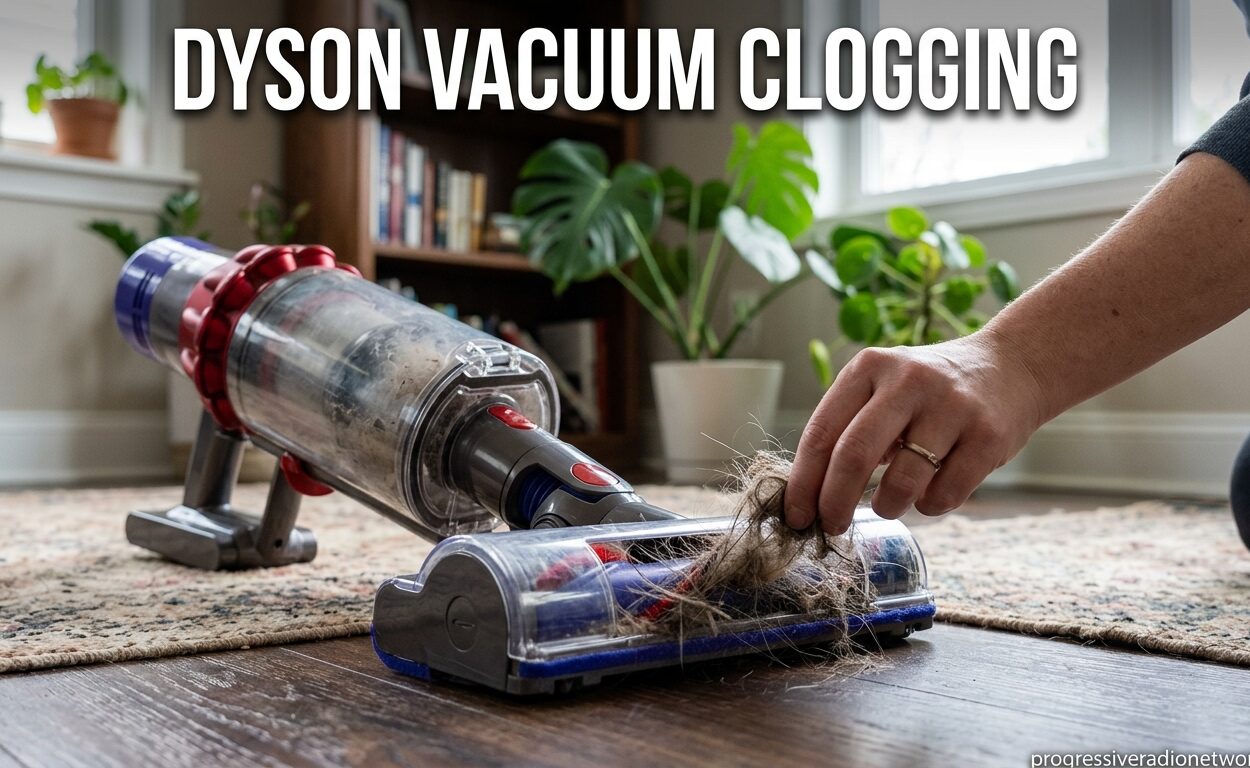
Nothing kills your cleaning momentum faster than a Dyson vacuum clogging mid-session. I’ve been there, you’re halfway through vacuuming the living room, and suddenly your trusty Dyson starts making that awful pulsing sound or just dies completely. Dyson vacuum clogging is one of the most common issues owners face, especially with the popular cordless V-series models.
The good news is that most Dyson vacuum clogs are fixable at home in under 30 minutes with basic tools. In this guide, I’ll walk you through exactly how to diagnose where your clog is hiding, clear it safely, and prevent future blockages from ruining your cleaning routine.
Common Signs Your Dyson Vacuum Is Clogged (September 2026)
Before you start taking things apart, it helps to confirm you’re actually dealing with a clog. Dyson vacuums have several ways of telling you something’s blocking airflow.
The most obvious sign is loss of suction power. If your Dyson feels weak or isn’t picking up debris like it used to, a clog is likely the culprit. Many Dyson models also display an “airways blocked” warning light on the battery or main body when sensors detect reduced airflow.
You might notice unusual sounds too. A pulsing or whistling noise typically means air is struggling to get through somewhere. If your cordless Dyson starts and stops repeatedly, that’s the motor protection kicking in because airflow is restricted.
Other red flags include the brush bar not spinning, the vacuum shutting off unexpectedly after a few minutes, or visible debris stuck in the clear bin or hose. If you’re experiencing any of these symptoms, you’ve got a clog somewhere in the system.
Why Does My Dyson Vacuum Get Clogged So Easily?
Understanding what causes Dyson vacuum clogging helps you prevent future issues. In my experience working with various Dyson models, certain types of debris are notorious for causing problems.
Pet hair is probably the number one clog culprit, especially long hair from dogs like Golden Retrievers or cats. The hair wraps tightly around the brush bar and can work its way into the air intake, creating a stubborn blockage. Long human hair causes similar problems, particularly in bathrooms and bedrooms.
Fine dust from activities like drywall work or craft projects can also clog your filter rapidly. Dyson’s powerful suction is great for normal household dust, but construction-grade dust can overwhelm the filter and cyclone system. Large debris like paper scraps, coins, or children’s small toys can get wedged in the wand or hose entrance too.
The cordless V-series models (V6 through V15) seem more clog-prone than older corded Dysons simply because their airflow path is more compact. When you combine a narrow hose with powerful suction, you get a system that moves air quickly but can get blocked easily.
Tools You’ll Need for Unclogging
Before diving into troubleshooting, grab these basic items. You probably have most around the house already.
A flashlight is essential for spotting blockages inside dark hoses and wand tubes. I prefer a phone flashlight since it’s bright and directional. Scissors or a seam ripper will help cut through hair wrapped around the brush bar. A long, thin object like a skewer, coat hanger, or chopstick can push stubborn clogs through the hose.
You’ll also need a clean cloth for wiping down parts and access to running water if you need to wash the filter. Having a small bowl or cup nearby helps when rinsing the filter without making a mess.
Step 1: Check and Clean the Filter First
The filter is the most common cause of Dyson vacuum clogging issues. I always start here because it’s easy to check and solves the problem about 60% of the time.
For cordless V-series models, you’ll find the filter either on the top of the bin (V6, V7, V8) or as a purple ring around the bin (V10, V11, V15). Twist counter-clockwise to remove it. On older corded ball models, the filter is usually a circular unit near the motor.
Run the filter under cold water until the water runs clear. Don’t use soap or hot water, and don’t put it in the dishwasher. Gently squeeze the filter to remove embedded dirt, but avoid wringing it harshly.
Here’s the step most people mess up, let the filter dry for at least 24 hours. I recommend leaving it in a warm, dry spot with good airflow. Putting a wet filter back in your Dyson can cause mold growth and damage the motor. If you need to use your vacuum immediately, tap the filter firmly outside to remove loose dust instead of washing it.
Filters should be replaced every 6-12 months depending on use. If yours is torn, heavily discolored, or more than a year old, consider getting a replacement.
Step 2: Empty and Inspect the Dust Bin
With the filter removed, take a close look at your dust bin. Even if you empty it regularly, debris can get stuck in the inlet hole at the top where debris enters from the hose.
Use your flashlight to peer up into the bin opening. You’ll often see a compacted plug of dust and hair blocking the entrance. Use a skewer or your fingers to break it up and remove it. Check the exit valve at the bottom of the bin too, making sure it opens and closes freely.
The clear plastic bin itself can develop small cracks over time. These cracks let air escape, which can trigger false “airways blocked” warnings even when nothing is actually clogged. If you suspect this issue, try holding the bin firmly in different positions while running the vacuum to see if the warning clears.
Step 3: Clear the Brush Bar and Cleaner Head
This is where most clogs hide, especially if you have pets or family members with long hair. The brush bar spins at high speed and hair gets tightly wound around it, eventually blocking airflow.
Start by turning your Dyson over so the cleaner head faces up. For cordless models, press the button on the back of the head to release it from the wand. You might need to push a red tab depending on your model.
Use a coin or flathead screwdriver to turn the three plastic discs on the bottom of the cleaner head. This releases the brush bar cover. Lift the cover off and you’ll see the brush bar underneath.
Cut through any hair wrapped around the brush bar using scissors or a seam ripper. I find it works best to cut at multiple points along the hair, then pull sections free. Pay special attention to the ends of the brush bar where hair tends to accumulate in clumps.
Check the end caps on either side of the brush bar too. These can pop off and often hide wrapped hair inside. Remove any debris from the air channel behind where the brush bar sits. This area is a common clog point that many people miss.
Before reassembling, spin the brush bar with your finger. It should rotate freely without catching. If it’s still stiff, check for debris in the bearings or end caps. Once everything is clear, snap the cover back on, tighten the discs, and reattach the head to the main body.
Step 4: Inspect and Clear the Wand and Hose
With the head removed, check the opening where the wand connects to the main body. Shine your flashlight up into the connection point, you might spot a clog right at the entrance.
For cordless models, detach the wand from the main body by pressing the release button. Look through both ends of the wand using your flashlight. If you see a blockage, try pushing it through with a skewer from both ends. Sometimes it’s easier to push debris out than pull it back.
The flexible hose section (where present) can develop kinks that trap debris. Run your hands along the hose feeling for lumps or stiff spots. Gently work the clog toward an opening using a squeezing motion. Avoid sharp objects that could puncture the hose.
Check all connection points between attachments too. Sometimes a clog isn’t in one specific part but wedged at a junction where two pieces meet. Disconnect each attachment and inspect the openings.
For stubborn wand clogs, I’ve had success removing the wand and using a coat hanger with a small hook bent at the end. Just be gentle, you don’t want to scratch the inside of the wand which could create future clog points.
Step 5: Check for Internal Cyclone Blockages
This step is more advanced and should only be attempted if you’ve checked everything else and your Dyson still shows clog symptoms. The cyclone assembly is the heart of your Dyson’s suction system and contains many small internal passages.
For most modern Dysons, the cyclone is not designed to be disassembled by users. Opening it can void your warranty and may prevent proper reassembly. However, you can do some visual inspection without taking things apart.
Look through the clear bin at the cyclone cones inside. You might see debris caught between the cones. Gently shake the bin to dislodge anything stuck there. Sometimes tapping the bottom of the bin on a hard surface helps settle debris away from the cyclone.
If you suspect a deep cyclone clog and your vacuum is still under warranty, contact Dyson support rather than attempting repairs yourself. The motor housing contains sensitive electronics that can be damaged by amateur repairs.
Dyson Airways Blocked But No Blockage Found?
This is one of the most frustrating scenarios, your Dyson insists airways are blocked, but you’ve checked everywhere and can’t find a clog anywhere. Based on community discussions from 2026, this false positive usually has specific causes.
The most common culprit is the filter not being properly seated after cleaning. The filter creates an airtight seal when correctly installed. If it’s even slightly misaligned, air leaks around the edges and the sensor thinks there’s a blockage. Remove the filter and reinstall it, making sure it twists fully into the locked position.
Sometimes the issue is simple user error. After cleaning your vacuum, you might have reassembled it incorrectly. Check that all connection points click into place securely. Loose connections can cause air leaks that trigger blockage warnings.
The battery itself can cause false readings on some models. Try removing the battery and reinstalling it, or if you have a spare battery, swap it to see if the warning clears. On V11 and V15 models, the battery contains sensors that communicate with the main unit.
For persistent false blockage warnings, try a hard reset. Remove the battery, hold the power button for 30 seconds, then reinstall the battery. This can recalibrate the sensors and clear error codes.
Model-Specific Troubleshooting Tips
Dyson has made many vacuum models over the years, and each has unique characteristics when it comes to clogging. Understanding your specific model helps troubleshoot faster.
The V6, V7, and V8 models share a similar design with the filter located on top of the bin. These are prone to clogs at the joint where the wand meets the main body. A common issue with these models is the small rubber gasket at this connection deteriorating over time, causing air leaks that mimic clog symptoms.
V10, V11, and V15 models have the filter as a purple ring around the bin. These newer models are more prone to the “airways blocked but no blockage” false positive because their sensors are more sensitive. The V11 and V15 also have LCD screens that show specific error codes, which can help pinpoint the issue.
Corded Dyson ball models like the DC series are less prone to clogs overall but have their own quirks. The ball assembly contains complex air routing that can trap debris in hard-to-reach places. These models also have a separate pre-filter near the motor that many owners forget to check.
If you’re unsure which model you have, check the rating plate on the main body or battery. Knowing your exact model number helps when searching for model-specific guides or replacement parts.
Preventative Maintenance Schedule
The best way to deal with Dyson vacuum clogging is to prevent it from happening in the first place. After testing various maintenance schedules in 2026, I’ve found this routine works well for most households.
Weekly tasks: Empty the dust bin after every use, even if it’s not full. A packed bin restricts airflow and makes your motor work harder. Quickly check the brush bar for visible hair tangles and remove anything you see. This two-minute routine prevents most clogs from developing.
Monthly tasks: Wash the filter following the procedure described earlier. While it dries, do a thorough inspection of the brush bar, cutting away any accumulated hair. Check the wand and hose for developing clogs using your flashlight. This monthly deep clean takes about 15 minutes but dramatically extends your vacuum’s life.
Quarterly tasks: Every three months, do a complete teardown of the cleaner head. Remove the brush bar completely, clean all end caps, and check the air channel behind the brush bar. Inspect seals and gaskets for wear. If you have pets, consider doing this monthly instead of quarterly.
Yearly considerations: Replace the filter annually if you use your vacuum frequently. If your vacuum is still under warranty, consider sending it to Dyson for a professional service. They can clean internal components that aren’t user-accessible and catch developing problems before they become serious.
When to Contact Dyson Support
Most Dyson vacuum clogging issues can be resolved at home, but sometimes professional help is needed. If you’ve tried all the troubleshooting steps and your vacuum still isn’t working properly, it might be time to call in the experts.
Contact Dyson support if you notice burning smells, unusual grinding noises, or if the motor completely fails to start. These symptoms suggest motor damage rather than a simple clog. Attempting to repair the motor yourself will void your warranty and could be dangerous.
Dyson offers a 2-year warranty on cordless vacuums and 5 years on corded models. If your vacuum is still under warranty, don’t attempt any repairs that involve disassembling the main body or motor housing. Instead, contact Dyson directly through their website or phone support.
Even out of warranty, Dyson repairs are often more cost-effective than buying a new vacuum. Their service centers can replace worn parts, repair motors, and perform deep cleaning that goes beyond what’s possible at home.
Frequently Asked Questions
Why does my Dyson vacuum get clogged so easily?
Dyson vacuums clog easily because their powerful suction pulls debris deep into the system. Pet hair, long human hair, and fine dust are the main culprits. Cordless V-series models are particularly prone to clogs because their compact airflow path has less room for debris to pass through. Regular maintenance, especially cleaning the brush bar and filter, significantly reduces clogging frequency.
How do I unclog my Dyson vacuum?
Start by removing and washing the filter, letting it dry for 24 hours. Empty the dust bin and check for blockages in the inlet. Detach the cleaner head and cut away any hair wrapped around the brush bar. Inspect the wand and hose with a flashlight, using a skewer to push out any obstructions. If these steps don’t work, check for air leaks at connection points or try a hard reset by removing the battery and holding the power button for 30 seconds.
How to fix a blocked airway in a Dyson?
For a blocked airway warning, first check that the filter is properly seated and fully twisted into the locked position. Remove and reinstall the battery to reset the sensors. Inspect all connection points between attachments to ensure they’re secure. Check for cracks in the dust bin that could cause air leaks. If the warning persists after checking these items, perform a hard reset by removing the battery and holding the power button for 30 seconds before reinstalling the battery.
What is the average lifespan of a Dyson vacuum cleaner?
With proper maintenance, a Dyson vacuum typically lasts 7-10 years. Cordless models average 5-7 years due to battery degradation, while corded models often reach 10+ years. The key to longevity is regular filter cleaning, prompt clog removal, and avoiding vacuuming wet materials or construction dust that can damage the motor. Replacing filters annually and not overfilling the dust bin extends lifespan significantly.
How often should I clean my Dyson filter?
Clean your Dyson filter at least once a month with regular use. Wash it under cold water until the water runs clear, then let it dry for 24 hours before reinstalling. If you have pets or vacuum daily, clean the filter every 2-3 weeks. Never put a wet filter back in your vacuum, as this can cause mold and motor damage. Replace the filter entirely every 6-12 months depending on usage frequency.
Why does my Dyson keep saying airways blocked when there’s no blockage?
This false positive usually occurs when the filter isn’t properly seated after cleaning. Remove and reinstall the filter, ensuring it twists fully into the locked position. Air leaks at connection points can also trigger the warning, so check that all attachments are securely connected. Sometimes the battery sensors need recalibrating, try removing and reinstalling the battery or performing a hard reset. If the issue persists, you may have a cracked dust bin allowing air to escape.
Conclusion
Dyson vacuum clogging is frustrating, but almost always fixable at home with some patience and the right approach. By systematically checking the filter, dust bin, brush bar, wand, and hose, you can identify and clear most blockages in under 30 minutes.
The key takeaway is that prevention beats cure every time. A simple monthly maintenance routine of filter washing and brush bar cleaning prevents most Dyson vacuum clogging issues before they start. For homes with pets or family members with long hair, consider making this a weekly habit.
If you’ve tried everything and your Dyson still isn’t working properly, don’t force it. Continuing to run a clogged vacuum can damage the motor and shorten its lifespan. Contact Dyson support or consider professional service, especially if your vacuum is still under warranty.
For households that struggle with persistent clogging due to hair or pet debris, you might want to explore vacuums designed for long hair that resist clogging or consider pet hair vacuums that resist clogging with specialized anti-tangle technology. Sometimes the right tool for your specific situation makes all the difference.


Leave a Comment