
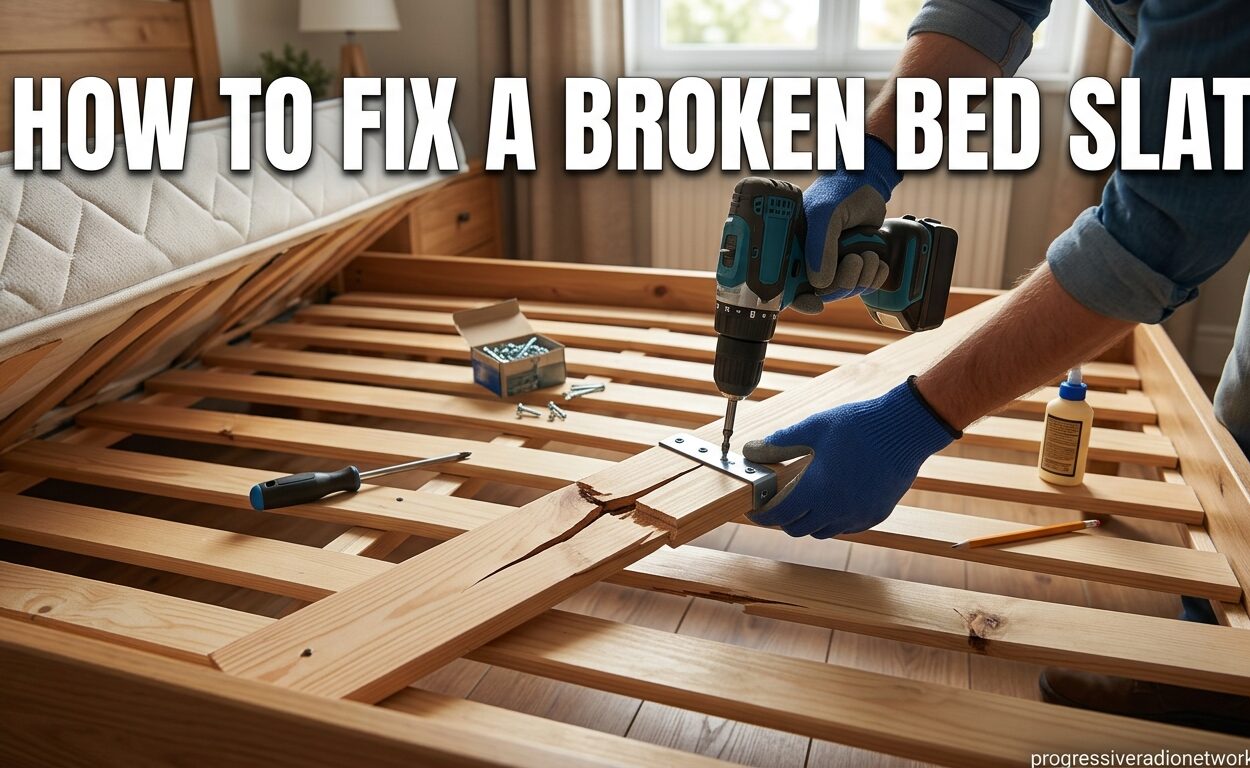
Waking up to a sagging mattress or an annoying squeak every time you move is frustrating. Learning how to fix a broken bed slat can save you from poor sleep quality and potentially expensive mattress damage. I’ve repaired dozens of bed frames over the years, and I’ll walk you through everything from quick temporary fixes to permanent replacements.
Understanding Bed Slats and Their Importance
Bed slats are the horizontal support bars that run across your bed frame, creating the foundation for your mattress. These wooden or metal planks distribute your body weight evenly across the frame, preventing sagging and ensuring proper spinal alignment during sleep. When even one slat breaks, it creates a chain reaction that puts extra stress on surrounding slats and can permanently damage your mattress.
Most modern bed frames use 12-20 individual slats spaced 2-3 inches apart. This design allows for airflow and prevents moisture buildup in your mattress. Broken slats compromise this system, leading to uncomfortable sleep surfaces and reduced mattress lifespan.
Signs You Have a Broken Bed Slat
Identifying a broken slat early can prevent further damage to your bed frame and mattress. Here are the telltale signs I look for when diagnosing bed slat issues:
- Visible cracks or splits: Inspect your slats by removing the mattress and looking for fractures, especially near the center where weight concentrates.
- Sagging mattress: If your mattress dips in specific areas, especially the middle, you likely have one or more broken slats beneath.
- Squeaking noises: Loose or broken slats rub against the frame, creating persistent squeaks when you shift positions.
- Slats falling through: If slats slip out of their holders regularly, the holders may be damaged or the slats warped from stress.
I recommend inspecting your bed slats every six months as preventive maintenance. Catching hairline cracks before they become complete breaks saves time and money in the long run.
How to Fix a Broken Bed Slat: Temporary Solutions
Sometimes you need an immediate fix to get through the night before you can purchase replacement materials. These temporary solutions have saved me more than once when a slat breaks at an inconvenient time.
Wood Glue and Clamp Method
For slats with clean cracks (not complete breaks), wood glue can provide a surprisingly strong temporary repair. I’ve used this method successfully for cracks that span less than half the slat’s width. Apply a quality wood glue like Titebond to both sides of the crack, then clamp tightly overnight. The key is applying even pressure and letting it cure fully before putting weight back on the bed.
After the glue dries, reinforce the repaired area with a mending plate or small wooden brace on the underside for added strength. This reinforcement is essential since bed slats endure significant stress and movement.
Plywood Support Patch
When a slat is completely broken but you need a quick solution, a plywood patch can bridge the gap temporarily. Cut a piece of 1/2-inch plywood to match the width of your slat and extend 6-8 inches past the break on both sides. Screw or clamp this patch over the broken area to restore support temporarily.
This method works best for single broken slats. If multiple slats are damaged, you’ll need a more comprehensive solution. I’ve used plywood patches for up to two weeks while waiting for replacement materials to arrive.
Emergency Center Support
For platform beds where the center slats have failed, a temporary 2×4 or 2×6 support beam can prevent mattress collapse. Place the board perpendicular to the slats, running down the center of the bed frame. This transfers weight to the side rails and buys you time to properly replace the damaged slats.
Use this emergency measure only for short periods. Center supports don’t distribute weight as evenly as properly spaced individual slats, which can create pressure points in your mattress.
How to Fix a Broken Bed Slat Permanently
Permanent repair means replacing the damaged slat entirely. While this requires more effort than temporary fixes, replacement ensures your bed returns to full structural integrity. I’ll walk you through the complete process from measuring to installation.
Tools and Materials Needed
Gather these supplies before starting your repair project:
- Replacement wood: Pine or hardwood board matching your current slat dimensions
- Measuring tape: For accurate length and width measurements
- Saw: Hand saw or circular saw for cutting replacement wood
- Sandpaper: Medium grit (80-120) for smoothing cut edges
- Drill and screws: If your slats are screwed into the frame
- Wood finish (optional): To seal and protect the new slat
Having everything ready before you start prevents frustration mid-project. I learned this the hard way after having to stop halfway through a repair because I was missing the right screws.
Step 1: Remove the Damaged Slat
Start by completely stripping your bed of all bedding and removing the mattress. Set up a clean workspace nearby where you can examine the damaged slat. Most slats simply lift out of their holders, though some designs use screws or bolts that you’ll need to remove with a drill or screwdriver.
Take photos of how the slats are positioned before removing any. This documentation helps when reinstalling, especially if your bed frame has unique spacing or orientation requirements. I keep a folder of bed frame reference photos on my phone for this exact purpose.
Step 2: Measure and Document Slat Dimensions
Accurate measurements are crucial for proper replacement. Measure the length, width, and thickness of your existing slat. Note any special features like tapered ends, notches for holders, or curvature in sprung slats. Standard slat dimensions are typically 1×3 or 1×4 inches in cross-section, but beds vary significantly.
If you have sprung slats (curved for flexibility), note the radius of the curve and which direction faces up. Installing curved slats upside down is a common mistake that reduces their effectiveness and can cause breakage.
Step 3: Select Replacement Wood
Choosing the right wood determines how long your repair will last. Based on my experience repairing countless bed frames, here’s what works best:
- Pine: Affordable and readily available, good for standard slats. Look for boards with minimal knots, as knots create weak points.
- Plywood: Strong and resistant to warping, excellent for wider slats or heavy-duty applications.
- Hardwood (oak, maple, birch): Most durable option, ideal for heavier sleepers or high-use beds. Worth the extra investment for longevity.
Avoid boards with visible knots, cracks, or warping. These defects compromise structural integrity and lead to premature failure. I spend extra time at the lumberyard selecting the straightest, clearest boards available.
Step 4: Cut and Prepare the Replacement Slat
Using your measurements, cut the replacement board to length. If you’re replacing multiple slats, consider creating a template from one intact slat to ensure consistency. After cutting, sand all edges smooth to prevent splinters and ensure the slat sits properly in its holders.
For wood slats, applying a wood finish or sealant helps protect against moisture and extends lifespan. This step isn’t strictly necessary but adds years of durability to your repair. I use a clear polyurethane finish that dries quickly and doesn’t affect mattress feel.
Step 5: Install the New Slat
Place your new slat in the position previously occupied by the broken one. If your bed uses slat holders or brackets, ensure the slat seats fully and securely. For screwed installations, use the existing screw holes or drill new ones if the wood has shifted over time.
Test the installation by applying gentle pressure to ensure the slat doesn’t shift or pop out of its holders. Properly installed slats should feel solid with no play or movement. If something feels loose, recheck your measurements and holder condition before reassembling the bed.
Step 6: Reassemble and Test
Replace your mattress and bedding, then test the repair by sitting or lying on the bed in various positions. Pay special attention to the repaired area to ensure it provides proper support and makes no noise. A successful repair should feel indistinguishable from the rest of the bed frame.
I recommend waiting 24 hours before moving the bed or changing linens to ensure everything settles properly. This waiting period is especially important if you used any wood glue or finish that needs final curing time.
Choosing the Right Replacement Slats
Selecting appropriate replacement slats involves more than just matching dimensions. Different slat types serve different needs, and choosing the wrong type can lead to recurring breakage or poor sleep quality.
Solid vs. Sprung Slats
Solid slats are flat wooden boards that provide firm, even support. They’re ideal for memory foam and latex mattresses that require consistent surfaces. Sprung slats feature a gentle curve and flexible mounting, creating a bouncier feel that works well with innerspring mattresses.
Check your mattress manufacturer’s recommendations when choosing between solid and sprung options. Some warranties specify which type to use, and using the wrong type could void your coverage. I always check manufacturer guidelines before making major changes to bed support systems.
Wood Type Considerations
While pine is the most common and affordable slat material, upgrading to hardwood provides significantly better durability. Heavier sleepers (over 200 pounds) should consider hardwood or reinforced slats to prevent recurring breakage. For platform beds with wider slat spacing, hardwood prevents the bowing and warping common with softer pine.
If you’re replacing multiple slats, consider upgrading all of them to the same material for consistent support. Mixing different wood types creates uneven flex patterns that can cause premature failure of the softer slats.
Preventing Bed Slat Breakage
Preventive maintenance extends the life of your bed slats and prevents mid-night failures. These simple habits have helped me avoid broken slats for years in my own beds.
Regular Inspection Routine
Check your bed slats every six months by removing the mattress and visually inspecting each slat for cracks, warping, or stress marks. Pay special attention to center slats, which bear the most weight. Early detection of hairline cracks allows for reinforcement before complete failure occurs.
I schedule bed inspections when rotating my mattress, combining two maintenance tasks into one efficient session. Mark your calendar or set a phone reminder to ensure you don’t forget this important maintenance.
Proper Weight Distribution
Avoid sitting on the edges of your bed, which concentrates excessive weight on outer slats not designed for such loads. When moving your bed, lift it completely rather than dragging it, which can twist and stress the slat system. Teach children not to jump on beds, as the impact force far exceeds what residential slats are designed to withstand.
For heavier sleepers or couples, consider adding a center support leg to reduce stress on individual slats. This simple addition distributes weight more evenly and can dramatically extend slat lifespan.
Addressing Squeaks Early
Squeaking often indicates loose slats rubbing against holders or each other. Address these sounds promptly by tightening hardware, adding felt pads to contact points, or lubricating squeaky joints with wax or silicone spray. Ignoring squeaks allows movement that worsens over time, leading to premature wear and eventual breakage.
I keep a small container of furniture wax specifically for addressing bed squeaks. A quick application at the first sign of noise prevents the problem from escalating into a more serious issue.
Common Mistakes to Avoid When Fixing Bed Slats
After repairing hundreds of bed frames, I’ve seen these mistakes repeatedly. Avoiding them saves time, money, and frustration.
Using Undersized Replacement Wood
Using thinner or narrower wood than the original slats might seem convenient, but it creates weak points that fail quickly. Always match or exceed the original dimensions for structural integrity. I’ve seen repairs fail within days because the replacement wood couldn’t handle the load.
Ignoring Slat Orientation
Curved or sprung slats must be installed with the curve facing upward (like a smile). Installing them upside down creates stress points and defeats their purpose. Always note the orientation of intact slats before removing any for replacement.
Overlooking Hardware Condition
Broken slats often indicate worn or damaged holders, screws, or brackets. Replace these components when installing new slats to prevent recurrence. I’ve fixed broken slats only to have them fail again because the underlying hardware issue wasn’t addressed.
Skipping the Center Support
For queen and king size beds, center support legs are essential for slat longevity. Without this support, center slats bear excessive weight and fail prematurely. If your bed lacks center support, adding a leg is one of the best investments you can make.
Frequently Asked Questions
Can you fix a broken bed slat?
Yes, you can fix a broken bed slat using several methods depending on the damage severity. For minor cracks, wood glue and clamping can provide a strong repair. Complete breaks typically require replacement with a new wooden slat cut to match your original dimensions. Temporary solutions like plywood patches can work in emergencies but should be replaced with permanent fixes for long-term durability.
Can I put plywood on top of slats?
Yes, placing plywood on top of existing slats is an effective solution to reinforce a failing slat system. Use 1/2 to 3/4 inch thick plywood cut to match your mattress dimensions. This distributes weight more evenly across all slats and prevents individual slat failure. The plywood creates a solid platform that’s especially beneficial for memory foam mattresses requiring consistent flat support.
Can you sleep on a bed with a broken slat?
Sleeping on a bed with a broken slat is not recommended for more than a night or two. A single broken slat causes uneven weight distribution that leads to mattress sagging and poor spinal alignment. Continued use can permanently damage your mattress and may void its warranty. The compromised support also increases stress on remaining slats, potentially causing multiple failures.
Why do my bed slats keep breaking?
Recurring bed slat breakage typically indicates underlying issues: insufficient slat quantity for the mattress weight, poor quality wood with knots, missing center support on larger beds, or damaged slat holders. Heavier sleepers may need reinforced hardwood slats instead of standard pine. Foundation problems like an uneven floor or warped bed frame also contribute to repeated slat failure.
What type of wood is best for bed slats?
Hardwoods like oak, maple, and birch offer the best durability for bed slats, especially for heavier sleepers. Pine is the most common and affordable choice but contains more knots that create weak points. Plywood provides excellent strength and resists warping. For slats that need to flex, choose straight-grained softwoods without knots. The key is selecting clear, straight lumber regardless of species.
How much does it cost to replace bed slats?
Replacing bed slats typically costs $15-50 depending on materials and quantity. Pine slats cost $3-8 each, while hardwood options run $8-15 per slat. Complete slat replacement sets range from $50-150. DIY repairs cost only the price of materials since labor is free. Professional repairs add $100-200 in labor but ensure proper installation. A temporary plywood fix costs under $20 for materials.
Conclusion
Learning how to fix a broken bed slat is a valuable DIY skill that saves money and protects your mattress investment. Whether you need a quick temporary solution or a complete replacement, the methods I’ve outlined will help you restore your bed’s proper support and sleep comfortably again.
Remember that proper bed slat maintenance prevents most breakage issues. Inspect your slats regularly, address squeaks promptly, and consider upgrading to hardwood slats if you experience recurring failures. Your sleep quality depends on this often-overlooked component of your bed system.
For most repairs, the entire process takes less than an hour from start to finish and requires only basic tools. The small investment of time pays off in better sleep and extended mattress life. Don’t ignore that sagging mattress or annoying squeak—fix it today and rest easy tonight.






Leave a Comment