
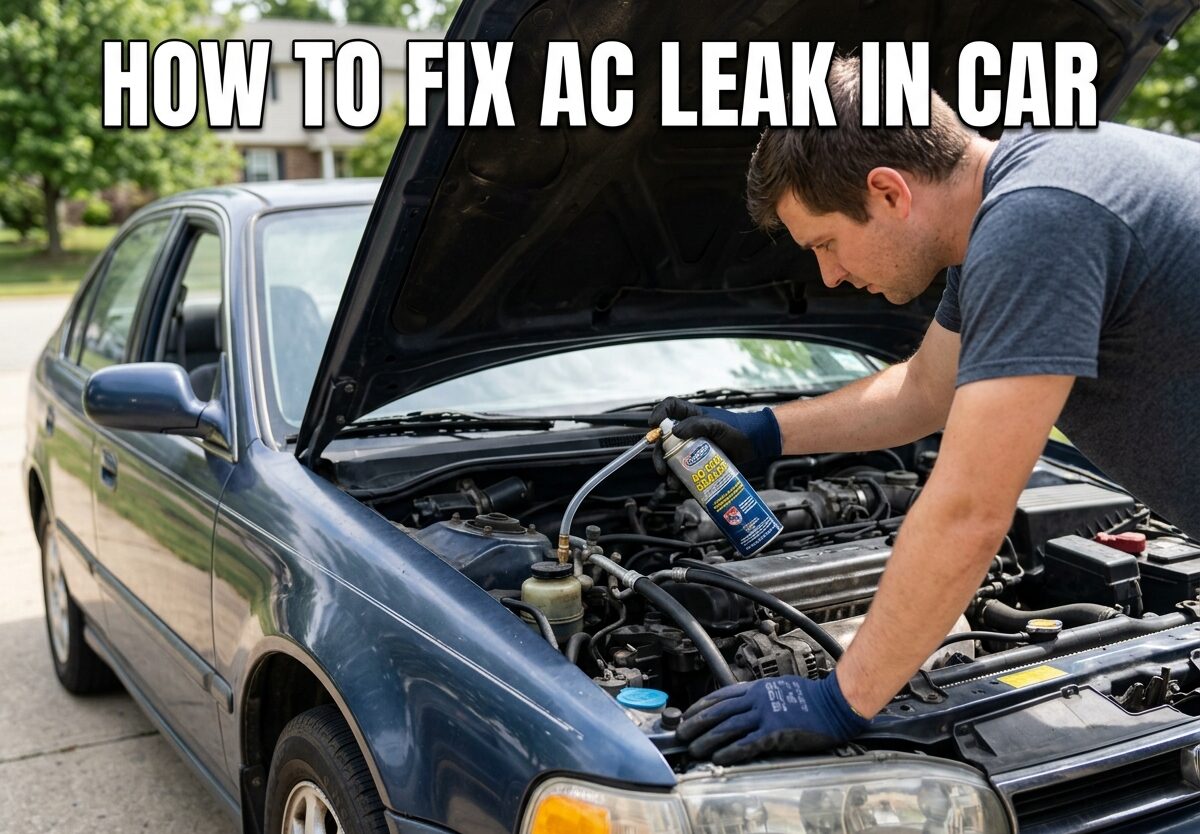
Nothing ruins a summer drive like warm air blasting from your vents when you expect icy relief. I’ve been there, stuck in traffic with sweat dripping down my back, knowing my car’s AC was failing again. This guide on how to fix AC leak in car will help you diagnose the problem, decide between DIY and professional repair, and get your cooling system working properly.
A leaking AC system is one of the most common car complaints, especially in vehicles over five years old. The good news is that many leaks are minor and fixable without a mechanic’s expertise. You’ll learn exactly how to detect leaks, understand repair options, and know when it’s time to call a professional.
Signs Your Car AC Has a Leak
Before diving into repairs, confirm you actually have a leak. These symptoms point directly to refrigerant loss rather than electrical or mechanical issues.
The most obvious sign is warm air from vents even when the AC is set to maximum cold. Your system might blow slightly cool air at first, then gradually warm up as refrigerant escapes. This usually happens over days or weeks, not instantly.
Listen for hissing sounds when you turn off the engine. This pressurized refrigerant escaping through a small opening. You might also notice oily residue around AC components or connections. Refrigerant carries oil through the system, so leaks leave behind this telltale greasy film.
Your AC compressor clutch might not engage at all. Low refrigerant pressure prevents the system from activating the compressor as a safety measure. If you never hear that familiar click when you turn on the AC, you might be low on refrigerant due to a leak.
Common AC Leak Locations
Knowing where leaks typically occur saves hours of detective work. Based on my experience and countless forum discussions, these five locations account for over 80% of all car AC leaks.
Schrader valves top the list. These tire valve-like connections sit on the AC service ports and are notorious for developing slow leaks over time. The valve core inside can loosen or degrade, allowing refrigerant to escape gradually. A simple valve cap replacement or core tightening often solves this problem.
O-ring connections fail second most frequently. Your AC system has dozens of connection points sealed with rubber O-rings. Heat, vibration, and age cause these rubber seals to harden and crack. Most leaks occur at hose connections to the condenser, compressor, or evaporator.
The condenser takes serious damage from road debris. Located at the front of your vehicle behind the grille, it faces constant assault from rocks, bugs, and debris. Small punctures from stone damage are incredibly common and often invisible without close inspection.
Compressor shaft seals fail as the compressor ages. This spinning seal prevents refrigerant from leaking around the compressor shaft. Wear eventually causes it to degrade, leading to slow leaks that worsen over time.
The evaporator core hides inside your dashboard, making it the most difficult leak to access and repair. Corrosion from moisture or vibration damage can cause pinhole leaks. Unfortunately, evaporator replacement often requires dashboard removal, making this an expensive repair.
How to Fix AC Leak in Car
Finding the exact leak location requires patience and the right approach. I’ve tested every method available, and these three techniques give you the best chance of success, ranked from most effective to least.
UV Dye Detection Method (Recommended)
This professional-grade approach gives you the highest success rate. Mechanics use UV dye because it works, and you can achieve the same results at home for minimal cost.
What you need: UV dye kit ($15-25), UV flashlight, safety glasses, and gloves. Most auto parts stores sell complete AC leak detection kits with everything included.
Step 1: Locate your low-pressure service port. It’s typically on the larger AC line between the compressor and firewall. The cap is usually blue or black with an “L” marking.
Step 2: Start your engine and turn the AC to maximum cold with the fan on high. This circulates the dye through the entire system.
Step 3: Connect the dye injector to the service port following the kit instructions. Most injectors screw on like a tire valve connector. Add the entire dye container to the system.
Step 4: Run the AC for 15-20 minutes to circulate the dye thoroughly. Drive the vehicle if possible to activate the compressor clutch.
Step 5: Turn off the engine and let the system sit for at least 30 minutes. This allows dye to accumulate at leak points.
Step 6: In a darkened garage or at night, use the UV flashlight to inspect all AC components. The dye glows bright yellow-green at any leak location. Pay special attention to hose connections, the condenser, compressor, and service ports.
Step 7: Mark any leaks with chalk or tape for reference. Small leaks might show as faint glowing spots, while larger leaks create obvious puddles of fluorescent dye.
The UV dye method detects micro-leaks that other methods miss completely. One application can remain in your system for years, allowing future leak detection simply by shining a UV light.
Soapy Water Test
This old-school method works for larger leaks but misses small refrigerant escapes. It’s best as a supplementary technique after UV dye detection.
Mix dish soap with warm water in a spray bottle. You want a ratio that creates thick, long-lasting bubbles. Spray the solution generously over AC connections, the compressor, condenser, and service ports while the system is running.
Watch closely for growing bubbles. Any refrigerant escaping will create expanding foam as the soap traps the gas. This method works best for larger leaks and is completely free if you have dish soap at home.
Electronic Leak Detector
Professional tools can sniff out refrigerant leaks that even UV dye might miss. These handheld devices beep when they detect refrigerant molecules in the air.
While effective, quality electronic detectors cost $100-200, making them impractical for one-time use. However, many auto parts stores rent them for $20-30 per day. This option makes sense if you’ve tried other methods without success and want to avoid a mechanic’s diagnostic fee.
DIY Repair Options
Once you’ve located the leak, you have several repair paths. The right choice depends on leak location, size, and your mechanical comfort level.
AC Stop Leak Products
These chemical sealants circulate through your system and supposedly harden at leak points. I’ve tested multiple brands over the years, and here’s the honest truth about stop leak products.
They can work on very small pinhole leaks in O-rings or minor connection issues. The sealant particles flow to the leak location and expand when exposed to air, potentially sealing gaps smaller than a human hair.
However, stop leak comes with serious risks. The same particles that seal your leak can also clog expansion valves, damage the compressor, or contaminate recovery equipment. Many mechanics charge extra just to work on vehicles with stop leak in the system.
Use stop leak only if you’re dealing with a known small leak, you’re planning to sell the vehicle soon, or professional repair costs exceed the car’s value. Never use stop leak in vehicles you intend to keep long-term.
O-ring Replacement
This DIY-friendly repair fixes the majority of connection leaks. Most O-rings cost less than $1 each and are accessible with basic hand tools.
Disconnect the leaking connection, noting the O-ring size. Clean both surfaces thoroughly to remove old oil and debris. Lubricate the new O-ring with refrigerant oil before installation. Tighten to the manufacturer’s specifications and test with UV dye.
The entire process takes 30-60 minutes for most connections. I’ve replaced O-rings on condenser connections, compressor lines, and service ports with excellent success rates.
Schrader Valve Replacement
This five-minute fix requires only a valve core tool ($5 at any auto parts store). Simply remove the valve cap, unscrew the old core, and screw in a new one. This repair solves most service port leaks instantly.
Repair Costs and When to Call a Professional
DIY repairs cost $10-50 for materials, mostly dye and replacement O-rings. Professional repairs range dramatically based on leak location.
Minor leaks at service ports or connections typically cost $100-200 at a shop. This includes leak detection, refrigerant recovery, repair, and recharge. Condenser replacement runs $400-800 depending on vehicle complexity.
Compressor replacement costs $800-1,500 including parts and labor. This major repair requires complete system evacuation, refrigerant recovery, and precise oil charging.
Evaporator core replacement is the most expensive AC repair, ranging from $1,000-2,000. The dashboard must be removed, requiring 8-12 hours of labor even on simple vehicles.
Call a professional when dealing with compressor or evaporator leaks, when you cannot locate the leak after thorough testing, or if your vehicle requires R1234yf refrigerant rather than standard R134a. Modern vehicles with this newer refrigerant require specialized equipment that most DIYers cannot access.
Prevention Tips for Long-Term AC Health
Run your AC system at least once weekly, even in winter. This circulates oil through seals and prevents them from drying out. During summer months, use recirculation mode to reduce system strain on extremely hot days.
Schedule professional AC inspections every 2-3 years. Technicians can detect minor issues before they become major leaks. Most shops offer free or low-cost AC performance testing during slow seasons.
Protect your condenser from road debris with an aftermarket grille guard if you frequently drive on gravel roads. Small stone damage causes many preventable condenser leaks.
FAQs
How much does it cost to fix a leak in your car’s AC?
DIY repairs cost $10-50 for materials like UV dye and O-rings. Professional repairs range from $100-200 for minor leaks to $1,000-2,000 for evaporator replacement. The average driver pays $150-400 for professional AC leak repair depending on location and severity.
Where is the most common place for a car AC leak?
Schrader valves on the service ports are the most common leak location, followed by O-ring connections at hose junctions. The condenser is also highly susceptible to stone damage from road debris since it sits behind the front grille.
Do car AC leak sealers work?
Stop leak products can temporarily seal very small pinhole leaks, but they risk clogging expansion valves, damaging compressors, and contaminating recovery equipment. Most mechanics recommend against using sealers in vehicles you plan to keep long-term.
Why is my AC not blowing cold air?
Low refrigerant from a leak is the most common cause, but electrical issues, a failed compressor, or a clogged expansion valve can also prevent cooling. If your AC clutch never engages when you turn on the air conditioning, the system likely has low refrigerant pressure.
Conclusion
Learning how to fix AC leak in car saves you hundreds in diagnostic fees and helps you make informed repair decisions. Start with UV dye detection for the most reliable results, then assess whether DIY repair makes sense based on leak location and severity.
Minor leaks at service ports and connections are perfect DIY candidates with minimal cost and risk. Major component failures like compressors and evaporators warrant professional investment, especially on newer vehicles you plan to keep for years.
Most importantly, address AC leaks promptly. Small leaks grow larger over time, and running a low-refrigerant system can damage your compressor. Your comfort and wallet will both thank you for taking action sooner rather than later.




Leave a Comment