
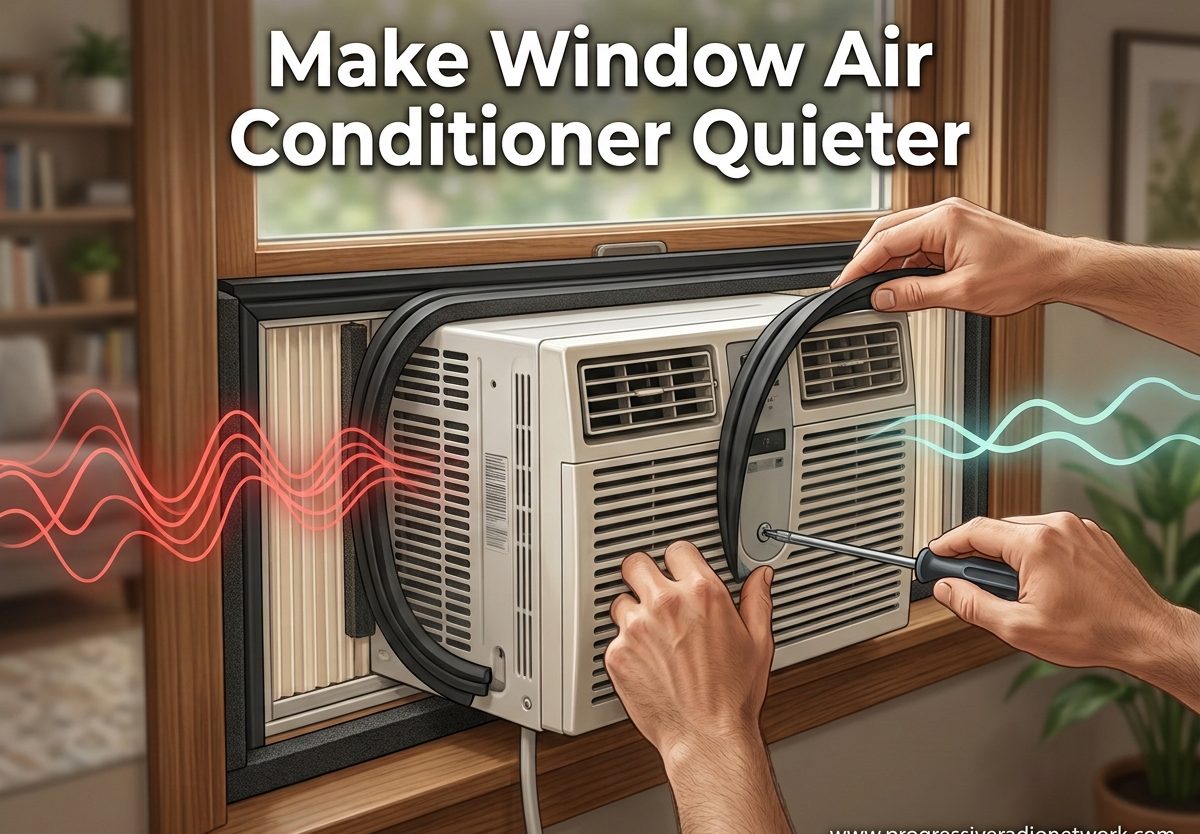
To make a window AC quieter, ensure it’s level and firmly supported, add foam weatherstripping to reduce vibration, seal the side panels, and clean the filter and coils so airflow stays smooth. These simple fixes can reduce noise by 5-15 decibels, transforming a disruptive unit into one that’s barely noticeable during daily activities.
A loud window air conditioner doesn’t just disrupt your sleep. It makes concentration impossible, interferes with virtual meetings, and creates constant tension in your living space. Based on our research of community solutions and HVAC insights, most window AC noise stems from fixable issues rather than permanent design flaws.
Why Is My Window AC Unit So Loud?
Understanding the source of your AC noise helps you target the right solution. Not all loud air conditioners have the same problem, and identifying the specific type of sound you’re hearing points directly to the fix.
Vibration against the window frame causes the most common complaints. When your unit isn’t properly supported or leveled, it rattles against the window sill and creates a buzzing noise that travels through the wall. This often worsens over time as mounting hardware loosens.
Loose side panels create whistling and rattling sounds. The accordion-style panels that fill gaps on either side of your unit should fit tightly. When they’re loose or poorly installed, air escapes and creates noise while also reducing efficiency.
Dirty fan blades and coils force your AC to work harder. The restriction causes the motor to strain, creating a humming or buzzing sound that gets worse as dirt accumulates. This is one of the easiest issues to fix and also improves cooling performance.
Worn motor bearings produce a grinding or squealing noise. This indicates mechanical wear that often requires professional repair. If you hear metal-on-metal sounds, stop using the unit and have it inspected to prevent further damage.
Compressor noise creates a low-pitched hum that’s normal but shouldn’t be overwhelming. Excessive compressor noise usually indicates the unit is undersized for your space or struggling due to poor maintenance.
How to Make Window AC Quieter: Step-by-Step Solutions
These solutions progress from easiest and most effective to more advanced options. Most people see significant improvement after completing just the first two steps.
Step 1: Level and Secure Your Unit
An unlevel window AC causes vibration that amplifies throughout your window frame. Most units have adjustable legs or mounting brackets designed specifically for this purpose.
Use a spirit level to check your unit from front to back and side to side. If it’s not level, adjust the support brackets until it sits evenly. For units without built-in leveling, place wood or plastic shims under the low side until level.
Tighten all mounting screws securely. Over time, normal operation loosens hardware. A screwdriver can often eliminate 30-40% of rattling noise in under five minutes. Check both interior and exterior mounting points.
Add support brackets if your unit only rests on the window sill. Window AC support brackets mount to the exterior wall and carry most of the unit’s weight. This reduces stress on your window frame and eliminates flexing that causes vibration.
Step 2: Reduce Vibration with Weatherstripping
Foam weatherstripping creates a buffer between your AC unit and the window frame, absorbing vibration before it becomes noise. This $10 fix delivers noticeable results for rattling units.
Clean the window frame and AC cabinet surface where they meet. Apply self-adhesive foam weatherstripping to the window sill and jambs. Press firmly to ensure good contact. The foam compresses when you close the window, creating a tight seal.
Seal gaps around the unit with removable caulk or rope caulk for renters. Focus on anywhere air might escape between the cabinet and window frame. This not only reduces noise but also prevents cool air from leaking outside.
Install vibration isolation pads under the unit. Rubber or cork pads placed between the AC cabinet and window sill absorb vibration energy. Community members report significant improvement using 1/4-inch rubber-cork pads available at hardware stores.
Step 3: Clean Filters and Coils
A dirty filter makes your AC work harder, creating more noise while cooling less effectively. Most window AC filters should be cleaned monthly during heavy use.
Remove the filter from the front grille. Wash it with warm water and mild soap, then let it dry completely before reinstalling. Avoid vacuuming as this can damage delicate filter materials.
Clean the condenser coils on the exterior of the unit. Use a garden hose to gently spray away debris, working from top to bottom. For stubborn dirt, use a soft brush and coil cleaner spray. This improves airflow and reduces strain on the motor.
Clear debris from around the exterior fan. Leaves, twigs, and dust can accumulate on the outdoor portion of your unit. Use a vacuum with a brush attachment to remove debris from the fan grille and housing.
Step 4: Install a Sound Blanket
Sound blankets wrap around the noisy portion of your AC to absorb sound energy. They’re particularly effective at reducing compressor noise and can lower sound levels by 5-8 decibels.
Measure your unit’s exterior dimensions. Sound blankets come in standard sizes but can be cut to fit. You’ll need enough material to wrap the portion of the unit that extends outside your window.
Choose an acoustic blanket designed for HVAC use. These have a mass-loaded vinyl core with fiberglass insulation and a reflective outer surface. Avoid wrapping the compressor itself, as this can cause overheating.
Install the blanket according to manufacturer instructions. Most secure with Velcro straps or adhesive strips. Ensure the blanket doesn’t block airflow to the condenser coils or fan. Leave at least 6 inches of clearance around moving parts.
Step 5: Seal Side Panels
The accordion panels on either side of your window AC are common noise sources. When they don’t fit tightly, they rattle and allow air leakage that creates whistling sounds.
Inspect both side panels for gaps or damage. The panels should extend fully from the window to the cabinet without bending or crimping. Replace damaged panels with universal replacement kits from hardware stores.
Add foam tape to the panel edges. Apply self-adhesive foam strips where the panels contact both the window frame and AC cabinet. This creates a tighter seal and eliminates rattling.
Secure panels with sheet metal screws if they’re permanently installed. Drill small pilot holes and use #6 sheet metal screws to hold panels firmly in place. For renters, use removable foam or consider tension-mounted solutions instead.
Rental-Friendly Temporary Solutions
If you’re renting and can’t make permanent modifications, you still have options. These solutions reduce noise without altering the property and can be removed when you move.
Removable acoustic panels attach with adhesive strips and peel off without damage. Place them on the wall around your window to absorb sound reflections. These work best in combination with other noise reduction methods.
Vibration dampening mats sit under your unit without requiring installation. Heavy rubber mats cut to size reduce vibration transfer without needing to be permanently attached. You can take them with you when you move.
Interior window inserts create an air gap that blocks sound transmission. These clear acrylic panels press into your window frame from inside and can be removed seasonally. They reduce both AC noise and outdoor noise entering your home.
Avoid anything that blocks airflow to the exterior portion of your unit. Restricting airflow causes your AC to work harder, creating more noise and potentially damaging the compressor. Never cover the exterior vents or fan grille.
When to Repair vs Replace Your Noisy Window AC
Sometimes noise indicates a problem that’s not worth fixing. Understanding when to repair versus replace saves money and ensures you’re not throwing good money after bad.
Age is the primary factor. Window AC units typically last 10-15 years. If your unit is over 10 years old and making mechanical noises, replacement is usually more cost-effective than repair. Newer units also operate more quietly and efficiently.
Consider the repair cost versus replacement. Professional repairs typically cost $150-400 for window units. If your repair estimate exceeds 50% of a new unit’s cost, replacement makes more financial sense. This is sometimes called the 50% rule.
Noise type matters. Rattling, buzzing, and whistling usually have simple fixes under $50. Grinding, squealing, or banging noises indicate serious mechanical problems. If you hear these sounds from the compressor or motor, professional repair or replacement is usually necessary.
Energy efficiency affects long-term costs. Older units cost more to run and produce more noise even when functioning properly. New Energy Star-certified window ACs operate up to 30% more quietly than models from 10 years ago while using significantly less electricity.
Maintenance Tips to Prevent Future Noise
Regular maintenance prevents most noise problems before they start. These simple habits extend your unit’s lifespan while keeping it running quietly.
Clean or replace filters monthly during cooling season. A dirty filter is the number one cause of AC noise and also reduces efficiency by 5-15%. Set a calendar reminder to check your filter on the first of each month.
Schedule annual professional cleaning before peak season. A technician can clean internal components you can’t reach safely, including the evaporator coils and drain pan. This service typically costs $75-125 and prevents many noise issues.
Inspect mounting hardware annually. Tighten screws and check for corrosion. Replace any rusted or damaged hardware before it fails. This preventive maintenance takes less than 15 minutes but prevents most vibration problems.
Clear the area around your exterior unit. Keep leaves, twigs, and other debris at least 2 feet away from the outdoor portion of your AC. This prevents debris from being pulled into the fan and causing noise or damage.
Frequently Asked Questions
Can you make a window AC unit quieter?
Yes, you can make a window AC quieter by ensuring it’s level and securely mounted, adding foam weatherstripping to absorb vibration, cleaning filters and coils to improve airflow, sealing gaps around side panels, and using sound blankets or acoustic panels. Most people see 5-15 decibel reduction from these simple fixes.
What is the 3 minute rule for air conditioners?
The 3 minute rule states that you should wait 3 minutes after turning off your AC before turning it back on. This waiting period allows pressure in the refrigerant lines to equalize, preventing compressor damage. Starting the compressor too soon can cause it to overheat and fail, creating loud noises and expensive repairs.
What is the $5000 rule for AC?
The $5000 rule is a guideline for deciding whether to repair or replace your air conditioner. If the cost of repairs multiplied by the age of the unit in years exceeds $5000, replacement is typically more cost-effective than repair. For example, a 10-year-old unit needing $600 in repairs would exceed the threshold ($600 x 10 = $6000), suggesting replacement is the better choice.
Why is my window AC unit so loud?
Window AC units become loud due to improper installation causing vibration, loose mounting hardware, dirty filters and coils restricting airflow, worn motor bearings creating grinding sounds, loose side panels rattling, or an aging compressor working harder than normal. Identifying the specific type of noise helps determine the right fix.
How do I stop my window AC from vibrating?
Stop window AC vibration by leveling the unit with adjustable legs or shims, tightening all mounting screws, adding foam weatherstripping between the cabinet and window frame, installing rubber-cork vibration isolation pads, and using support brackets to carry the unit’s weight. These steps address the root cause of vibration rather than just masking the noise.
Conclusion
Learning how to make window air conditioner quieter transforms your living environment from disruptive to peaceful. Most noise issues stem from simple problems like improper leveling, loose mounting, or dirty components that you can fix yourself in under an hour.
Start with the easiest solutions: level your unit, add foam weatherstripping, and clean your filter. These three steps alone solve most noise problems and cost less than $20 total. For persistent issues, sound blankets and professional cleaning provide additional noise reduction.
Remember that some noise indicates serious problems requiring professional attention. Grinding, squealing, or metal-on-metal sounds mean you should stop using the unit and call a technician. For older units experiencing mechanical failure, replacement might be more cost-effective than repair.
With regular maintenance and proper installation, your window AC can cool your home quietly and efficiently. Implement these solutions today to enjoy peaceful comfort all season long.


Leave a Comment