
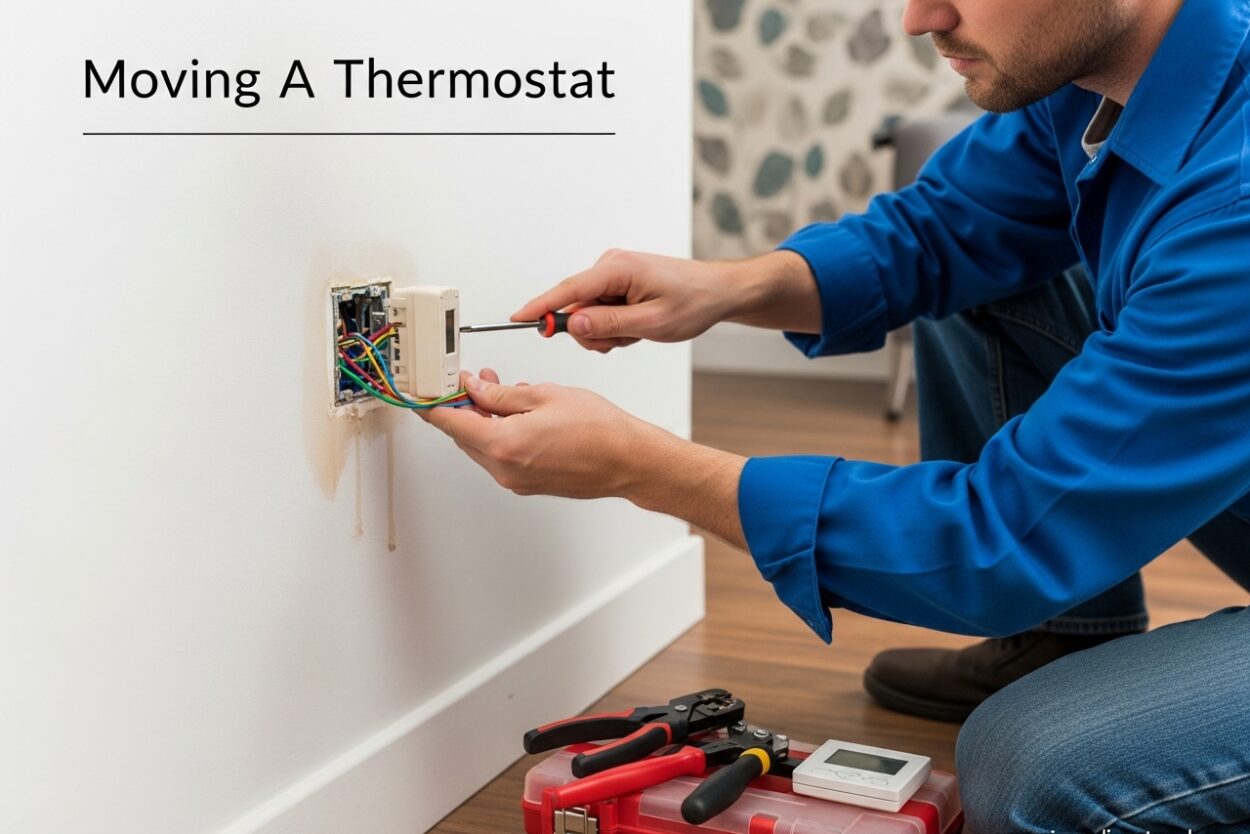
Is your thermostat in a spot that doesn’t reflect your home’s actual temperature? You’re not alone. Many homeowners deal with thermostats placed in poor locations that cause inaccurate readings, uncomfortable temperature fluctuations, and higher energy bills. Moving a thermostat to a better location can improve comfort and reduce energy costs by 10-20% when done correctly.
I’ve helped homeowners relocate thermostats for years, and I’ll walk you through everything you need to know. Whether you’re dealing with a wired thermostat in a finished basement or considering a wireless upgrade, this guide covers the complete process.
Why Thermostat Placement Matters
Your thermostat acts as the brain of your HVAC system. When it’s in the wrong location, it can’t accurately sense your home’s temperature. This leads to your heating or cooling system running longer than necessary, wasting energy and creating uncomfortable hot or cold spots throughout your home.
Proper thermostat placement ensures your system responds to actual living conditions rather than localized temperature extremes. A well-placed thermostat in a central location away from drafts and direct sunlight will maintain consistent comfort levels throughout your home while reducing unnecessary HVAC cycling.
Signs Your Thermostat Is in the Wrong Location
Before moving a thermostat, confirm it’s actually the problem. Look for these common signs:
- Temperature swings: Some rooms feel too hot while others are too cold
- Short cycling: Your HVAC system turns on and off frequently
- High energy bills: Unexplained increases in heating or cooling costs
- Inaccurate readings: The displayed temperature doesn’t match how rooms actually feel
- System runs constantly: Your HVAC never seems to shut off
These issues often indicate your thermostat is responding to localized conditions like direct sunlight, drafts, or heat from appliances rather than your home’s actual temperature.
Tools Needed for Moving a Thermostat
Gather these tools before starting your thermostat relocation project:
- Screwdriver set: Both Phillips and flathead for removing faceplates
- Voltage tester: Non-contact pen tester to verify power is off
- Wire labels or masking tape: Mark each wire before disconnecting
- Camera or phone: Document original wiring configuration
- Fish tape or stiff wire: For routing wires through walls
- Drywall saw: Cut new opening for thermostat base
- Stud finder: Locate framing behind new location
- Level: Ensure new thermostat mount is straight
- Pencil: Mark cut lines and mounting holes
- Wire strippers: For extending wires if needed
- Electrical tape: Secure wire connections
Having everything ready before starting prevents frustration mid-project.
Ideal Thermostat Placement Guidelines
Choosing the right location is critical for accurate temperature readings. Follow these guidelines when selecting your new thermostat location:
- Central location: Place thermostat on an interior wall in the most frequently used area of your home
- Avoid direct sunlight: Sun exposure causes false high readings
- Stay away from drafts: Don’t place near windows, doors, or vents
- Avoid exterior walls: These walls experience temperature fluctuations
- Keep away from heat sources: Stay clear of lamps, TVs, appliances, and electronics
- Mount at correct height: Install approximately 52-60 inches from the floor
- Ensure good air circulation: Don’t place behind furniture or in tight corners
- Avoid kitchens and bathrooms: These rooms have extreme temperature and humidity variations
- Consider WiFi signal: For smart thermostats, ensure reliable wireless coverage
The best location is typically a central hallway or living area on an interior wall away from any direct temperature influences.
Moving A Thermostat: Step-by-Step Guide
Follow these steps to safely relocate your thermostat to a better location. This process works for most low-voltage residential thermostats (24-volt systems common in most homes).
Step 1: Turn Off Power
Before touching any wires, shut off power to your HVAC system at the circuit breaker panel. Look for breakers labeled “furnace,” “HVAC,” “air handler,” or “thermostat.” Flip the breaker to the off position.
Use your non-contact voltage tester to verify no power is flowing to the thermostat before proceeding. This is the most critical safety step—never skip it.
Step 2: Document and Label Wires
Remove the thermostat faceplate by gently pulling it straight off the wall or unscrewing it. Before disconnecting any wires, take a clear photo of the current wiring configuration.
Each wire should be connected to a terminal labeled with a letter (R, W, Y, G, C, etc.). Label each wire with masking tape using the corresponding terminal letter. This step prevents confusion during reconnection.
Common wire colors and terminals include:
- R or Rc: Red wire for power (24-volt hot)
- W: White wire for heating
- Y: Yellow wire for cooling
- G: Green wire for fan
- C: Blue wire for common (power for smart thermostats)
Step 3: Disconnect Wires from Old Location
Unscrew each wire from its terminal. If wires are stapled to the wall, carefully remove staples to free the wiring. Gently pull the wires through the wall opening to determine how much slack you have available.
Measure the distance from your old thermostat location to the new location. This will tell you if you have enough wire to reach the new spot or if you’ll need to extend the wiring.
Step 4: Plan Your Wire Route
Determine the best path for routing wires to the new location. The easiest route is through an unfinished attic, basement, or crawlspace above or below the thermostat wall.
If moving to a different wall or room, you’ll need to fish wires through finished walls. This is where the project becomes more challenging. If you’re uncomfortable with fishing wires through walls, consider hiring a professional.
Step 5: Cut New Opening for Thermostat
Mark the location for your new thermostat using the base plate as a template. Use your level to ensure it’s straight. Trace around the base plate with a pencil.
Use your drywall saw to carefully cut along your marked lines. Cut only through the drywall—be careful not to cut into any pipes or electrical wires behind the wall. Use a stud finder to avoid framing, though you may need to notch a stud for wire passage (check local building codes).
Step 6: Run Wires to New Location
If you have enough wire slack, simply pull it through to the new opening. If you need to extend the wires, splice in additional wire using wire nuts and electrical tape. Ensure each wire is extended with matching gauge wire (typically 18-gauge thermostat wire).
For routes through walls or ceilings, use fish tape to pull the wires. Attach the wires to the fish tape with electrical tape and carefully pull them through to the new opening. Take your time—snagged wires can be frustrating.
Thread all wires through the opening in your new thermostat location, leaving about 3-4 inches of wire extending from the wall.
Step 7: Mount New Thermostat Base
Feed the wires through the opening in the new thermostat mounting plate. Secure the plate to the wall using the provided screws. If you’re mounting to drywall without a stud, use appropriate drywall anchors to ensure a secure mount.
Use your level to verify the base plate is straight before fully tightening screws. A crooked thermostat not only looks unprofessional but can also affect operation in some models.
Step 8: Reconnect Wires and Install Thermostat
Connect each labeled wire to its corresponding terminal on the new thermostat base. Refer to your photo from Step 2 if you need clarification. Tighten each terminal screw securely to ensure good contact.
Tuck any excess wire back into the wall opening, being careful not to pinch any wires. Snap or screw the thermostat faceplate onto the mounted base.
Step 9: Restore Power and Test
Return to your circuit breaker panel and flip the HVAC breaker back to the on position. Your thermostat should power on within a few seconds.
Test each system function:
- Set temperature above current room temp to test heating
- Set temperature below current room temp to test cooling
- Test fan-only mode if available
- Listen for your HVAC system to respond appropriately
Everything working correctly? Congratulations on successfully moving your thermostat!
Wired vs Wireless Thermostat Considerations
Traditional wired thermostats require physical wire connections to your HVAC system, making relocation challenging in finished homes without accessible routing paths. This is why many homeowners face difficulties when moving thermostats in finished basements or between rooms.
Wireless and smart thermostats offer significant advantages for relocation projects. Many smart models use remote sensors that can be placed anywhere in your home, communicating wirelessly with the main thermostat unit. This eliminates the need to run new wires during relocation.
Some wireless thermostats can be battery-powered and placed anywhere, receiving signals from a base station connected to your HVAC equipment. These options are particularly attractive if your current thermostat is in an inconvenient location and you want to avoid wall fishing wires.
When deciding between extending existing wires or upgrading to a wireless solution, compare the cost of wire fishing tools and materials against the price of a new wireless thermostat. For many homeowners, the smart thermostat upgrade offers better long-term value with added energy savings and convenience features.
Cost of Moving a Thermostat
The cost varies significantly depending on whether you tackle the project yourself or hire a professional. Here’s what to expect:
DIY Thermostat Relocation Costs:
- Basic tools (if you don’t own them): $50-150
- Thermostat wire (if extending): $20-40
- Drywall repair supplies: $10-30
- Total DIY cost: Typically under $100
Professional Installation Costs:
- Electrician or HVAC technician: $150-500
- Complex wire routing through finished walls: Additional $100-300
- Drywall repair at old location: $100-200 if included
- Total professional cost: $250-800+ depending on complexity
For simple moves with accessible wire routing, DIY can save significant money. However, if you’re uncomfortable working with electrical wiring or fishing wires through finished walls, professional installation ensures safety and proper operation.
Common Mistakes to Avoid
Based on real experiences from homeowners in DIY forums and Reddit communities, here are mistakes to watch for:
- Not labeling wires before disconnecting: This creates confusion during reconnection and can lead to improper wiring
- Forgetting to turn off power: Working on live wires is dangerous and can damage your thermostat
- Choosing a poor new location: Moving from one bad spot to another defeats the purpose
- Underestimating wire routing difficulty: Finished walls can make wire fishing extremely challenging
- Not checking wire gauge when extending: Using different gauge wire can cause voltage drops and connection issues
- Omitting the C-wire for smart thermostats: Many smart models require a common wire for reliable power
- Mounting on exterior walls: This causes temperature reading issues just like the original bad location
- Not testing all HVAC functions: Some wires work for heating but not cooling if incorrectly connected
Take your time, plan carefully, and don’t hesitate to call a professional if you encounter complications beyond your comfort level.
When to Hire a Professional
Many homeowners successfully relocate thermostats themselves, but certain situations require professional expertise:
- Line-voltage systems: Some electric baseboard heating systems use 120V or 240V thermostats that require licensed electrician work
- Complex wire routing: Multi-story homes or horizontal wire runs through finished walls may be beyond DIY capabilities
- System-specific compatibility: High-end HVAC systems may require professional calibration after thermostat relocation
- No access to wiring pathways: If you can’t access attic, basement, or crawlspace for wire routing
- Concerns about damaging finished walls: Professionals minimize damage and can repair any wall modifications
Hiring an HVAC technician costs $150-500 on average but ensures proper installation and system compatibility. For complex situations, this investment prevents costly mistakes and ensures your warranty remains intact.
Frequently Asked Questions
Do I need an electrician to move a thermostat?
Most residential thermostats use low-voltage (24-volt) wiring that homeowners can safely relocate themselves. However, you should hire a licensed electrician for line-voltage systems (120V or 240V), commonly used with electric baseboard heating. If you’re uncomfortable working with wiring or fishing wires through walls, hiring an HVAC technician is a smart investment.
How expensive is it to move a thermostat?
DIY thermostat relocation typically costs under $100 for tools and materials if you already have basic tools. Professional installation ranges from $150-500 depending on complexity. Wire routing through finished walls can add $100-300 to the cost. Many homeowners find upgrading to a wireless smart thermostat more cost-effective than paying for complex wire fishing in finished spaces.
Can you change the location of a thermostat?
Yes, you can relocate a thermostat to any location that follows proper placement guidelines. The ideal location is on an interior wall in a central area of your home, away from direct sunlight, drafts, windows, doors, and heat sources. The new location must have access for routing the thermostat wiring from your HVAC equipment, or you can upgrade to a wireless model that doesn’t require physical wire connections.
Conclusion
Moving a thermostat to a better location can significantly improve your home’s comfort and energy efficiency. With the right tools, careful planning, and attention to safety, most homeowners can successfully relocate low-voltage thermostats themselves.
Remember to prioritize proper placement in a central location away from temperature extremes. If wire routing through finished walls seems overwhelming, consider upgrading to a wireless smart thermostat with remote sensors instead of tackling complex wall fishing.
Whether you DIY or hire a professional, the investment in proper thermostat placement pays dividends in comfort and energy savings for years to come. Take time to plan your new location carefully, and enjoy more accurate temperature control throughout your home.

Leave a Comment