
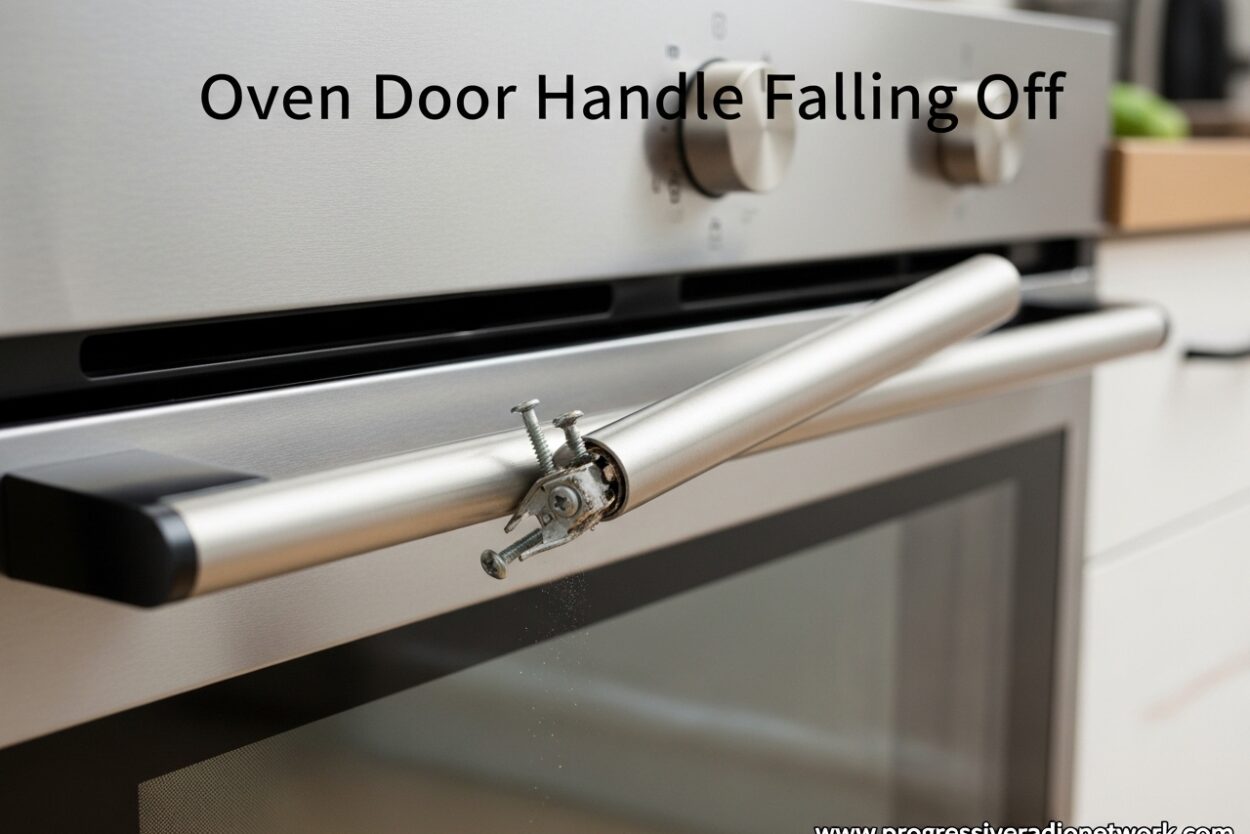
There’s nothing quite like the heart-dropping moment when your oven door handle comes off in your hand. I’ve been there – you’re pulling the door open to check on dinner, and suddenly the handle is loose, wobbly, or has completely detached from the door. An oven door handle falling off is one of those frustrating household problems that seems to happen at the worst possible time, but the good news is that it’s usually a straightforward fix you can handle yourself.
Beyond the inconvenience, a loose or missing oven handle poses real safety concerns. A hot oven door without a secure handle could slam shut unexpectedly, potentially causing burns or damaging the door glass. Many people discover this problem during or immediately after a self-cleaning cycle when extreme temperatures can weaken already-loose screws.
After researching hundreds of user experiences and repair guides, I’ve found that most oven door handle issues stem from a handful of common causes. In this comprehensive guide, I’ll walk you through exactly why your oven door handle keeps falling off and show you how to fix it step by step.
Why Your Oven Door Handle Keeps Falling Off
Understanding why your oven handle won’t stay put is the first step toward a permanent fix. Based on appliance repair forums and user reports, several culprits are responsible for most handle failures.
Thermal expansion and contraction is the leading cause of loose oven handles. Every time you use your oven, the metal components heat up and expand. When the oven cools down, everything contracts. Over hundreds of heating cycles, this constant movement gradually loosens the screws securing your handle. The effect is even more pronounced during self-cleaning cycles, which can reach temperatures of 800 degrees Fahrenheit or higher.
Stripped threads in the mounting brackets or handle itself prevent screws from holding tight. When screws become loose, they wiggle around as you open and close the door. This movement gradually strips away the threads in either the screw holes or the screws themselves. Once threads are stripped, tightening alone won’t solve the problem – the screws simply won’t grip anymore.
Factory defects affect certain oven models more than others. Many Kenmore, Whirlpool, and Frigidaire owners report that their handles were loose from day one because the manufacturer used screws that were slightly too short. In some cases, the mounting bracket inside the door wasn’t properly aligned during assembly, leaving only a few threads to hold the handle screws.
Regular wear and tear takes a toll over years of use. Most people open their oven door multiple times per day. That’s thousands of opening and closing cycles per year. Each time you pull the handle, you’re applying force to the screws and mounting brackets. Eventually, something has to give.
Hard impact or excessive pressure can immediately damage handle mounting. Leaning on the door while checking food, slamming the door shut, or a child hanging on the handle can strip threads or crack mounting brackets instantly.
Safety First: Before You Start
Before diving into any oven repair, safety must come first. I’ve seen too many people skip these precautions and end up with bigger problems than a loose handle.
Unplug your oven or turn off the breaker at your electrical panel. This is non-negotiable for electric ovens. Even with the oven off, there are live electrical components inside that could shock you if you accidentally contact them while working. For gas ovens, turn off the gas supply valve.
Let the oven cool completely if you’ve used it recently. Oven doors retain heat long after the interior has cooled. Metal components can stay hot for hours, and you don’t want to discover this the hard way while trying to remove screws.
Clear your workspace around the oven. You’ll need room to lay the oven door flat once removed. Protect your floor with a towel or blanket – oven doors are heavier than they look, and glass inner panels can crack if dropped on hard surfaces.
Have a helper available if possible. Removing and reinstalling an oven door is a two-person job, especially if you have a heavier model or limited mobility. Having someone to help hold the door or hand you tools makes the process much smoother.
Tools and Materials You’ll Need
Gathering everything before you start will save you frustration mid-repair. Most households already have these basic tools on hand.
Screwdrivers – You’ll need either a Phillips head screwdriver, a Torx driver, or a hex key (Allen wrench), depending on your oven model. Many ovens use #2 or #3 Phillips screws. Some higher-end brands like Bosch and Miele use Torx screws. Check what you need before starting.
Thread-locking fluid – This is the secret weapon for a permanent fix. Blue Loctite (thread locker) is specifically designed to prevent screws from loosening due to vibration and thermal cycling. A small tube costs less than $10 and will last through countless repairs. The blue formula is removable, unlike permanent red Loctite.
Cleaning supplies – Have a damp cloth, some mild detergent, and rubbing alcohol ready. You’ll want to clean the screw holes and mounting surfaces before reassembly. Grease and food splatters can prevent proper tightening.
Replacement screws – If your existing screws are stripped or too short, you’ll need replacements. Take one of the old screws to the hardware store to match the thread size and length. Stainless steel screws are ideal for oven applications because they resist heat and corrosion.
Two-part epoxy – For severely stripped holes that won’t hold screws at all, a high-temperature epoxy like JB Weld can save the day. This is a last-resort solution, but it can work when the mounting bracket itself is damaged. Look for epoxy rated for temperatures above 500 degrees.
How to Fix an Oven Door Handle Falling Off: 7 Simple Steps
Step 1: Open the Oven Door and Lock the Hinges
Open your oven door fully. Look for the hinge locks on each side – these are small metal tabs or levers located where the hinges attach to the oven frame. Flip the locks outward or rotate them to the locked position. This prevents the hinges from snapping closed when you remove the door.
If your oven doesn’t have visible hinge locks, don’t worry – some models use a different locking mechanism or rely on door weight. The key is to understand how your specific hinges work before proceeding.
Step 2: Remove the Oven Door
With the hinges locked, grasp the door on both sides near the hinges. Lift the door straight up while maintaining even pressure on both sides. You’ll feel the door clear the hinge brackets. Once free, carefully pull the door away from the oven at the bottom angle.
Lay the door flat on your protected surface, facing down. This is where that helper comes in handy – oven doors typically weigh 15-30 pounds depending on the model.
Pro tip: Take a photo of the hinge configuration before removing the door. This visual reference can be invaluable when reassembling everything later.
Step 3: Access the Handle Screws
Here’s where oven designs differ significantly. You’ll encounter one of two scenarios:
Scenario A – Exposed screws: On many ovens, the handle screws are accessible from the front. You’ll see screw heads on the top and bottom edges of the door, directly where the handle attaches. Simply remove these screws, and the handle will detach.
Scenario B – Hidden screws: Some ovens require removing the inner door panel to access the handle mounting screws. Look for screws around the perimeter of the inner door panel. Remove these carefully while supporting the glass panel – it may want to fall out once the screws are removed. Set the glass and inner panel aside in a safe place.
Whichever scenario applies, keep track of which screw came from which hole. They may look identical but have different lengths. I like to lay them out in order on a piece of tape labeled with their position.
Step 4: Remove and Inspect Existing Screws
With the handle removed (or access gained to the mounting area), carefully remove all handle screws. Examine each screw closely for signs of damage.
Look for stripped threads on the screws themselves – the threads should be sharp and well-defined. If they look worn, rounded, or partially missing, the screw needs replacement.
Check the length of the screws. If they’re shorter than 1/2 inch, they may have been too short from the factory. This is a common issue with handles that have been loose since new. Replace with screws at least 3/4 inch long for better thread engagement.
Inspect the screw holes in the handle and the mounting bracket in the door. Look for cracks, stripped threads, or deformation. If the metal mounting bracket inside the door is cracked or completely stripped, you may need professional repair or a door replacement.
Step 5: Clean Screw Holes and Mounting Surfaces
This step is often skipped but crucial for a lasting repair. Use your damp cloth with mild detergent to clean the screw holes in both the handle and the door mounting bracket. Remove any grease, food residue, or metal shavings.
Follow up with rubbing alcohol on a cloth or cotton swab to degrease the surfaces completely. The thread-locking fluid won’t adhere properly to greasy surfaces. Let everything dry thoroughly before proceeding.
While cleaning, check again for any debris or damage in the screw holes. Compressed air can help blow out metal filings from stripped threads.
Step 6: Apply Thread-Locker and Reinstall Handle
This is the step that will prevent your handle from falling off again. Apply a small drop of blue Loctite to the threads of each screw near the tip. You don’t need much – one drop per screw is plenty. Too much can make future removal difficult.
Position the handle on the door, aligning all screw holes. Start each screw by hand to ensure proper threading. Cross-tighten gradually – rather than tightening one screw fully before moving to the next, tighten each screw a little at a time in a crisscross pattern. This ensures even pressure on the handle and prevents warping.
Use firm pressure when tightening, but don’t overtighten. You want the screws snug, not stripping the threads anew. If you feel significant resistance before the screw is fully seated, back it out and investigate – something may be misaligned.
If you’re working with hidden screws and had to remove the inner door panel, reassemble the door in reverse order. Make sure all insulation is properly positioned and the glass panel is seated correctly before tightening the perimeter screws.
Step 7: Reattach Door and Test
With the handle securely fastened, it’s time to reinstall the door. Grasp the door on both sides near the hinges and position it at the same angle you removed it. Slide the hinge arms into the mounting brackets.
Flip the hinge locks back to their unlocked position. Slowly open and close the door a few times to ensure smooth operation. The hinges should move freely without binding.
Test the repaired handle by pulling firmly on it from several angles. It should feel solid with no wiggle or movement. Open and close the oven door 10-15 times using the handle to verify the repair is holding.
Consider running the oven on low heat (around 200 degrees) for 30 minutes, then letting it cool completely. Test the handle again while cold and hot. The thread-locker needs time to fully cure, so avoid heavy use for the first 24 hours.
Different Oven Handle Types and What to Expect
Not all oven handles are created equal. Understanding your handle type can help you anticipate what to expect during repair.
Bar-style handles are the most common type, typically found on Whirlpool, Maytag, KitchenAid, and many other brands. These are horizontal bars attached by two or more screws on each end. They’re usually the easiest to repair because the screws are often accessible from the front.
Recessed handles are built into a indented portion of the door, common on European brands like Bosch, Neff, and Siemens. These can be trickier because screws are sometimes hidden behind decorative caps or require partial door disassembly.
Vertical towel-bar handles run perpendicular to the door, typically found on some GE and older Frigidaire models. These often have the most leverage stress and may have more issues with screws pulling out over time.
Brand-specific considerations: Kenmore and Whirlpool ovens are notorious for using screws that are slightly too short from the factory. Frigidaire handles commonly pop out during self-cleaning. LG and Samsung ovens sometimes have hidden screws that require removing the entire door assembly. Knowing your brand’s common issues can help you troubleshoot more effectively.
When to Call a Professional
Most oven handle repairs are well within DIY capabilities, but some situations warrant professional help. Recognizing when you’re in over your head can save you from causing more expensive damage.
If the internal mounting bracket is broken or cracked, you may need professional repair. This bracket is welded or integrated into the door frame and isn’t easily replaceable. A technician can assess whether door replacement is necessary.
Door frame damage beyond simple handle issues – such as bent frames, damaged hinges, or cracked outer glass – should be evaluated by a professional. These problems indicate more serious issues that handle tightening won’t solve.
For electric ovens, if you discover any wiring issues, burned components, or insulation damage while accessing the handle screws, stop and call a technician. Electrical repairs can be dangerous and may void warranties if not performed properly.
Cost comparison: DIY handle repair typically costs $5-30 for screws and thread-locker. Professional appliance repair generally runs $150-300 for a service call plus parts. For simple handle issues, the DIY route usually makes sense unless you’re uncomfortable with the process.
How to Prevent Your Oven Handle from Falling Off Again
Once you’ve completed the repair, a few preventive measures can keep your handle securely attached for years to come.
Use thread-locking fluid on every handle screw during reassembly. This is the single most effective preventive measure. The blue Loctite creates a chemical bond that resists loosening from thermal cycling and vibration while still allowing for future removal if needed.
Check handle tightness annually as part of your regular appliance maintenance. A quick tug on the handle each year can catch loosening before it becomes a problem. If you detect any wiggle, tighten the screws immediately rather than waiting for complete failure.
Avoid slamming the oven door. The impact shock travels directly to the handle screws and mounting brackets. Close the door gently but firmly. This is especially important during self-cleaning cycles when components are already under thermal stress.
Don’t use the handle as leverage. I’ve seen people lean on the oven door while reaching for upper cabinets or use it to support their weight while cleaning. The handle isn’t designed for this kind of force and will eventually fail under abuse.
Be gentle during self-cleaning cycles. The extreme temperatures of self-cleaning can warp components and accelerate screw loosening. If you’ve had handle problems, consider running shorter self-cleaning cycles or using alternative cleaning methods when possible.
Address loose screws immediately. At the first sign of handle movement, tighten the screws before threads become stripped. A loose screw that wiggles for weeks will eventually strip the threads, making repair much more difficult.
Frequently Asked Questions
How do you fix an oven door handle that fell off?
Fix a fallen oven door handle by first removing the door and accessing the mounting screws. Clean all screw holes thoroughly, apply blue thread-locking fluid to the screws, and reinstall with even pressure. Cross-tighten screws gradually and test thoroughly before regular use.
Why does my oven handle keep falling off?
Oven handles typically fall off due to thermal expansion loosening screws over time, stripped threads in mounting holes, or factory defects like screws that are too short. Self-cleaning cycles accelerate this problem with extreme heat that can weaken already-loose connections.
What is the best glue for oven door handles?
Thread-locking fluid like blue Loctite is superior to glue for oven handles because it’s designed for high-temperature applications and allows future removal. For severely stripped holes, high-temperature epoxy like JB Weld rated above 500 degrees can work as a last resort.
Can you use an oven without a handle?
While technically possible, using an oven without a handle is dangerous and not recommended. The hot door could slam shut unexpectedly causing burns or glass breakage, and you’ll struggle to open the door safely when hot. Replace the handle before using the oven.
How much does it cost to replace an oven door handle?
DIY oven door handle repair costs $5-30 for screws and thread-locking fluid. Professional appliance repair ranges from $150-300 including service call and parts. Universal replacement handles typically cost $20-50, while OEM handles run $30-80 depending on brand.
Conclusion
An oven door handle falling off is one of those frustrating but fixable household problems. In most cases, a simple DIY repair with thread-locking fluid will have your oven back in working order in less than an hour. The key is addressing the issue promptly before stripped threads make repair more difficult.
By following this comprehensive guide, you’ve not only fixed your immediate problem but also learned preventive measures to keep your handle secure for years to come. Regular maintenance and gentle use will extend the life of your oven components and prevent future handle issues from disrupting your kitchen routine.





Leave a Comment