
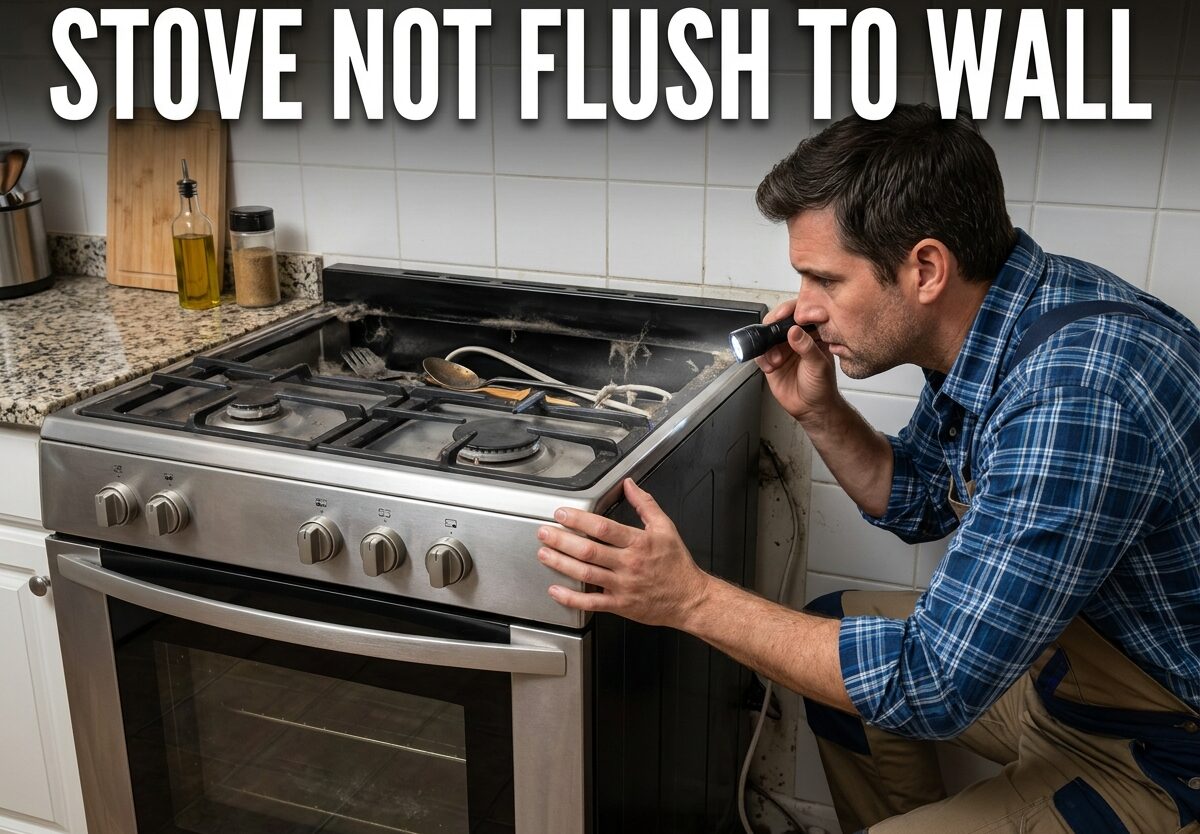
Dealing with a stove not flush to wall can be incredibly frustrating. You push your range back, but it stubbornly refuses to sit against the wall, leaving an unsightly gap that collects crumbs and grease. This common kitchen issue affects homeowners everywhere, whether you’ve just installed a new appliance or are remodeling your cooking space.
Why does this happen? The answer usually comes down to one of five culprits: your gas line sticks out too far, the power cord or electrical outlet blocks the stove, leveling legs aren’t adjusted properly, an anti-tip bracket creates interference, or you have the wrong range type for your setup.
Understanding which problem you’re facing is the first step toward a solution. In this guide, I’ll walk you through each cause and show you exactly how to fix it, from simple DIY adjustments to knowing when it’s time to call a professional.
Common Causes of Stove Not Flush to Wall
When your stove won’t sit flush against the wall, something is physically blocking it from being pushed back all the way. Identifying the obstruction is key to finding the right solution.
The most frequent offenders are gas lines that extend too far from the wall, power cords that bunch up behind the appliance, and electrical outlets positioned right where the stove needs to go. Sometimes the issue is as simple as uneven leveling legs or an anti-tip bracket installed too far forward.
Not all ranges are designed to sit completely flush either. Slide-in ranges are meant to overlap your countertops for a built-in look, while freestanding ranges typically have a small gap by design. Knowing which type you own helps set realistic expectations.
Gas Line Blocking Your Stove
A gas line protruding from the wall is one of the most common reasons stoves can’t sit flush. The flexible connector and shut-off valve take up valuable space behind your range, creating a gap anywhere from one to several inches.
This issue affects both natural gas and propane setups. The gas line needs to be accessible for safety reasons, but its placement often conflicts with achieving that clean, flush look you want.
There are three solutions depending on your situation and comfort level with DIY work. The simplest option involves repositioning how the gas line sits behind the stove. You can gently bend the flexible connector to create an S-shape, allowing it to lay flatter against the wall. Some homeowners also use zip ties to secure the line closer to the wall, though never pull it too tight.
For a more permanent fix, you’ll need a licensed plumber to relocate the gas line. This typically involves moving the connection point to the side of the cabinet or lower near the floor, where the indentation on the side of your range is designed to accommodate it. Expect to pay between $150-$400 for this work depending on your location and the complexity of the job.
Safety note: Never attempt to modify gas lines yourself. Working with gas requires specialized knowledge and tools. A small mistake can create serious hazards including gas leaks, fire, or carbon monoxide poisoning.
Power Cord or Electrical Outlet Issues
Electric stoves face a different challenge—the power cord and outlet. Your range likely has a thick 3-prong or 4-prong cord that takes up surprising space behind the appliance, especially when the outlet is positioned directly in the middle of the wall space.
This problem affects both electric smoothtop ranges and dual-fuel models. The cord creates a bulge that physically prevents your stove from sliding back completely, resulting in that frustrating gap.
The quickest DIY solution comes from an ingenious trick shared by appliance installers: tie a string around the power cord near the plug, hold the cord up against the wall while you push the stove back, then release the cord once the appliance is almost flush. This simple technique lets you temporarily clear the obstruction without any tools.
For a permanent fix, consider installing a recessed electrical outlet. These specialized boxes sit inside the wall cavity rather than protruding, giving you the clearance needed for your stove to sit flush. A qualified electrician can install one for $200-$500, depending on whether your existing wiring needs to be extended.
Another option is relocating the outlet to a side wall or cabinet base where the cord won’t interfere with the range’s position. This requires more extensive electrical work but provides the cleanest result.
Safety warning: Always turn off power at the breaker before working on electrical outlets. Test that power is off with a voltage tester before touching any wires.
Leveling and Anti-Tip Bracket Problems
Sometimes the issue isn’t what’s behind the stove, but how the stove itself is positioned. Uneven flooring or improperly adjusted leveling legs can prevent your range from sitting flush against the wall.
Most ranges have four adjustable legs, one in each corner. If the front legs are extended higher than the back, the stove will naturally tilt forward, creating a gap at the top even when the bottom seems flush. This tilt might be subtle, but it’s enough to create visible spacing and alignment problems.
Check your leveling by placing a spirit level on the oven floor or cooktop surface. Adjust the legs as needed using a wrench or pliers, turning clockwise to raise and counter-clockwise to lower. Most manufacturers recommend a slight backward tilt (about 1/8 inch) to prevent door drift, but extreme angles indicate a problem.
The anti-tip bracket presents another potential conflict. This essential safety device, required by building codes, secures your range to the floor or wall to prevent tipping when heavy pots are on the open oven door. However, if installed too far forward, the bracket itself can block the stove from being pushed back completely.
Inspect your anti-tip bracket by looking behind the lower kick panel or removing the bottom drawer. If the bracket interferes with flush installation, you may need to reinstall it in a different position. The bracket must still secure the range properly, but slight repositioning can solve clearance issues while maintaining safety.
Floor damage can also contribute to leveling problems. Water damage from previous leaks, rot, or structural settling creates uneven surfaces that make proper installation difficult. Address flooring issues before attempting to level your range for the best results.
Range Types and Their Clearance Requirements
Not all stoves are designed to sit flush against the wall. Understanding your range type helps set realistic expectations and may explain why your appliance isn’t achieving the look you want.
Freestanding ranges, the most common type in American homes, feature finished sides and a back guard with controls. These models typically sit about 2-3 inches from the back wall by design. The gap accommodates the gas line, electrical connections, and provides necessary airflow. Expect some spacing with freestanding ranges—it’s normal and intentional.
Slide-in ranges are engineered specifically for built-in appearance. They lack a back guard and have unfinished sides meant to be hidden by cabinetry. When properly installed, the cooktop should overlap your countertop by about 1-2 inches, creating a nearly seamless transition. The back of a slide-in range should sit within a half-inch of the wall, significantly closer than freestanding models.
Drop-in ranges, less common today, are designed to rest on a custom cabinet base with the cooktop flush to surrounding counters. These require specific cabinetry and can’t be used in standard range openings. If you have a drop-in, any spacing issue likely stems from improper installation rather than the range design itself.
Understanding your range type prevents unnecessary frustration. If you have a freestanding model expecting slide-in appearance, you’ll be disappointed by the inevitable gap. Conversely, if your slide-in range isn’t achieving its intended flush installation, there’s likely a specific obstruction to address.
Clearance Requirements You Must Know
Sometimes a gap isn’t a problem at all—it’s a required safety clearance. Building codes and manufacturer specifications dictate minimum distances between your range and surrounding surfaces for fire safety and proper ventilation.
The back wall clearance typically ranges from 0-6 inches depending on your range type and local codes. Slide-in models can be closer, often within half an inch, while freestanding ranges generally need 2-3 inches for gas and electrical connections. Always consult your installation manual for specific requirements.
Sidewall clearances are equally important. You need at least 6 inches of clearance between the cooktop edge and adjacent combustible walls for most electric ranges. Gas models often require 9-12 inches on one side and 3-6 inches on the other. These distances prevent heat damage to surrounding materials.
Don’t overlook your refrigerator placement. If your fridge is next to your stove, maintain at least 3-6 inches of separation. Heat from the range can force your refrigerator to work harder, increasing energy consumption and potentially shortening its lifespan. Some local codes require even greater spacing.
Cabinetry above your range also needs attention. Standard overhead clearance requirements range from 24-30 inches between the cooktop and upper cabinets for electric ranges, with gas models sometimes requiring 30-36 inches. These distances protect your cabinets from heat damage and prevent fires.
Always prioritize safety over aesthetics when it comes to clearances. A slightly larger gap beats a fire hazard every time. If you’re unsure about local requirements, consult a building inspector or licensed contractor familiar with codes in your area.
Temporary Cosmetic Solutions
Sometimes you can’t eliminate the gap entirely, but you can minimize its appearance. Several cosmetic solutions bridge the space between your stove and wall, creating a cleaner look without major construction.
Stove gap covers are the simplest option. These flexible silicone or metal strips fill the space between your range and countertop, preventing crumbs from falling through. While they don’t address the wall gap directly, they solve the related problem of debris accumulation and cost $10-$30 for standard sizes.
For the wall gap itself, consider a filler panel. These thin strips of matching stainless steel, black or white material can be cut to size and attached to the wall behind your stove. They hide the gap while allowing necessary clearance for gas and electrical connections. Custom panels cost $50-$150 depending on materials and whether you DIY or hire fabrication.
Some homeowners use decorative tile or backsplash materials to create a visual transition between the wall and range. This approach works especially well during kitchen renovations when you’re already updating the backsplash. The tile doesn’t close the gap but makes it look intentional rather than problematic.
Remember that cosmetic solutions don’t fix underlying issues. If your gap stems from improper gas line installation or electrical problems, address those safety concerns first. Surface-level improvements are best for situations where the gap is within normal clearance ranges but simply looks unsightly.
When to Call a Professional
Many stove flush issues have DIY solutions, but some situations require professional expertise. Knowing when to call in the pros saves time, money, and potentially prevents dangerous situations.
Gas line work should always be handled by licensed plumbers or gas fitters. These professionals understand local codes, proper materials, pressure testing, and safety protocols. Attempting gas line modifications yourself risks leaks, carbon monoxide poisoning, and fire hazards. Professional relocation typically costs $150-$400 but ensures the job is done safely and correctly.
Electrical modifications also warrant professional help in most cases. If you need a new circuit, outlet relocation, or panel upgrades, a licensed electrician ensures your work meets code requirements and can handle your range’s power draw safely. Expect to pay $200-$500 for outlet work, more for extensive rewiring projects.
Complex installation problems sometimes require appliance repair technicians rather than general contractors. These specialists understand specific brand requirements and can diagnose issues unique to your particular range model. If you’ve tried basic troubleshooting without success, a technician might identify problems less obvious to the average homeowner.
Structural issues like severely uneven floors, water damage, or cabinet problems need carpentry or general contracting expertise. These underlying issues must be resolved before your stove can sit properly regardless of other adjustments. Professional assessment costs $75-$150 for a service call, with additional expenses for actual repairs.
When in doubt, professional consultation provides peace of mind. Most contractors offer free or low-cost estimates and can tell you whether a job is suitable for DIY or requires their expertise. The cost of professional help outweighs the risks of improper installation when safety is at stake.
Frequently Asked Questions
How to get a stove flush against a wall?
Start by identifying what’s blocking your stove from sitting flush. Check for gas lines, power cords, or outlets that might be in the way. For power cord issues, try the string trick—tie a string around the cord, hold it up while pushing the stove back, then release it. If a gas line is the problem, gently bend the flexible connector into an S-shape or call a plumber to relocate it. For leveling issues, adjust the legs until the stove sits evenly. Always ensure any modifications maintain required safety clearances.
Do slide-in ranges go flush with the wall?
Yes, slide-in ranges are designed to sit much closer to the wall than freestanding models, typically within half an inch. Their design lacks the back guard found on freestanding ranges and overlaps countertops by 1-2 inches for a built-in appearance. However, they still need small clearance for gas and electrical connections. If your slide-in range has a large gap, check for obstructions like protruding gas lines or improperly positioned outlets that might be blocking proper installation.
Should the stove be flush against the wall?
It depends on your range type. Freestanding ranges typically need 2-3 inches of clearance by design to accommodate connections and airflow. Slide-in ranges should sit much closer, within half an inch. What matters most is following your manufacturer’s specifications and local building codes for required clearances. Never force your stove against the wall if it creates unsafe conditions with gas lines, electrical connections, or prevents proper ventilation. Some gap is normal and necessary for safe operation.
Why is there a gap between my stove and wall?
Gaps typically occur for five reasons: protruding gas lines or shut-off valves blocking the range, power cords or electrical outlets positioned behind the stove, uneven leveling legs causing tilt, anti-tip brackets installed too far forward, or using a freestanding range where slide-in was intended. The most common culprits are gas lines extending 2-4 inches from the wall and power cords that bunch up behind electric ranges. Identifying which obstruction is affecting your installation determines the appropriate solution.
Conclusion
Dealing with a stove not flush to wall doesn’t have to be a permanent frustration. By identifying whether your gas line, power cord, outlet, leveling legs, or anti-tip bracket is causing the issue, you can apply the right solution and achieve the clean look you want in your kitchen.
Start with the simple fixes first. Try the string trick for power cord management, adjust your leveling legs, or gently reposition your gas line if it’s safe to do so. These DIY solutions cost nothing but a little time and might solve the problem completely.
For more complex issues like gas line relocation or electrical outlet changes, don’t hesitate to call professionals. The investment in proper installation pays off in safety, peace of mind, and a kitchen that looks and functions exactly as it should.
Remember that some clearance is normal and necessary for safe operation. Freestanding ranges will always have a small gap, and that’s okay. Focus on eliminating unnecessary spacing while maintaining required safety distances, and you’ll achieve the best possible result for your specific setup.


Leave a Comment