
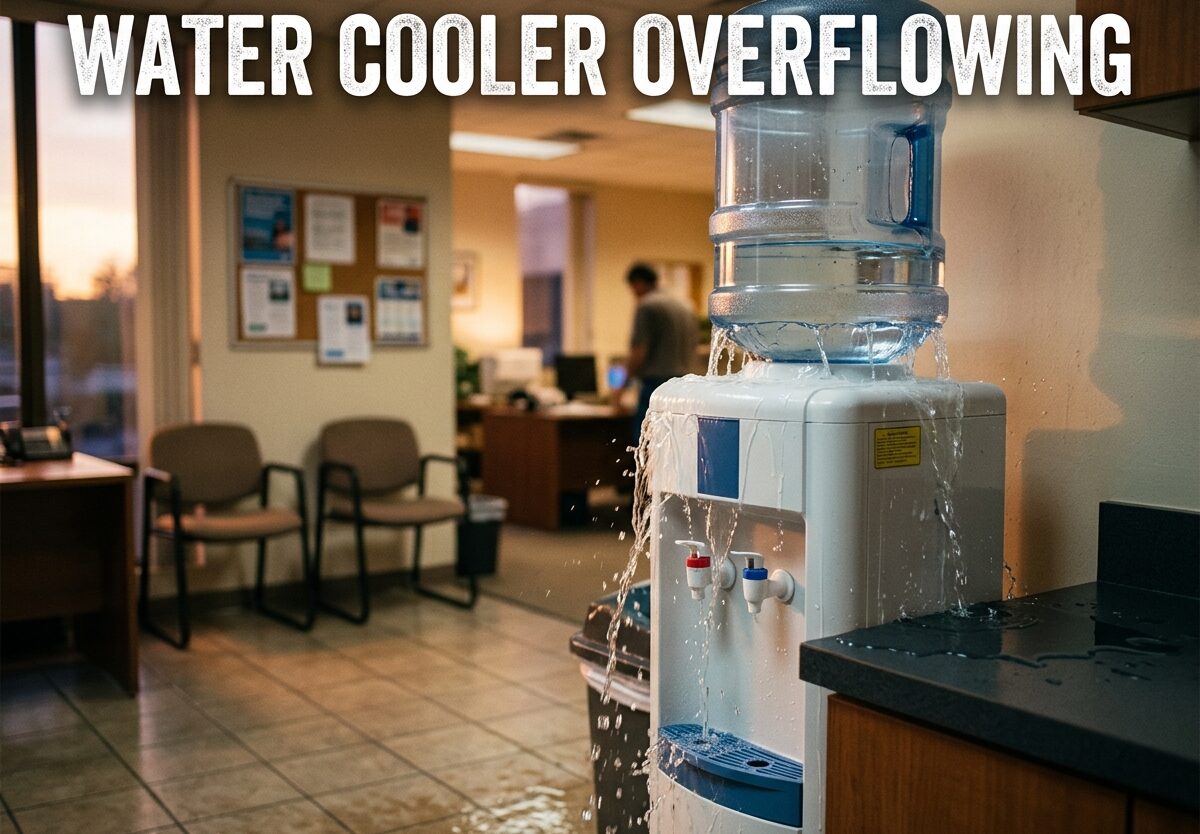
Water pooling around your water cooler can quickly turn from a minor annoyance into a serious problem. I’ve dealt with countless overflowing water cooler issues over the years, and I know how frustrating it is to walk into a puddle on your kitchen floor or office carpet. Water cooler overflowing is usually caused by a few specific problems that you can diagnose and often fix yourself without calling a professional.
In this guide, I’ll walk you through exactly why your water cooler keeps overflowing, how to identify the source of the leak, and step-by-step instructions to fix it. Most water cooler leaks can be resolved in under 30 minutes with basic tools or even no tools at all. Let’s get your water dispenser back to working properly.
Why Does My Water Cooler Keep Overflowing?
Water cooler overflowing typically happens for one of five reasons: a cracked water bottle breaking the vacuum seal, a loose spigot connection, faulty internal seals or gaskets, a clogged condensate drain, or an airlock in bottleless systems. The most common cause is a tiny crack in the water bottle that allows air to enter, which breaks the vacuum seal and causes water to flow continuously into the reservoir until it overflows. I’ve seen hairline cracks so small they’re invisible to the naked eye cause massive flooding problems.
Quick Diagnosis: Where Is Your Water Cooler Leaking?
Before you start fixing anything, you need to identify exactly where the water is coming from. Different leak locations point to different causes. Here’s what to check:
From the top where the bottle sits: This usually indicates a cracked bottle or broken vacuum seal. Water flows continuously from the bottle into the reservoir.
From the spigot or faucet: A dripping or steady stream from the dispensing tap means loose connections or worn washers in the spigot assembly.
From the bottom of the unit: Water pooling underneath often points to internal seal failures, a cracked reservoir, or a clogged condensate drain (for units with cooling mechanisms).
Only in the drip tray: If water only appears in the drip tray and nowhere else, you might not actually have a leak—just a full drip tray that needs emptying.
Spend a few minutes observing exactly where and when the water appears. This diagnosis step will save you time and prevent you from fixing the wrong thing.
Cause 1: Cracked or Damaged Water Bottle
The number one cause of water cooler overflowing is a cracked or damaged water bottle. Here’s why this happens: water coolers rely on a vacuum seal between the bottle and the reservoir. When everything works properly, the vacuum prevents water from flowing until you dispense it. But a crack—even a microscopic one—breaks this seal.
When air enters through a crack, pressure equalizes and water flows freely from the bottle into the reservoir. The reservoir fills up and overflows, often creating a significant mess. I’ve seen this happen overnight, leaving gallons of water on the floor by morning.
How to fix it:
Step 1: Remove the water bottle and inspect it carefully. Hold it up to a bright light and look for cracks, pinholes, or damage around the neck and bottom.
Step 2: If you find any damage, replace the bottle immediately. Most water delivery companies will replace damaged bottles for free—just call customer service.
Step 3: If you can’t see a crack but suspect one, try swapping in a fresh bottle from a different source. If the overflow stops, you’ve found your culprit.
Step 4: Before installing the new bottle, wipe down the reservoir rim and bottle neck to ensure a clean seal.
Cause 2: Loose Spigot or Spout Connection
A loose or worn spigot is the second most common cause of water cooler leaking. Every time you press the dispenser button, mechanical stress wears down the connection. Over time, the packing nut loosens, washers degrade, or the spigot itself develops cracks. This causes water to drip or even stream continuously from the faucet.
I’ve found this issue especially common in office coolers where hundreds of people dispense water daily. The constant use accelerates wear and tear.
How to fix it:
Step 1: Unplug your water cooler for safety.
Step 2: Locate the packing nut behind the spigot handle (inside the cooler cabinet). Use an adjustable wrench to tighten it—about a quarter turn usually does the trick. Don’t overtighten or you might crack the plastic.
Step 3: If tightening doesn’t work, remove the spigot completely and inspect the washer. Replace it if worn or cracked. Most hardware stores carry universal spigot washers.
Step 4: For push-button spigots, check that the spring mechanism returns properly. Clean any mineral buildup that might prevent full closure.
Cause 3: Faulty Internal Seals or Gaskets
Inside your water cooler, multiple seals and gaskets keep water contained. Over time, these rubber components degrade, crack, or shift out of position. Common failure points include the reservoir seal, O-rings around internal plumbing, and gaskets separating the hot and cold tanks.
Internal seal failures typically cause water to pool underneath the unit rather than from obvious points like the spigot. You might notice water dripping from the bottom or leaking from seams in the casing.
How to fix it:
Step 1: Unplug the cooler and drain all water from the reservoir.
Step 2: Remove the outer casing following your manufacturer’s instructions. This usually involves removing a few screws from the back.
Step 3: Inspect all visible seals and gaskets. Look for cracks, tears, compression, or misalignment.
Step 4: For accessible seals, clean the surface and apply a food-grade silicone lubricant. This can temporarily restore the seal.
Step 5: If seals are damaged, contact the manufacturer for replacement parts. For older coolers, compare replacement cost versus buying a new unit—sometimes internal seal repairs aren’t worth the expense.
Cause 4: Overflowing Drip Tray (Not a Real Leak)
Before you panic about a broken water cooler, check your drip tray. Many people mistake a full drip tray for a leak. The drip tray catches normal drips from dispensing, but it can only hold so much. When it overfills, water spills onto the surface below, mimicking a leak.
This is especially common in high-use environments like offices or large households. I’ve diagnosed countless “leaking” coolers that just needed their drip trays emptied.
How to fix it:
Step 1: Remove the drip tray and empty it completely.
Step 2: Clean the tray with mild soap and water. Check that the drain hole (if equipped) isn’t clogged with debris.
Step 3: Monitor the tray over the next few days. If it fills rapidly, you might have a separate issue causing excess dripping.
Step 4: Consider upgrading to a model with a larger drip tray or one that connects to a drain line if emptying it frequently becomes burdensome.
Cause 5: Airlock or Float Valve Issues (Bottleless Systems)
Bottleless water coolers connected to reverse osmosis (R/O) systems or plumbed water lines face different challenges. These units don’t use vacuum seals—instead they rely on float valves or electronic sensors to stop water flow. When these mechanisms fail, water continues filling until it overflows.
Airlocks can also develop in the supply line, causing erratic water flow and sudden overflows. This is especially common after filter changes or if the water supply was temporarily shut off.
How to fix it:
Step 1: Turn off the water supply valve to your cooler.
Step 2: Disconnect the supply line and check for debris or mineral buildup in the connection point.
Step 3: Remove any airlock by dispensing water from both hot and cold taps until the flow steadies. This might take several minutes.
Step 4: Test the float valve (if equipped) by gently lifting it. It should move freely and spring back. Replace if sticky or damaged.
Step 5: For persistent issues, consider installing an external shut-off valve in the supply line as a safety measure.
Hidden Cause: Weight-Related Leaking When Bottle Is Low
Here’s a cause I discovered through years of hands-on experience: some water coolers develop leaks when the water bottle gets low. As the water level drops, the weight decreases, which can slightly shift the bottle’s position on the reservoir. This movement breaks the vacuum seal just enough to cause slow dripping or overflowing.
I’ve seen this phenomenon mostly in older coolers with worn reservoir rims or slightly deformed bottle necks. The seal holds when the bottle is full and heavy, but fails as weight reduces.
How to fix it:
Step 1: Notice when the leaking occurs—if it only happens when the bottle is below half-full, weight is likely the factor.
Step 2: Check that the reservoir rim is clean and level. Clean away any mineral deposits that might prevent a flush seal.
Step 3: Try gently rotating the bottle to find a better seating position.
Step 4: As a temporary fix, place a lightweight object on top of the bottle to maintain pressure (but never anything heavy enough to break the bottle).
Step 5: For persistent issues, the reservoir rim may be warped and require replacement.
When to Replace Your Water Cooler Instead of Repairing
Sometimes repairing a leaking water cooler doesn’t make economic sense. The average lifespan of a water dispenser is 5-10 years with proper maintenance. If your unit is approaching or past this range, replacement might be smarter than repair.
Consider replacement if: multiple components are failing, parts are discontinued or unavailable, repair costs exceed 50% of a new unit’s price, or the cooler shows signs of corrosion or mold that can’t be fully remediated. Newer models also offer better energy efficiency and improved sanitation features.
Prevention Checklist: Stop Water Cooler Leaks Before They Start
Regular maintenance prevents most water cooler leaks. Follow this checklist monthly:
Inspect water bottles for cracks before installation
Check that the bottle seats properly and creates a tight seal
Tighten spigot connections slightly every few months
Clean the drip tray weekly and check its drain hole
Wipe down the reservoir rim monthly to remove mineral buildup
For bottleless systems, replace filters on schedule to prevent pressure issues
Keep the cooler level to prevent stress on internal components
Address small drips immediately—they never fix themselves
Annual professional servicing can catch issues before they become floods
FAQs
What is the average lifespan of a water dispenser?
The average water dispenser lasts 5-10 years with proper maintenance. Bottled water coolers typically last longer than bottleless models due to fewer moving parts. Regular cleaning, timely filter changes, and addressing leaks promptly can extend your cooler’s life toward the longer end of this range.
How to know if a water cooler is leaking?
Check for water pooling around the base, dripping from the spigot when not in use, or continuous water flow from the bottle reservoir. A full drip tray that needs frequent emptying also indicates a leak. Place paper towels under the unit overnight—if they’re wet in the morning, you have a leak.
How to remove airlock from water dispenser?
To remove an airlock from a bottleless water dispenser, first turn off the water supply. Then dispense water from both hot and cold taps continuously for 2-3 minutes until the flow becomes steady without sputtering. If the airlock persists, disconnect the supply line, flush it with water, and reconnect before turning the supply back on.
Why does my water cooler keep overflowing?
Water coolers overflow primarily due to a broken vacuum seal from a cracked bottle, loose spigot connections allowing continuous dripping, internal seal failures causing reservoir leaks, or clogged drains in units with cooling mechanisms. Identifying the exact location of the water helps pinpoint which component is failing.
Conclusion
Water cooler overflowing doesn’t have to be a recurring nightmare. By systematically checking each potential cause—from cracked bottles to loose spigots to internal seals—you can identify and fix most leaks yourself. Remember that catching problems early prevents water damage and extends your cooler’s lifespan. If you’re unsure about any repair, consult a professional. But in most cases, a little troubleshooting saves the day and keeps your water dispenser running smoothly for years to come.

Leave a Comment