
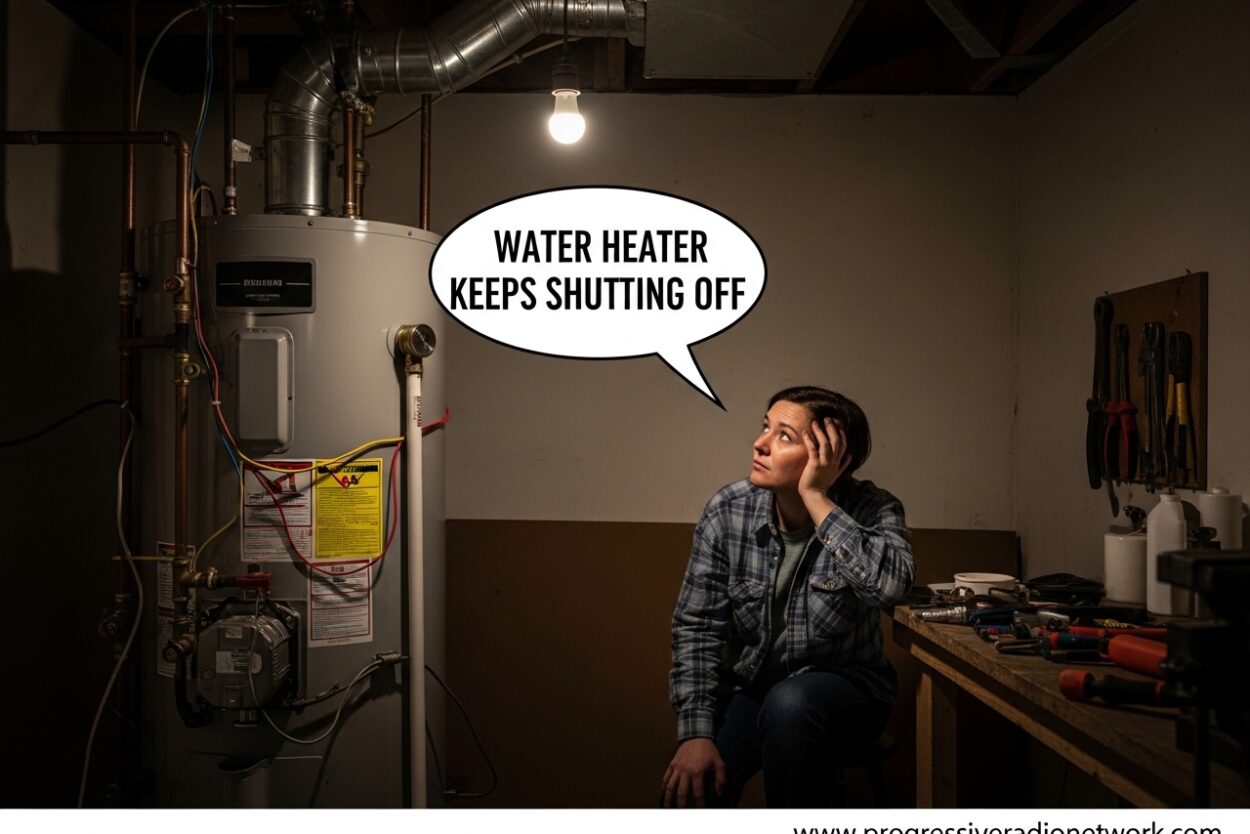
There’s nothing worse than stepping into a hot shower, only to be greeted by an icy blast because your water heater keeps shutting off. I’ve been there, and I know the frustration all too well. When your water heater keeps shutting off, it’s not just an inconvenience—it’s your unit telling you something needs attention.
Modern water heaters have built-in safety mechanisms designed to protect you from dangerous conditions like gas leaks, fires, or tank damage. When these sensors detect problems, they automatically cut off fuel or power to prevent hazards. Understanding why your water heater keeps shutting off is the first step toward fixing it and getting reliable hot water back.
In this guide, I’ll walk you through every common cause of water heater shutdowns, whether you have a gas or electric unit. I’ve spent years researching and troubleshooting these issues, and I’ll share exactly what you need to check, when you can safely fix it yourself, and when it’s time to call a professional. And if you encounter water leaks during your troubleshooting, having a wet/dry vacuum for water cleanup on hand can help manage the mess quickly.
Why Is My Hot Water Heater Shutting Off By Itself? Quick Diagnosis
If your water heater keeps shutting off, it’s almost always due to one of these nine causes. The specific issue depends on whether you have a gas or electric unit, but many problems affect both types. Understanding the pattern of when your water heater shuts off can help you narrow down the culprit quickly.
The 9 Most Common Reasons Your Water Heater Keeps Shutting Off:
1. Tripped High-Limit Switch (Overheating)
When your water heater overheats, the high-limit switch trips to prevent tank damage or explosion. This safety feature activates when water temperature exceeds 180°F. You’ll usually need to press a reset button, but the underlying cause must be addressed or it will trip again.
2. Faulty Thermocouple (Gas Heaters Only)
The thermocouple is a safety sensor that detects whether the pilot light is lit. If it fails or gets dirty, it thinks the pilot is out and cuts off gas supply. This is the number one cause of shutdowns in gas water heaters—Reddit users agree, “It’s the thermocouple. It’s always the thermocouple.”
3. Sediment Buildup in Tank Bottom
Minerals from hard water settle at the bottom of your tank, forming an insulating layer that causes overheating and triggers the high-limit switch. You might hear rumbling or popping sounds before shutdown. This affects both gas and electric heaters equally.
4. Malfunctioning Thermostat
A faulty thermostat can misread water temperature, causing the heater to shut down prematurely or not heat at all. Electric units have two thermostats (upper and lower), and either can fail independently.
5. Dirty or Failing Flame Sensor (Gas Heaters)
Modern gas water heaters with electronic ignition use flame sensors instead of thermocouples. When these get coated with residue or fail, the heater shuts off gas supply for safety. Cleaning is often enough to fix the issue.
6. Clogged Air Intake or Vented Exhaust
Gas water heaters need proper airflow for combustion. Blocked vents or air intakes cause the unit to shut down to prevent carbon monoxide buildup. Electric heaters can also suffer from airflow issues if installed in tight spaces without ventilation.
7. Tripped Circuit Breaker (Electric Heaters Only)
If your electric water heater keeps shutting off, check your breaker panel. A tripped breaker cuts power to the unit. Frequent tripping indicates a serious electrical problem that needs professional attention.
8. Gas Supply Problems
Insufficient gas pressure, a closed gas valve, or problems with the gas line can cause shutdowns. The unit may fire up initially but shut down after a few minutes when it can’t get enough fuel to maintain operation.
9. Broken Heating Element (Electric Heaters Only)
Electric water heaters use one or two heating elements to warm water. When an element fails, usually due to sediment buildup or age, the heater can’t maintain temperature and may shut down completely.
Gas Water Heater Keeps Shutting Off: Specific Causes and Solutions
Gas water heaters have unique components that can cause shutdowns. Understanding these parts and how they fail will help you diagnose the problem faster. I’ve found that gas units tend to fail in predictable patterns, and knowing these patterns saves hours of troubleshooting time.
Thermocouple Failure: The #1 Culprit
The thermocouple is a small metal rod that sits next to your pilot light. It generates a tiny electrical current when heated by the pilot flame, telling the gas valve it’s safe to open. If the thermocouple fails or gets coated in soot, it can’t generate enough voltage, and the gas valve closes for safety.
Symptoms of a bad thermocouple:
- Pilot light won’t stay lit after you release the button
- Water heater works for 20-30 minutes then shuts off
- Unit fires up initially but won’t reignite after shutdown
How to test a thermocouple: Use a multimeter to check for 25-30 millivolts when the pilot is heating it. Anything less means replacement is needed. Thermocouples cost about $15-30 and take 20 minutes to replace—making this one of the easiest and cheapest fixes.
Pilot Light Problems
If your pilot light keeps going out, several issues could be at play. The pilot tube might be clogged with dust or debris, the thermocouple might be failing (see above), or there could be drafts blowing out the flame.
How to relight your pilot light safely:
- Turn the gas valve to “off” and wait 5 minutes for gas to clear
- Turn the valve to “pilot” and press down
- Click the ignition button or use a long lighter to light the pilot
- Continue holding the button for 30-60 seconds after lighting
- Release the button—if the pilot stays lit, you’re good to go
If the pilot won’t stay lit after multiple attempts, the thermocouple is likely the issue.
Gas Valve and Supply Issues
The gas control valve regulates fuel flow to your burner. When these fail, the entire unit shuts down for safety. Gas supply issues include insufficient pressure, a partially closed shutoff valve, or problems with the gas line itself.
Safety warning: If you smell gas at any point, leave your home immediately and call your gas company from outside. Don’t attempt to diagnose or fix gas leaks yourself—this is strictly professional territory.
Testing gas pressure requires a manometer and specialized knowledge. If you suspect gas supply problems, it’s worth the $100-150 service call to have a professional verify everything is working correctly.
Venting and Airflow Blockage
Gas water heaters need fresh air for combustion and proper venting of exhaust gases. Blocked vents create dangerous carbon monoxide conditions, which is why modern units have sensors that trigger shutdown when airflow is restricted.
Common airflow blockages:
- Bird nests or debris in the vent cap on your roof
- Dusty or blocked air intake vents at the bottom of the unit
- Items stored too close to the heater restricting airflow
- Collapsed or disconnected vent pipes
Check the vent cap on your roof and remove any obstructions. Clear dust from air intake openings using a vacuum cleaner. Ensure at least 12 inches of clearance around all sides of your water heater.
Electric Water Heater Keeps Shutting Off: Specific Causes and Solutions
Electric water heaters have different components than gas units, but many symptoms overlap. The key difference is that electric units rely on heating elements and thermostats rather than combustion. I’ve found that electric units tend to fail more gradually than gas units, giving you warning signs before complete shutdown.
Thermostat Problems
Electric water heaters have two thermostats—an upper and a lower—that control corresponding heating elements. When either thermostat fails, it can cause intermittent operation or complete shutdown. The upper thermostat acts as the master control, so its failure affects the entire unit.
Signs of thermostat failure:
- Water temperature fluctuates wildly
- Unit produces lukewarm water but never truly hot
- Water heater shuts off before reaching desired temperature
- Only one heating element appears to be working
Testing thermostats requires a multimeter to check for continuity. With power off, disconnect the wires and test across the terminals. No continuity means the thermostat needs replacement. Thermostats cost $20-40 and are relatively easy to replace if you’re comfortable working with electricity.
Heating Element Failure
Electric water heaters use one or two heating elements submerged in the tank to warm water. When an element fails, the unit can’t maintain temperature and may shut down completely. Sediment buildup is the primary killer of heating elements—the minerals coat the element, causing it to overheat and burn out.
Symptoms of a failed heating element:
- Water never gets hot enough
- Unit trips the circuit breaker when element turns on
- Water heater works briefly then shuts down
- Lukewarm water even at highest temperature setting
Test elements with a multimeter—expect 10-16 ohms of resistance. Open circuit means the element is burned out and needs replacement. Elements cost $15-35 and require draining the tank to replace.
Tripped Circuit Breaker
Electric water heaters draw significant current—typically 4,500 watts per element. If your water heater keeps tripping the breaker, it indicates a serious electrical problem. The breaker is doing its job by preventing potential fire hazards.
Common causes of breaker tripping:
- Shorted heating element (most common)
- Wiring failure or loose connections
- Water leak causing electrical short
- Breaker too small for the heater’s power draw
Safety warning: If the breaker trips immediately when you reset it, stop and call an electrician. Repeatedly resetting a tripped breaker can cause electrical fires. This is not a DIY situation.
Wiring Issues
Faulty wiring can cause intermittent operation or complete shutdown. Loose connections, corroded terminals, or damaged wires create resistance that generates heat and triggers safety shutdowns. Wiring problems are more common in older units or areas with high humidity.
Signs of wiring issues include burning smells, visible burn marks on terminals, or intermittent operation patterns. If you’re not experienced with electrical work, this is best left to professionals.
Common Problems Affecting Both Gas and Electric Water Heaters
Some issues affect all water heaters regardless of fuel type. Understanding these universal problems will help you identify patterns and solutions that apply to your specific situation.
Sediment Buildup: The Silent Killer
Hard water contains dissolved minerals like calcium and magnesium. As water heats, these minerals precipitate out and settle at the bottom of your tank, forming an insulating layer that causes multiple problems.
How sediment causes shutdowns:
- Creates hot spots that trigger the high-limit switch
- Covers heating elements, causing them to overheat and fail
- Reduces tank capacity, causing more frequent cycling
- Creates rumbling or popping sounds during operation
The solution: Flush your tank annually. This simple maintenance task involves draining the tank through the drain valve until water runs clear. It takes about 30 minutes and can extend your water heater’s life by years. If sediment is severe, you may need a professional to perform a deliming treatment.
High-Limit Switch Activation
The high-limit switch (or reset button) is a safety device that shuts off the heater if water temperature exceeds safe limits—typically around 180°F. When this trips, it means something is causing your water to overheat.
Common causes of high-limit switch trips:
- Sediment buildup creating hot spots
- Faulty thermostat not cutting off at set temperature
- Gas valve stuck open (gas units)
- Blocked exhaust causing overheating
After pressing the reset button, monitor your unit carefully. If it trips again within 24 hours, you have an underlying problem that needs diagnosis. Simply resetting without finding the cause is dangerous and can lead to tank failure or explosion in extreme cases.
Short Cycling: What It Means and Why It Happens
Short cycling occurs when your water heater turns on and off frequently without completing a full heating cycle. This pattern wastes energy, wears out components faster, and can be a symptom of several underlying problems.
Causes of short cycling:
- Thermostat set too high, causing rapid overheating
- Sediment buildup causing uneven heating
- Failing heating element or thermocouple
- Undersized unit for your household’s needs
If your unit runs for only a few minutes before shutting off, you’re experiencing short cycling. This pattern requires prompt attention to prevent further damage to components.
Step-by-Step Troubleshooting Guide
When your water heater keeps shutting off, a systematic approach saves time and prevents unnecessary parts replacement. I’ve developed this diagnostic process over years of troubleshooting, and it works for both gas and electric units.
Pre-Troubleshooting Safety Checklist
Before diving into diagnostics, ensure you’re prepared and safe. Working with water heaters involves gas, electricity, scalding water, and pressurized tanks—all potentially hazardous if you’re not careful.
Safety essentials:
- Install a carbon monoxide detector if you have a gas unit
- Turn off gas supply at the valve before working on gas components
- Shut off electricity at the breaker for electric units
- Let water cool for 2-3 hours before draining the tank
- Have a fire extinguisher rated for electrical and gas fires nearby
- Wear heavy gloves and eye protection
Tools you’ll need:
- Multimeter for electrical testing
- Adjustable wrench
- Screwdriver set
- Garden hose for tank flushing
- Flashlight for inspecting tight spaces
- Thermocouple (if you suspect it’s bad—have a spare ready)
Gas Water Heater Diagnostic Steps
Follow these steps in order for gas units. Each step builds on the previous one, and this progression will lead you to the problem efficiently.
Step 1: Check the pilot light. Look through the viewing window or remove the access panel. Is the pilot lit? If not, attempt to relight it using the manufacturer’s procedure. If it won’t stay lit after 2-3 attempts, move to Step 2.
Step 2: Test the thermocouple. With the pilot lit, use your multimeter to test for 25-30 millivolts across the thermocouple terminals. If voltage is low or nonexistent, replace the thermocouple.
Step 3: Inspect the flame. A healthy pilot flame should be blue and strong, about 1-2 inches tall. A weak yellow flame indicates dirty pilot tube or low gas pressure. Clean the pilot tube with compressed air.
Step 4: Check venting and airflow. Go to the roof and inspect the vent cap for obstructions. Check that air intake vents at the base of the unit are clear of dust and debris. Ensure nothing is stored within 12 inches of the heater.
Step 5: Examine the burner. With the unit running, look at the burner flame through the viewing window. It should be blue with yellow tips. Yellow flames throughout indicate combustion problems requiring professional service.
Step 6: Check gas supply. Verify the gas shutoff valve is fully open (parallel to the pipe). If other gas appliances work fine, the problem is isolated to the water heater. If nothing works, check your main gas supply.
Electric Water Heater Diagnostic Steps
Electric units require a different approach. Follow these steps systematically to identify the problem.
Step 1: Check the breaker. Go to your electrical panel and find the breaker labeled “water heater.” Is it tripped? Reset it once. If it trips again immediately or within a few hours, you have a short circuit that needs professional diagnosis.
Step 2: Verify power at the unit. Use your multimeter to check for voltage (usually 240V) at the heater’s electrical connection. No power indicates a wiring problem between the panel and heater.
Step 3: Test the upper thermostat. With power off, remove the access panel and insulation. Set your multimeter to continuity mode and test across the thermostat terminals. No continuity means the thermostat is bad.
Step 4: Test the upper heating element. With power still off, disconnect one wire from the element and test for continuity. Expect 10-16 ohms. Open circuit or infinite resistance means the element is burned out.
Step 5: Repeat for lower components. If upper components test good, repeat the process for the lower thermostat and element. Remember that upper thermostat failure can affect the entire unit, so test it first.
Step 6: Check the reset button. Press the high-limit reset button located above the upper thermostat. If it clicks, it was tripped. Monitor the unit—if it trips again, you have an overheating problem that needs further diagnosis.
Universal Checks for All Units
These steps apply to both gas and electric water heaters and should be performed regardless of fuel type.
Step 1: Check temperature settings. Recommended setting is 120°F. Higher settings cause stress on components and increase scalding risk. If set above 140°F, lower to 120°F and see if problems persist.
Step 2: Assess sediment level. Connect a garden hose to the drain valve and run 3-5 gallons into a bucket. If water is cloudy or contains debris, you have significant sediment buildup that should be addressed.
Step 3: Consider unit age. Water heaters typically last 10-15 years. If yours is over 12 years old and experiencing problems, replacement may be more cost-effective than repair.
Step 4: Check for leaks. Inspect around fittings, the drain valve, and the tank bottom. Leaks can cause electrical shorts or damage components, leading to shutdown issues. If you find minor leaks from fittings or valves, you may want to keep a shop vacuum for water heater leaks nearby for quick cleanup during repairs.
When to Call a Professional: Red Flags and Cost Considerations
While many water heater issues are DIY-friendly, some situations absolutely require professional expertise. I’ve seen too many homeowners make problems worse—or create dangerous conditions—by attempting repairs beyond their skill level. Knowing when to call a pro saves money, time, and potentially your life.
Red Flags That Require Professional Service
These situations are strictly professional territory. Don’t attempt DIY repairs under these conditions.
Gas smell or suspected gas leak: If you smell rotten eggs, leave your home immediately and call your gas company from outside. Gas leaks can cause explosions and carbon monoxide poisoning. This is not negotiable—professional diagnosis is mandatory.
Carbon monoxide detector activation: If your CO detector alarms, evacuate the home and call emergency services. Carbon monoxide is odorless, colorless, and deadly. Don’t assume it’s a false alarm—let professionals determine the source.
Water leaking from the tank itself: Leaks from fittings or valves are repairable, but leaks from the tank body indicate corrosion or failure. Tank replacement is the only solution, and this requires professional installation.
Repeated failures after repair attempts: If you’ve replaced a part and the problem persists within days, there’s likely an underlying issue you’re missing. Multiple component failures suggest systemic problems that need professional diagnosis.
Electrical issues beyond simple component replacement: Wiring problems, repeated breaker trips, and anything involving the main electrical service panel should be handled by licensed electricians. The risk of fire or electrocution is too high for DIY attempts.
Repair vs Replace: Making the Right Decision
At some point, replacement becomes more economical than continued repairs. This decision depends on several factors, and I recommend considering all of them before investing in another repair.
Age guidelines:
- Under 8 years old: Repair is almost always the better choice
- 8-12 years old: Repair if cost is under 50% of replacement
- Over 12 years old: Replace if repair cost exceeds $300-400
- Over 15 years old: Replace regardless of repair cost
Repair cost ranges (professional installation):
- Thermocouple replacement: $150-250
- Thermostat replacement: $200-350
- Heating element replacement: $250-400
- Gas valve replacement: $400-700
- Complete flush and deliming: $150-300
Replacement cost ranges:
- Basic 40-50 gallon unit: $800-1,200 installed
- High-efficiency unit: $1,200-2,000 installed
- Tankless unit: $2,000-4,500 installed
What to Expect from a Professional Service Call
When you call a professional, here’s what should happen during the service call. Knowing this process helps ensure you get quality service and fair pricing.
A qualified technician will perform a complete diagnostic including: pressure testing, combustion analysis (for gas units), electrical load testing, and visual inspection of all components. They should explain their findings and provide a written estimate before beginning any work.
Get multiple quotes for expensive repairs. Prices can vary significantly between providers, and a second opinion often reveals alternative solutions. Ask about warranty on parts and labor—reputable companies stand behind their work.
Preventing Water Heater Shutdowns: Maintenance That Extends Unit Life
The best way to deal with water heater problems is to prevent them before they start. Regular maintenance is far cheaper than emergency repairs and can double your unit’s lifespan. I’ve maintained water heaters that are still running strong after 20 years thanks to consistent care.
Annual Maintenance Checklist
Perform these tasks once a year, and you’ll prevent most common shutdown issues. Set a reminder on your calendar—it’s that important.
Test the temperature pressure relief (TPR) valve: Lift the handle on the TPR valve located near the top of the tank. Hot water should rush out through the overflow pipe. If nothing comes out or it drips continuously, replace the valve. This safety device prevents tank explosions.
Flush sediment from the tank: Connect a garden hose to the drain valve and run 3-5 gallons into a bucket or floor drain. Continue until water runs clear. This simple task prevents sediment buildup that causes overheating and premature failure.
Inspect the anode rod: The anode rod sacrifices itself to prevent tank corrosion. Remove it (you’ll need a socket wrench) and inspect. If it’s less than 50% of its original thickness or coated with calcium, replace it. A new anode rod costs $30-50 and can extend tank life by years.
Check venting and airflow: For gas units, inspect the vent cap on your roof and clear any obstructions. Ensure air intake vents are clean and unobstructed. Electric units need space around them for heat dissipation.
Test gas shut-off valve: Turn the gas valve to “off,” wait a few minutes, then turn it back to “on.” The valve should move smoothly without resistance. Sticky valves can fail when you need them most.
Extending Water Heater Life Through Smart Habits
Beyond annual maintenance, daily habits significantly impact water heater longevity. Small changes in how you use hot water add up to big differences in wear and tear.
Lower the temperature to 120°F: This setting prevents scalding, reduces energy consumption by 10%, and decreases stress on components. Higher temperatures accelerate corrosion and wear while increasing the risk of accidental burns.
Install a water softener if you have hard water: Hard water contains minerals that destroy water heaters from the inside out. A water softener eliminates sediment buildup, reduces corrosion, and can double your unit’s lifespan. The cost of a softener is easily recouped in extended water heater life and reduced energy bills.
Insulate exposed pipes: Insulating the first 3-6 feet of hot and cold water pipes reduces heat loss and prevents condensation that can corrode fittings. Pipe insulation is cheap and takes minutes to install.
Install an expansion tank: If you have a closed water system (check valve on the main line), install an expansion tank. Without it, thermal expansion causes excessive pressure that damages the tank and components. Expansion tanks cost $50-100 and prevent countless problems.
Seasonal Considerations for Water Heater Performance
Water heater problems often follow seasonal patterns. Understanding these patterns helps you anticipate and prevent issues before they occur.
Winter challenges: Colder incoming water requires more energy to heat, putting additional stress on your unit. Set your thermostat slightly higher (125°F) in winter to compensate, then return to 120°F in summer. Insulate pipes in unheated spaces to prevent freezing and reduce the workload on your heater.
Vacation settings: When leaving for more than a week, turn your water heater to “vacation” mode or the lowest setting. This saves energy while preventing bacterial growth in the tank. For extended absences over a month, consider draining the tank completely.
Summer efficiency: In summer, incoming water is warmer and your water heater works less. This is the ideal time for maintenance tasks and repairs—you’ll have minimal disruption to hot water access.
Tankless Water Heater Shutdown Issues: What’s Different?
Tankless water heaters have unique shutdown problems that traditional storage tanks don’t experience. Since competitors rarely cover this topic, I want to address tankless-specific issues here. If you have a tankless unit that keeps shutting off, these are the most likely culprits.
Flow Rate Problems
Tankless units require a minimum flow rate (typically 0.5-0.75 gallons per minute) to activate and continue heating. If flow drops below this threshold, the unit shuts off to prevent overheating the heat exchanger.
Common flow rate issues:
- Running only one low-flow fixture (showerhead with flow restrictor)
- Partial clogs in plumbing or aerators
- Clogged inlet filter screen on the unit
- Undersized unit for simultaneous hot water demands
Check and clean the inlet filter screen monthly—this simple task resolves many tankless shutdown issues. If you’re experiencing shutdowns during showers, try removing the flow restrictor from your showerhead or installing a model designed for tankless units.
Tankless-Specific Error Codes
Modern tankless units display error codes that pinpoint problems. Understanding these codes saves hours of troubleshooting time. While codes vary by manufacturer, some are nearly universal.
Common error codes:
- Error code 11: No ignition (gas supply or igniter problem)
- Error code 12: Flame loss (flame sensor or gas valve issue)
- Error code 29: Locked rotor (circulation pump or fan problem)
- Error code 71: Heat exchanger error (usually requires replacement)
Consult your owner’s manual for specific error code meanings. Some issues require professional service, especially heat exchanger problems which are among the most expensive repairs on tankless units.
Descaling for Tankless Units
Unlike tank units, tankless water heaters require periodic descaling to remove mineral deposits from the heat exchanger. Hard water causes scale buildup that reduces efficiency and causes overheating shutdowns.
Descaling should be performed annually in hard water areas or every 2-3 years in moderate water conditions. The process involves circulating a descaling solution through the unit using a submersible pump. Professional descaling costs $150-250, while DIY kits are available for $50-75.
Frequently Asked Questions
Why is my hot water heater shutting off by itself?
Your water heater is shutting off due to a safety mechanism detecting a problem. The most common causes include a tripped high-limit switch from overheating, faulty thermocouple (gas units), sediment buildup, or a malfunctioning thermostat. These safety features prevent dangerous conditions like gas leaks, fires, or tank damage. The unit will continue shutting off until the underlying problem is diagnosed and repaired.
How to fix a heater that keeps shutting off?
Start with the easiest checks first. For gas units: verify the pilot light is lit, clean the pilot tube if needed, and test the thermocouple with a multimeter (should read 25-30 millivolts). For electric units: check the breaker panel, test thermostats and heating elements for continuity. If the high-limit switch tripped, press the reset button but monitor carefully—repeated tripping indicates a serious problem. If basic checks don’t resolve the issue, sediment buildup may require flushing the tank, or you may need professional service for gas valve, thermostat, or heating element replacement.
Why does my water heater run for 5 minutes then shut off?
This specific pattern typically indicates a thermocouple problem (gas units) or overheating issue. The thermocouple generates electricity from the pilot flame to keep the gas valve open. As it fails, it can’t maintain voltage after the unit runs for a few minutes, causing shutdown. Alternatively, sediment buildup creates hot spots that trigger the high-limit switch after 5-10 minutes of operation. Test the thermocouple voltage and flush the tank to remove sediment. If the problem persists, the gas valve or thermostat may require replacement.
Can I still use water if the water heater is turned off?
Yes, you can still use cold water from your taps when the water heater is off. The water supply system works independently of the water heater. However, if your water heater is leaking or you suspect flooding damage, you may want to shut off the main water supply to prevent further water damage. For gas units in emergency situations (gas smell or carbon monoxide detection), evacuate immediately and don’t use any water fixtures as this could trigger ignition sources.
Is it dangerous to keep resetting my water heater?
Repeatedly resetting a tripped water heater without finding the cause is dangerous. The reset button trips for a reason—to prevent hazardous conditions. Common underlying causes include sediment buildup causing overheating, faulty thermostats that don’t regulate temperature, gas valves stuck open, or electrical shorts. Resetting without diagnosis can lead to tank rupture, explosion (in extreme cases), or fire hazard. If your unit trips more than once within 24 hours, professional diagnosis is essential. Continuing to reset without addressing the problem risks catastrophic failure.
How often should I flush my water heater?
Flush your water heater at least once annually to remove sediment buildup. In areas with very hard water, flush every 6 months for optimal performance. Sediment accumulates continuously as minerals precipitate out of heated water. This insulating layer causes overheating, reduced efficiency, component failure, and strange rumbling sounds. The flushing process involves connecting a garden hose to the drain valve and running 3-5 gallons of water until it runs clear. This simple 30-minute maintenance task can extend your water heater’s life by 5-10 years and prevent most shutdown issues.
What are the signs of a failing thermocouple?
A failing thermocouple typically shows these symptoms: pilot light won’t stay lit after you release the button, water heater works for 20-30 minutes then shuts off, unit fires up initially but won’t reignite after shutdown, or the pilot flame is weak and yellow rather than strong and blue. Test the thermocouple with a multimeter—healthy units generate 25-30 millivolts when heated by the pilot flame. Anything less indicates replacement is needed. Thermocouples are inexpensive ($15-30) and relatively easy to replace, making this one of the most DIY-friendly water heater repairs.
Why does my water heater shut off during showers?
For tankless units, shutdowns during showers almost always indicate flow rate problems. Tankless units require minimum flow (typically 0.5-0.75 GPM) to activate. Low-flow showerheads, partially clogged aerators, or running multiple fixtures simultaneously can drop flow below this threshold. Clean the inlet filter screen on your tankless unit and consider removing flow restrictors from showerheads. For storage tank units, shower shutdowns suggest the unit can’t keep up with demand or the heating element/thermocouple is failing. Sediment buildup reducing tank capacity may also be the culprit.
Conclusion
When your water heater keeps shutting off, it’s frustrating and inconvenient—but it’s also a solvable problem. Armed with the information in this guide, you can now diagnose most issues yourself, make informed decisions about repair versus replacement, and know exactly when to call in a professional.
Remember that water heater shutdowns are almost always triggered by safety mechanisms designed to protect you. These shutdowns are your unit’s way of telling you something needs attention before it becomes dangerous or more expensive to fix.
The most common causes are usually the easiest to fix: a faulty thermocouple, sediment buildup, or a tripped breaker. Start your troubleshooting with these basics before moving to more complex issues. And don’t forget the power of prevention—annual maintenance can prevent most shutdown problems before they start.
If you’re dealing with repeated shutdowns or can’t identify the cause, there’s no shame in calling a professional. The cost of a service call is far less than the cost of water damage, higher energy bills from inefficient operation, or replacing a unit that failed prematurely due to neglect.
Here’s to consistent hot water and fewer cold showers. With proper maintenance and timely repairs, your water heater should provide reliable service for years to come.
Leave a Comment