
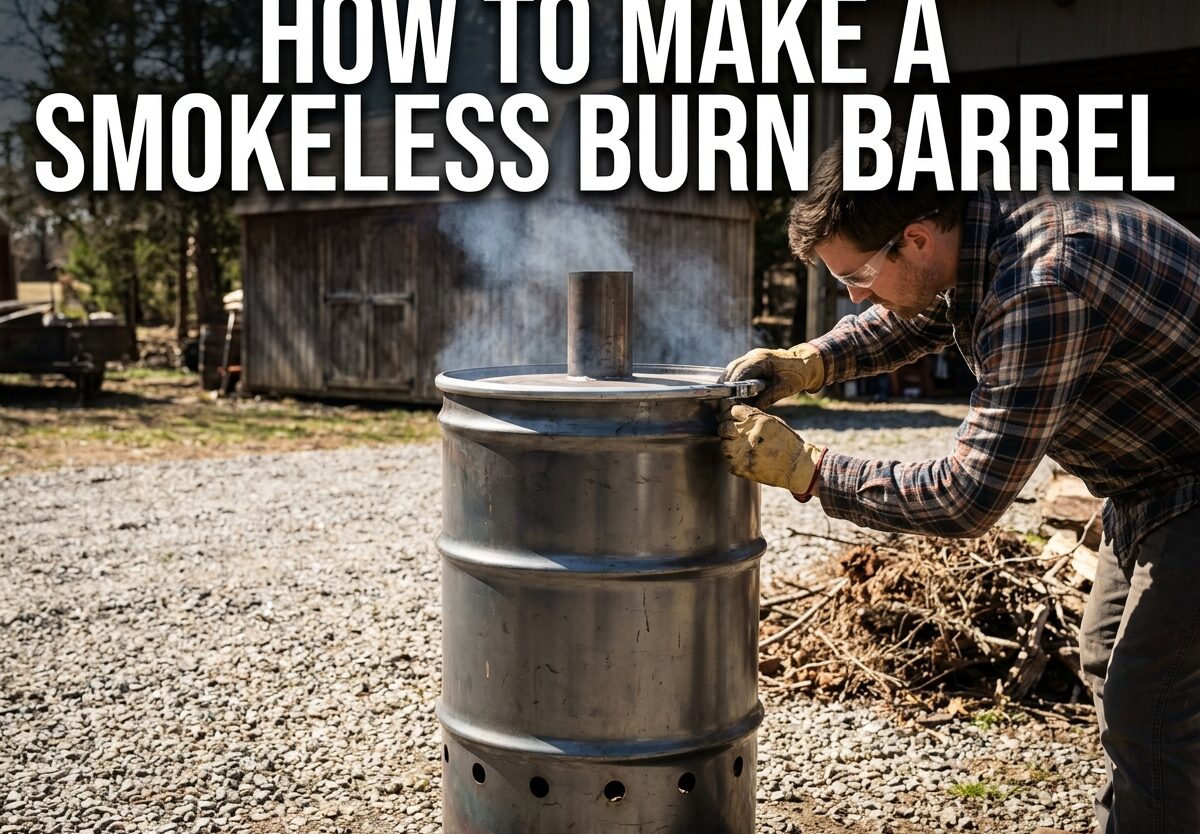
If you’ve ever dealt with a traditional burn barrel, you know the frustration of thick smoke blanketing your yard, neighbors complaining about the smell, and that nagging guilt about what you’re putting into the air. Learning how to make a smokeless burn barrel changed everything for me. After years of dealing with smoky fires that made my eyes water and sent my neighbors indoors, I discovered that a simple design modification can transform a standard 55-gallon drum into a clean-burning incinerator that produces virtually no smoke.
What makes a smokeless burn barrel different? It all comes down to secondary combustion. A traditional burn barrel starves the fire of oxygen, creating incomplete combustion and lots of smoke. A smokeless design uses double-wall construction and strategic venting to give the fire exactly what it needs – plenty of oxygen at the right temperature to burn off those smoke-producing gases before they ever escape the barrel.
How Smokeless Burn Barrels Work
The science behind a smokeless burn barrel is actually pretty brilliant. When you burn wood or yard waste in a standard barrel, the fire doesn’t get hot enough or have enough oxygen to burn completely. This creates smoke – which is basically unburned fuel particles and gases trying to escape.
A smokeless burn barrel solves this through a two-stage combustion process. Primary air enters through holes at the bottom of the inner barrel, feeding the initial fire. As the fire heats up, air rises between the inner and outer barrel walls, getting superheated in the process. This hot air then exits through vents at the top of the inner barrel, where it ignites the smoke and gases in a secondary combustion chamber. The result? A much hotter fire that burns fuel almost completely, producing minimal smoke and ash.
This double-wall construction is the same principle used in commercial smokeless fire pits that cost hundreds of dollars. You’re essentially building the same thing using common materials for a fraction of the price.
Materials Needed for Your Smokeless Burn Barrel
The heart of your smokeless burn barrel is two 55-gallon steel drums. This might sound like a lot, but the design requires both an inner and outer barrel to create that crucial air gap for secondary combustion. When sourcing your drums, be extremely careful about what they previously contained.
I can’t stress this enough: only use food-grade drums or drums that contained non-toxic materials. Drums that stored chemicals, petroleum products, or hazardous materials can release toxic fumes when heated. Food-grade drums that held juice concentrate, syrups, or similar products are ideal. They’re often available from restaurants, food processing plants, or through online marketplaces for $20-40 each.
Beyond the drums, you’ll need:
- Heavy-duty metal barrel strap or bung (to secure the inner barrel position)
- Metal bolts, nuts, and washers (1/4 inch or larger)
- High-temperature metal paint (optional, for exterior finishing)
- Spark arrestor screen material (hardware cloth or expanded metal)
- Lid for the outer barrel (can be cut from a third drum)
Essential Tools for the Project
You don’t need a professional metal shop to build a smokeless burn barrel, but having the right tools makes the job much easier. An angle grinder with cutting discs is your best friend for this project – it’ll handle most of the metal cutting quickly and cleanly. If you don’t have an angle grinder, a reciprocating saw with metal blades or even a jigsaw with a metal blade can work, though they’ll take longer.
You’ll also need:
- Drill with various drill bits (especially step bits for larger holes)
- Marker or soapstone for marking cut lines
- Tape measure
- Safety equipment: heavy gloves, safety glasses, and hearing protection
- Files or sandpaper for deburring sharp edges
- Welding equipment (optional – some designs use welding, others don’t require it)
Step-by-Step: How to Make a Smokeless Burn Barrel
This is where the rubber meets the road. I’ve built three of these barrels now, and I’ll walk you through the process that works best based on my experience. Set aside a good 3-4 hours for this project, and make sure you have adequate ventilation if you’re working indoors.
Step 1: Prepare and Clean Your Drums
Start by thoroughly cleaning both drums, especially if they had any residue from their previous contents. Remove any bungs or fittings, and use a wire brush or pressure washer to clean the interior. If your drums have paint or coatings on the inside, don’t worry too much – the initial burn will take care of that, though you’ll want to do this outdoors away from neighbors.
Step 2: Mark and Cut the Inner Barrel
The inner barrel needs substantial venting to allow air to flow through. I recommend cutting about 30-40 rectangular slots around the bottom third of the barrel. Each slot should be roughly 2 inches wide and 4-6 inches tall. These will serve as your primary air intakes.
About 6-8 inches from the top of the inner barrel, cut another row of smaller holes or slots – these will be the secondary air outlets where hot air exits to burn off smoke. I’ve found that about 8-10 holes of 1-2 inches each work well.
Use your angle grinder to make these cuts, and immediately file down any sharp edges. You’ll be handling this barrel during assembly, and trust me, fresh-cut metal is razor sharp.
Step 3: Prepare the Outer Barrel
The outer barrel is simpler – it mainly needs air intake at the bottom. Cut a ring of holes around the base, about 2-3 inches from the bottom. These should be about 1-2 inches in diameter, with 8-12 holes evenly spaced. These will allow air to enter the space between the barrels.
At the top of the outer barrel, cut out an opening for your lid. You can either use a removable metal lid or cut one from a third drum. If cutting your own, make it about 2 inches larger in diameter than the barrel opening so it overlaps properly. Add several small holes around the perimeter for wire to secure it.
Step 4: Position the Inner Barrel
This is the tricky part – you need to suspend the inner barrel inside the outer barrel with proper spacing. The air gap between them should be about 2-3 inches all around. I use sections of metal strapping or angle iron bolted between the barrels at three or four points to maintain this gap.
The bottom of the inner barrel should sit about 4-6 inches above the bottom of the outer barrel. This creates a collection area for ash and allows air to flow upward between the barrels. If you’re welding, you can tack weld the spacers in place. If not, use bolts through both barrels to secure everything.
Step 5: Add Ventilation Holes to Inner Barrel Top
Remember those secondary air outlets I mentioned earlier? Now’s the time to make sure they’re positioned correctly. These holes should be about 6-8 inches down from the top of the inner barrel, and they need to align with the open space between the barrels, not with the outer barrel wall.
The idea is that hot air rises between the barrels, then exits through these top holes into the combustion chamber. This creates that all-important secondary burn that eliminates smoke.
Step 6: Create and Install the Spark Arrestor
A spark arrestor is crucial for safety – you don’t want flying sparks starting a fire. Cut a piece of hardware cloth or expanded metal to fit inside the lid. Secure it with bolts or by folding it over the lid edges. This screen allows smoke to escape while catching any sparks or embers.
Step 7: Final Assembly and Inspection
Put the lid on and do a final inspection. Make sure all vents are clear and not obstructed. Check that the inner barrel is securely positioned and won’t shift during use. If anything looks misaligned, now’s the time to fix it.
Give the entire exterior a once-over and paint with high-temperature paint if desired. This isn’t strictly necessary, but it can help prevent rust and extend the life of your barrel.
First-Time Use: Breaking In Your Barrel
Here’s something most guides don’t tell you – your first fire will smoke. A lot. This is completely normal. The paint and coatings inside the drum need to burn off, and this process can take 30-60 minutes of sustained fire.
I recommend doing this initial burn on a day when neighbors won’t be bothered, and stand upwind if possible. Start with a small fire using dry paper and small twigs, then gradually add larger material as the temperature builds. Once the interior coatings have burned off, you’ll notice the smoke production drop dramatically.
After the break-in fire, let the barrel cool completely before using it again. This gives any remaining coatings a chance to fully cure, and you’ll get much better performance on subsequent burns.
Legal Considerations and Safety Precautions
Before you even start building, check your local regulations. Burn barrels are actually illegal in many states and municipalities, particularly in areas with air quality concerns. Even where legal, there are often restrictions on what you can burn, when you can burn, and what kind of container you must use.
Generally speaking, you should only burn dry yard waste, untreated wood, and paper products. Never burn plastic, rubber, treated lumber, household trash, or anything that produces toxic fumes. Many areas have designated burning seasons and may require permits or restrict burning during air quality alerts.
For safety, always place your barrel on a non-combustible surface at least 10 feet from any structure or flammable material. Keep a water source or fire extinguisher nearby, and never leave a fire unattended. The metal barrel will become extremely hot during use and can remain hot for hours after the fire dies down.
Maintenance and Long-Term Care
Your smokeless burn barrel will need periodic maintenance to keep it working efficiently. Ash buildup at the bottom reduces air flow and combustion efficiency. I clean out my barrel after every 10-15 uses, or whenever ash reaches the bottom of the inner barrel vents.
Rust is the enemy of any metal fire container. Inspect your barrel regularly, especially around vents and cut areas. If you catch rust early, you can sand it down and repaint with high-temperature paint. Once rust eats through the metal, it’s time to replace the barrel.
During the off-season, store your barrel under cover or invest in a fitted cover. This prevents moisture accumulation and extends the life of the metal significantly.
Troubleshooting Common Issues
Even the best-built smokeless burn barrel can develop problems. If you’re still seeing excessive smoke after the break-in period, check that all vents are clear and not obstructed by ash buildup. Make sure you’re using dry material – wet wood is the number one cause of smoky fires.
If your fire keeps dying out, you might not be getting enough airflow to the bottom. Check that the lower intake holes in the outer barrel aren’t blocked, and ensure the inner barrel is sitting at the right height. Too low, and it restricts airflow; too high, and you lose the chimney effect.
Excessive ash production usually means incomplete combustion. This happens when the fire isn’t hot enough or isn’t getting enough oxygen. Try smaller, hotter fires rather than loading the barrel to the top, and make sure you’re feeding the fire gradually rather than dumping everything in at once.
Frequently Asked Questions
Why are burn barrels illegal in some areas?
Burn barrels are restricted or banned in many areas because they produce significant air pollution including dioxins, furans, and other toxic chemicals. Traditional burn barrels burn at low temperatures that don’t complete combustion, releasing harmful particulates and carcinogens. Smokeless designs are cleaner but still regulated in many jurisdictions due to air quality concerns.
What’s the best material for a burn barrel?
The best material is a food-grade 55-gallon steel drum that previously contained non-toxic substances like juice concentrate or syrups. Avoid drums that stored chemicals, petroleum products, or hazardous materials. Steel is essential because it can withstand high temperatures without warping or releasing toxic fumes. The thickness of the metal matters too – thinner barrels will warp and deteriorate faster.
How many vent holes do I need in a smokeless burn barrel?
For optimal performance, cut 30-40 primary air intake slots around the bottom third of the inner barrel, each about 2 inches wide and 4-6 inches tall. Add 8-10 secondary air outlet holes near the top. The outer barrel needs 8-12 intake holes at the base. The exact number isn’t as important as ensuring even distribution – you want consistent airflow all around rather than concentrated in one area.
Can I make a smokeless burn barrel without welding?
Yes, you can absolutely build a smokeless burn barrel without welding equipment. Instead of welding the spacers between barrels, use metal strapping, angle iron, or threaded rods secured with bolts and nuts. Many successful designs use only mechanical fasteners. The key is maintaining the proper spacing between inner and outer barrels and ensuring everything is securely fastened so it doesn’t shift during use.
How long will a homemade smokeless burn barrel last?
With proper care and maintenance, a homemade smokeless burn barrel typically lasts 2-3 years of regular use. The biggest enemy is rust, which eventually eats through the metal, especially around vents and cut areas. You can extend the life significantly by keeping the barrel covered when not in use, regularly inspecting for rust, touching up any spots with high-temperature paint, and cleaning out ash buildup that retains moisture.
Final Thoughts
Learning how to make a smokeless burn barrel is one of those projects that seems intimidating but delivers massive rewards. For a relatively small investment in materials and a Saturday afternoon of work, you get a clean-burning solution for yard waste that’s dramatically better than a traditional burn barrel.
The environmental impact alone makes it worthwhile – smokeless designs burn fuel more completely, reducing harmful emissions by up to 80% compared to conventional barrels. Add in the benefits of less smoke bothering your neighbors, hotter fires that consume material faster, and reduced ash cleanup, and it’s hard to argue against upgrading your setup.
Just remember to check your local regulations first, prioritize safety with proper placement and fire management, and take the time to break in your barrel correctly before regular use. With proper maintenance, your homemade smokeless burn barrel will provide years of reliable service while keeping your yard clean and your air clear.



Leave a Comment