
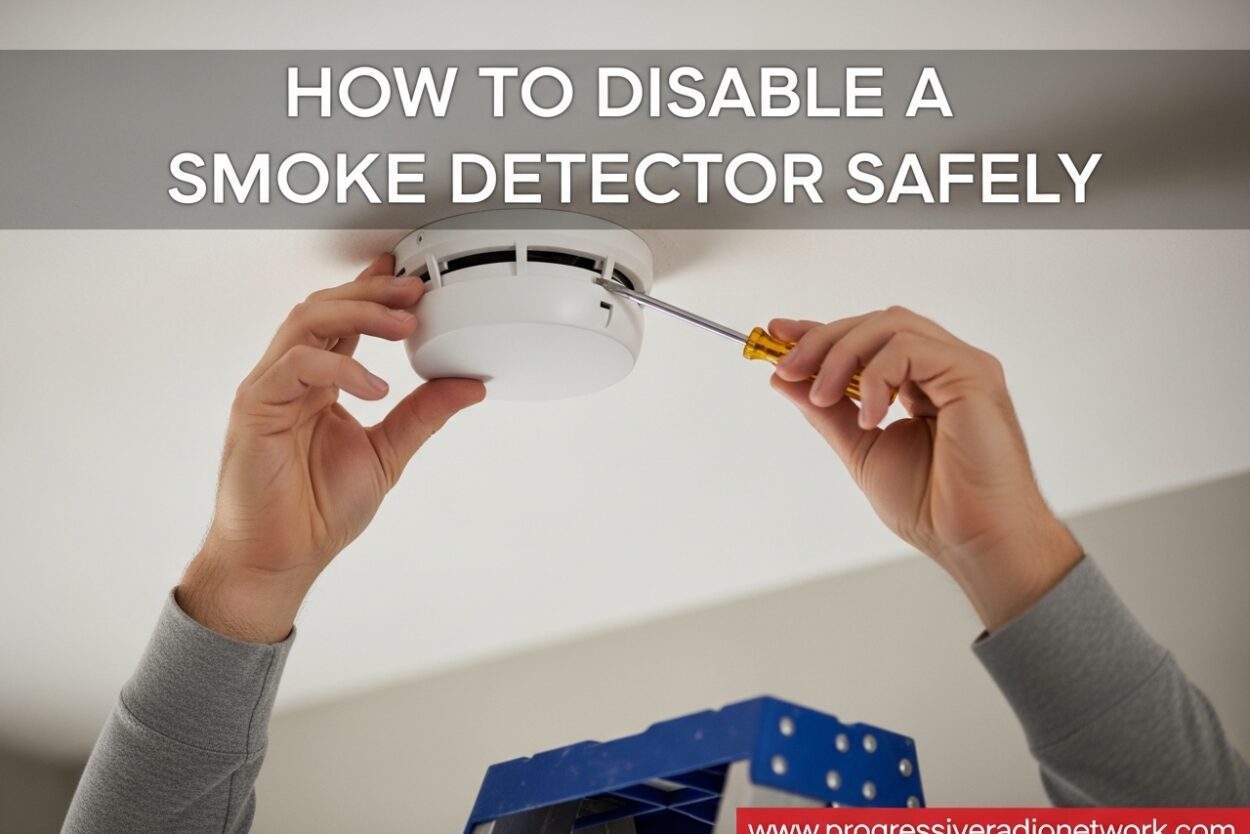
Dealing with a smoke detector that won’t stop chirping or keeps triggering false alarms can be incredibly frustrating. Whether you’re cooking dinner, taking a hot shower, or just trying to sleep, that persistent beep is enough to drive anyone crazy. Before you learn how to disable smoke detector units, it’s important to understand that these devices save lives, and any tampering should be done with full awareness of the risks involved.
Most people searching for how to disable smoke detector are experiencing nuisance alarms rather than actual emergencies. These false triggers happen for legitimate reasons—cooking steam, shower humidity, dust buildup, or simply an aging detector that’s become overly sensitive. The good news is that you don’t have to permanently disable your safety system to get some peace and quiet. This guide will walk you through temporary silencing methods, proper disconnection procedures, and safer alternatives to completely removing your smoke detector. For those concerned about hearing smoke alarms with headphones, proper detector placement is especially important.
Quick Methods to Silence a Smoke Detector Immediately
Silencing a nuisance alarm doesn’t always require disconnecting the entire unit. Most modern smoke detectors include built-in features designed specifically for temporary silencing when you’re dealing with non-emergency situations like burnt toast or shower steam. These methods allow you to maintain fire protection while stopping the annoying noise.
Use the Hush or Test/Silence Button
The fastest way to silence a nuisance alarm is using the dedicated silence button on your smoke detector. Most models manufactured after 2000 include this feature, which temporarily desensitizes the alarm for 7-8 minutes. Simply press and release the button labeled “Test/Silence” or “Hush” on the front or side of the unit. This works well for cooking smoke or steam that will dissipate quickly.
For stubborn alarms that won’t silence with a single press, try holding the button down for 3-5 seconds. This activates a longer silence period on some models. If the alarm continues sounding after using the hush feature, there may be actual smoke present or the detector needs attention beyond temporary silencing.
Flip the Circuit Breaker for Hardwired Units
Hardwired smoke detectors are connected to your home’s electrical system, which means you can cut power to them directly from your electrical panel. Locate your circuit breaker box and find the breaker labeled “smoke detectors” or “fire alarm.” Flip it to the off position to immediately silence all interconnected detectors in your home.
This method is particularly useful when one detector triggers the entire system—a common occurrence in interconnected setups where a single unit’s nuisance alarm sets off every detector in the house. Keep in mind that this disables ALL your smoke detectors, so flip the breaker back on as soon as you’ve addressed the immediate problem.
Remove the Battery Temporarily
For battery-operated units, the quickest solution is removing the power source. Open the battery compartment on the side or back of the detector and remove the battery. The alarm will stop immediately, but you’ll want to replace the battery within a few hours to maintain protection.
If you’re dealing with a hardwired unit that also has a backup battery, you’ll need to remove both the AC power and the backup battery to fully silence the alarm. Most hardwired detectors have a battery compartment accessible from the side or require you to detach the unit from the ceiling to access it.
How to Disable Smoke Detector: Battery-Powered Units
Battery-powered smoke detectors are the easiest to work with since they don’t require accessing your electrical system. Whether you need to silence a chirping detector or remove it permanently for replacement, following the proper steps ensures you don’t damage the unit or your ceiling.
Step 1: Remove the Detector from Its Mount
Most battery-powered detectors attach to a base plate mounted on the ceiling or wall. To remove it, twist the detector counter-clockwise about a quarter turn until it releases from the base plate. Gently pull it down, taking care not to yank the wiring if you discover it’s actually a hardwired unit with a hidden power connection.
Some models use a simple release tab or button instead of a twisting motion. Look for a small tab or slot on the side of the unit—pressing or sliding this releases the detector from the mount. If you’re unsure about your specific model, check the manufacturer’s instructions printed on the base plate or available online.
Step 2: Remove and Disconnect the Battery
Once the detector is down, locate the battery compartment on the back or side. Slide the compartment cover off or unclip it to reveal the battery. Note how the battery is positioned before removing it—you’ll need to reinstall it the same way later.
Remove the battery completely to disable the detector. If you’re planning to reinstall it later, keep the battery in a safe place rather than leaving it in the unit. This prevents accidental reactivation and preserves battery life. For 9-volt batteries, avoid touching both terminals simultaneously to prevent any potential shock.
Step 3: Reinstall or Store the Unit
If you’re temporarily disabling the detector for a specific activity like extensive cooking, you can store it in a drawer or cabinet until you’re ready to reinstall. Make sure to keep it away from dust and moisture, which can affect its sensitivity when you reactivate it.
For permanent removal, dispose of the detector according to local electronic waste regulations. Many communities have specific recycling programs for smoke detectors since they contain small amounts of radioactive material in ionization sensors. Check with your local waste management facility for proper disposal guidelines.
How to Disable Smoke Detector: Hardwired Units
Hardwired smoke detectors present more challenges than battery-operated models since they’re connected to your home’s electrical system. These units also typically have backup batteries, so you need to address both power sources to fully disable them. Working with electrical systems requires caution—if you’re uncomfortable with any step, it’s worth calling a professional electrician.
Step 1: Turn Off Power at the Circuit Breaker
Before touching any hardwired smoke detector, you MUST cut power to avoid electrical shock. Locate your electrical panel and find the breaker controlling your smoke detectors. It’s typically labeled “smoke detectors,” “fire alarm,” or sometimes grouped with lighting circuits.
Flip the breaker to the off position and verify power is cut by attempting to test the detector. If it doesn’t respond when you press the test button, you’ve successfully cut power. If it still responds, you may have the wrong breaker—try again with a different one or turn off the main breaker if necessary.
Step 2: Detach the Detector from the Mount
Hardwired detectors attach to ceiling mounts the same way battery units do—typically with a quarter-turn twist. Twist the detector counter-clockwise until it releases, then gently pull it down. You’ll see a wiring harness connecting the unit to your home’s electrical system.
The wiring harness usually has a plug-style connector that allows you to disconnect the detector without cutting wires. Simply squeeze the connector clips or press the release tab to detach the harness. If there’s no quick-disconnect, you may need to note which wire connects to which terminal before disconnecting them.
Step 3: Remove the Backup Battery
Even with AC power disconnected, hardwired detectors have backup batteries that keep them functioning during power outages. Locate the battery compartment—often on the side or back of the unit—and remove the battery. This ensures the detector is completely disabled and won’t chirp from low battery warnings.
Some hardwired models use sealed, rechargeable battery packs rather than replaceable batteries. These are typically located inside the unit and may require removing a cover to access. If you’re unsure about your specific model, consult the manufacturer’s documentation before proceeding.
Step 4: Cap the Wires (If Permanently Removing)
If you’re permanently removing the detector and don’t plan to replace it immediately, you’ll need to safely cap the electrical wires in the ceiling. Use wire nuts to cap each individual wire, then wrap them in electrical tape for extra protection. Push the wires back into the ceiling junction box and cover the opening with a blank plate.
This step is critical for safety—exposed electrical wires can create fire hazards or shock risks. If you’re not comfortable working with electrical wiring, this is definitely a task best left to a licensed electrician who can ensure the job is done safely and up to code.
Understanding When Disabling Is Appropriate
Before you disable smoke detector units, it’s worth considering whether there are better alternatives. Nuisance alarms are frustrating, but they often indicate solvable problems that don’t require completely disabling your safety system. Understanding the root cause of false alarms can help you address the issue without compromising fire protection.
Common Causes of False Alarms
Cooking is the number one cause of nuisance smoke alarms. Oil, steam, and even normal cooking can trigger detectors placed too close to kitchens. Rather than disabling your detector, consider moving it further from cooking areas or installing a photoelectric model, which is less sensitive to cooking particles than ionization detectors.
Steam from bathrooms is another frequent trigger, especially when detectors are installed near bathroom doors or in adjacent hallways. Improving ventilation with exhaust fans or bathroom fans can reduce moisture-related false alarms. Similarly, dust buildup in the sensing chamber can cause sensitivity issues—regular vacuuming or compressed air cleaning can resolve this problem without disabling the unit.
When to Consider Relocation Instead
Sometimes the issue isn’t the detector itself but its placement. Detectors installed too close to kitchens, bathrooms, or heating vents are prone to false alarms. Relocating the problem detector just a few feet can dramatically reduce nuisance triggers while maintaining proper coverage. Most building codes require detectors in specific locations, but there’s usually some flexibility within those guidelines.
If you’re a renter dealing with poorly placed detectors, contact your landlord or property manager before disabling anything. They may be willing to relocate problematic units or install less sensitive models. Many landlords are receptive to these requests since they also benefit from reduced false alarm complaints and improved tenant satisfaction.
Safety, Legal, and Rental Considerations
Disabling a smoke detector isn’t just a personal decision—it has legal implications, affects your safety, and may violate rental agreements or building codes. Understanding these considerations before you disable smoke detector units helps you make informed decisions and avoid potential consequences.
Fire Protection Risks
Every year, smoke detectors save thousands of lives by providing early warning of fires. When you disable your detectors, you eliminate this critical protection. Even if you plan to reactivate them later, it’s easy to forget—and that forgetfulness could have tragic consequences. According to fire safety experts, roughly 60% of home fire deaths occur in properties without working smoke detectors.
Consider timing your detector disabling carefully. Never disable all detectors simultaneously—at least one unit should remain active in your sleeping area. If you must disable detectors for extended periods, invest in temporary alternative protection like portable heat detectors or simply remain extra vigilant about fire safety during that time. For optimal sleep safety and alarm audibility, keep at least one detector active near sleeping areas.
Legal and Building Code Implications
Most jurisdictions require working smoke detectors in residential properties by law. Building codes typically specify the number, type, and placement of detectors. Disabling required detectors can violate local fire codes, potentially resulting in fines if discovered during inspections or after incidents. In some areas, intentionally disabling fire protection equipment can even result in criminal charges, especially if a fire occurs while detectors are disabled.
Homeowners should check local ordinances and building codes before permanently disabling detectors. Many municipalities require detectors for certificate of occupancy compliance, and disabled units could affect your ability to sell your property or pass inspections. Some insurance policies also require functioning detectors—disabling them could theoretically affect coverage in case of fire claims.
Renter and Tenant Considerations
If you’re renting, disabling smoke detectors becomes even more complicated. Most lease agreements include clauses requiring tenants to maintain safety equipment in working order. Tampering with or disabling smoke detectors typically violates these clauses and could result in lease termination or even eviction in extreme cases.
Landlords are generally responsible for providing and maintaining working smoke detectors, but tenants are usually prohibited from disabling or removing them. If nuisance alarms are a problem, document the issue and request maintenance through proper channels rather than taking matters into your own hands. Your landlord may be required by law to address the issue, and you’ll have legal protection against retaliation for making safety complaints.
When to Call a Professional
Some smoke detector issues require professional expertise. If you’re uncomfortable working with electrical systems, unsure about proper detector placement, or dealing with a complex interconnected system, it’s worth calling an electrician or fire safety professional. They can diagnose underlying issues, relocate problematic units, or recommend better detector options for your specific situation.
Professional help is especially important for hardwired systems, interconnected units, or detectors in commercial or multi-unit buildings. These systems often have specific requirements and safety considerations that differ from standalone residential detectors. The cost of professional help is minimal compared to the potential risks of improper installation or modification.
Stopping Chirping and Beeping Issues
One of the most common reasons people want to disable smoke detector units is persistent chirping or beeping. These annoying sounds typically indicate specific issues that can be resolved without completely disabling the detector. Understanding what different chirp patterns mean helps you address the root cause rather than removing protection entirely.
Low Battery Chirp Diagnosis
The most common chirp pattern is a single beep every 30-60 seconds, which almost always indicates a low battery. Even hardwired units with backup batteries will chirp when the backup battery fails. Replacing the battery with a fresh one typically resolves this issue immediately. Always use the recommended battery type for your detector—most require 9-volt or AA batteries.
If your detector continues chirping after battery replacement, the issue might be corrosion in the battery compartment or poor battery contact. Clean the battery contacts with a pencil eraser or cotton swab and ensure the battery is seated properly. In rare cases, the chirping indicates a failing detector that needs replacement rather than just a battery change.
End-of-Life Warning Chirps
Most modern smoke detectors chirp differently when they reach the end of their 10-year lifespan. This might be a pattern of three chirps, chirping at different intervals, or a combination of chirps and silence. Unlike low battery chirps, end-of-life warnings can’t be resolved by battery replacement—the entire unit must be replaced.
Check your detector’s manufacturing date, usually printed on the back or inside the battery compartment. If it’s been 8-10 years since manufacture, the unit is likely reaching the end of its service life. Most manufacturers recommend replacement after 10 years regardless of whether the detector appears functional, as sensors degrade over time and may not respond properly to actual smoke.
Cleaning and Maintenance Tips
Dust, insects, and debris can accumulate in smoke detector sensing chambers, causing false alarms and chirping. Regular cleaning can resolve these issues without disabling the unit. Use compressed air or a vacuum with a soft brush attachment to clean detector vents every 6-12 months. Avoid using water, cleaning sprays, or solvents, which can damage the sensing mechanism.
For detectors in especially dusty environments or near cooking areas, increase cleaning frequency to every 3-4 months. Some detectors are designed with removable covers that make cleaning easier—if yours has this feature, take advantage of it during routine maintenance. Keeping detectors clean not only prevents nuisance alarms but also ensures optimal performance during actual emergencies.
Reactivating and Testing Your Smoke Detector
After you’ve disabled smoke detector units temporarily for maintenance, cooking, or other activities, proper reactivation is essential. Simply reinstalling the unit isn’t enough—you need to verify it’s functioning correctly to ensure your family’s safety. Testing protocols help confirm that your detectors will work when you need them most.
Proper Reinstallation Steps
For battery-operated units, reinstallation is as simple as inserting a fresh battery and remounting the detector. Make sure the battery is oriented correctly according to the polarity markings inside the compartment. Once powered, the detector should emit a brief chirp or sound to indicate it’s functioning. Mount the unit back on its base plate by twisting it clockwise until it locks into place.
Hardwired units require reconnection of the wiring harness before remounting. Ensure all connections are secure and no bare wires are exposed. Reinstall the backup battery, then restore power at the circuit breaker. The detector should power up automatically when AC power is restored, though some models require pressing a test button to activate after battery replacement.
Testing and Verification
Every smoke detector has a test button that verifies both the sensing mechanism and the alarm. Press and hold the test button for 3-5 seconds—the alarm should sound loudly and clearly. If the alarm is weak, doesn’t sound, or makes unusual noises, the detector may need replacement rather than reactivation.
Test all detectors monthly, not just after reactivation. This routine testing ensures continuous protection and helps identify failing units before they become problems. For interconnected hardwired systems, verify that triggering one detector activates all units in the system—this confirms that the interconnection wiring is intact and functioning properly.
FAQ
How do I permanently disable a smoke detector?
Permanently disabling a smoke detector requires removing the power source completely. For battery-operated units, remove the battery and do not replace it. For hardwired detectors, turn off the circuit breaker, disconnect the wiring harness, remove the backup battery, and cap the exposed wires with wire nuts. Be aware that permanently disabling required smoke detectors may violate local fire codes and building regulations. Consider relocating the detector or replacing it with a less sensitive model instead.
Can I turn off a hardwired smoke detector?
Yes, you can turn off a hardwired smoke detector by flipping the circuit breaker that controls it. Find the breaker labeled “smoke detectors” or “fire alarm” in your electrical panel and switch it to the off position. This cuts power to all interconnected detectors. For complete disconnection, you’ll also need to detach the unit from its mount, disconnect the wiring harness, and remove the backup battery. Always restore power as soon as possible to maintain fire protection.
Is it illegal to disable smoke detector?
Disabling smoke detectors can be illegal depending on your location and situation. Most jurisdictions have building codes requiring working smoke detectors in residential properties. Intentionally disabling required detectors may violate local fire codes and could result in fines. For renters, disabling detectors typically violates lease agreements and could lead to eviction. In some cases, especially in commercial or multi-unit buildings, tampering with fire protection equipment can result in criminal charges. Check local ordinances and your lease before disabling any detectors.
How do I stop my smoke alarm from going off for no reason?
To stop nuisance smoke alarms, first try pressing the Test/Silence or Hush button on the detector. This temporarily silences the alarm for 7-8 minutes. If cooking or showering triggered the alarm, improve ventilation or relocate the detector away from these areas. Clean the detector with compressed air to remove dust buildup that can cause false alarms. Replace batteries if low battery chirps occur. If problems persist, the detector may be at the end of its 10-year lifespan and need replacement rather than just silencing.
Can you temporarily turn off a smoke detector?
Yes, you can temporarily turn off a smoke detector using several methods. The easiest is pressing the Hush or Test/Silence button, which silences the alarm for 7-8 minutes. For battery-operated units, remove the battery temporarily and replace it when you’re done. For hardwired detectors, flip the circuit breaker to cut power, but remember this disables all interconnected detectors. Always restore power or replace batteries as soon as possible to maintain fire protection. Never leave detectors disabled for extended periods.
Conclusion
Learning how to disable smoke detector units gives you control over nuisance alarms, but that control comes with responsibility. The methods outlined in this guide—using hush buttons, removing batteries, or disconnecting hardwired units—provide relief from annoying false alarms while reminding us that smoke detectors are essential life-saving equipment that deserve respect and proper maintenance.
Before you disable smoke detector protection in your home, consider whether relocation, cleaning, or replacement with a less sensitive model might solve the problem without compromising safety. If you must temporarily disable a detector, set a reminder to reactivate it immediately after the triggering activity ends. For renters, work with landlords rather than against them to address nuisance alarms—properly placed and maintained detectors benefit everyone in the building.
Smoke detector technology continues improving, with newer models offering better discrimination between actual threats and false alarms. If your detectors are more than 10 years old or constantly triggering nuisance alarms, upgrading to modern units might be the best long-term solution. Your family’s safety is worth the investment, and modern detectors provide protection without the frustration of constant false alarms.




Leave a Comment