
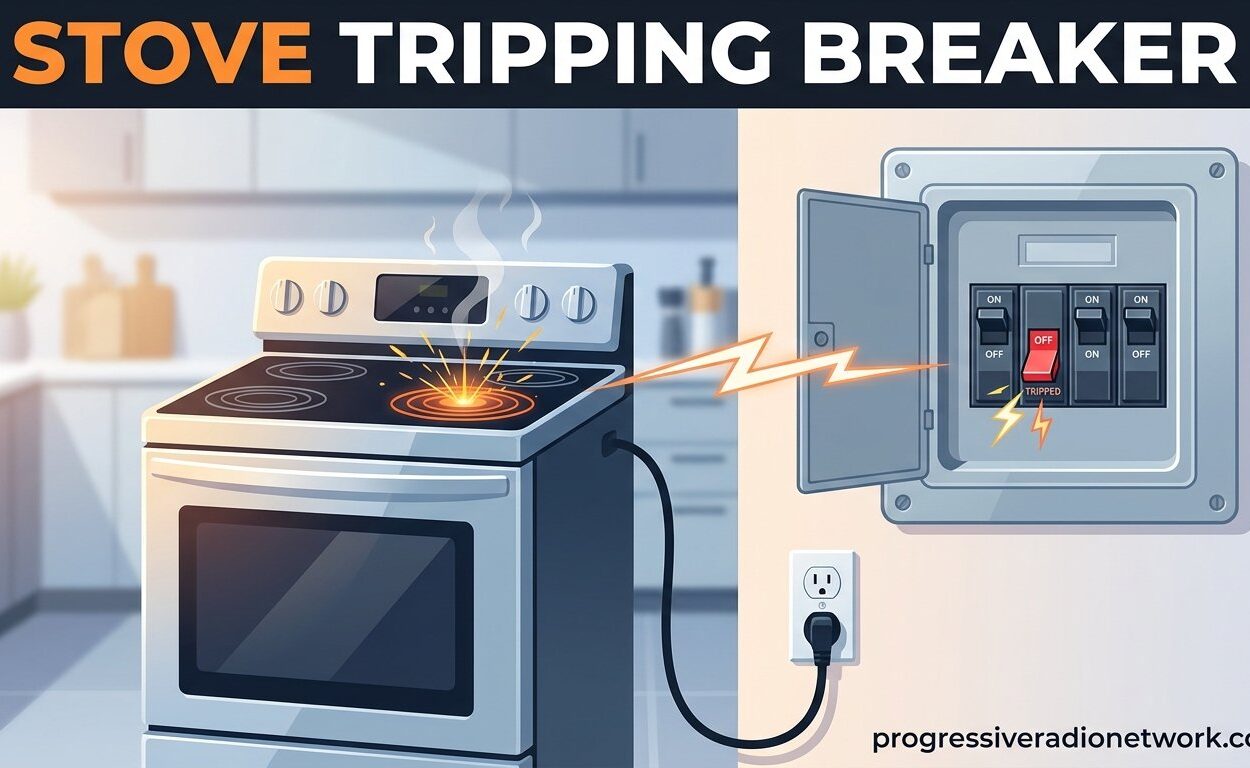
You set the oven to preheat, walk away for five minutes, and come back to a dark kitchen and a tripped breaker. Sound familiar? A stove tripping breaker is one of the most common and frustrating electrical issues homeowners face, and ignoring it is not an option.
When your electric range trips the circuit breaker repeatedly, it is telling you something is wrong with the appliance, the wiring, or the breaker itself. The good news is that most causes are diagnosable with patience, a multimeter, and a methodical approach.
I have spent years researching appliance electrical faults, pouring through electrician forums, repair guides, and manufacturer documentation to understand why this happens. This guide walks you through every common cause, a timing-based diagnostic method, step-by-step multimeter testing, and clear advice on when to call a professional. You can also learn about oven tripping circuit breaker issues for related scenarios.
Stop resetting the breaker repeatedly. Each trip happens because the breaker detects a dangerous condition. Resetting it over and over without fixing the root cause can lead to electrical arcing, damaged components, or even a fire. Let us diagnose the real problem.
Safety First: Read This Before You Start
Your safety comes first, always. Before touching any wiring, component, or connection on your stove, follow these non-negotiable steps:
Step 1: Turn off the circuit breaker that supplies power to your stove at the main panel. Do not just turn off the stove switch. The breaker must be physically OFF.
Step 2: Verify power is off using a non-contact voltage tester at the stove outlet or terminal block. Never assume the power is off without testing.
Step 3: Wear insulated gloves and use tools with rubberized handles. If you smell burning plastic, see scorch marks, or feel heat from the breaker panel, stop immediately and call a licensed electrician.
Step 4: If your breaker is hot to the touch (a common complaint from homeowners on electrician forums), do not reset it. A hot breaker indicates a serious overload or a failing breaker that needs professional replacement.
You will need a digital multimeter, a non-contact voltage tester, insulated screwdrivers, and a flashlight. If you do not own a multimeter, this guide will still help you identify many issues through visual inspection alone.
What Causes a Stove Tripping Breaker? The 7 Most Common Culprits
A stove tripping breaker happens when the circuit breaker detects an unsafe electrical condition and cuts power to prevent fire or damage. The seven most common causes are a failed heating element, a burnt terminal block, damaged internal wiring, a shorted burner switch, a weak or undersized breaker, a damaged power cord or outlet connection, and (for gas stoves) a shorted igniter.
We have seen every one of these scenarios discussed across repair forums, manufacturer service manuals, and technician reports. Each cause has distinct symptoms, and the key to fixing the problem is matching your specific symptom to the right component. For broader oven issues, our oven not working guide covers additional failure modes.
Let us walk through each cause in detail, starting with the most common offender.
1. Failed Heating Element (Bake or Broil Element)
The heating element is the single most common cause of an electric stove tripping breaker. These elements are made of Nichrome wire surrounded by magnesium oxide powder insulation inside a metal sheath. Over thousands of heating and cooling cycles, that insulation degrades.
When the MgO insulation breaks down, the energized Nichrome wire makes contact with the outer metal sheath. This creates a ground fault, and the breaker trips instantly to protect the circuit. The element may still heat partially, which makes diagnosis tricky.
Visual signs of a failed element:
Look for blistering, bubbling, cracks, or charred spots on the surface of the bake or broil element. A visibly damaged element is a guaranteed failure. However, elements can also fail internally with no visible damage, which is why a multimeter test is essential.
Why this trips the breaker after a few minutes: Many homeowners report that the oven works for 15 to 30 seconds, or sometimes up to 10 minutes, before tripping. This happens because the element heats up, thermal expansion worsens the internal short, and the ground fault finally triggers the breaker.
This delayed-trip pattern is a hallmark of heating element failure. If your oven heats briefly then trips, the bake or broil element is your prime suspect. We cover multimeter testing for elements in detail later in this guide.
One detail worth noting: the broil element typically draws more current than the bake element. If your stove only trips when you use broil mode, the broil element is likely the culprit. If it trips during bake mode, focus on the bake element first.
2. Burnt or Loose Terminal Block
The terminal block is where the stove power cord connects to the internal wiring of the appliance. It is a high-current junction point that handles 40 to 50 amps on a typical electric range. Over time, the screw terminals can loosen from thermal cycling.
When a terminal connection loosens, electrical resistance increases at that point. Higher resistance generates heat, and that heat causes more expansion, which loosens the connection further. This cycle accelerates until the terminal block chars, melts, or arcs.
How to spot terminal block damage:
Pull the stove away from the wall and remove the back access panel covering the terminal block. Look for discoloration, melted plastic, burnt insulation, or corroded terminal lugs. If the wire insulation near the terminal block is brittle or blackened, you have found your problem.
A burnt terminal block can cause intermittent tripping because the arcing creates momentary short circuits. The stove might work fine for days, then suddenly trip when the arc intensifies. This unpredictable pattern is a strong indicator of terminal block failure.
Replacing a terminal block is a moderate DIY repair if you are comfortable working with heavy-gauge wiring. The replacement kit typically costs under $30 and includes the block, strain relief bracket, and installation instructions. Make sure the new connections are tight, as a loose install will repeat the same failure.
If you notice the terminal block has melted significantly or damaged the surrounding wiring harness, do not attempt a patch repair. Replace the block and any heat-damaged wires completely to prevent a fire.
3. Damaged Internal Wiring
Behind the panels of your stove runs a network of wires connecting the control board, heating elements, switches, and sensors. This wiring harness can sustain damage from several sources, and any damaged wire can short against the metal chassis, tripping the breaker.
Common causes of internal wiring damage:
Physical pinching is the most frequent cause. If the stove was pushed too close to the wall, the power cord or internal wires can get pinched between the chassis and the wall, crushing the insulation. This is especially common after moving or cleaning behind the stove.
Heat damage is another major factor. Wires routed too close to heating elements or the bake compartment can have their insulation baked over time. Once the insulation cracks and falls away, the bare copper contacts the grounded chassis and trips the breaker.
Rodent damage is more common than people expect, especially in rural homes or garages. Mice and rats chew on wire insulation, exposing bare conductors. If your stove suddenly starts tripping the breaker and you have had rodent activity, inspect the wiring harness for chew marks.
Vibration from the convection fan or self-cleaning cycle can also chafe wires over time, particularly where they pass through metal knockouts or strain reliefs. Look for rub marks on the wire insulation near any metal edges.
Diagnosing wiring damage requires a methodical visual inspection. Remove the back panel and trace each wire from the terminal block to its destination. Look for discoloration, cracks, bare copper, and any wires touching metal surfaces. Wiggle harnesses gently to check for hidden breaks inside the insulation.
4. Shorted Burner Switch (Infinite Switch)
If your stove only trips the breaker when you turn on a specific surface burner, the infinite switch for that burner is likely shorted. The infinite switch (also called a burner switch or surface element switch) controls power delivery to the cooktop burner by cycling power on and off.
Inside the infinite switch, a bimetallic arm heats and bends to interrupt the circuit at regular intervals, which is how it controls the burner temperature. Over years of use, the contacts inside the switch can weld together, arc, or short to the switch housing.
How to identify a bad infinite switch:
The most reliable diagnostic is isolation testing. Turn off all burners, reset the breaker, and then turn on one burner at a time. If the breaker trips only when a specific burner is activated, you have isolated the problem to that burner circuit.
Next, disconnect power and remove the back panel to access the infinite switches. Swap the wires between the suspect burner switch and a known-good burner switch. If the problem follows the switch, the switch is bad. If the problem stays with the burner, the element or its wiring is at fault.
Reddit users on r/ApplianceRepair frequently report that glass-top (smooth-top) stoves have higher rates of infinite switch failure than coil-top models. The dual-element switches on glass tops are more complex and have more failure points. If you have a glass-top stove that trips only when using a specific burner, prioritize switch testing.
Replacement infinite switches cost between $20 and $60 depending on the brand and model. Make sure to match the part number exactly, as switches with different amperage ratings can cause unsafe operation even if they physically fit.
5. Weak or Undersized Breaker
Sometimes the stove is perfectly fine, and the breaker itself is the problem. Circuit breakers do not last forever. A typical residential breaker has a lifespan of 30 to 40 years under ideal conditions, but thermal stress, frequent tripping, and manufacturing defects can shorten that significantly.
Signs of a weak breaker:
If the breaker trips at lower and lower current draws over time, it is wearing out. A breaker that used to handle all four burners plus the oven but now trips with just two burners is showing classic failure symptoms. The internal bimetallic strip or magnetic trip mechanism has degraded.
A breaker that feels warm or hot to the touch is another red flag. Homeowners on electrician forums consistently report this symptom when a breaker is failing. Heat at the breaker indicates high internal resistance, which means the breaker is not conducting properly and needs replacement.
Undersized circuit problems:
Electric ranges require a dedicated 40-amp or 50-amp circuit with appropriate wire gauge (8 AWG for 40 amp, 6 AWG for 50 amp). If the circuit was installed with a smaller breaker or thinner wire than required, the breaker will trip under normal stove operation.
This is particularly common in older homes or DIY installations. If a previous homeowner installed a 30-amp breaker on a circuit meant for a 40-amp range, the stove will trip the breaker every time it draws full power. Check the breaker amp rating in your panel and compare it to the stove nameplate rating.
Breaker replacement should be done by a licensed electrician. Working inside the main electrical panel exposes you to lethal bus bar voltage, even with the main breaker off. This is one repair where the cost of a professional is always worth it.
One more consideration: if you recently upgraded to a new stove with higher power draw, your existing breaker and wiring may no longer be adequate. Always verify that the circuit matches the new appliance specifications before installation.
6. Damaged Power Cord or Outlet Connection
The power cord and wall outlet are the first links in the chain between your electrical panel and your stove. A failure here can cause tripping just as easily as an internal component failure.
Inspecting the power cord:
Check the entire length of the range cord for cuts, burns, or crushed sections. Pay close attention to the strain relief clamp where the cord enters the stove chassis. If this clamp is loose or missing, the cord can move and chafe against the metal edge, eventually shorting out.
For hardwired stoves (no plug), inspect the flexible conduit or whip connecting the stove to the junction box. This whip can get pinched between the stove and wall, damaging the wires inside. We have seen multiple reports of newly installed stoves tripping immediately because the conduit was crushed during installation.
Checking the outlet and junction box:
For cord-and-plug connections, turn off the breaker and remove the wall outlet cover. Check for burnt or discolored wire nuts, loose terminal screws, and damaged insulation. The 3-prong or 4-prong range receptacle carries heavy current, and loose connections at this point cause significant heat and arcing.
In the junction box for hardwired installations, check all wire nut connections for tightness. A loose neutral wire can cause voltage fluctuations that trip sensitive breakers, especially GFCI and AFCI breakers.
If you find damage to the cord, replace the entire cord set. Splicing or taping a damaged range cord is never safe. Range cords are inexpensive and easy to replace, and a proper replacement eliminates a significant fire risk.
7. Gas Stove Igniter Short Circuit
Gas stoves use electricity for ignition, oven controls, lights, and convection fans. While they draw far less current than electric ranges, they can still trip breakers, and the cause is often different.
The hot surface igniter (glow bar) in a gas oven is the most common tripping culprit. This component draws 2.5 to 4 amps continuously during the ignition cycle to glow red-hot and open the gas safety valve. Over time, the ceramic insulator in the igniter can crack.
When the ceramic cracks, the internal heating element touches the metal bracket, creating a ground fault. The igniter may still glow and the oven may still light, but the ground fault trips GFCI breakers. If you have a gas stove on a GFCI-protected circuit, igniter failure is your primary suspect.
Diagnosing gas stove igniter issues:
If the breaker trips every time the oven tries to ignite, the igniter is almost certainly the cause. Replace it. Gas oven igniters are inexpensive ($20 to $50) and fail frequently enough that they should be your first check for any gas oven electrical issue.
For gas cooktops, the spark module that generates clicking ignition sparks can also short out. If the breaker trips when you turn a cooktop burner knob to ignite, the spark module or its wiring may be shorting to the chassis.
Note that gas stoves installed on standard (non-GFCI) circuits may not trip the breaker even with an igniter short. The trip typically happens on GFCI or AFCI breakers, which are now required by the National Electrical Code for kitchen branch circuits.
For other gas stove issues, see our guide on troubleshooting stove stays on issue for additional diagnostic help.
Timing-Based Diagnosis: What the Trip Pattern Tells You
One of the most powerful diagnostic tools is the timing of the trip. The instant versus delayed pattern of tripping points to completely different root causes, and understanding this pattern can save you hours of guessing.
Instant trip (breaker trips the moment you turn on the stove or a specific function):
An instant trip indicates a hard short circuit. This means a direct path exists between a hot wire and ground or neutral. The most likely causes are a wire touching the metal chassis, a completely shorted heating element, or a welded switch contact. The breaker trips before any component has time to heat up.
For instant trips, focus your inspection on wiring paths where wires pass through metal, the terminal block connections, and the infinite switches. The fault is significant and consistent.
Delayed trip (breaker trips after 30 seconds to 10 minutes of operation):
A delayed trip usually means a component heats up until a fault develops. This is the classic signature of a failing heating element where thermal expansion causes an intermittent ground fault. As the element heats, the internal Nichrome wire shifts and contacts the sheath.
Forum users frequently report trips after 10 minutes when a convection or distribution fan kicks in. If the trip correlates with a fan starting, check the fan motor for shorts. Fan motor windings can degrade and short to the motor frame, which is grounded to the chassis.
Intermittent trip (breaker trips randomly with no clear pattern):
Random tripping is the hardest to diagnose and usually points to a loose connection or vibration-related short. A loose terminal screw, a wire that shifts during fan operation, or arcing at the terminal block can all cause unpredictable trips.
Tackle intermittent trips by checking and tightening every electrical connection in the stove, starting with the terminal block and working outward. If tightening connections does not resolve the issue, you may need to test each component individually under load.
Load-dependent trip (breaker trips only when using multiple burners or oven plus burners):
If the breaker holds fine with one burner but trips when you add a second or third, you are dealing with an overload or an undersized breaker. The circuit cannot handle the combined current draw. This points to a breaker or wiring issue rather than a stove component failure.
How to Test Stove Components with a Multimeter
A multimeter is the single most valuable tool for diagnosing stove tripping breaker issues. If you do not own one, a basic digital multimeter costs $15 to $25 and will pay for itself on your first repair. Here is how to test the most common failure points.
Before any testing: Turn off the breaker at the main panel and verify power is off with a non-contact voltage tester. All resistance tests below are done with the stove completely disconnected from power.
Testing a Heating Element for Continuity and Ground Fault
Step 1: Disconnect the two wires from the element terminals. Note which wire goes to which terminal for reassembly.
Step 2: Set your multimeter to the lowest ohms (resistance) setting, typically 200 ohms. Touch the two probes together to verify the meter reads near zero. This confirms your meter and leads are working.
Step 3: Touch one probe to each element terminal. A good bake or broil element should read between 20 and 40 ohms. If the reading is significantly higher (over 100 ohms) or shows OL (over limit, meaning infinite resistance), the element has an open circuit and needs replacement.
Step 4: Now test for a ground fault. Leave one probe on an element terminal and touch the other probe to the metal frame of the element (the outer sheath). A good element will show OL or infinite resistance. Any reading below infinite means the internal wire is contacting the sheath, and the element must be replaced.
This ground fault test is the critical one. An element can show perfect continuity (Step 3) but still have a ground fault that trips the breaker. Always perform both tests.
Testing an Infinite Switch
Step 1: Disconnect all wires from the infinite switch and label them for reassembly.
Step 2: Set the multimeter to ohms. With the switch in the OFF position, test between the L1 (line) and H1 (heater) terminals. You should see OL (infinite resistance) in the OFF position.
Step 3: Turn the switch to a medium setting. You should now see a resistance reading that fluctuates as the internal bimetallic arm cycles. If the reading stays at zero (constant contact regardless of setting) or stays at OL (no contact at any setting), the switch is bad.
Step 4: Test between each terminal and the switch metal housing. Any continuity to the housing indicates a shorted switch that will trip the breaker.
Testing the Terminal Block for Resistance
While the terminal block itself does not have a resistance test, you can test the connections leading to it. With the power cord disconnected, test for continuity between each hot leg (L1 and L2) and the neutral. There should be no continuity between hot and neutral at the terminal block with all stove switches off. Any reading here indicates a shorted component downstream.
For GFCI breakers, even a small leakage current (as low as 5 milliamps) can cause a trip. Moisture inside the stove from spillage or steam can create leakage paths that trip GFCI breakers without showing up on a standard multimeter test. If your stove only trips during cooking that generates steam, dry the interior thoroughly and retest.
Prevention: How to Avoid Future Stove Tripping Breaker Issues
Once you fix the immediate problem, a few preventive measures can keep your stove running reliably for years.
Ensure your stove is on a dedicated circuit rated for the appliance. No other high-draw appliances should share the range circuit. If your microwave, refrigerator, or other kitchen appliances are on the same circuit as the stove, move them to a separate circuit to prevent combined overload.
Tighten the terminal block connections annually. Thermal cycling loosens these connections over time, and a five-minute check once a year can prevent the most common cause of terminal block failure. Use a screwdriver to confirm all terminal screws are snug (do not overtighten).
Clean spills immediately to prevent moisture intrusion into the electrical compartment. Liquids that seep under the cooktop or into the oven cavity can create leakage paths that trip GFCI breakers and corrode electrical connections.
Replace heating elements proactively if they are over 10 years old or show any signs of blistering. A failing element does not just trip breakers. It can also damage the control board if the ground fault sends voltage to unintended circuits.
For more on appliances that cause breaker issues, our guide on other appliances that keep tripping breakers covers air conditioner and HVAC-specific causes.
When to Call a Professional
Some repairs are well within a capable DIYer’s wheelhouse. Others require a professional. Here is a clear checklist for when to stop and call for help.
Call a licensed electrician if:
The breaker itself needs replacement. Working inside the main electrical panel is dangerous and should only be done by a qualified electrician. The bus bars inside the panel remain energized even with the main breaker off.
You discover the circuit is undersized or improperly wired. If the wire gauge does not match the breaker amp rating, or if the circuit is not dedicated to the stove, an electrician needs to correct the installation.
The breaker is hot to the touch or you smell burning from the panel. These indicate serious issues that can lead to a panel fire. Turn off the main breaker and call an electrician immediately.
Call an appliance repair technician if:
You have identified the failed component but are not comfortable performing the replacement. A professional can replace heating elements, infinite switches, terminal blocks, and igniters quickly and safely.
The diagnostic tests are inconclusive and the stove continues to trip after you have checked all the common causes. An experienced technician has specialized tools and pattern recognition that can identify obscure faults.
The control board is suspect. Control board failures can cause intermittent tripping that is difficult to diagnose without manufacturer-specific diagnostic modes and wiring diagrams.
The electrician versus appliance repairman debate:
One of the most frustrating experiences homeowners share on forums is the finger-pointing between electricians and appliance repair technicians. The electrician says the stove is bad. The appliance tech says the wiring is bad. Nobody takes responsibility.
Here is how to avoid this trap. Before calling anyone, do the diagnostic work in this guide. If you can identify whether the problem is the stove (component failure) or the electrical system (breaker, wiring, outlet), you will know which professional to call. A clear diagnosis eliminates the guesswork and the finger-pointing.
If the problem is ambiguous, call an appliance repair technician first. They can test the stove in isolation using a temporary power cord connected directly to a known-good circuit. If the stove works on a different circuit, the problem is electrical. If it trips on a different circuit, the stove is the issue.
FAQs
How to fix a stove that trips electricity?
To fix a stove that trips electricity, first unplug the stove or turn off its breaker. Inspect the heating elements for visible damage, test each element with a multimeter for ground faults, check the terminal block for burn marks, and examine internal wiring for shorts. Replace any failed component. If all components test fine, the breaker or circuit wiring may be the problem.
How to fix an oven tripping breaker?
An oven tripping breaker is usually caused by a failing bake or broil element. Disconnect power, remove the element, and test it with a multimeter for both continuity (20-40 ohms is normal) and ground faults (should show infinite resistance to the metal sheath). Replace the element if it fails either test. Also inspect the terminal block and wiring connections for damage.
How do you fix an appliance that trips the power?
Start by identifying the trip pattern. An instant trip means a hard short circuit. A delayed trip usually indicates a component heating up and failing. Isolate the problem by testing one function at a time, then use a multimeter to test the suspect component for continuity and ground faults. Replace the failed part, and if no component is faulty, have an electrician check the breaker and circuit wiring.
How to tell what is causing a breaker to trip?
Match the trip timing to the cause. An instant trip points to a hard short in wiring, the terminal block, or a switch. A delayed trip (30 seconds to 10 minutes) typically means a failing heating element or motor. A load-dependent trip (only when using multiple burners) suggests an undersized or weak breaker. Use a multimeter to confirm which component has failed.
Conclusion: Diagnosing Stove Tripping Breaker the Right Way
A stove tripping breaker is your electrical system doing its job, protecting you from fire and damage. The fix starts with understanding that each trip pattern points to a specific cause. Instant trips mean hard shorts. Delayed trips mean thermal failures. Load-dependent trips mean circuit problems.
Work through the seven common causes methodically, starting with the heating elements since they fail most often. Use your multimeter to test for both continuity and ground faults, and never skip the ground fault test because it catches failures that continuity testing misses.
If you have checked every component and the stove still trips, the problem may be the breaker, the wiring, or the outlet. That is when you call a professional. And if your stove is experiencing other issues like not powering up at all, our guide on what to do if your stove wont turn on can help you continue troubleshooting.
Do not ignore a stove that trips the breaker. Every trip is a warning sign. Diagnose it, fix it, and cook with confidence knowing your kitchen is safe.

Leave a Comment