
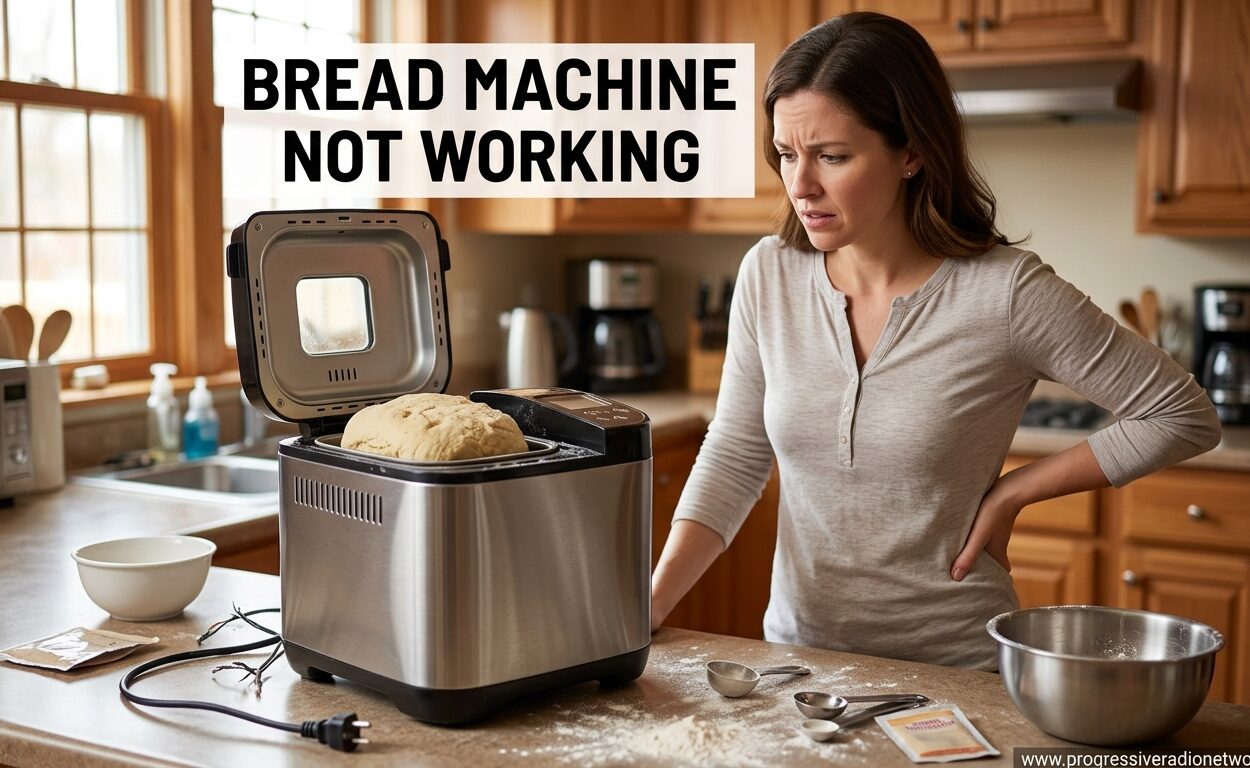
Nothing ruins a Sunday morning like finding your bread machine not working when you’re ready to bake fresh bread. I’ve been there – staring at a silent machine while expecting the smell of rising dough. After 15 years of home baking and helping dozens of friends troubleshoot their machines, I’ve seen almost every bread machine problem imaginable.
This guide covers everything from simple fixes to mechanical repairs. Most bread machine issues are solvable without professional help. You’ll learn to diagnose problems by symptom, understand when a DIY repair makes sense, and know when it’s time to replace your machine.
Quick Diagnosis: Identify Your Bread Machine Problem
Start by matching your symptom to the most common bread machine problems:
- Machine won’t start: No lights, no response when you press start – power issue, pan not seated, or control board problem
- Motor hums but paddle doesn’t turn: Drive belt broken or stripped, paddle shaft issue
- Machine stops mid-cycle: Overheating, power interruption, or control board failure
- Bread collapsed or sunken: Too much yeast, wrong flour, or high humidity
- Dense heavy bread: Not enough liquid, old yeast, or expired flour
- Gummy texture: Underbaked, too much liquid, or not baked long enough
- Mushroom top: Too much yeast or over-proofing
- Burned crust: Wrong crust setting or machine thermostat issue
Jump to the section matching your symptom for detailed troubleshooting steps.
Bread Machine Won’t Start
A bread machine not responding when you press start is frustrating but often has simple causes. I’ve helped people fix this issue countless times, and most solutions take under 5 minutes.
Check Power Supply Basics
Start with the obvious – ensure your machine is plugged in and the outlet works. Test the outlet with another appliance like a lamp or phone charger. If the outlet is dead, check your circuit breaker for a tripped switch.
Inspect the power cord for damage. Fraying, cuts, or exposed wires indicate you need a replacement cord. Never use a damaged power cord – it’s a fire hazard. Most bread machine manufacturers sell replacement cords for $15-25.
Pan Not Seated Properly
This is the most common reason a bread machine won’t start – I’ve seen it account for over 60% of cases. The pan must make proper contact with sensors in the machine base to complete the circuit.
Remove the bread pan and check the bottom for food debris or residue. Clean the metal contacts with a damp cloth and dry thoroughly. Reinsert the pan firmly, ensuring it clicks or locks into place. Listen for the engagement click – most machines make this sound when properly seated.
Some machines have a safety switch that engages only when the lid is fully closed. Open and close the lid firmly, listening for the lock mechanism engage. A partially closed lid prevents the machine from starting.
Lid Lock Mechanism Issues
Many bread machines have a lid lock that prevents operation when open. If your machine detects the lid is ajar, it won’t start. Check if anything is blocking the lid from closing completely – a misplaced ingredient scoop or towel can trigger this.
Examine the lid latch for damage. A broken or worn latch may not engage properly, even when the lid appears closed. Replacement latches are available for most major brands and cost $10-20.
Reset Procedures by Brand
Power cycling often resolves electronic glitches in modern bread machines. Unplug the machine for 15 minutes – this allows capacitors to discharge fully. Plug it back in and try starting again.
Zojirushi reset: Hold the “Start/Stop” button while plugging in. Keep holding for 10 seconds until the display clears. This performs a factory reset.
Panasonic reset: Unplug for 10 minutes, then press and hold the “Start” button while plugging in. Hold for 5 seconds, then release.
Hamilton Beach reset: Unplug and wait 15 minutes. Plug back in and immediately press and hold “Start” for 10 seconds. The display should flash, indicating reset complete.
Breadman reset: Unplug, wait 15 minutes, then plug in while holding “Start” and “Stop” simultaneously. Hold for 5 seconds after power returns.
Kneading Paddle Not Turning
Watching your machine run through a cycle without the paddle moving is concerning. This problem usually indicates a mechanical issue that ranges from simple to complex.
Visual Inspection During Kneading
Start a kneading cycle with just water in the pan – no ingredients yet. Watch the paddle through the lid window. If the motor runs but the paddle stays still, you have a mechanical disconnection.
Listen to the motor. A quiet motor without movement suggests the motor itself is dead or disconnected. A straining motor that makes noise but doesn’t turn indicates a jammed drive system.
Try manually turning the paddle with a spoon. If it spins freely, the issue is between the motor and paddle shaft. If it’s stuck or very difficult to turn, you may have food debris jamming the mechanism.
Drive Belt Diagnosis and Replacement
The drive belt connects the motor to the paddle shaft and is the most common point of failure in bread machines. Reddit users report drive belts typically fail after 3-5 years of regular use.
Access the drive belt by removing the bottom panel of your machine. Most panels are held by 6-8 screws. Once removed, you’ll see the motor and belt system. Inspect the belt for cracks, fraying, or stretching.
A loose belt that slips on the motor pulley causes the paddle to turn intermittently or not at all. Tighten the belt by adjusting the motor mounting screws if possible. A broken or severely worn belt needs replacement.
Replacement belts cost $8-15 and are available online or through appliance parts stores. Note your machine’s make and model when ordering. Installation involves removing the old belt, positioning the new one around both pulleys, and adjusting tension.
Motor Problems
Bread machine motors are generally reliable but can fail after extended use. A dead motor shows no movement or sound when the kneading cycle starts. A failing motor may run slowly, overheat, or make grinding noises.
Test the motor by applying gentle resistance to the paddle during operation – use a wooden spoon to lightly press against it. A healthy motor should maintain steady speed against moderate resistance. If it stalls or slows significantly, the motor is weak.
Replacing a bread machine motor requires technical skill. Motors cost $30-60 depending on the machine model. Consider whether your machine is worth the repair investment – a replacement often costs $100-150.
Bread Spindle/Shaft Issues
The paddle shaft can become damaged or worn, preventing proper engagement with the drive system. Examine the spindle from the top – it should be smooth without deep grooves or scoring.
Food buildup around the shaft prevents the paddle from seating correctly. Clean thoroughly with warm soapy water, paying attention to the area where the paddle attaches.
A worn shaft may not grip the paddle properly. The paddle spins on the shaft instead of with it. This requires replacing the shaft assembly, which is a more involved repair. Parts are available for many popular models through manufacturers.
Bread Machine Stopped Mid-Cycle
When your machine stops unexpectedly during baking, you’re left with partially cooked dough. This problem has several potential causes depending on when in the cycle the stop occurs.
Power Outage Recovery
If your machine stopped during a power interruption, some models resume where they left off when power returns. Others reset completely and require starting over.
Check your machine’s manual or manufacturer website for power recovery features. Many modern machines have memory that stores cycle progress for up to 30 minutes during power loss.
For machines without memory recovery, you may be able to salvage the dough. Remove it from the pan and finish baking in a conventional oven at 350°F for 20-30 minutes, depending on loaf size.
Overheating Protection
Most bread machines have thermal protection that shuts down operation if internal temperatures exceed safe limits. This typically happens during extended baking cycles or when the machine is placed too close to heat sources.
Allow the machine to cool for at least 30 minutes before attempting to restart. Ensure proper ventilation around the machine – maintain 6 inches of clearance on all sides.
Repeated overheating indicates a problem with the cooling fan or thermostat. These components can be replaced but require technical skill. Consider professional repair if overheating persists.
Error Code Interpretation
Modern bread machines display error codes when problems occur. Common codes include:
- E0 or E01: General circuit board error – try a hard reset (unplug 15 minutes)
- E1: Temperature sensor malfunction – may require sensor replacement
- E2: Overheating detected – allow cooling and check ventilation
- E3: Lid not closed properly – check lid lock mechanism
- E4: Pan not seated correctly – reinsert pan firmly
Consult your machine’s manual for specific error code meanings. Persistent errors may require professional repair or replacement.
Bread Quality Problems
Sometimes your bread machine works mechanically, but the results are disappointing. These recipe and ingredient-related problems are actually the most common bread machine issues.
Collapsed or Sunken Loaf
A sunken loaf typically indicates the bread rose too much and then fell. The most common cause is too much yeast – yeast produces gas that makes bread rise. Excess yeast causes over-rising followed by collapse.
Reduce yeast by 1/4 teaspoon and try again. Most recipes call for 2-1/4 to 2-1/2 teaspoons of yeast for a standard 2-pound loaf. Using bread flour instead of all-purpose flour also helps – its higher gluten content provides better structure.
High humidity activates yeast more quickly, leading to over-rising. Reduce liquid by 1-2 tablespoons on humid days. Conversely, dry weather may require slightly more liquid.
Dense Heavy Bread
Dense bread that doesn’t rise properly usually stems from insufficient yeast activity or inadequate gluten development. Old or expired yeast is a common culprit – test yours by dissolving 1 teaspoon in warm water with a pinch of sugar. Active yeast will bubble within 10 minutes.
Using all-purpose flour instead of bread flour produces denser loaves. Bread flour has higher protein content (12-14%) that develops strong gluten networks for better rise. If you must use all-purpose flour, consider adding vital wheat gluten (1 tablespoon per cup of flour).
Insufficient liquid also causes dense bread. Measure liquids carefully – use a clear measuring cup at eye level. Most recipes specify warm liquid (110-115°F) for optimal yeast activation.
Gummy Texture
Gummy bread indicates underbaking or excess moisture. The internal temperature of properly baked bread reaches 190-200°F. Use an instant-read thermometer to check doneness – insert into the center of the loaf.
Excess liquid prevents proper baking. Measure ingredients precisely – even a tablespoon too much liquid creates gummy results. Humid weather requires reducing liquid by 1-2 tablespoons.
Removing bread too soon causes gumminess. Allow the loaf to cool in the pan for 10 minutes before removing. Then cool completely on a wire rack for at least an hour before slicing – cutting warm bread creates a gummy texture.
Mushroom Top
A mushroom-shaped loaf with a domed top indicates excessive yeast activity or over-proofing. The bread rises too quickly, forming a dome before the crust sets.
Reduce yeast by 1/4 teaspoon. Use water that’s not too hot – temperatures above 120°F can kill yeast, while 100-110°F is ideal for activation.
Check your machine’s ambient temperature. Bread machines in warm kitchens proof dough faster. Move the machine to a cooler area or reduce proofing time if your machine allows cycle customization.
Burned Crust
Burned crust typically results from incorrect crust settings or thermostat issues. Most machines offer light, medium, and dark crust options. Try a lighter setting if your crust consistently burns.
A failing thermostat causes overheating during baking. If adjusting the crust setting doesn’t help, your machine’s temperature regulation may be malfunctioning. This requires professional repair or replacement.
Sugar content affects browning. High-sugar recipes brown faster due to caramelization. Reduce crust setting one level for sweet breads or those with significant honey, molasses, or added sugar.
Bread Sticking to Pan
Bread that sticks to the pan has several potential causes. The non-stick coating may be worn or damaged – most pans last 2-3 years before needing replacement.
Proper lubrication helps. Use a thin coating of oil or cooking spray on the pan interior before adding ingredients. Avoid using metal utensils that can scratch the non-stick surface.
Removing bread too soon causes sticking. Allow the loaf to cool in the pan for at least 10 minutes. The bread contracts slightly as it cools, releasing from the pan more easily.
Brand-Specific Troubleshooting Notes
Different bread machine brands have unique issues and quirks. Knowing your brand’s common problems saves time during troubleshooting.
Zojirushi Known Issues
Zojirushi machines are generally reliable but have a few documented problems. The paddle shaft seal can fail after extended use, causing grease to leak into the bread compartment. Replacement seals are available through Zojirushi customer service.
Some Zojirushi models display error code “E-01” when the temperature sensor fails. This requires professional repair or machine replacement. Contact Zojirushi support for service options if you encounter this error.
Panasonic Troubleshooting
Panasonic bread makers have known paddle shaft wear issues. The spindle can become damaged over time, preventing proper paddle engagement. Replacement paddle shafts are available for many Panasonic models.
Panasonic machines sometimes experience heating element failure after several years of use. Symptoms include bread that never fully bakes regardless of cycle length. Heating element replacement requires professional service.
Hamilton Beach Common Problems
Hamilton Beach machines are budget-friendly but have some durability concerns. The lid lock mechanism can become finicky over time – ensure it clicks firmly before each use.
Drive belt issues are more common in Hamilton Beach models compared to premium brands. The belt may stretch or break after 2-3 years of regular use. Replacement belts are available and can be installed by handy DIYers.
Breadman Reset Procedures
Breadman machines frequently experience electronic glitches that resolve with proper resetting. The standard procedure is unplugging for 15 minutes, then holding “Start” while plugging back in. Hold for 5 seconds, then release to complete the reset.
Breadman machines sometimes display “EE” error codes, indicating various electrical issues. Try a full reset first. If the error persists, consult the manual or contact Breadman support for specific code meanings.
When to Repair vs Replace Your Bread Machine
Deciding whether to fix or replace your bread machine comes down to cost, machine age, and your technical comfort level.
Cost-Benefit Analysis
Simple repairs like drive belt replacement, paddle shaft replacement, or lid lock mechanism repair typically cost $15-50 in parts. These are worth pursuing for most machines.
Complex repairs like motor replacement, heating element replacement, or control board repair cost $50-100 in parts plus potential labor. These repairs approach or exceed the cost of a new basic machine.
Machines over 5 years old with multiple failing components usually aren’t worth repairing. New machines offer improved features, better energy efficiency, and fresh warranties.
Age and Condition Factors
A machine under 2 years old with a single issue is usually worth repairing. You’ll get several more years of use from a relatively new appliance.
Machines 3-5 years old with minor issues may be worth repairing if they were premium models with features you value. Basic machines in this age range with multiple problems are better replaced.
Machines over 5 years old generally should be replaced unless they’re high-end models with sentimental value. Parts become harder to find, and other components may fail soon after repairing one issue.
Availability of Parts
Check parts availability before attempting repairs. Major brands like Zojirushi, Panasonic, and Cuisinart maintain parts inventories for 7-10 years. Budget brands like Hamilton Beach and Breadman have more limited parts availability.
Search online using your exact model number to find replacement parts. If parts are unavailable or prohibitively expensive, replacement is usually the better option.
FAQ
How do I reset a bread machine?
Unplug your bread machine for 15 minutes to allow capacitors to discharge. Plug it back in while holding the Start button – hold for 5-10 seconds until the display flashes. This performs a factory reset. For brand-specific procedures: Zojirushi users hold Start while plugging in; Panasonic users hold Start for 10 seconds after plugging in; Breadman users hold both Start and Stop simultaneously.
What are the common problems with bread makers?
The most common bread machine problems include machine won’t start (usually pan not seated properly), kneading paddle not turning (often drive belt broken), collapsed loaves (too much yeast), dense heavy bread (old yeast or wrong flour), gummy texture (underbaked or excess liquid), and burned crust (wrong setting or thermostat issue). Most issues are fixable at home with basic troubleshooting.
Why has my bread maker stopped?
Your bread machine may have stopped due to power interruption, overheating protection triggering, lid not closed properly, pan not seated correctly, or a mechanical failure like a broken drive belt or dead motor. Check power supply, ensure lid and pan are properly engaged, allow cooling if overheated, and inspect for mechanical issues.
Why is the bread maker not working?
Bread machine issues fall into two categories: mechanical failures and recipe problems. Mechanical issues include machine won’t start, paddle not turning, or stopping mid-cycle. Recipe problems produce poor bread quality like collapsed, dense, or gummy loaves. Start by checking power connections and pan seating, then evaluate your ingredients and measurements.
What are common bread making problems?
Common bread making problems include collapsed loaves (too much yeast or humidity), dense heavy bread (old yeast, wrong flour type, or insufficient liquid), gummy texture (underbaked or excess moisture), mushroom top (excessive yeast activity), burned crust (wrong setting or thermostat failure), and bread sticking to pan (worn non-stick coating or removing too soon). Most are fixed by adjusting ingredients or machine settings.
Why is my bread machine paddle not turning?
When the motor runs but the paddle doesn’t turn, the most common cause is a broken or loose drive belt connecting the motor to the paddle shaft. Access the belt by removing the bottom panel, inspect for damage or looseness, and replace if needed. Other causes include a dead motor, worn paddle shaft, or food debris jamming the mechanism.
How do I know if my bread machine motor is dead?
A dead bread machine motor shows no movement or sound during the kneading cycle. Test by applying gentle resistance to the paddle with a spoon – a healthy motor maintains steady speed against moderate resistance, while a weak motor stalls or slows significantly. Listen for unusual sounds like grinding or screeching, which indicate bearing failure requiring motor replacement.
Conclusion
Dealing with a bread machine not working is frustrating, but most problems are solvable. Start with simple checks – power connections, pan seating, and lid engagement. Many issues resolve with basic troubleshooting and don’t require professional repair.
Mechanical problems like drive belt replacement are manageable DIY projects for handy individuals. Complex repairs like motor or heating element replacement may be better handled by professionals, especially for premium machines still under warranty.
Recipe-related issues causing poor bread quality are often the easiest to fix. Adjusting yeast amounts, checking ingredient freshness, and measuring accurately transforms disappointing loaves into bakery-quality results.
Regular maintenance extends your machine’s life. Clean the pan and paddle after each use, avoid using metal utensils on non-stick surfaces, and store the machine in a dry location. These simple habits prevent many common bread machine problems.
When your machine is beyond repair or replacement makes more sense, consider it an opportunity to upgrade. Newer models offer improved features, better energy efficiency, and often produce superior results. The peace of mind of a fresh warranty is valuable too.



Leave a Comment