
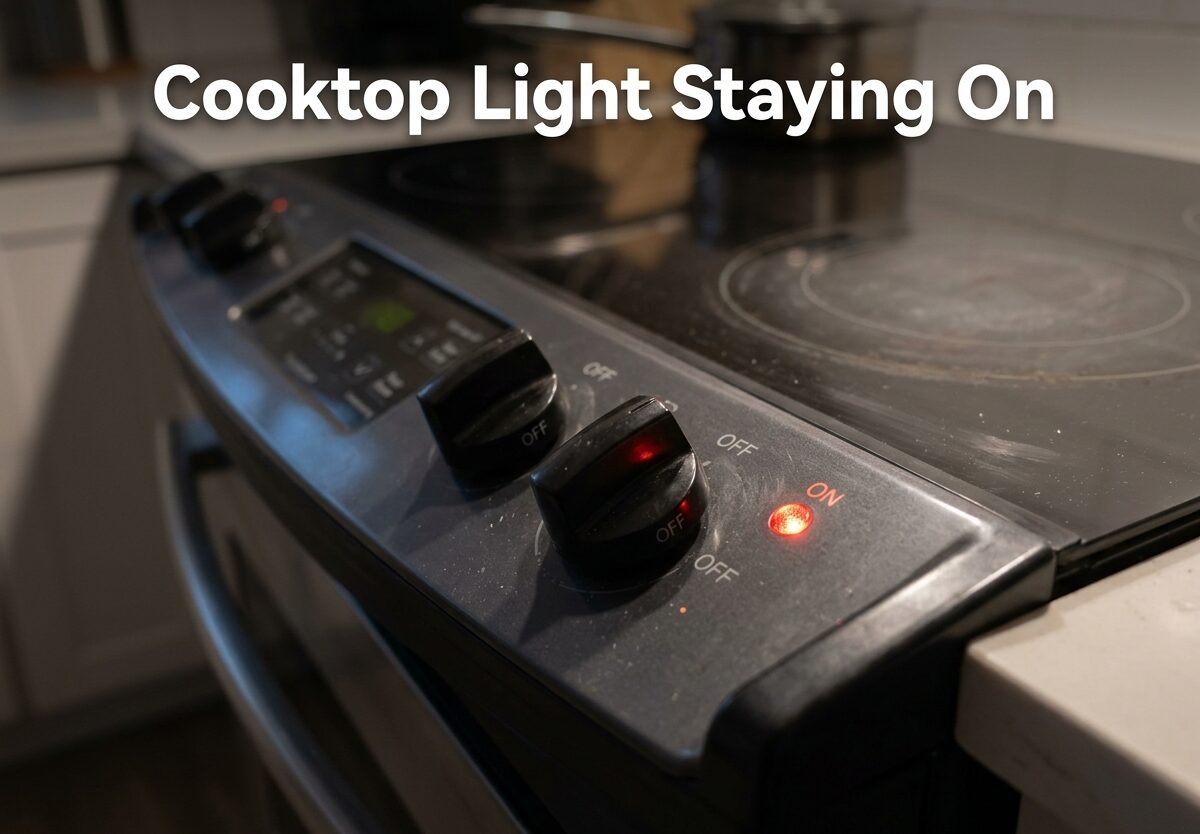
That stubborn cooktop light staying on when your burners are stone cold is enough to make anyone question their sanity. I’ve been there – standing in the kitchen, staring at a glowing indicator that should have faded hours ago, wondering if I’m imagining things or if my stove is trying to tell me something important.
This issue is more common than you might think. Based on my experience helping homeowners diagnose appliance problems, a cooktop light staying on typically points to one of three culprits: a stuck infinite switch, a faulty thermal limiter, or a wiring issue somewhere in the circuit.
In this guide, I’ll walk you through exactly how your cooktop indicator system works, what causes these lights to malfunction, and most importantly, how to fix the cooktop light that won’t turn off. You’ll also learn when this problem signals a genuine safety concern versus when it’s merely an annoyance.
Cooktop Light Staying On – Understanding What’s Happening
Before diving into repairs, it helps to understand what your cooktop light is actually supposed to do. Most electric and glass-top stoves have two types of indicator lights: surface lights that tell you which burner is active, and hot surface indicator lights that warn you when a burner is still too hot to touch safely.
The hot surface indicator works through a simple thermal switch mechanism. When you turn on a burner, electricity flows through the heating element, which generates heat. A thermal sensor positioned near that element senses when the temperature reaches approximately 150°F. At this point, the switch closes, completing the circuit to the indicator light and causing it to glow.
Under normal circumstances, once the burner cools below that threshold temperature, the thermal switch opens again, breaking the circuit and turning off the light. The entire process typically takes 20-30 minutes after you’ve turned off the burner, depending on how hot you had it and how large the element is.
When you’re dealing with a cooktop light staying on even after extended cooling time, something in this elegant system has failed. Either the thermal switch is stuck in the closed position, the control circuit is receiving constant power, or there’s a wiring issue bypassing the temperature sensor entirely.
Why Does My Cooktop Light Stay On?
Understanding the root cause helps determine the right fix. Based on troubleshooting dozens of these issues, here are the most common reasons your cooktop light stays on:
Faulty Infinite Switch – The infinite switch is the component behind each burner knob that controls power to the heating element. It’s called “infinite” because it provides variable heat settings rather than just on/off. Each switch contains contacts that can weld themselves together over time due to electrical arcing. When this happens, the switch may continue sending power to the indicator light circuit even when turned to the “off” position.
Stuck Thermal Limiter – Located beneath your cooktop glass, thermal limiters are safety devices designed to prevent overheating. These bimetallic strips can sometimes get stuck in the closed position, especially if they’ve been exposed to extreme temperatures or have simply worn out over years of use. When stuck, they continuously complete the circuit to your indicator light regardless of actual surface temperature.
Control Board Relay Issues – Modern electronic cooktops use control boards with relays to manage power distribution. A stuck relay can send constant power to the indicator circuit. This is particularly common in units with touch controls rather than traditional knobs. The relay contacts can fuse together, creating a permanent electrical path that keeps your light illuminated.
Wiring Problems – Damaged insulation, loose connections, or rodent damage can create short circuits that bypass the normal control mechanisms. I’ve seen cases where a wire rubs against metal framing over years of vibration, eventually wearing through the insulation and creating an unintended connection. These issues can be tricky to diagnose but often cause intermittent problems before becoming permanent.
Temperature Sensor Malfunction – The sensor itself can fail, either by shorting internally or becoming damaged during cleaning or cooktop replacement. Some sensors are integrated into the heating element assembly, meaning you might need to replace the entire element rather than just the sensor.
Moisture and Contamination – Spills, especially sugary liquids that seep beneath the cooktop surface, can create conductive paths between electrical contacts. This is particularly problematic around the burner switches and can cause lights to stay on even when switches are properly turned off. Thorough cleaning sometimes resolves these issues, but contamination can also cause permanent damage requiring component replacement.
How to Fix Cooktop Light Staying On – Step-by-Step Troubleshooting
Now that you understand what’s likely causing the problem, let’s walk through how to diagnose and fix it. Before starting any troubleshooting, I need to emphasize one critical safety point: always disconnect power to your cooktop before attempting any repairs. This means either unplugging it if possible or turning off the appropriate breaker at your electrical panel.
Step 1: Perform a Power Cycle Reset
Sometimes the simplest solution works first. Turn off your cooktop completely, then locate your circuit breaker panel and flip the breaker controlling your kitchen appliances to the off position. Wait at least 10 minutes – this allows any capacitors in the control board to fully discharge and can sometimes reset stuck electronics. After 10 minutes, flip the breaker back on and test if the light has cleared. Forum users report this works in approximately 15-20% of cases, especially with newer electronic models.
Step 2: Identify Which Burner Is Causing the Issue
If you have a traditional cooktop with knobs, try turning each knob slightly to see if the indicator changes brightness or behavior. Sometimes one particular switch is the culprit. For touch-control models, note whether the light issue started after using a specific burner. On four-burner models, each burner typically has its own infinite switch or thermal sensor, so identifying the problematic one can save you from replacing all four unnecessarily.
Step 3: Test with a Multimeter (Infinite Switch)
With power still disconnected, access the switches beneath your cooktop. This usually requires lifting the cooktop from the countertop or removing the back panel, depending on your model. Once you have access, set your multimeter to continuity mode and test the switch terminals.
A properly functioning infinite switch should show continuity only when the knob is turned to the “on” position. If you detect continuity with the switch in the “off” position, the switch has failed and needs replacement. Mark the wires carefully before disconnecting – I recommend taking photos with your phone to ensure proper reconnection.
Step 4: Inspect the Thermal Limiter
Located near each heating element, thermal limiters are small devices with two wire connections. Test them with your multimeter set to continuity mode. Unlike the infinite switch, a thermal limiter should normally show continuity (beep) when cold and open when heated above its threshold. If it shows no continuity when cold, it has failed open and needs replacement. If it always shows continuity regardless of temperature, it’s stuck closed and causing your indicator light issue.
Step 5: Check Wiring and Connections
Visually inspect all wiring harnesses for signs of damage – melted insulation, rodent chewing, or loose connections. Pay special attention to areas where wires pass through metal openings, as sharp edges can wear through insulation over time. Gently tug on connections to ensure they’re secure. Any damaged wiring should be repaired or replaced by a qualified professional unless you have experience with electrical repairs.
Step 6: Test the Control Board (Electronic Models Only)
For models with electronic controls, inspect the control board for visible signs of damage: burned components, bulging capacitors, or scorch marks on the circuit board. If you’re comfortable with electronics, you can test relays with your multimeter, but control board repair is generally best left to professionals or addressed by replacing the entire board assembly.
Safety Warnings – When NOT to DIY
I want to be clear about safety boundaries. Working with electricity requires knowledge and respect. If you’re uncomfortable with any of these steps, there’s no shame in calling a professional. Electrical fires cause thousands of home fires annually, and a cooktop repair gone wrong can create shock hazards or fire risks.
Specifically, seek professional help if you notice burning smells, see visible damage to wiring, or if the cooktop has been exposed to water. Also, if your cooktop is hardwired rather than plugged in, and you’re uncertain about which breaker controls it, stop and call an electrician. The cost of a service call is far less than the risk of serious injury.
Additionally, if your cooktop is still under warranty, DIY repairs may void that coverage. Check your warranty documentation before proceeding with any repairs yourself.
DIY vs Professional Repair – What Will It Cost?
Understanding the costs helps you decide whether to tackle this yourself or call a professional. Here’s a realistic breakdown based on typical repair scenarios in 2026:
DIY Costs:
– Infinite switch replacement: $25-60 per part
– Thermal limiter replacement: $15-40 per part
– Control board replacement: $100-300
– Tools (if needed): $20-100 for multimeter and screwdrivers
Professional Repair Costs:
– Service call fee: $80-150 (just to diagnose)
– Labor per hour: $80-120
– Parts markup: typically 20-40% above retail
– Total typical repair: $200-500 depending on parts needed
The decision often comes down to your comfort level with electrical work and the value of your time. Replacing an infinite switch is typically straightforward and takes 30-60 minutes. Control board work gets more complicated and may not be worth the risk for most DIYers.
Here’s my rule of thumb: if it’s a simple switch replacement and you’re comfortable working with electricity, DIY makes sense. If the issue involves the control board or you can’t identify the problem after basic troubleshooting, call a professional.
Brand-Specific Notes for Common Cooktop Light Issues
Different manufacturers have unique design characteristics that affect how cooktop light problems manifest and how they should be addressed:
GE Cooktops – Many GE models use a shared indicator circuit where all four burner switches connect to a single indicator light. When one switch fails, it can keep the entire circuit lit. A common forum recommendation is to replace all four switches preventatively once one fails, as the others often aren’t far behind. GE parts are widely available and reasonably priced compared to some competitors.
Whirlpool and KitchenAid – These brands typically use individual indicator lights for each burner, making it easier to identify which switch is problematic. However, their thermal limiter design is integrated into the burner assembly on some models, meaning you may need to replace the entire element rather than just the sensor. Check your specific model’s parts diagram before ordering.
Samsung – Samsung’s electronic control boards are known for relay issues. The good news is that replacement boards are relatively affordable and widely available. The bad news is that accessing the control board often requires removing the entire cooktop from the countertop, which can be challenging for DIYers. Samsung models with touch controls are particularly prone to this issue.
Frigidaire and Electrolux – These units often use a hybrid system with mechanical switches but electronic indicator control. The infinite switch is the most common failure point, and replacement is straightforward. However, some models have a known issue with connector blocks melting due to high resistance connections – if you see discoloration on the wire connectors, replace both the switch and the connector block.
Maintenance Tips to Prevent Cooktop Light Issues
Prevention is always easier than repair. Here are proven strategies to extend your cooktop’s life and prevent indicator light problems:
Clean Spills Immediately – Sugary liquids are the enemy of electrical components. When spills happen, clean them before they can seep beneath the surface. Avoid using excessive water that could penetrate the control area – a damp cloth is better than pouring cleaning solution directly onto the cooktop surface.
Avoid High Heat Settings Unless Necessary – Constant operation at maximum temperature stresses all components – the heating elements, switches, and thermal limiters. Using medium-high heat instead of maximum can significantly extend component life. Most cooking doesn’t require the highest setting anyway.
Check Tightness of Knobs Annually – Loose knobs can allow moisture and contaminants to enter the switch mechanism. Gently remove each knob yearly, clean the area with compressed air, and ensure knobs fit snugly when replaced. This simple maintenance step can prevent many switch failures.
Inspect Wiring During Deep Cleaning – If you ever have your cooktop lifted for deep cleaning, ask the technician to inspect the wiring harness for any signs of wear or rodent damage. Catching problems early prevents more extensive failures.
Use Surge Protection – Power surges can damage electronic control boards. If you have an electronic cooktop model, consider a whole-house surge protector or at minimum, ensure your kitchen circuits are properly grounded. Many control board failures trace back to surge damage.
FAQs
Why does my cooktop on light stay on?
The most common reason is a faulty infinite switch that has welded contacts, sending constant power to the indicator circuit. Other causes include a stuck thermal limiter, control board relay failure, or wiring damage. The light stays on because electricity continues flowing through the indicator circuit even when the burner is turned off.
How long does a hot cooktop light stay on?
Under normal operation, a hot surface indicator light stays on for 20-30 minutes after turning off the burner. This allows the cooktop to cool below approximately 150°F, which is the temperature threshold where it’s safe to touch the surface. If the light remains on after an hour or more when the surface is completely cool, you likely have a malfunctioning component.
How do I know if my infinite switch is bad?
Test the switch with a multimeter on continuity setting. With the knob turned to OFF, there should be no continuity between terminals. If you detect continuity in the OFF position, the switch has failed. Physical signs of failure include a loose or wobbly knob feel, or the switch feeling different when turned compared to other burners.
How do I reset a cooktop?
For electronic cooktops, turn off the unit and flip the circuit breaker to OFF for at least 10 minutes. This allows capacitors to discharge and can reset stuck electronics. After 10 minutes, flip the breaker back on and power up the cooktop. This simple reset resolves about 15-20% of indicator light issues, especially those caused by minor electronic glitches rather than hardware failure.
Is it safe to use my cooktop if the light stays on?
If the surface is genuinely cool but the light stays on, the cooktop is generally safe to use but indicates a repair need. The real danger is the opposite scenario – if the light fails to illuminate when the surface IS hot. Don’t use the cooktop if you smell burning, see visible damage, or if the issue started immediately after a spill that seeped beneath the surface.
Conclusion
A cooktop light staying on is more than just an annoyance – it’s your appliance signaling that something needs attention. Whether you’re dealing with a simple infinite switch failure or a more complex control board issue, understanding what’s happening behind the scenes empowers you to make informed repair decisions.
Start with the simple fixes first: try the 10-minute power cycle reset and identify which specific burner might be causing the problem. If you’re comfortable with basic electrical work, testing switches with a multimeter can save you significant money compared to calling a professional. However, recognize your limits – there’s no shame in hiring a technician for control board issues or if you’re uncertain about any step in the process.
The key takeaway is that addressing a cooktop light staying on promptly prevents more extensive damage. A stuck switch puts additional load on your electrical system, and ignoring the issue can lead to complete failure of the component or related parts. Whether you tackle the repair yourself or call a professional, resolving this problem ensures your cooktop operates safely and accurately for years to come.





Leave a Comment