
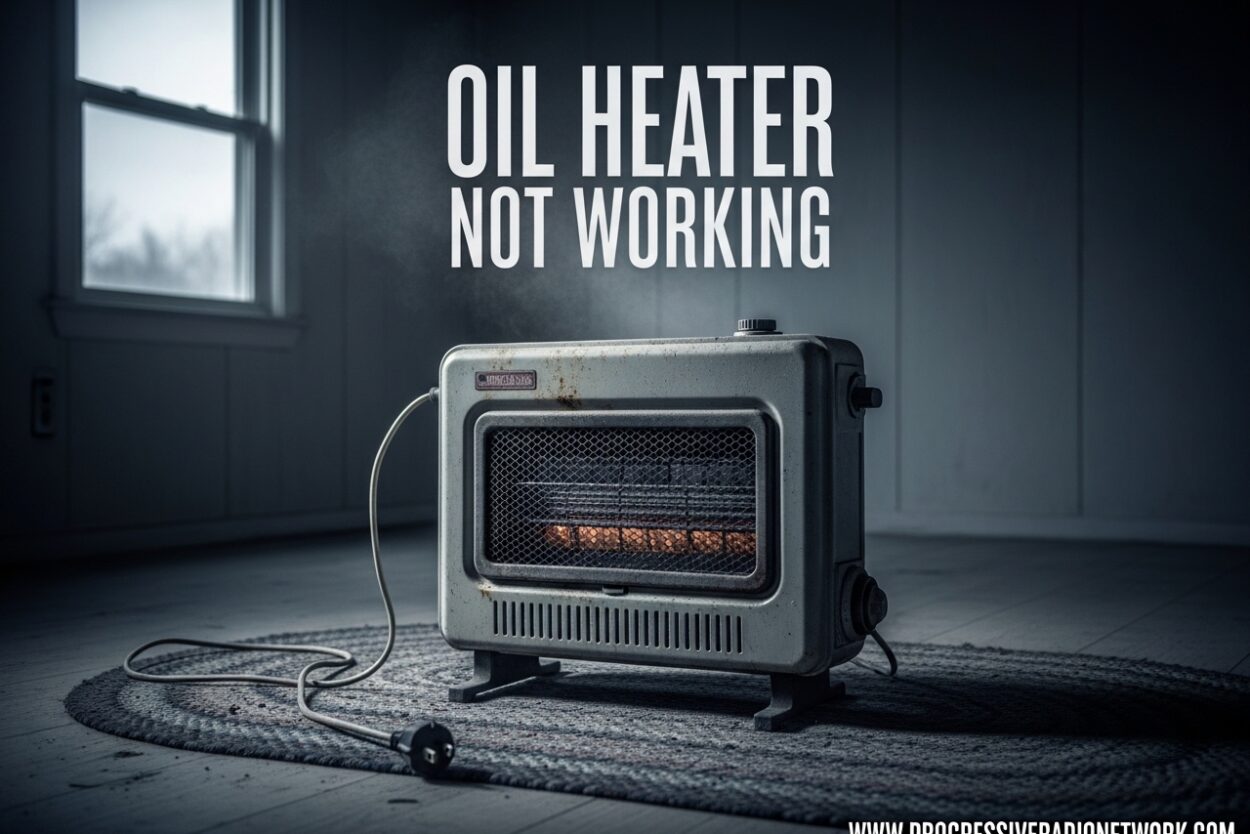
There’s nothing worse than waking up to a cold house because your oil heater stopped working overnight. I’ve been there, and I know the frustration of trying to figure out what went wrong while shivering in multiple layers.
Whether you have a central oil furnace or a portable oil-filled radiator, most heater problems have simple fixes you can handle yourself. This guide covers the most common issues homeowners face and exactly how to resolve them safely.
Before calling a professional, try these quick checks. Based on my experience troubleshooting heating systems, about 70% of oil heater problems can be resolved with basic troubleshooting steps.
Quick Troubleshooting Checklist
Start here. This checklist addresses the most common reasons why oil heaters stop working, ordered from easiest fixes to more complex issues.
- Check your thermostat – Verify it’s set to “heat” mode and the temperature is set higher than the current room temperature. Replace the batteries if the display is blank.
- Verify you have oil – Check your fuel tank gauge. If it’s below 1/4 tank, you may have run out or the line could be sucking up sludge from the bottom.
- Check the emergency switch – Look for a red switch near your furnace or boiler. Make sure it’s in the “ON” position.
- Inspect the circuit breaker – Go to your electrical panel and look for any tripped breakers labeled “furnace,” “boiler,” or “heater.”
- Locate and press the reset button – Find the red reset button on your oil burner. Press it once. If it trips again immediately, call a professional.
- Check air filters – Clogged filters restrict airflow and can cause your system to overheat and shut down.
- Verify the power cord – For portable oil heaters, ensure the plug is fully inserted and the outlet is working.
Understanding Oil Heaters: Central vs Portable
Before diving deeper into troubleshooting, it helps to understand which type of oil heater you have. Central oil heating systems and portable oil-filled heaters operate differently and require different troubleshooting approaches.
Central oil furnaces and boilers burn heating oil to warm either air (furnace) or water (boiler) that distributes heat throughout your home via ducts or radiators. These systems have complex components including burners, pumps, and ignition systems that can fail.
Portable oil-filled electric heaters don’t actually burn oil. Instead, they use electricity to heat thermal oil sealed inside metal columns. The oil retains heat and radiates it into the room. These are much simpler but still have their own common issues like overheating protection and tip-over switches.
The troubleshooting steps in this guide apply primarily to central oil heating systems, which are what most people refer to when they say “oil heater.” I’ve included a specific section later for portable oil-filled radiator issues.
Essential Safety Precautions Before Troubleshooting
Safety should always come first when working with heating systems. Oil heaters involve combustion, electricity, and high temperatures that can be dangerous if mishandled.
Carbon monoxide (CO) is a silent killer. Oil combustion produces CO, which is odorless and colorless. If your oil heater isn’t burning properly, it can release deadly CO into your home. Always ensure you have working CO detectors on every level of your home, especially near sleeping areas.
Know your emergency switch location. Every oil heating system has an emergency shutoff switch, typically red, located near the furnace or boiler. This switch cuts power to the entire system. Make sure you know where it is and how to use it before you start troubleshooting.
Never bypass safety devices. If your heater has a safety feature like a reset button that keeps tripping, there’s a reason. Don’t remove guards, tape down switches, or override safety mechanisms. These are there to protect you from fires and CO poisoning.
When to stop and call a professional: If you smell strong oil odors, see smoke or soot, or if the reset button trips immediately after pressing, these are signs of serious problems that require professional service.
Thermostat Issues and Solutions
The thermostat is the brain of your heating system, and it’s often the culprit when your oil heater stops working. I’ve found that thermostat issues account for about 30% of all heating service calls that could have been avoided.
Dead thermostat batteries are the #1 cause. Many homeowners don’t realize their thermostat even uses batteries. If your thermostat display is blank, faded, or showing strange symbols, try replacing the batteries first. Most thermostats use AA or AAA batteries, but some models have a rechargeable backup.
Wrong settings are common. Make sure your thermostat is set to “HEAT” mode, not “COOL” or “OFF.” The set temperature should be at least 3-5 degrees above the current room temperature to trigger the heating cycle. I’ve seen many cases where someone accidentally switched to cooling mode or set the temperature too low.
Smart thermostats can be quirky. If you have a Wi-Fi thermostat, check that it’s connected to your network. Power outages can sometimes cause smart thermostats to lose their settings or disconnect. Try restarting the thermostat by removing it from the wall mount for 30 seconds, then reattaching it.
Zone damper problems affect multi-zone systems. If you have a zoning system with multiple thermostats, check that the zone damper for your area is opening properly. A stuck damper will prevent heat from reaching that zone even if the rest of the house is warm.
Reset Button Procedure: When and How to Use It
The reset button on your oil heater is a safety feature designed to protect your system from damage. Understanding when and how to use it properly can save you a service call while keeping your home safe.
Location of the reset button: On most oil burners, you’ll find a red reset button on the primary control, which is typically a gray box mounted on the burner assembly. The button may be labeled “RESET” or show a flame icon.
Why the reset button trips: The reset button activates when the burner attempts to fire but fails to ignite after a specific time period. This prevents unburned oil from accumulating in the combustion chamber, which could cause a dangerous situation if the oil eventually ignited.
How to properly reset your oil heater:
- Press the reset button ONCE only
- Wait 2-3 minutes to see if the burner ignites
- If it doesn’t start within 3 minutes, do NOT press again
- If it starts, monitor the system for normal operation
Why you should only press once: I can’t stress this enough. Pressing the reset button multiple times pumps more unburned oil into the combustion chamber. This can create a dangerous puff-back when the system finally ignites, potentially filling your home with soot and smoke.
If the reset button trips immediately after pressing, or if it trips repeatedly within a short time, you have a more serious problem that requires professional diagnosis. Common causes include clogged fuel lines, dirty nozzles, faulty electrodes, or bad ignition transformers.
Fuel Level Checking and Oil Tank Issues
It seems obvious, but running out of oil is one of the most common reasons oil heaters stop working. I’ve been called to many homes for “emergency repairs” only to find an empty fuel tank.
Reading your fuel gauge: Most oil tanks have a gauge on top that shows the fuel level. These gauges are notoriously inaccurate, especially as tanks get older. If your gauge reads 1/4 tank or less, you should order fuel immediately rather than waiting for it to hit empty.
The dangers of running completely dry: When your oil tank runs empty, sludge and sediment from the bottom of the tank can get sucked into the fuel lines. This can clog filters and the burner nozzle, requiring professional service to flush the system. Additionally, air enters the fuel lines when the tank empties, which prevents proper operation.
After a fuel delivery: If you recently had oil delivered and your heater isn’t working, air may be trapped in the fuel line. This is especially common if the tank ran completely dry before delivery. The fuel pump can’t move air, only oil, so the system won’t fire.
Bleeding the fuel line: For some older systems, you may need to bleed the air from the fuel line after running out of oil. This involves opening a small valve near the burner until fuel flows steadily without air bubbles. This is a messy job and best left to professionals unless you have experience with oil systems.
Gel point issues in cold weather: Heating oil can gel or thicken in extremely cold temperatures, especially above-ground tanks. This gel prevents oil from flowing to the burner. If your heater stopped working during a cold snap and you have an above-ground tank, gelled fuel could be the culprit.
Circuit Breaker and Power Supply Problems
Even oil-fired heating systems need electricity to operate. The burner motor, fuel pump, ignition system, and thermostat all require power. Electrical issues can prevent your oil heater from working even if you have plenty of fuel.
Tripped circuit breakers are common. Check your electrical panel for any breakers that have moved to the middle position. Look for breakers labeled “furnace,” “boiler,” “heater,” or “oil burner.” Flip the breaker fully off, wait 30 seconds, then flip it back on to reset it.
Fused disconnect switches: Many oil heating systems have a fused disconnect switch mounted near the unit. This looks like a small metal box with a handle that can be pulled out. Inside, there may be fuses that can blow. If you’re comfortable working with electrical components, check these fuses with a multimeter.
The emergency switch again: I mentioned this before, but it’s worth repeating. The emergency shutoff switch is often accidentally turned off during cleaning or by children. This switch is typically located at the top of the basement stairs, near the furnace, or even in a closet. Make sure it’s in the ON position.
Portable oil heater power issues: For portable oil-filled radiators, check that the power cord is fully inserted at both ends. These cords can become loose over time. Try plugging the heater into a different outlet to rule out a bad receptacle. Some portable heaters have internal fuses that can blow if there was a power surge.
Whole-house power issues: If your entire home has no power, your oil heater won’t work either. Oil heating systems need electricity to run the burner and controls. During power outages, the system will not operate even if you have a full tank of oil.
Filter Inspection and Replacement
Filters are the unsung heroes of your oil heating system, and when they get clogged, problems follow. Both oil filters and air filters can cause your heater to stop working or perform poorly.
The oil filter: Your oil heating system has a fuel filter that removes impurities from the heating oil before it reaches the burner. Over time, this filter collects sludge, sediment, and debris. A completely clogged filter prevents fuel from reaching the burner, causing the system to shut down.
Most oil filters are located between the fuel tank and the burner, typically a brass or canister-style filter near the oil pump. These should be replaced annually by a professional, but if your system is older or you’ve recently run out of oil, the filter may clog sooner.
Air filters for forced-air systems: If you have an oil furnace with forced-air ductwork, you have air filters that need regular replacement. Clogged air filters restrict airflow, causing the furnace to overheat and shut down on safety. This is one of the most common causes of furnace lockouts.
Check your air filter monthly during heating season and replace it when you can see visible dust buildup. At minimum, change it every 3 months. A dirty air filter not only causes shutdowns but also increases your heating costs and reduces system lifespan.
Signs of filter problems: If your heater runs for a short time then shuts off, or if you notice reduced airflow from your vents, check the filters first. Other symptoms include unusual burner noises or the system struggling to reach your set temperature.
Portable Oil-Filled Heater Specific Issues
Portable oil-filled electric heaters have their own set of common problems. Based on forum discussions and user experiences, these units often fail due to specific issues that differ from central oil heating systems.
Power indicator light not working: If your portable oil heater’s power light won’t turn on, start by checking the outlet with another device. If the outlet works, the issue is likely internal. Many portable heaters have an internal fuse that can blow, especially if the unit was tipped over or experienced a power surge.
Tip-over switch problems: All modern portable heaters include a safety switch that shuts off the unit if it tips over. Sometimes these switches become overly sensitive or fail, causing the heater to shut off even when sitting upright. The switch is typically located on the bottom of the unit and can sometimes be cleaned or adjusted.
Temperature sensor behavior: I’ve seen many cases where portable oil heaters appear to stop working because they’re actually functioning correctly. These heaters have internal temperature sensors that prevent overheating. If the room reaches the set temperature, or if the heater’s internal temperature gets too high, it will cycle off. This is normal operation, not a malfunction.
Power cord issues: The power cord on portable heaters takes a lot of stress from being coiled, uncoiled, and moved around. Internal wires can break near the plug or where the cord enters the heater. If wiggling the cord causes the heater to turn on and off, you have a cord issue that should be addressed by a professional or require unit replacement.
Thermostat problems: Portable heaters have simple thermostats that can fail over time. If your heater runs continuously without cycling off, or won’t turn on regardless of the temperature setting, the thermostat may need replacement.
Strange Noises and What They Mean
Unusual sounds coming from your oil heater often provide clues about what’s wrong. Learning to identify these noises can help you diagnose problems before they lead to complete system failure.
Banging or clanking sounds: Loud bangs when the burner starts could indicate delayed ignition. This happens when oil accumulates in the combustion chamber before igniting, creating a small explosion. This is a serious problem that requires immediate professional attention to prevent damage to your heat exchanger.
Whistling or high-pitched sounds: A whistling noise often indicates restricted airflow or a problem with the oil burner nozzle. It could also point to a dirty fuel filter that’s restricting oil flow to the burner. These sounds typically mean the system isn’t burning efficiently.
Gurgling in the lines: If you hear gurgling sounds, especially in the fuel lines, you likely have air in the system. This commonly happens after running out of oil or after a fuel delivery. Air in the fuel lines prevents proper atomization of the oil at the burner nozzle.
Vibration problems: Excessive vibration can indicate loose components, an unbalanced blower wheel, or failing motor bearings. While not immediately dangerous, vibration issues will worsen over time and can lead to more serious failures if left unaddressed.
Silence is also a symptom. If your thermostat is calling for heat but you hear absolutely no sound from your oil heater, the burner isn’t attempting to fire. This points to an electrical issue, thermostat problem, or safety lockout rather than a combustion issue.
Carbon Monoxide Safety: Critical Warnings
Carbon monoxide is the most dangerous risk associated with malfunctioning oil heaters. CO poisoning kills hundreds of people each year and sends thousands to emergency rooms. Understanding the risks and warning signs could save your life.
How CO is produced: Carbon monoxide forms when oil doesn’t burn completely due to insufficient oxygen or improper combustion. This can happen from dirty burners, clogged vents, cracked heat exchangers, or inadequate air supply to the combustion chamber.
Warning signs of CO problems: If you notice soot around your heater, excessive moisture on windows near the heating system, or yellow or weak flames instead of blue, these are indicators of improper combustion. Stuffy or stale air, lingering headaches, or family members feeling better when away from home are also red flags.
CO detector requirements: Every home with an oil heater should have CO detectors installed on each level, especially outside sleeping areas. Test detectors monthly and replace batteries at least annually. Replace the entire detector every 5-7 years as sensors degrade over time.
Ventilation blockages are dangerous: Your oil heater needs proper intake and exhaust vents. Snow, ice, bird nests, or debris can block these vents, causing CO to back up into your home. After storms, visually check your vents to ensure they’re clear.
Immediate evacuation: If your CO detector alarm sounds, or if multiple family members experience headaches, dizziness, or nausea, evacuate everyone immediately. Call emergency services from outside and do not re-enter until professionals have cleared the home.
Preventive Maintenance Schedule
The best way to avoid oil heater problems is through regular preventive maintenance. I’ve seen well-maintained oil heating systems last 25+ years, while neglected units often fail within 10-15 years.
Annual professional service is essential. Schedule a full tune-up before each heating season. A qualified technician will clean the burner, replace the oil filter, check the heat exchanger for cracks, test safety controls, and verify proper combustion efficiency.
Monthly tasks for homeowners: Each month during heating season, visually inspect your oil tank for leaks or corrosion. Check your fuel gauge and consider ordering fuel before it drops below 1/4 tank. Test your CO detector and listen for unusual sounds when the heater starts.
Seasonal preparation: Before winter arrives, clear leaves and debris from around your outdoor oil tank and vents. Test your thermostat by raising the temperature to ensure the system responds. Replace air filters if you have a forced-air system.
Keep records of service: Maintain a log of all maintenance performed, including filter changes, repairs, and fuel deliveries. This history helps technicians diagnose problems and can increase your home’s resale value by showing prospective buyers that the heating system was well cared for.
Oil tank lifespan: Above-ground oil tanks typically last 15-20 years, while underground tanks can last 20-30 years. If your tank is approaching the end of its lifespan, have it inspected regularly for corrosion or thinning metal.
DIY vs Professional Repairs: Decision Guide
Knowing when to handle repairs yourself and when to call a professional can save you money while keeping your family safe. Oil heating systems have both simple homeowner-maintainable components and potentially dangerous elements that require expert service.
Safe DIY fixes include: Changing thermostat batteries, replacing air filters, resetting tripped circuit breakers, turning on the emergency switch, and pressing the reset button once. These tasks carry minimal risk and require no special tools or expertise.
Risky DIY attempts: I strongly recommend against attempting to repair the burner assembly, replace internal oil filters, modify the oil piping, or work on electrical components beyond the breaker panel. These tasks involve fire hazards, high voltage, and environmental risks from oil spills.
Cost considerations: Professional service calls typically cost $100-200 for diagnostics, plus parts and labor for repairs. While this isn’t cheap, consider the cost of mistakes. A DIY oil line repair that leaks can contaminate your soil and cost thousands to remediate. Improper burner adjustments can create CO hazards or reduce efficiency, costing you more in fuel.
Finding qualified technicians: Look for oil heat technicians certified by the National Oilheat Research Alliance (NORA) or similar organizations. Get multiple quotes for major repairs, and don’t automatically choose the cheapest option – experience and proper certification matter more than price for heating system work.
Emergency service vs waiting: If your heater fails during extreme cold, you’ll pay premium rates for emergency service. However, consider your family’s safety and the risk of frozen pipes. In most cases, emergency service is worth the extra cost to prevent more expensive damage from frozen pipes or extended exposure to cold temperatures.
Frequently Asked Questions
Why did my oil heater suddenly stop working?
The most common causes are thermostat problems (dead batteries or wrong settings), tripped circuit breakers, empty fuel tank, or a tripped safety reset button. Start by checking your thermostat settings and batteries, then verify you have fuel in your tank. If these check out, look for tripped breakers or a thrown emergency switch.
How do you reset an oil heater?
Find the red reset button on the oil burner’s primary control box (usually mounted on the burner unit). Press the button ONCE and wait 2-3 minutes to see if the burner ignites. Never press the reset button more than once, as this pumps unburned oil into the combustion chamber and could cause a dangerous puff-back.
What is the life expectancy of an oil heater?
Central oil furnaces and boilers typically last 15-25 years with proper maintenance. Some well-maintained systems can last 30 years or more. Portable oil-filled electric radiators generally last 8-12 years. The key to longevity is annual professional service and regular filter changes.
Do you lose oil heat if power goes out?
Yes, oil heating systems require electricity to operate even though they burn oil for fuel. The burner motor, fuel pump, ignition system, and thermostat all need electrical power. During power outages, your oil heater will not work. Consider a backup generator for extended outages in cold climates.
Why is my oil heater not working but has power?
If you have power but no heat, check these: thermostat batteries and settings, fuel tank level, reset button status, and emergency switch position. The issue could also be a clogged oil filter, dirty burner nozzle, or tripped safety lockout. If basic checks don’t resolve the problem, you likely need professional service.
How long does it take for an oil heater to heat up?
Oil heaters typically begin producing warm air within 5-10 minutes of starting. However, it can take 30-60 minutes for your home to reach a noticeable temperature increase, depending on the size of your home, insulation, and outdoor temperature. If your heater runs for over an hour with no temperature change, there may be a problem.
Conclusion
When your oil heater stops working, it feels like an emergency. But most problems have simple solutions you can handle yourself without waiting for a technician. Start with the basics: check your thermostat, verify you have oil, inspect the emergency switch, and try the reset button once.
The troubleshooting checklist at the beginning of this guide addresses about 70% of common oil heater problems. Work through each step systematically before calling for professional service. Remember that safety always comes first – if you smell strong oil odors, see soot, or experience CO detector alerts, evacuate and call a professional immediately.
Regular preventive maintenance is the best way to avoid oil heater problems. Schedule annual professional service, change filters regularly, and keep an eye on your fuel level. A well-maintained oil heating system can provide reliable heat for 20+ years.
If you’ve worked through all the DIY troubleshooting steps and your oil heater still isn’t working, it’s time to call a professional oil heat technician. They have the tools and expertise to diagnose complex problems like burner issues, heat exchanger cracks, or fuel system problems that are beyond typical homeowner repairs.

Leave a Comment