
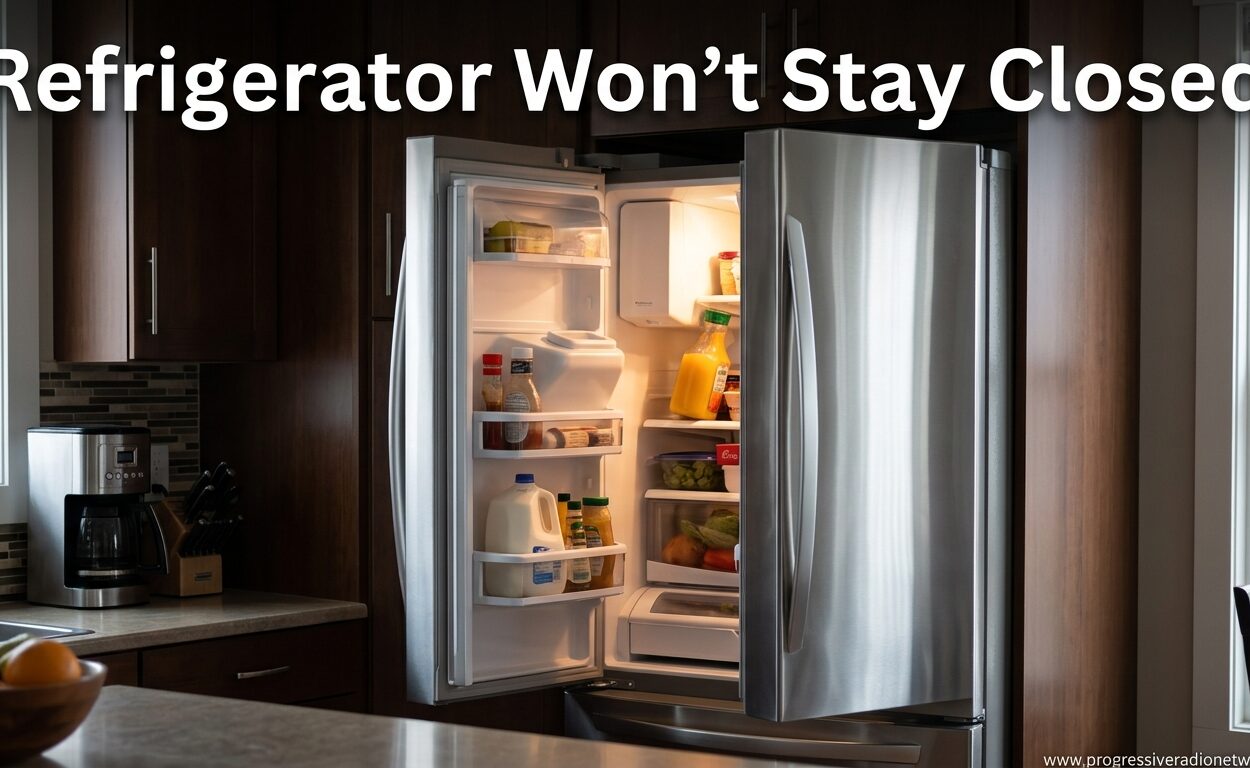
There’s nothing more frustrating than walking into the kitchen and finding your refrigerator door slightly open. Your food is warming up, the compressor is working overtime, and your energy bill is climbing with every hour the seal stays broken. A refrigerator door won’t stay closed is one of the most common appliance problems homeowners face, and it can happen to any fridge regardless of age or brand.
I’ve seen this issue countless times over the years. The good news is that most refrigerator door problems have simple DIY fixes you can handle in under an hour. In some cases, the solution costs absolutely nothing. Let me walk you through exactly what’s happening and how to fix it.
Why Your Refrigerator Door Won’t Stay Closed
Understanding the root cause helps you choose the right fix. Most refrigerator door issues stem from one of four common problems.
Worn Door Gasket/Seal
The rubber gasket running around your door frame creates an airtight seal using magnetic strips embedded inside. Over time, this gasket becomes brittle, cracked, or compressed. The magnetic strip can also lose its strength after years of use. When this happens, the door won’t grip the frame properly and will pop open.
This is the most common cause, especially in refrigerators over 5 years old. The good news is that gasket issues are often fixable with a simple cleaning, and replacement gaskets cost under $50 for most models.
Refrigerator Not Level
Your refrigerator relies on gravity to help the door close and stay sealed. If the fridge tilts forward even slightly, the door naturally swings open. This often happens after moving the appliance or if the flooring has settled unevenly over time.
Most refrigerators have adjustable leveling legs at the front corners. When these aren’t properly set, the entire unit sits at an angle that works against the door closing mechanism.
Loose or Damaged Hinges
Door hinges take a lot of stress over years of opening and closing. The screws can work loose, causing the door to sag or sit crooked. Bent hinge pins or worn hinge bushings also prevent the door from aligning properly with the frame.
Hinge problems are especially common in households with children who might hang on the door or in refrigerators that see heavy daily use. The misalignment prevents the magnetic seal from engaging fully.
Faulty Door Cam Mechanism
Many refrigerators have a spring-loaded door cam mechanism that helps pull the door closed in the final inches of travel. When this cam wears out or breaks, the door lacks that final assist to engage the seal properly.
This is a less obvious cause that many DIYers overlook. The door might seem to close but doesn’t get that final pull to create a tight seal. The cam is typically located in the bottom hinge assembly.
The Dollar Bill Test: Check Your Door Seal in 30 Seconds
Before you start any repairs, you need to confirm whether your door seal is the problem. The dollar bill test is the quickest way to diagnose gasket issues, and it takes less than a minute.
Here’s how to do it:
Step 1: Close the refrigerator door on a dollar bill (or any piece of paper).
Step 2: Pull the dollar bill out gently.
Step 3: If you feel resistance, the seal is working in that spot. If it slides out easily, the seal has lost its grip.
Step 4: Repeat this test around the entire door frame, testing every 6-8 inches.
What the results mean:
- Strong resistance everywhere: Your seal is fine, look for other causes like leveling or hinges.
- Weak resistance in one spot: You have a localized gasket issue that cleaning might fix.
- Weak resistance all around: The gasket likely needs replacement.
I recommend doing this test quarterly as part of routine refrigerator maintenance. Catching seal problems early can save you hundreds in energy costs and prevent food spoilage.
Fix #1: Clean the Door Gasket (Most Common Fix)
A dirty gasket is the #1 cause of refrigerator door problems. Food spills, grease, and grime build up on the rubber surface and create a barrier that prevents the magnetic seal from gripping the frame properly.
What You’ll Need
- Warm water – Not hot, as heat can damage the rubber
- Mild dish soap – Avoid harsh chemicals or bleach
- Soft cloth or sponge – Nothing abrasive that could scratch the rubber
- Old toothbrush – For getting into crevices
- Dry towel – For thorough drying
Step-by-Step Cleaning Process
Step 1: Mix warm water with a few drops of dish soap in a bowl. You want a gentle cleaning solution – nothing that could degrade the rubber.
Step 2: Dip your cloth in the solution and wring it out thoroughly. You want it damp, not dripping.
Step 3: Wipe down the entire gasket surface on both the door and the frame. Pay special attention to the folds and crevices where debris tends to hide.
Step 4: Use the toothbrush for stubborn grime in the crevices. Gently scrub in a circular motion.
Step 5: Rinse your cloth with clean water and wipe away any soap residue.
Step 6: Dry the gasket completely with a towel. Moisture on the seal can cause mold growth and further sealing issues.
Step 7: Repeat the dollar bill test to see if the seal has improved.
This simple fix resolves the issue in about 60% of cases I’ve seen. It costs nothing and takes just 10-15 minutes. Make this part of your monthly kitchen cleaning routine to prevent problems before they start.
Warning: Don’t Use Harsh Chemicals
Avoid bleach, ammonia, vinegar, or abrasive cleaners on your gasket. These can break down the rubber and cause it to deteriorate faster. Stick to mild dish soap and warm water. Your gasket will thank you.
Fix #2: Level Your Refrigerator
An unlevel refrigerator is a sneaky cause of door problems that many people overlook. When the fridge tilts forward, gravity works against the door closure. The door might seem to close but then slowly pop open due to the angle.
How to Check if Your Fridge Is Level
You’ll need a simple bubble level for this test. Place the level on top of the refrigerator, first from front to back, then from side to side.
What to look for:
- The bubble should be centered in both directions.
- If it leans forward, the front of the fridge is too low.
- If it leans to one side, that side needs adjustment.
Also check if the door swings closed or open on its own when partially opened. If it swings open, you have a leveling problem.
Adjusting the Leveling Legs
Most refrigerators have adjustable front legs. Here’s how to adjust them:
Step 1: Pull the refrigerator away from the wall gently. You only need a few inches of access.
Step 2: Locate the leveling legs at the front bottom corners. These may look like small feet or threaded bolts.
Step 3: Use a wrench or pliers to turn the legs clockwise to raise that corner, counterclockwise to lower it.
Step 4: Make small adjustments and check with your level frequently.
Step 5: The refrigerator should have a slight backward tilt (about 1/4 inch higher at the front) to help the door close naturally.
Step 6: Push the refrigerator back into place and test the door.
If your refrigerator has rear leveling wheels instead of front legs, you may need a helper to tilt the unit while you adjust the wheels. Always disconnect the power before working on any appliance components.
Front-to-Back and Side-to-Side Leveling
Both directions matter. Side-to-side level ensures the door doesn’t swing open due to tilt. Front-to-back level with a slight forward raise helps gravity pull the door shut. This natural closure is exactly what you want.
After leveling, test the door by giving it a gentle push. It should swing closed on its own and stay shut without popping back open.
Fix #3: Inspect and Tighten Door Hinges
Loose hinges are a common cause of door problems, especially on older refrigerators or those in busy households. Over years of opening and closing, hinge screws can work loose and cause the door to sag.
Check for Loose Hinge Screws
Examine all the hinges on your refrigerator door. You’ll typically find a top hinge and a bottom hinge. Look for any visible gaps between the hinge and the door or frame.
Use a screwdriver to test each screw. If any turn easily, they’ve worked loose and need tightening. This is especially common on the top hinge, which bears more stress.
Inspect Hinge Pins for Wear
The hinge pin is the metal rod that allows the door to swing. Over time, these can wear down or develop grooves that prevent smooth operation.
Signs of hinge pin wear include:
- Squeaking or grinding when opening/closing
- Door feels loose or wobbly
- Visible wear or grooves on the pin surface
If you notice these signs, the hinge pin or the entire hinge assembly may need replacement. Most hinge pins cost under $20 and are straightforward to replace.
When to Replace Hinges
Tightening screws often solves the problem. But if the hinge itself is bent, cracked, or severely worn, replacement is necessary. Replacement hinges typically cost $30-60 and are available through appliance parts suppliers or the manufacturer.
When replacing hinges, always replace both the top and bottom hinge together. Mismatched hinges can cause alignment issues and make the door close unevenly.
Fix #4: Check the Door Cam Mechanism
The door cam is a spring-loaded component that provides that final pull to close the door completely. It’s located in the hinge assembly and engages when the door is within a few inches of being closed.
What Is a Door Cam
Think of the door cam as a gentle assistant that gives your door a final push into the closed position. As you close the door, a spring-loaded ramp or wedge engages and helps pull the door that last inch.
When the cam wears out, the door might seem to close but lacks that final assist to fully engage the magnetic seal. This is especially common on refrigerators with heavy doors or those with through-the-door ice and water dispensers.
Signs of Door Cam Wear
How can you tell if your door cam is the problem?
- Door closes but doesn’t get that final pull to seal
- You have to push harder than usual to get the door fully closed
- Door pops open shortly after closing
- Visible wear or damage to the cam when you inspect the hinge area
To inspect the door cam, you typically need to remove the hinge cover. Look for cracks, wear, or missing pieces in the plastic cam mechanism.
Door Cam Replacement Steps
Replacing a door cam is a moderately difficult DIY project. You’ll need basic tools and some patience.
Step 1: Unplug the refrigerator for safety.
Step 2: Remove the hinge cover. This might snap off or require removing screws.
Step 3: Support the door and remove the hinge screws.
Step 4: Carefully lift the door off the hinge and set it aside.
Step 5: Remove the old cam from the hinge assembly. It typically pulls off or is held by a small clip.
Step 6: Install the new cam, ensuring it’s properly seated.
Step 7: Reassemble in reverse order and test the door operation.
Door cam replacements typically cost $15-30 and can be ordered based on your refrigerator model number. If this repair seems beyond your comfort level, it’s a reasonable job for a professional technician.
Fix #5: Remove Heavy Items from Door Storage
Sometimes the problem is simple physics. If you store heavy items like large juice containers, gallons of milk, or wine bottles in the door shelves, the weight can cause the door to sag.
This sagging prevents the seal from engaging properly. The magnetic strip might not make full contact with the frame, allowing the door to pop open.
The fix is straightforward: redistribute heavy items to the main refrigerator shelves. The door shelves are designed for lighter items like condiments, beverages, and small containers.
If you must store some heavier items in the door, place them on the lower shelves rather than the upper ones. This reduces the leverage that causes sagging.
Fix #6: Check for Obstructions and Ice Buildup
Sometimes the simplest explanation is the right one. Before diving into complex repairs, check for obvious obstructions.
Common obstructions include:
- Items sticking out of shelves or bins that block the door
- Misaligned drawers or bins that prevent full closure
- Ice buildup in the freezer compartment along the door seal
- Frozen food packages positioned too close to the door
Ice buildup is especially common in freezer compartments and can prevent the door from sealing properly. If you notice frost or ice along the door gasket area, defrost the freezer and clean the seal thoroughly.
Also check that the door gasket isn’t folded or pinched. Sometimes the seal can get twisted during cleaning or after a heavy door load, preventing it from lying flat against the frame.
Fix #7: Test the Door Light Switch
This is a hidden cause that many people never consider. Your refrigerator has a light switch that turns off the interior light when the door closes. If this switch malfunctions or gets stuck, the door might not close properly.
Here’s how to test it:
Step 1: Locate the door switch. It’s typically a small button or plunger along the door frame, often near the top.
Step 2: Press the switch manually with your finger. The light should turn off.
Step 3: If the light doesn’t turn off, or if the switch feels stuck or doesn’t spring back, the switch may be faulty.
Step 4: Check for any debris or food residue around the switch that might prevent proper operation.
A faulty light switch can prevent the door from closing fully because the switch housing physically blocks the door. In some cases, the switch can also cause electrical issues that affect the door’s operation.
Door light switches are inexpensive (typically under $10) and easy to replace. They simply snap into place or are held by one or two screws. However, always unplug the refrigerator before working on any electrical components.
When to Replace the Door Gasket
Cleaning helps, but sometimes the gasket is simply too far gone. Knowing when to replace saves you time and frustration.
Signs Your Gasket Needs Replacement
Look for these clear indicators:
- Visible cracks, tears, or gaps in the rubber
- Sections of the gasket that feel hard or brittle
- The gasket has lost its flexibility and doesn’t spring back when compressed
- Physical deformation or warping
- The dollar bill test shows weak resistance all around
Age is also a factor. Most gaskets last 8-12 years. If your refrigerator is older and you’ve never replaced the seal, it’s likely time.
DIY Gasket Replacement Steps
Replacing a door gasket is a manageable DIY project that takes about 30 minutes.
Step 1: Order the correct gasket for your refrigerator model. The part number is typically found on a label inside the fridge or on the back.
Step 2: Remove the old gasket. Most are held in place by a retaining plate or screws around the door perimeter.
Step 3: Clean the gasket channel thoroughly. Remove any residue, mold, or debris.
Step 4: Soak the new gasket in warm water for 10 minutes. This makes it more pliable and easier to install.
Step 5: Starting at the top, press the new gasket into the channel. Work your way around the door, ensuring it sits flat and even.
Step 6: Secure the retaining plate or screws if your model uses them.
Step 7: Let the gasket set for at least an hour before closing the door. This allows it to conform to the door shape.
Step 8: Perform the dollar bill test to verify a proper seal.
Cost Considerations
Replacement gaskets typically cost $30-60, depending on your refrigerator model. This is a worthwhile investment considering the energy savings and food preservation benefits. A faulty seal can increase your energy bill by 10-15% and significantly shorten the lifespan of your food.
If you’re not comfortable replacing the gasket yourself, a professional technician can do it in about an hour. Labor costs typically run $75-150, making the total repair around $100-210 in most cases.
Preventive Maintenance for Your Refrigerator Door
Preventing problems before they start saves time, money, and frustration. Here’s a simple maintenance schedule I recommend following:
Weekly: Wipe down the door gasket with a damp cloth to prevent buildup of food residue and spills.
Monthly: Perform the dollar bill test to catch seal issues early. Check that the door closes smoothly and stays shut.
Quarterly: Deep clean the gasket with warm soapy water. Inspect hinges and tighten any loose screws. Check that the refrigerator remains level.
Annually: Vacuum the condenser coils (located on the back or bottom of the fridge). This reduces strain on the compressor and helps the entire unit run more efficiently.
This simple maintenance routine can extend the life of your refrigerator by years and prevent most door-related problems before they start.
Energy Cost Impact of a Door That Won’t Close
A refrigerator door that won’t stay closed is more than just an annoyance – it’s costing you money every single day.
When the seal fails, cold air escapes and warm air enters. Your refrigerator has to work constantly to maintain temperature. This increased runtime can add 10-15% to your monthly energy bill. For the average household, that’s $5-10 per month or $60-120 per year literally going out the door.
The compressor also runs more frequently, which can shorten its lifespan. A new refrigerator costs $800-2500, so protecting your existing unit makes financial sense.
Food spoilage is another hidden cost. A faulty seal causes temperature fluctuations that can cause food to spoil faster. The average household throws away $1500 worth of food annually – a bad seal makes this problem significantly worse.
Fixing a refrigerator door won’t stay closed issue typically costs $0-50 if you handle it yourself, or $100-250 if you hire a professional. This minor repair pays for itself in energy savings within just a few months.
Frequently Asked Questions
How to fix a fridge that won’t stay shut?
Start with the dollar bill test to check your door seal. Clean the gasket with warm soapy water if dirty. Check that the refrigerator is level and adjust the front legs if needed. Tighten any loose hinge screws and remove heavy items from door shelves. If these don’t work, the gasket or door cam may need replacement.
Why does the refrigerator door keep popping open?
The most common cause is a worn or dirty door gasket that can’t grip the frame properly. Other causes include an unlevel refrigerator that tilts forward, loose or damaged hinges, a faulty door cam mechanism, or heavy items on the door shelves causing sagging. Ice buildup in the freezer or a malfunctioning door light switch can also be culprits.
Why has my fridge door lost suction?
Refrigerator doors use magnetic strips in the rubber gasket to create a seal, not actual suction. Loss of magnetic grip happens due to gasket wear from age, debris buildup preventing contact, or the magnetic strip weakening over time. Cleaning the gasket often restores the seal. If cleaning doesn’t help, the gasket likely needs replacement.
How do you remagnetize a refrigerator door seal?
You cannot actually remagnetize a refrigerator door seal. Once the magnetic strip inside the gasket loses its magnetism, the gasket must be replaced. However, what seems like lost magnetism is often just dirt or debris preventing contact. Clean the gasket thoroughly with warm soapy water and test with the dollar bill test before deciding to replace.
Conclusion
A refrigerator door won’t stay closed is a frustrating problem, but it’s almost always fixable without calling a professional. Start with the simple solutions: clean the gasket, check the level, tighten hinge screws, and remove heavy items from the door. These basic fixes resolve most cases and cost nothing but a few minutes of your time.
If those don’t work, move on to checking the door cam mechanism, looking for obstructions, and testing the door light switch. When all else fails, replacing the door gasket is a straightforward DIY repair that typically costs under $60 and takes less than an hour.
Remember that a properly closing refrigerator door saves you money on energy bills, prevents food spoilage, and extends the life of your appliance. If you’ve tried all these fixes and the problem persists, it may be time to consult a professional technician who can diagnose more complex issues with the door closing system or refrigerator alignment.



Leave a Comment