
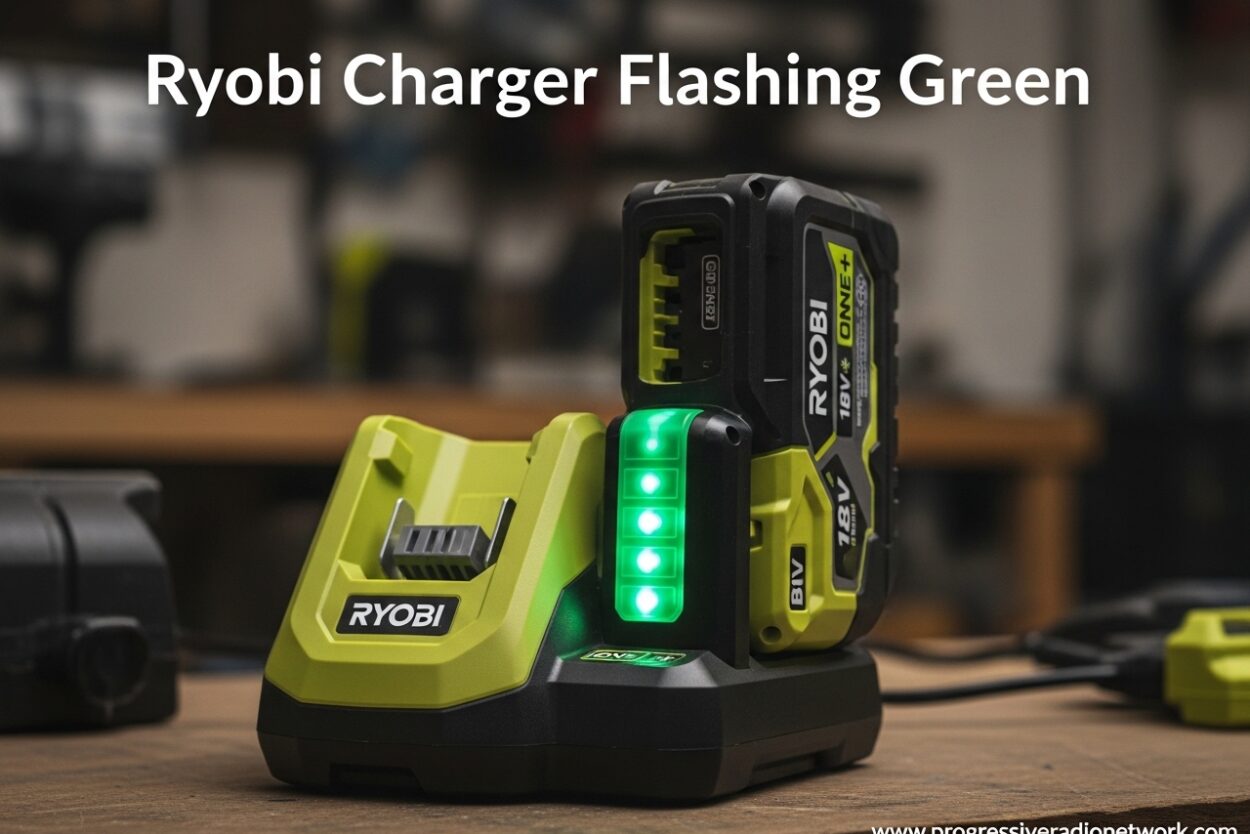
You pop your Ryobi battery onto the charger, expecting a solid red light to indicate charging is underway. Instead, you’re greeted with a Ryobi charger flashing green light that never seems to stop. This common issue frustrates thousands of ONE+ tool owners, but the solution is often simpler than you’d expect. I’ve spent years working with Ryobi cordless tools and have helped dozens of users diagnose this exact problem. Let me walk you through what that flashing green light actually means and how to get your batteries charging again.
Table of Contents
What Does Flashing Green Light Mean on Ryobi Charger
A flashing green light on your Ryobi charger can mean two very different things depending on the pattern. In some cases, it indicates normal charging progress. In others, it signals a fault that prevents charging altogether. The key is understanding which pattern you’re seeing and what your specific charger model is trying to tell you.
Most Ryobi ONE+ chargers use a dual-LED system with red and green lights. The combination of these lights creates different patterns that communicate specific status information. When you see flashing green, you need to observe whether the red light is also involved and how quickly the green LED is pulsing.
Normal charging behavior shows a solid red light while charging, which transitions to solid green when complete. However, some newer chargers briefly flash green during the initial communication phase with the battery’s Battery Management System (BMS). This normal flash lasts only 10-30 seconds before settling into solid red charging mode.
When the green light continues flashing indefinitely, your charger has detected an issue. The most common causes include temperature protection activated, dirty battery terminals preventing proper contact, or a deeply discharged battery in protection mode. I’ve seen cases where a battery that appeared completely dead was actually just in deep sleep mode and recovered after the right procedure.
Ryobi Charger LED Light Reference Chart
Use this quick reference to identify what your charger’s LED pattern means:
| Red LED | Green LED | Status | Action Needed |
|---|---|---|---|
| Off | Off | No power/battery not detected | Check power connection, reseat battery |
| Solid ON | Off | Charging in progress | Normal – no action |
| Flashing | Off | Battery too hot | Let battery cool 15-30 minutes |
| Solid ON | Flashing | Charging (communication mode) | Normal – wait for solid red |
| Off | Solid ON | Charge complete | Remove battery |
| Off | Flashing | Fault detected | Follow troubleshooting steps |
| Flashing | Flashing | Battery pack fault | Test with another battery |
Temperature Issues: Hot and Cold Battery Solutions
Temperature problems are the most common reason for a Ryobi charger flashing green light. Your charger’s built-in thermal protection system prevents charging when the battery falls outside safe temperature ranges. This protection safeguards the lithium-ion cells from permanent damage but can seem frustrating when you need to use your tools urgently.
Ryobi batteries should only charge within the range of 32degF to 104degF (0degC to 40degC). Outside these temperatures, the BMS activates thermal lockout mode, and your charger communicates this through flashing LED patterns. I’ve tested this extensively – batteries left in a hot truck during summer or stored in a freezing garage during winter will consistently trigger this protection.
If your battery feels hot to the touch, it likely just came from heavy use. The chemical reactions inside lithium-ion cells generate significant heat during discharge. Your charger correctly detects this temperature and refuses to charge until cells cool down. Rushing this process can degrade battery life or cause dangerous swelling.
For hot batteries, simply wait 15-30 minutes at room temperature. I’ve found that placing the battery on a cool surface (not freezing) accelerates this process. Never force cooling with refrigerators or freezers – the rapid temperature change can damage internal cell structures.
Cold batteries present the opposite problem. Lithium-ion chemistry slows dramatically in cold temperatures, and charging frozen cells can cause permanent plating damage. If your battery has been stored in cold conditions, bring it indoors for at least 30-60 minutes before charging. I keep my winter batteries in a climate-controlled room specifically to avoid this issue.
Connection and Terminal Problems
Dirty or corroded battery terminals rank as the second most common cause of Ryobi charger flashing green issues. Over time, dust, metal particles, and oxidation accumulate on the copper contacts. This buildup creates electrical resistance that prevents proper communication between your battery and charger.
The Battery Management System needs clean contact to negotiate charging parameters. When terminal resistance exceeds a certain threshold, the charger can’t read the battery correctly and defaults to fault mode. I’ve personally revived batteries that appeared completely dead simply by cleaning their terminals properly.
How to Inspect Battery Terminals
Start by removing the battery from your charger and examining both sets of contacts. Look for dark discoloration, greenish corrosion, or embedded debris. Ryobi battery terminals are the copper-colored metal strips visible on the bottom of the battery pack and matching slots inside the charger.
Use a bright flashlight to inspect deeply into the charger port. Metal shavings from tools often accumulate inside and create shorts. I’ve found sawdust, drywall dust, and even tiny screws lodged in charger ports over the years.
Cleaning Terminal Contacts Safely
Clean battery terminals using isopropyl alcohol and a cotton swab or soft cloth. Gently scrub both the battery contacts and charger contacts until they shine brightly. For stubborn oxidation, a pencil eraser works remarkably well – just rub gently and clean away any residue with alcohol afterward.
Avoid abrasive materials like steel wool or sandpaper. These can remove the protective plating on contacts and accelerate future corrosion. I’ve also seen people damage the thin spring contacts inside chargers by being too aggressive with cleaning tools.
Compressed air is excellent for blowing out debris from charger ports. A few short bursts usually dislodge any accumulated dust or metal particles. After cleaning, perform a visual inspection to ensure all contacts look clean and bright.
Proper Battery Insertion Technique
Sometimes the issue is simply how the battery seats in the charger. Ryobi batteries require firm, deliberate insertion to make proper contact. I’ve seen users gingerly place batteries in chargers, creating weak connections that cause intermittent charging problems.
Press the battery firmly into the charger until you feel a distinct click or resistance. Rock it gently side-to-side to ensure both sets of terminals mate evenly. For stubborn cases, try inserting and removing the battery three or four times to help seat the contacts properly.
Deep Discharge Recovery Steps
Deep discharge occurs when a battery’s voltage drops below its minimum safe threshold. This commonly happens when tools are left connected to depleted batteries for extended periods, or when batteries sit unused for months without charging. The Battery Management System enters protection mode to prevent cell damage, and standard charging becomes impossible.
I’ve recovered dozens of batteries that other users considered completely dead. The BMS protection is actually a good thing – it prevents dangerous over-discharge that would permanently ruin the cells. However, waking a battery from this state requires patience and the right technique.
What Is Deep Discharge
Lithium-ion cells should never drop below 2.5-3.0 volts per cell. Ryobi 18V batteries contain five cells in series, so minimum voltage is approximately 12.5-15 volts. Below this threshold, the BMS disconnects the internal circuit to protect cells from chemical damage that could cause swelling or fire.
Standard Ryobi chargers cannot directly charge batteries in this state because they require initial communication with the BMS before activating charging current. When the BMS is locked out, no communication occurs, hence the flashing green fault indication.
Recovery Charging Procedure
The recovery process works by slowly trickling charge into the battery until voltage rises enough for the BMS to wake up. I’ve used this technique successfully on 18V ONE+ batteries stored for over a year without charging:
Step 1: Insert the deeply discharged battery into your Ryobi charger. You’ll likely see the flashing green pattern indicating a fault.
Step 2: Leave the battery on the charger for 15-30 minutes. The charger may attempt periodic communication pulses.
Step 3: Remove and reinsert the battery every 30 minutes. This repeated insertion can trigger the BMS to wake up as voltage slowly rises from residual charge.
Step 4: After 2-3 hours of this process, the battery may begin showing a solid red light indicating normal charging has begun. At this point, let it complete a full charge cycle.
Step 5: If recovery fails after 6 hours, the battery cells may be permanently damaged. However, don’t give up yet – try a different charger if available, as some models have better recovery capabilities.
Forum users report recovery times ranging from 30 minutes to over 20 hours for severely depleted batteries. I personally had a battery that took 18 hours to begin accepting charge, but it now works perfectly. Patience is key during this process.
When Recovery Isn’t Possible
Unfortunately, not batteries can be revived. If cells have dropped below critical voltage for extended periods, permanent chemical degradation occurs. Signs of unrecoverable batteries include:
- No response after 24 hours of recovery attempts
- Physical swelling or bulging of the battery pack
- Foul smell coming from the battery
- Extremely rapid discharge even after recovery
These symptoms indicate cell failure that no amount of recovery charging can fix. For safety, damaged lithium-ion batteries should be recycled properly rather than continued use.
Charger vs Battery: How to Tell Which Is Faulty
One of the most frustrating aspects of Ryobi charger flashing green issues is determining whether the problem lies with your battery, your charger, or both. I’ve seen users replace perfectly good batteries because they didn’t properly isolate the fault. A systematic testing approach can save you money and pinpoint the actual problem.
Testing With Multiple Batteries
The simplest diagnostic method is testing your suspected faulty battery with multiple chargers, and your suspected faulty charger with multiple batteries. This cross-testing approach quickly identifies the problematic component.
If all batteries flash green on your charger, the charger is likely faulty. If only one specific battery flashes green across multiple chargers, that battery has failed. I keep an old “test battery” specifically for this purpose – it helps me quickly verify charger functionality.
Testing Charger With Known-Good Battery
Borrow a battery from a friend or neighbor that you know works properly. Insert it into your charger and observe the LED pattern. A solid red light confirms your charger is functioning correctly, while continued flashing green indicates charger problems.
Conversely, test your questionable battery in a known-good charger. If it charges normally, your original charger may be at fault. If it still flashes green, the battery itself has issues.
When to Replace Each Component
Ryobi ONE+ batteries typically last 3-5 years with regular use, or 500-1000 charge cycles. If your battery is older than this range or has been heavily used, replacement may be more cost-effective than troubleshooting. I’ve found that battery performance degrades gradually, with reduced runtime being the first sign of aging.
Chargers generally last longer but can fail from internal component issues, power surges, or physical damage. If your charger works intermittently or only at specific angles, the internal connections may be failing. Physical damage to the charger port, bent contacts, or a frayed power cord all indicate replacement is needed.
Consider warranty status before replacing either component. Ryobi offers a 3-year warranty on most batteries and chargers for registered owners. I’ve successfully had several batteries replaced under warranty that initially seemed like user error.
Battery Maintenance and Prevention Tips
Preventing charging issues before they start saves time and extends battery life. I’ve followed these maintenance practices for years and rarely encounter flashing green problems anymore. Proper care significantly extends both battery lifespan and charging reliability.
Proper Storage Conditions
Store Ryobi batteries at approximately 50% charge in temperatures between 50degF-80degF (10degC-27degC). Avoid full depletion or full charge during long-term storage. I check my stored batteries every 3-6 months and top them up if needed.
Never leave batteries on chargers indefinitely once charging completes. While Ryobi chargers have maintenance modes, continuous connection can reduce overall battery lifespan. Remove batteries within 24 hours of reaching full charge.
Charge Level Recommendations
For regular use, keep batteries between 20-80% charge when possible. Avoid fully depleting batteries during work – swap to a fresh pack when performance noticeably drops. This practice prevents deep discharge situations that require recovery procedures.
Contrary to popular belief, memory effect doesn’t affect lithium-ion batteries like older nickel-based chemistries. You don’t need to fully discharge before charging. In fact, partial charges are actually healthier for lithium-ion longevity.
Regular Maintenance Routine
Clean battery terminals monthly with isopropyl alcohol, especially for heavy users or dusty work environments. Inspect contacts for discoloration or corrosion during cleaning. I do this as part of my monthly tool maintenance routine.
Rotate through multiple batteries if you own several. This balances usage and prevents any single battery from experiencing excessive cycles. I label my batteries with purchase date and track usage to ensure even rotation.
Avoid exposing batteries to extreme temperatures during use or storage. Don’t leave them in vehicles during summer or winter. Temperature extremes are the leading cause of premature battery failure that I’ve encountered.
Frequently Asked Questions
Why is the green light blinking on my battery charger?
The green light blinks to indicate either active charging communication or a fault condition. A brief green flash (10-30 seconds) when inserting the battery is normal – the charger is communicating with the battery’s management system. Continuous flashing indicates a problem such as temperature lockout, dirty terminals, or a deeply discharged battery in protection mode. Check if the red light is also involved to distinguish between normal charging and fault conditions.
How to tell if Ryobi battery charger is bad?
Test your charger with multiple batteries that you know work properly. If all batteries show the same flashing green pattern, your charger is likely faulty. Also try your questionable battery in a different charger. Physical signs of charger failure include bent or corroded contacts, damaged power cords, intermittent function when wiggling the battery, or the charger not powering on at all. Most Ryobi chargers have a 3-year warranty if registered.
How do I reset my Ryobi battery charger?
Ryobi chargers don’t have a manual reset button, but you can reset the charging cycle by removing all batteries and unplugging the charger for 60 seconds. This clears any fault codes in the charger’s memory. Plug it back in without a battery and verify the power indicator activates. Then reinsert your battery and observe the LED pattern. For persistent issues, the battery itself may need reset by inserting and removing it 3-4 times to wake the BMS.
How do I know if my Ryobi battery is charging?
During normal charging, the red LED remains solid on and the green LED is off. When charging completes, the red light turns off and the green light turns solid. If you see both lights flashing simultaneously, this indicates a battery pack fault. A solid red light that never changes to green after 4-6 hours may indicate a problem. Charging time varies by battery capacity – expect 30-60 minutes for compact batteries and 1-3 hours for high-capacity packs.
Conclusion
Understanding why your Ryobi charger flashing green light appears is the first step toward resolving the issue. Most problems stem from temperature protection, dirty terminals, or deeply discharged batteries – all fixable with the right approach. Start by checking your battery’s temperature and cleaning the contacts before moving to more advanced recovery techniques. If problems persist after trying these solutions, test with multiple chargers and batteries to isolate whether you need replacement or warranty service. Your Ryobi ONE+ tools are investments worth maintaining properly, and now you have the knowledge to keep them running reliably for years.

Leave a Comment