
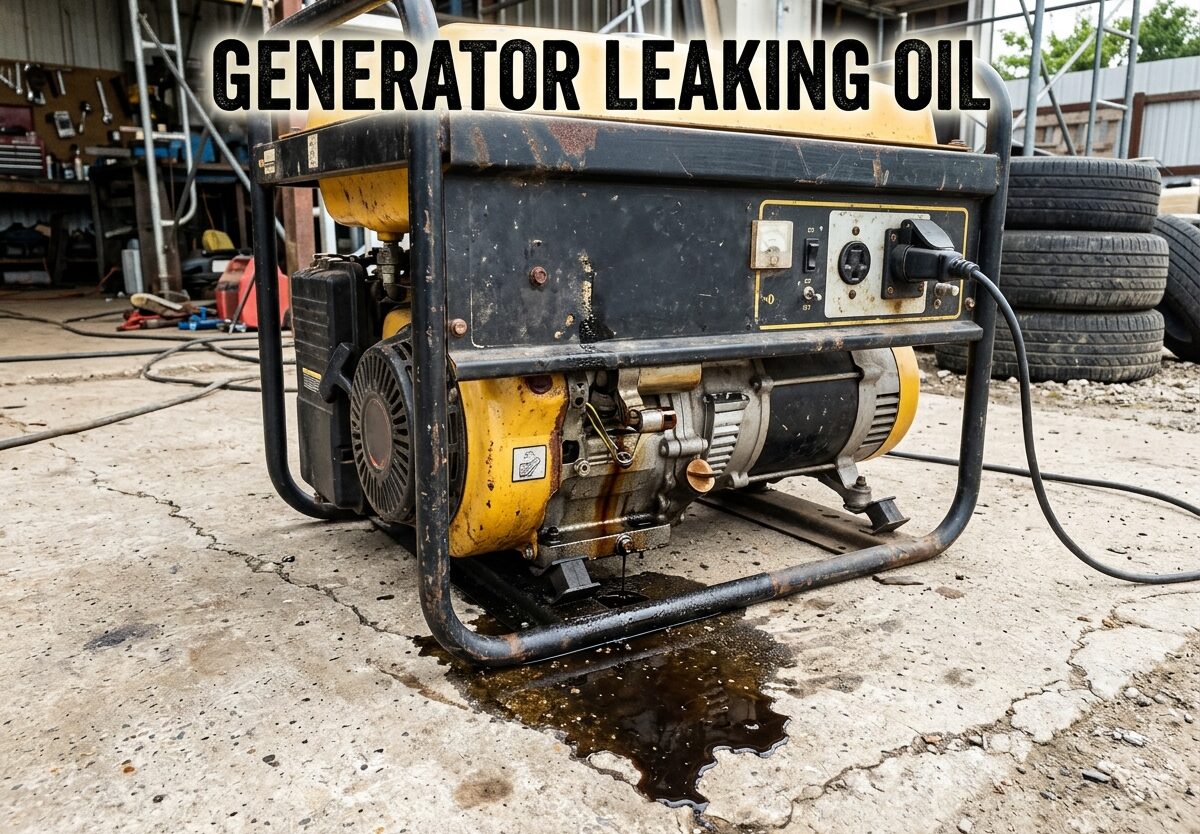
Discovering your generator leaking oil can be frustrating, especially when you need reliable backup power. I’ve dealt with this issue countless times over the years, and I’m here to help you understand what’s happening and how to fix it.
A generator oil leak occurs when engine oil escapes from the crankcase, seals, or gaskets. This might seem like a minor annoyance, but ignoring it can lead to serious engine damage, overheating, and complete generator failure when you need it most.
What makes generator oil leaks particularly tricky is that most portable generators hold only about 1 quart of oil. Even a small leak becomes noticeable quickly and can leave you stranded without power during an outage.
The good news is that most generator oil leaks have identifiable causes and straightforward fixes. In this guide, I’ll walk you through everything you need to know about Generator Leaking Oil problems, from diagnosis to repair and prevention.
Why Would a Generator Leak Oil
Understanding the root cause of your oil leak is the first step toward fixing it. Based on my experience working with various generator brands, here are the most common reasons why your generator might be leaking oil.
Overfilled oil level is by far the most common cause I encounter. Many owners accidentally add too much oil during changes, especially on smaller generators where the difference between full and overfull is just a few ounces. When oil exceeds the crankcase capacity, excess pressure forces it out through seals, gaskets, and the breather tube.
Worn or damaged gaskets represent another frequent culprit. The valve cover gasket and oil pan gasket degrade over time, especially if your generator sits unused for months. Heat cycles cause rubber gaskets to harden and crack, creating escape paths for oil.
Loose or damaged drain plug issues are surprisingly common. The oil drain plug uses a crush washer or O-ring that should be replaced during each oil change. If reused or improperly tightened, it can drip oil steadily during operation.
Crankshaft seal failure happens on older generators or those with high hours. The front and rear crankshaft seals keep oil inside the engine while the crankshaft spins. When these seals wear out, oil escapes directly onto the ground or generator frame.
Breather tube problems occur when the crankcase ventilation system becomes blocked or overwhelmed. If the breather tube clogs, crankcase pressure builds and forces oil out through any available opening. This often manifests as oil dripping from the breather tube itself.
Fuel entering the crankcase is a less obvious but serious cause. A leaking carburetor needle valve can allow gas to seep into the oil sump, thinning the oil and raising the level. This creates a dangerous situation where the overfilled, diluted oil leaks and provides inadequate lubrication.
How to Identify a Generator Oil Leak
Catching an oil leak early prevents extensive engine damage. I recommend inspecting your generator before each use and after any oil change. Here are the telltale signs that your generator has an oil leak.
Visual oil evidence is the most obvious indicator. Look for fresh oil puddles under the generator, wet spots on the engine casing, or oil drips on the frame. Oil typically appears amber or brown when fresh, darkening to black as it ages and collects combustion byproducts.
Oil smell and smoke often accompany leaks. If you notice a burning oil smell or see bluish smoke from the exhaust, oil is likely leaking onto hot engine components. This is particularly common with valve cover gasket leaks or breather tube issues.
Rapid oil level drops between uses indicate a leak even if you don’t see visible drips. Check your oil level before and after each extended run session. A generator that loses significant oil between uses definitely has a leak that needs attention.
Oil residue buildup accumulates gradually around leak points. Look for greasy, dark areas near the valve cover, oil drain plug, or crankshaft ends. This residue attracts dirt and debris, creating a grimy buildup that points directly to the leak source.
Low oil sensor alerts on modern generators shouldn’t be ignored. While sometimes triggered by actual low oil, frequent sensor activation might indicate a slow leak. Interestingly, the low oil sensor itself can develop leaks and may need resealing with RTV silicone or epoxy.
Where Are the Three Most Common Places for an Oil Leak
Pinpointing the exact location of your oil leak saves time and ensures you address the right problem. Based on my experience repairing generators, these three locations account for over 80% of all oil leaks.
The valve cover gasket area is the most common leak location on overhead valve engines. The valve cover sits at the top of the engine and seals the valve train with a rubber or cork gasket. Heat causes this gasket to deteriorate over time, developing cracks that allow oil to seep out. You’ll typically see oil running down the side of the engine block or pooling on top of the generator deck.
The oil drain plug and gasket rank second in frequency. Located at the bottom of the crankcase, the drain plug uses a sealing washer or O-ring that can fail if reused, damaged, or improperly torqued. This leak usually drips directly onto the ground and is most noticeable shortly after an oil change. A loose drain plug creates a steady drip, while a damaged sealing washer causes a slower but persistent leak.
The crankshaft seals (both front and rear) constitute the third common leak point. The front seal sits behind the recoil starter or flywheel, while the rear seal is near the generator head. When these seals fail, oil escapes directly from where the crankshaft exits the engine. Front seal leaks often spray oil onto the generator housing, while rear seal leaks typically drip onto the ground beneath the engine.
For stubborn leaks that aren’t immediately visible, I recommend using UV leak detection dye. Add a small amount to your oil, run the generator briefly, then use a UV light to pinpoint the exact leak location. This technique is especially helpful for small, slow leaks that are hard to trace visually.
How to Fix Generator Oil Leaks
Once you’ve identified the leak source, most repairs are straightforward DIY projects. I’ve completed these fixes countless times in my shop, and I’ll walk you through each repair step by step.
Fix 1: Drain Overfilled Oil to Correct Level
If your dipstick shows oil above the full mark, you’ve found your problem. Overfilling is the easiest fix but one that requires care to avoid making a mess.
Start by locating the oil drain plug beneath the crankcase. Place an appropriate container underneath to catch the oil. Loosen the drain plug carefully and allow excess oil to drain until the flow slows to a drip. Alternatively, use a fluid transfer pump to suction oil through the dipstick tube for a cleaner approach.
Check the dipstick frequently as you drain. Remember that most generators need to be level for accurate readings. Once the oil level reaches the full mark, reinstall and properly tighten the drain plug. Clean any spilled oil with absorbent materials before running the generator.
Fix 2: Replace Valve Cover Gasket
A worn valve cover gasket requires replacement but is an accessible repair for most DIYers. You’ll need a socket set, a new gasket, and a scraper or cleaning cloth.
First, disconnect the spark plug wire to prevent accidental starting. Remove the valve cover bolts, noting their locations as some may have different lengths. Lift off the valve cover and carefully remove the old gasket material from both mating surfaces.
Clean both surfaces thoroughly with a shop towel, ensuring no debris remains. Install the new gasket, checking that it seats properly in any grooves. Reinstall the valve cover and torque the bolts in a crisscross pattern to the manufacturer’s specifications. Reconnect the spark plug wire and check for leaks after running the generator briefly.
Fix 3: Tighten or Replace Drain Plug
For drain plug issues, the fix depends on what you find. A loose plug simply needs proper tightening, but a damaged sealing washer requires replacement.
Start by draining the oil completely. Inspect the drain plug threads for damage and replace the plug if necessary. Remove the old sealing washer or O-ring and install a new one. These are typically inexpensive but critical for a proper seal.
Reinstall the drain plug with the new washer and torque to the manufacturer’s specification. Avoid overtightening, which can strip the threads. Refill with the correct amount and viscosity of oil, typically 10W-30 for most generators. Check for leaks after running the engine briefly.
Fix 4: Replace Crankshaft Seals
Crankshaft seal replacement is more advanced and may require special tools. The front seal is usually accessible by removing the recoil starter or flywheel, while the rear seal often requires engine disassembly.
I recommend consulting your generator’s service manual for specific procedures. Generally, the process involves removing components to access the seal, carefully prying out the old seal without damaging the crankshaft, cleaning the sealing surface, and pressing in the new seal squarely.
For rear seal replacement on larger generators, I often recommend professional service unless you have significant small engine experience. The labor involved can exceed the cost of professional repair on some models.
Fix 5: Address Breather Tube Issues
If oil is leaking from the breather tube, first check that the tube isn’t clogged or kinked. Clean or replace the tube if necessary. Excessive breather tube leaking often indicates another issue causing high crankcase pressure.
Check for blowby from worn piston rings by watching for smoke from the breather tube while the engine runs. If blowby is excessive, the engine may need internal service. Also verify that your carburetor isn’t leaking fuel into the crankcase, which would thin the oil and raise the level.
Common Generator Brand Oil Leak Problems
Different generator brands have characteristic leak patterns based on their design. I’ve worked with most major brands, and here’s what I’ve observed.
Generac generators frequently develop oil leaks at the valve cover gasket, especially on units stored for extended periods. The gasket material hardens and cracks, causing oil to run down the engine block. Generac portable generators also occasionally leak from the low oil sensor switch itself, which requires resealing with appropriate gasket maker.
Honda generators generally have excellent sealing but aren’t immune to issues. Older EU and EU-i series models may develop crankshaft seal leaks at very high hour counts. Honda’s valve cover designs vary by model, with some using rubber gaskets that eventually need replacement. Overall, Honda’s build quality results in fewer leaks than many competitors.
Champion generators sometimes leak from the oil drain plug area, particularly if the sealing washer is reused during oil changes. Champion’s value-oriented models also may use gasket materials that don’t last as long as premium brands. Regular inspection and timely gasket replacement prevent most issues.
Predator generators from Harbor Freight have a dedicated following but known issues. The Predator 6500 and similar models commonly develop oil leaks from the crankcase cover gasket. Forum members frequently report success with replacing stock gaskets with higher-quality aftermarket versions. Like many budget generators, Predators benefit from proactive gasket replacement as preventative maintenance.
Is an Engine Oil Leak Expensive to Fix
The cost of fixing a generator oil leak varies widely depending on the cause and whether you tackle the repair yourself. Here’s what I typically see in my repair business.
DIY repair costs are quite reasonable for most leaks. A valve cover gasket typically costs $5-15, while an oil drain plug washer or O-ring is usually under $5. Even crankshaft seals are generally $10-30 each. If you have basic tools and mechanical aptitude, these repairs cost very little in parts.
Professional repair costs include labor, which adds up quickly. A simple valve cover gasket replacement might cost $75-150 at a small engine shop. Crankshaft seal replacement can run $150-300 or more depending on accessibility. For standby generators, which are more complex, repair costs can exceed $500 for extensive seal work.
The repair versus replace decision depends on your generator’s value. For a $300 portable generator needing $300 in professional repairs, replacement might make sense. However, for a $2,000 standby generator or high-end inverter model, investing $300 in repairs is typically worthwhile.
Consider also the generator’s age and overall condition. A newer unit with a simple leak is worth repairing. An older generator with multiple developing issues might not justify significant investment in repairs.
How to Prevent Generator Oil Leaks
Prevention is always easier than repair. I’ve maintained generators for over 15 years, and these practices dramatically reduce leak problems.
Proper oil filling technique prevents overfilling. Always check your dipstick with the generator on a level surface. Add oil gradually, checking frequently as you approach the full mark. It’s much easier to add more oil than to remove excess.
Regular oil changes using the correct viscosity (typically 10W-30 for most models) keep seals conditioned and prevent sludge buildup. I recommend changing oil at least annually, or more frequently under heavy use or dusty conditions. Always replace sealing washers during oil changes rather than reusing old ones.
Proper storage prevents seal drying and cracking. Store your generator in a climate-controlled area when possible. If long-term storage is unavoidable, run the generator periodically to circulate oil through the engine and keep seals lubricated. Consider using a fuel stabilizer and running the engine monthly during storage.
Correct torque specifications matter when reassembling after maintenance. Overtightened bolts can warp sealing surfaces, while undertightened bolts allow oil to escape. Use a torque wrench when possible and follow manufacturer specifications.
Regular inspections catch problems early. Check for oil residue, wet spots, or drips before each use. Addressing small leaks promptly prevents them from becoming major problems that leave you without power when you need it most.
Environmental Handling and Safety Tips
Oil spills require proper handling to protect the environment and prevent accidents. I always follow these practices when dealing with generator oil leaks.
Containment is essential during any repair work. Always place an appropriate container or absorbent pad under the generator when draining oil or working on leak repairs. This prevents soil contamination and makes cleanup much easier.
Cleanup materials should be oil-absorbent and disposed of properly. Kitty litter, commercial absorbents, or specific oil absorbent pads work well. Never wash oil into drains or onto the ground where it can contaminate water supplies.
Disposal of used oil and contaminated materials must follow local regulations. Most auto parts stores accept used oil for recycling. Absorbent materials saturated with oil may require special disposal depending on your area’s regulations.
Fire safety is critical when working with oil leaks. Oil dripping on hot engine components or exhaust systems can ignite. Never run a generator with known oil leaks that could spray or drip onto hot surfaces. Clean any oil spills completely before operating the generator.
Frequently Asked Questions
Why would a generator leak oil?
The most common causes include overfilled oil, worn valve cover or oil pan gaskets, loose drain plugs, failed crankshaft seals, or breather tube issues. Less commonly, fuel leaking into the crankcase can dilute oil and force it out through seals. Generators stored for long periods may develop dried seals that leak when returned to service.
Where are the three most common places for an oil leak?
The three most common leak locations are: 1) The valve cover gasket at the top of the engine, 2) The oil drain plug at the bottom of the crankcase, and 3) The crankshaft seals at either end of the crankshaft. These three areas account for over 80% of all generator oil leaks based on repair data.
Why is my engine losing oil but no leak?
If your oil level drops without visible leaks, you may be burning oil internally due to worn piston rings or valve guides. Another possibility is fuel leaking into the crankcase through a faulty carburetor needle valve, which raises the oil level and causes overflow. Check if the oil smells strongly of gasoline, which indicates this problem.
Is an engine oil leak expensive to fix?
DIY repairs typically cost $5-30 in parts for gaskets, seals, or drain plug washers. Professional repairs range from $75-150 for simple gasket replacement to $150-500+ for complex seal work or standby generator service. The repair cost should be weighed against the generator’s value and condition when deciding whether to fix or replace.
Can you run a generator with an oil leak?
Running a generator with an oil leak is not recommended. Even small leaks can worsen quickly, leading to catastrophic oil loss and engine failure. Oil dripping on hot components creates fire risks, and low oil levels can destroy your engine in minutes. Always address oil leaks before operating your generator.
Conclusion
Dealing with a generator leaking oil doesn’t have to be overwhelming. Most leaks stem from common causes like overfilling, worn gaskets, or loose drain plugs that you can fix yourself with basic tools and mechanical know-how.
The key is catching leaks early through regular inspection and addressing problems promptly before they escalate. Whether you own a Generac, Honda, Champion, or Predator generator, understanding these common leak patterns and solutions keeps your backup power reliable when you need it most.
Remember that preventive maintenance goes a long way. Proper oil filling techniques, regular oil changes, appropriate storage, and routine inspections prevent most Generator Leaking Oil issues before they start.
When in doubt about a repair’s complexity or cost, consult your generator’s service manual or a professional small engine mechanic. Your generator is an investment in reliable power, and proper maintenance ensures it’s ready to perform when the lights go out.




Leave a Comment