
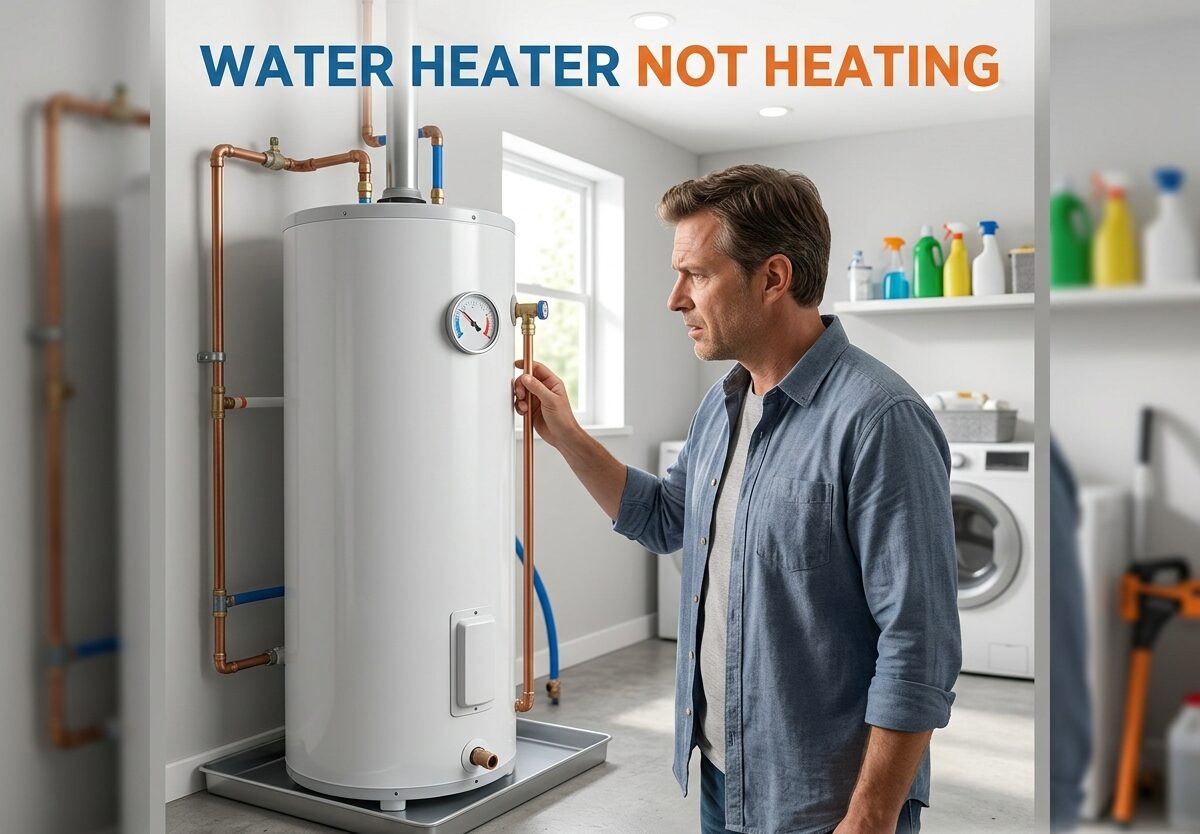
Few things disrupt a morning routine quite like stepping into the shower expecting warmth and being greeted by an icy blast of cold water. When your water heater is not heating, it is not just an inconvenience, it throws your entire household schedule into chaos. I have spent years helping homeowners troubleshoot these exact emergencies, and the truth is, most water heater heating problems have straightforward solutions you can diagnose yourself before picking up the phone.
This guide walks you through every major cause of a water heater not heating, from tripped circuit breakers to faulty heating elements. I will cover electric and gas models separately because the troubleshooting paths differ significantly. By the end, you will know exactly what is wrong with your unit and whether you can fix it yourself or need to call in a professional.
Quick Diagnostic Checklist: Electric vs Gas Water Heaters
Before diving into specific problems, here is the fastest way to identify what type of water heater you have and what to check first.
Electric Water Heater Quick Check
- Check your circuit breaker panel for a tripped breaker serving the water heater
- Look for the reset button on the upper thermostat (usually a red button)
- Verify the temperature setting is above the minimum
- Listen for any humming or clicking sounds from the tank
Gas Water Heater Quick Check
- Confirm the gas supply is turned on at the meter and the unit
- Check if the pilot light is lit through the viewing window
- Verify the gas control knob is set to the ON or PILOT position
- Look for any error lights or blinking codes on newer models
If you completed the quick check and found nothing obviously wrong, read on for detailed troubleshooting steps for your specific situation.
No Hot Water from Your Water Heater
When you turn on a faucet and get absolutely nothing but cold water, the issue falls into one of two categories: complete power failure to the unit or a failed heating component. Our team has encountered both scenarios hundreds of times, and the diagnosis process is always the same.
Electric Water Heater Not Heating
The most common reason an electric water heater stops producing hot water is a tripped circuit breaker. I recommend checking your electrical panel first, even if other outlets seem to work fine. Water heater circuits often share breakers with high-draw appliances, and the overload protection trips specifically for the water heater circuit.
If the breaker looks fine, the next suspect is the high-limit switch, also known as the reset button. This safety device trips when water temperatures exceed 180 degrees Fahrenheit, which can happen if the thermostat fails. Locate the reset button on the upper thermostat behind the access panel. Press it firmly to reset it. If it trips again immediately, you have a thermostat or heating element problem that needs further diagnosis.
Forum users frequently report that checking the breaker first saved them an expensive service call. One Reddit user described how their cat had bumped the gas valve to pilot position, which they initially mistook for a complete failure. Always check the simplest causes before assuming the worst.
Gas Water Heater Not Heating
Gas water heaters fail to heat for three main reasons: extinguished pilot light, interrupted gas supply, or a failed thermocouple. Start by checking whether the pilot light is lit. If you can see through the viewing window, look for the small blue flame. If you see nothing, the pilot has gone out.
When the pilot light will not stay lit, the thermocouple is usually the culprit. This small device senses whether the pilot flame is burning and sends a signal to keep the gas valve open. If the thermocouple detects no heat, it shuts off gas flow as a safety measure. The solution is either cleaning accumulated dust from the pilot assembly or replacing the thermocouple entirely, which costs between $20 and $50 for the part.
A less common but serious issue involves the gas control valve itself. These rarely fail, but when they do, you will notice the pilot light staying lit while the main burner never ignites. This requires professional replacement due to the complexity and safety implications of working with gas lines.
Sediment Buildup: The Silent Efficiency Killer
Even when your water heater technically works, sediment buildup can make it seem like the unit is not heating properly. Over time, minerals from your water supply settle at the bottom of the tank, creating a layer of sand and scale that reduces the heater’s efficiency.
The signs of sediment buildup include rumbling or popping sounds from the tank, takes longer to get hot water, and noticeably higher energy bills. I have seen tanks where the bottom third was completely filled with sediment, making the heating elements work twice as hard to warm the water.
Flushing the tank annually is the best prevention. Here is how our team recommends doing it: turn off the power or gas, connect a garden hose to the drain valve at the bottom of the tank, run the hose to a floor drain or outside, open the valve and let gravity pull the water out. Watch the water color as it drains, you want clear water before closing the valve. If you see rust-colored water that does not clear after several gallons, the tank may be corroded internally.
Roto-Rooter notes that sediment buildup is one of the most common water heater issues they encounter in homes with hard water. Their technicians report that tanks flushed yearly typically last twice as long as unmaintained units. This is one of the simplest maintenance tasks that delivers the biggest return on investment.
Thermostat and Heating Element Problems
When your water heater is not heating but has power, the thermostats or heating elements are the next things to investigate. Electric water heaters typically have two heating elements, an upper and a lower element, each controlled by its own thermostat.
Understanding Upper vs Lower Thermostats
The upper heating element does most of the initial heating work. It heats water in the top portion of the tank, and that warm water naturally rises to fill the rest of the tank. The lower element then maintains the temperature. When the upper element fails, you may get no hot water at all. When the lower element fails, you will get some hot water at first, but it will run out quickly and not recover.
Testing these components requires a multimeter, which costs around $15 to $30 at any hardware store. Turn off the circuit breaker to the water heater, remove the access panel and insulation to expose the thermostats and elements. Set your multimeter to continuity mode and touch the probes to the element terminals. A reading of zero or infinity means the element needs replacement.
Many homeowners feel intimidated by electrical testing, but the forum evidence is clear: checking for power at the breaker first would have identified most problems without touching the electrical components. Only test the heating elements and thermostats after confirming the circuit breaker is functioning and the reset button has been checked.
Common Heating Element Failure Signs
Watch for these symptoms that point to a failing heating element: hot water runs out much faster than normal, water is warm but not as hot as before, you hear clicking or sizzling sounds from the tank, or the circuit breaker trips when the water heater runs. Each of these points toward specific element or thermostat failures.
Replacement heating elements typically cost between $15 and $50 depending on your model. The labor to have a plumber install one usually runs $150 to $300, which means a failed element is often a worthwhile DIY repair for comfortable homeowners.
Gas Water Heater: Pilot Light and Burner Issues
Gas water heaters rely on a continuous flame to heat your water, and any interruption to that flame stops the heating process. Understanding how the pilot light and burner system works helps you diagnose issues faster.
Why Your Pilot Light Keeps Going Out
A pilot light that will not stay lit points to one of three problems: a dirty or faulty thermocouple, insufficient gas pressure, or a draft blowing out the flame. The thermocouple is the most common culprit, and cleaning it often resolves the issue.
To clean the pilot assembly, turn the gas valve to OFF and wait for everything to cool. Remove the pilot tube and thermocouple from the assembly, then blow through them to clear any dust or debris. Reassemble and try relighting. If the pilot still will not stay lit after cleaning, the thermocouple likely needs replacement.
Gas water heater professionals report that thermocouple replacement is one of the most frequent service calls they receive. The part itself is inexpensive, but the diagnostic and installation work drives the cost. Understanding this component helps you decide whether a DIY fix is worth attempting or if you should call a professional from the start.
Main Burner Ignition Problems
When the pilot light stays lit but the main burner never ignites, the issue lies in the gas valve, the igniter, or the thermal coupling between the pilot and the gas valve. Modern water heaters use electronic igniters rather than standing pilot lights, and these can fail like any electronic device.
Diagnosing burner ignition problems requires observing the sequence when the thermostat calls for heat. You should hear a click as the gas valve opens, see the burner ignite within a few seconds, and hear the characteristic sound of gas burning. If you hear the click but no ignition, check whether the gas valve is getting power or whether there is a thermal fuse that has opened.
For safety reasons, any work involving the gas control valve itself should be left to licensed plumbers or gas fitters. The risk of a gas leak outweighs any savings from a DIY repair in these situations.
Water Heater Leaking: When the Tank Fails
A leaking water heater requires immediate attention because even small leaks can cause significant water damage to your home. The location of the leak tells you whether you are dealing with a simple fix or a complete replacement.
Common Leak Points You Can Fix
The drain valve at the bottom of the tank sometimes develops leaks. This is often a simple fix of tightening the valve or replacing a worn rubber gasket. The temperature and pressure relief valve, commonly called the T&P valve, can drip if the water pressure inside the tank gets too high or if the valve itself has worn out. Replacing a T&P valve is straightforward and costs $15 to $30 for the part.
Connections at the top of the tank where the inlet and outlet pipes attach can develop leaks due to worn fittings or loose connections. These are usually simple fixes involving tightening or replacing the appropriate connector.
When a Leak Means Replacement
If you see water pooling directly beneath the tank itself rather than from connections, the tank has failed. Once a steel water heater tank begins to corrode from the inside, the process cannot be reversed. I have seen tanks that lasted 15 years and others that failed in under 8 years, depending on water quality and maintenance habits.
The age of your water heater matters significantly when deciding between repair and replacement. Most tank water heaters last 8 to 12 years. If your unit is approaching or past this age and developing leaks, replacement is usually more cost-effective than repair. The cost of repeated repairs quickly exceeds the price of a new unit.
When to Call a Professional Plumber
While many water heater issues are DIY-friendly, certain situations absolutely require professional help. Knowing the difference protects your safety and your wallet.
Safety Thresholds That Require a Pro
Call a licensed plumber immediately if you smell gas anywhere near your water heater, notice any visible damage to the gas line or gas valve, encounter electrical problems beyond a simple tripped breaker, or see signs of water damage to surrounding walls or floors. Gas leaks are not worth the risk of a fire or explosion.
Any work involving the main gas line, the gas control valve, or internal tank components should be left to professionals with proper licensing and insurance. The money you save by DIY repair is never worth the potential consequences of a botched job.
The 50% Rule for Repair vs Replace Decisions
Experienced plumbers often apply what they call the 50% rule: if a repair costs more than 50% of the price of a new water heater, replacement makes more sense. A new electric water heater costs $700 to $1,500 installed, while a gas model runs $900 to $2,000 installed. Use these ranges when deciding between repair and replacement.
Annual water heater maintenance costs under $50 if you do it yourself or around $150 to $300 if you hire a plumber. Over the life of your unit, this investment typically adds 3 to 5 years of service. The math is clear: regular maintenance costs far less than premature replacement.
Maintenance Tips to Prevent Future Issues
Preventive maintenance is the best way to avoid waking up to a cold shower. I recommend establishing a simple annual routine that takes less than an hour and costs almost nothing.
Monthly Tasks
- Check around the base of the water heater for any pooling water
- Listen for unusual sounds like rumbling, popping, or hissing
- Verify the temperature setting has not changed
Annual Tasks
- Flush the tank to remove sediment buildup (described earlier)
- Test the temperature and pressure relief valve by lifting the lever briefly
- Inspect the anode rod and replace if corroded (costs $20 to $50)
- Check the pilot light flame color (should be blue, not yellow)
Every Few Years
- Replace the T&P valve if it shows any signs of corrosion or dripping
- Inspect the burner assembly and clean if dusty or corroded
- Consider a professional inspection if your unit is over 8 years old
The homeowners who get the longest life from their water heaters are the ones who perform this simple maintenance. Forum discussions consistently show that tanks receiving annual flushes and anode rod checks routinely exceed 15 years of service, while neglected tanks often fail within 10 years.
Water quality in your area also plays a significant role. If you have hard water, you may need to flush the tank more frequently, perhaps every 6 months instead of annually. Consider a water softener if your water heater is located in an area with particularly hard water.
Frequently Asked Questions
How do you reset a hot water heater?
For electric water heaters, locate the reset button on the upper thermostat behind the access panel. Press it firmly until it clicks. If it trips immediately again, you have an underlying electrical problem. For gas water heaters, the reset process involves relighting the pilot light according to the manufacturer’s instructions.
What is the first thing to check when there is no hot water?
Check your circuit breaker panel for a tripped breaker serving the water heater. If the breaker has flipped to the OFF position, reset it to ON. For gas models, check whether the pilot light is lit and whether the gas supply is turned on.
Why is my Rheem water heater not getting hot?
Rheem water heaters experience the same issues as other brands. Check the circuit breaker first, then the reset button. For gas models, verify the pilot light and thermocouple. Rheem units older than 10 years may have sediment buildup reducing efficiency.
What is the most common part failure that causes no heat?
The heating element is the most common component to fail in electric water heaters. The lower heating element typically fails first because it works harder to reheat water after use. Thermocouple failure is the most common issue in gas models.
How long does it take for a water heater to heat up after resetting?
After resetting your water heater, the recovery time depends on tank size and the initial water temperature. A 40-gallon tank typically takes 60 to 90 minutes to fully heat after a reset. You should see gradual temperature increases within 20 to 30 minutes.
Why does my water heater only get lukewarm?
Lukewarm water usually indicates sediment buildup at the bottom of the tank, a failing lower heating element, or a thermostat set too low. Start by flushing the tank to remove sediment. If the problem persists, test the lower heating element with a multimeter.
Conclusion
A water heater not heating problem does not have to ruin your day. The majority of issues fall into a handful of categories, and most can be diagnosed in under 30 minutes with basic tools. Electric water heaters most commonly fail due to tripped breakers, tripped reset buttons, or failed heating elements. Gas water heaters typically have pilot light or thermocouple issues that are straightforward to address.
The key steps are: check power first, then the reset button or pilot light, test heating components if needed, and flush the tank annually to prevent sediment problems. When in doubt about gas or electrical work, call a professional. Your safety matters more than any repair cost.
Regular maintenance extends the life of your water heater significantly. Flush the tank once a year, test the pressure relief valve, and keep the area around the unit clean and dry. These simple habits will help you avoid cold showers for years to come.


Leave a Comment