
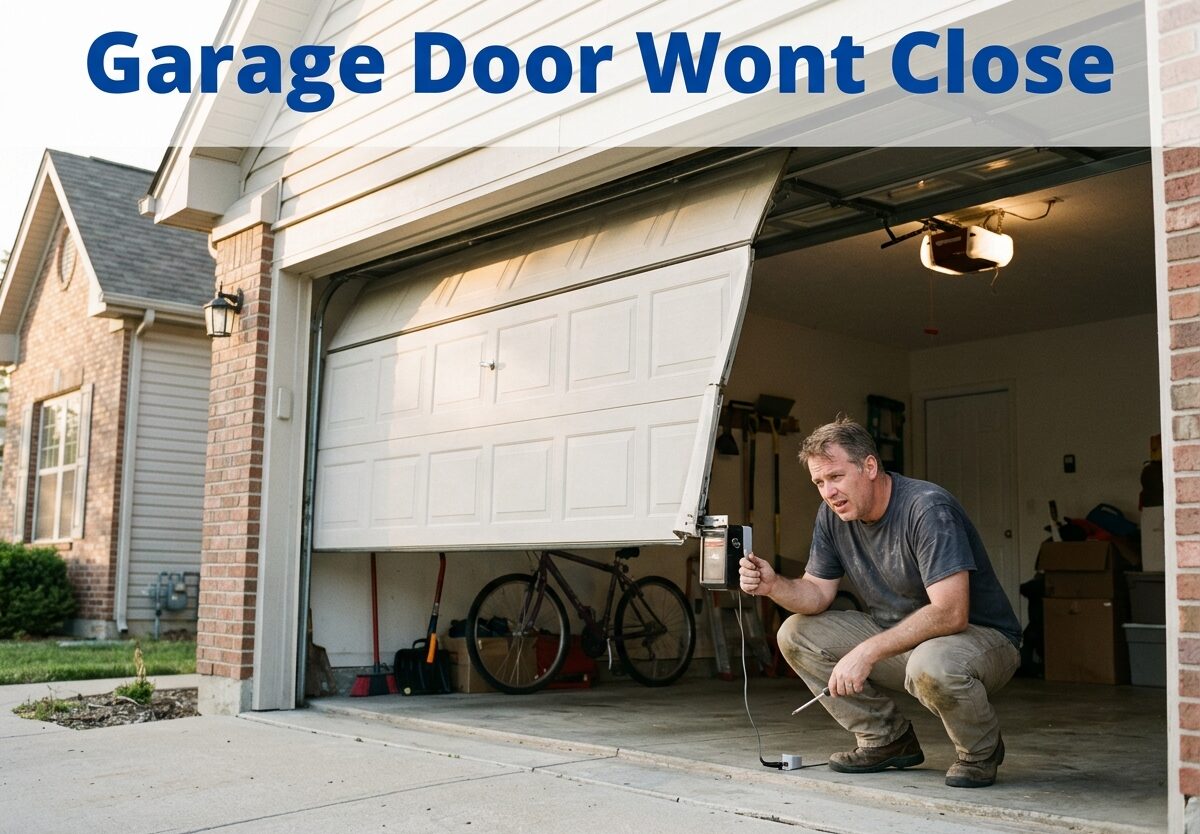
There’s nothing quite like the sinking feeling of pressing your garage door remote, watching the door start to descend, only to have it reverse direction and leave your garage wide open. I’ve been there, and it’s not just frustrating—it’s a security risk waiting to happen. Whether you’re rushing to work, trying to secure your home for the night, or keeping weather and pests out, a garage door that won’t close needs immediate attention.
The good news is that most garage door problems are fixable without calling a professional. After helping friends and family troubleshoot their garage door issues over the years, I’ve learned that about 80% of these problems stem from just a few common causes. Let me walk you through exactly what to check and how to fix it.
Why Your Garage Door Wont Close: Quick Diagnosis
Before diving into detailed troubleshooting, let’s do a quick 30-second diagnosis. This will help you identify the most likely culprit based on what’s happening with your specific door.
If your garage door starts closing then reverses back up, it’s almost certainly a safety sensor issue. These sensors are designed to prevent the door from closing on anything (or anyone) in their path. When they malfunction, they’ll falsely detect an obstruction and refuse to let the door close.
If the door doesn’t respond at all when you press the remote, but works fine with the wall button, you’re dealing with a remote-specific problem—likely dead batteries or a defective transmitter.
When the door won’t close from either the remote or wall button, but makes clicking or humming sounds, you’re likely looking at a trolley issue, travel limit problem, or something blocking the door’s path.
And if the motor doesn’t make any sound at all when you try to close it? Check your power source first—the outlet might be dead, or the GFCI has tripped.
Garage Door Wont Close: Safety Sensor Troubleshooting
Safety sensors are the number one reason garage doors won’t close. I’d estimate they’re responsible for about 70% of all garage door closing issues. These small devices (also called photo eyes) are mounted near the floor on either side of your garage door opening, and they shoot an invisible infrared beam across the door’s path.
When this beam is interrupted or the sensors can’t see each other, the garage door opener assumes something is in the way and refuses to close the door. It’s a great safety feature—until it malfunctions and leaves you with a door that won’t close.
Dirty Sensor Lenses
The most common sensor issue is also the easiest to fix. Over time, dust, cobwebs, and grime accumulate on the sensor lenses, blocking or weakening the infrared beam. I’ve seen this happen especially in garages that aren’t climate-controlled or are near dusty roads.
Clean both sensor lenses with a soft, dry cloth. Don’t use water or cleaning solutions—these can damage the sensors. Simply wipe away any visible dirt or debris, then try closing the door again. This simple fix resolves about 30% of sensor-related issues.
Misaligned Sensors
Garage door sensors need to be perfectly aligned to see each other. Even a slight misalignment—sometimes as little as 1/8 of an inch—can break the infrared connection and prevent the door from closing.
Vibration from normal operation, accidental bumps from storage items, or even temperature changes can cause sensors to drift out of alignment over time. The brackets holding the sensors are designed to be adjustable precisely for this reason.
How to Align Your Garage Door Sensors
Start by checking the sensor lights. Most sensors have a small LED light that glows solid when properly aligned and blinks when they’re not. If either light is blinking, you know alignment is the issue.
Loosen the mounting screws on the blinking sensor’s bracket (don’t remove them completely). Gently adjust the sensor until its LED turns solid. You may need to make several small adjustments to get it just right. Once both lights are solid, tighten the mounting screws and test the door.
Corroded Sensor Wires: A Hidden Problem
Here’s something most troubleshooting guides miss: corroded sensor wires. After years of exposure to garage humidity and temperature fluctuations, the copper wires inside the sensor insulation can corrode, especially near the connections. I’ve seen this issue countless times in online forums, with users reporting that their sensors “look aligned” but still won’t work.
Inspect the wires connecting both sensors to the opener unit. Look for fraying, cracking insulation, or greenish corrosion on the copper. If you find corrosion, you may need to cut away the damaged portion and strip fresh wire for a clean connection. This simple fix has solved the problem for many frustrated homeowners.
Sunlight Interference with Sensors
This is a weird one, but it’s real. Some garage door sensors can be confused by direct sunlight hitting the sensor lens. The intense infrared radiation from the sun can overwhelm the sensor, causing it to think there’s an obstruction.
If this only happens at certain times of day when the sun hits your garage door, try shading the affected sensor with a small piece of cardboard or repositioning it slightly in its bracket. Several forum users have reported that this simple adjustment solved their intermittent closing issues.
Cold Weather Sensor Issues
Winter brings unique garage door challenges. Frost or ice can form on sensor lenses overnight, blocking the infrared beam. I’ve also seen condensation build up inside the sensor housing when temperatures fluctuate rapidly.
In cold climates, check your sensor lenses first thing on frosty mornings. A quick wipe with a dry cloth often solves the problem. If condensation is getting inside the sensor housing, you may need to replace the affected sensor or add a small weather shield.
Garage Door Wont Close: Remote and Wall Button Issues
If your sensors check out but the door still won’t close, let’s look at your control mechanisms. Problems with the remote or wall button are responsible for about 15% of garage door closing issues.
Dead Remote Batteries
It sounds obvious, but dead remote batteries are one of the most common causes of garage door issues. Remotes typically use standard batteries (often CR2032 coin cells or 12V batteries) that last 1-2 years with regular use.
Before assuming your opener is broken, try replacing the remote battery. If you have a multi-button remote, test all buttons—if only one works, you might have a defective button rather than a battery issue.
Defective Remote Control
Remotes can fail after years of use, especially if they’ve been dropped or exposed to moisture. If a new battery doesn’t fix the problem, test with a different remote if you have one. If the second remote works, you know the first one needs replacement.
Most universal remotes are compatible with major garage door opener brands (Liftmaster, Chamberlain, Genie, Craftsman), and they’re relatively inexpensive compared to a service call.
Wall Button Not Working
If your remote works but the wall button doesn’t (or vice versa), you’re dealing with a wiring or switch issue. The wall button is a simple wired connection that can fail over time.
Check that the button isn’t stuck or damaged. Sometimes dirt or debris can get behind the button and prevent proper contact. If the button looks fine, the wiring connecting it to the opener motor may be damaged—especially common in garages with finished walls where mice have chewed through wires.
Vacation Lock Mode: The Common Oversight
Many wall controls have a “vacation lock” or “lock” feature that disables remote operation. This is designed to prevent unauthorized access when you’re away from home. However, it’s easy to accidentally engage this feature and then forget it’s active.
Check your wall control for a lock button or switch (often indicated by a padlock icon). If it’s engaged, hold it for 3-5 seconds to disable. This simple check has solved the mystery for many garage door owners who couldn’t figure out why their remotes suddenly stopped working.
Power Source and GFCI Issues
Your garage door opener needs power to function, and sometimes the problem is as simple as a tripped breaker or GFCI outlet. Garage outlets are typically GFCI-protected for safety, and these outlets can trip unexpectedly.
Check that the opener is still plugged in (vibration can work plugs loose over time). Test the outlet with another device, and check your home’s electrical panel for tripped breakers. Reset any tripped breakers or GFCI outlets, then try the door again.
Garage Door Wont Close: Track and Roller Inspection
Physical obstructions and mechanical issues account for another 10% of garage door closing problems. Let’s examine what might be physically blocking your door’s path.
Track Obstructions
Even small objects in the garage door track can prevent proper operation. I’ve found everything from toys and tools to leaves and debris in tracks. The safety sensors can’t detect objects in the tracks themselves—only in the sensor beam path.
Visually inspect both tracks from top to bottom. Remove any obstructions, and check for bent sections that might impede the rollers’ movement. Even a slight dent in the track can cause problems as the door tries to close.
Roller Problems
Garage door rollers can wear out, become damaged, or seize up over time. Worn rollers create friction that can prevent smooth door operation. If your door makes grinding or scraping sounds as it moves, bad rollers are likely the culprit.
Inspect each roller for cracks, flat spots, or excessive wobbling. Nylon rollers tend to wear out faster than steel ones but operate more quietly. Replacing damaged rollers is a manageable DIY task for most homeowners, though it does require some mechanical aptitude.
Can You Spray WD-40 on Garage Door Rollers?
This is a common question, and the answer is nuanced. Traditional WD-40 is primarily a solvent and water displacer, not a lubricant. While it might provide temporary relief, it can actually attract dirt and cause rollers to gum up over time.
If your rollers are squeaky, use a dedicated garage door lubricant instead. Silicone-based or lithium grease sprays are designed for this application and will provide longer-lasting results without attracting debris. Apply lubricant to the roller stems and hinges, but avoid getting it on the tracks themselves—this can cause the door to slip.
Track Misalignment
Garage door tracks should be perfectly parallel and properly spaced. Accidental bumps, vehicle impacts, or settling foundations can cause tracks to shift out of alignment.
Check that both tracks are the same distance apart at the top, middle, and bottom. Look for any sections that appear bent or twisted. Minor misalignments can sometimes be corrected by loosening the track mounting brackets and gently repositioning them. Significant track damage typically requires professional repair.
Manual Door Test
Here’s a quick test that can reveal a lot about what’s wrong. Disconnect the door from the opener (using the emergency release cord—we’ll cover this in detail next) and try lifting the door manually.
The door should move smoothly and relatively easily. If it feels heavy, uneven, or gets stuck in certain spots, you have a mechanical problem that needs addressing. This could be spring issues, track problems, or roller damage. A door that moves smoothly manually but won’t close automatically points to an opener or sensor issue rather than a mechanical one.
Garage Door Wont Close: Travel Limit Adjustment
Your garage door opener uses “travel limits” to know how far to open and close the door. These limits tell the opener when to stop moving. When they’re set incorrectly, the door might not close fully or might reverse before reaching the ground.
What Are Travel Limits?
Travel limit settings control the exact position where your garage door stops when opening and closing. Most openers have separate adjustment screws for “up” and “down” travel limits. These are typically located on the side or back of the opener motor unit.
If your door starts closing but reverses before hitting the ground, the down travel limit may be set too high (telling the door to stop too soon). Conversely, if the door closes but then immediately opens again, the down limit might be detecting too much resistance.
How to Adjust Your Travel Limits
First, locate the travel limit adjustment screws on your opener. These are usually labeled with arrows indicating which direction increases or decreases the travel. You’ll need a step ladder to access them safely.
To make the door close farther: Turn the down limit screw in the direction that increases down travel (usually clockwise). Make adjustments in small increments—about 1/4 turn at a time. Test the door after each adjustment until it closes properly without reversing.
If the door closes but the motor keeps running or the door appears to be straining against the floor, you’ve gone too far. Back off the adjustment slightly.
Closing Force Adjustment Dial
Many garage door openers also have a closing force or “weight” adjustment dial. This controls how much force the opener uses to close the door. If set too low, the door will reverse when it meets normal resistance from the weatherstripping or floor. If set too high, the door won’t reverse when it should, which is a safety hazard.
In cold weather, garage doors can become stiffer due to lubricants thickening and weatherstripping becoming less flexible. I’ve seen many forum users report that adjusting the closing force dial solved their winter garage door problems. However, only increase this setting enough to allow normal operation—never bypass safety features.
Diagnostic Flash Codes
Many modern garage door openers communicate problems through flashing LED lights and beep patterns. These diagnostic codes can tell you exactly what’s wrong.
Common flash patterns include: 1 flash (sensor wire problem), 2 flashes (sensors misaligned or obstructed), 3 flashes (door travel limits need adjustment), 4 flashes (sensor eyes slightly misaligned), and 5 flashes (obstruction detected or motor overheating).
Consult your opener’s manual for the specific flash code meanings for your model. The patterns vary between brands like Liftmaster, Chamberlain, and Genie, but the concept is similar across manufacturers.
Garage Door Wont Close: Trolley and Bypass Mode
Understanding how your garage door connects to the opener can help diagnose certain problems. The trolley mechanism and bypass mode are important concepts for troubleshooting.
What Is the Garage Door Trolley?
The trolley is the mechanism that connects your garage door to the opener drive mechanism (chain, belt, or screw). It rides back and forth on the rail, pulling the door open and pushing it closed. When the opener operates, you can see the trolley moving along the rail.
The trolley has two positions: engaged (connected to the door) and disengaged (disconnected from the door). In the engaged position, the opener can open and close the door. In the disengaged position, you can operate the door manually.
Bypass Mode Explained
Bypass mode is what happens when the trolley is disengaged. This is useful during power outages or opener malfunctions, but sometimes the trolley can accidentally become disengaged during normal operation.
When the door is in bypass mode, the opener motor will run but the door won’t move. You might hear the chain or belt moving without any effect on the door itself. This typically means the trolley has become disconnected—possibly from the door being jerked during operation or the emergency release being pulled accidentally.
To re-engage the trolley, pull the emergency release cord toward the door (away from the opener motor). Then manually move the door until you hear the trolley click into place. Test with the opener to confirm it’s reconnected.
The Emergency Release Cord
That red cord hanging from your garage door opener rail is the emergency release. It disconnects the trolley from the opener, allowing manual door operation. This is essential during power outages or opener failures.
To use it, pull the cord straight down. You’ll hear the trolley disconnect. Now you can lift the door manually. When you’re ready to reconnect, simply pull the cord toward the door and run the opener briefly—it should reconnect automatically.
Important note: If your garage door springs are broken or weakened, the door will be extremely heavy to lift manually. This is a sign that you need professional repair before attempting manual operation.
Garage Door Wont Close: When to Call a Professional
While many garage door issues are DIY-friendly, some problems require professional expertise. Garage doors are under extreme tension and can cause serious injury if improperly handled. Let’s review when you should call in the experts.
Broken Garage Door Springs
Garage door springs are under tremendous tension—enough to cause severe injury or even death if they snap or are mishandled. If you have a broken spring (you’ll often hear a loud bang, and the door won’t stay open or will be extremely heavy), call a professional immediately.
Never attempt to repair or replace garage door springs yourself unless you have proper training and tools. This is one DIY project that’s genuinely dangerous.
Snapped or Frayed Cables
Like springs, garage door cables are under high tension. A snapped cable is obvious—the door will hang unevenly, and you’ll see the loose cable hanging. A frayed cable might not be broken yet but is at risk of snapping.
Cable replacement requires specialized tools and knowledge. Improper installation can cause the door to fall unexpectedly, creating a serious safety hazard.
Door Feels Heavy Manually
Remember the manual door test I mentioned earlier? If the door feels unusually heavy or difficult to lift, this indicates a spring or counterbalance problem. A properly balanced door should be relatively easy to lift manually.
A heavy door means your springs aren’t doing their job, and continuing to operate the door this way can damage the opener and create a dangerous situation. This requires professional diagnosis and repair.
Track Damage or Severely Misaligned Tracks
Minor track misalignments can sometimes be corrected DIY-style. However, severely bent, twisted, or damaged tracks need professional replacement. Attempting to straighten badly damaged tracks can weaken them further or cause complete failure.
Sagging tracks, tracks pulling away from the wall, or tracks that are significantly out of parallel all indicate problems that require professional assessment.
When DIY Becomes Dangerous
Here’s my rule of thumb: if you’re unsure about your ability to safely complete a repair, call a professional. Garage doors weigh hundreds of pounds and are suspended over your head—that’s not something to take chances with.
Additionally, if you’ve tried the troubleshooting steps in this guide and the problem persists, it’s time for professional help. Some issues require specialized diagnostic tools and expertise that go beyond DIY solutions.
Frequently Asked Questions
What can you do if your garage door won’t close?
Start with the basics: check that nothing is blocking the sensor beam, clean both sensor lenses with a dry cloth, and verify sensor alignment (the LED lights should be solid, not blinking). If sensors check out, replace remote batteries, check that the wall control isn’t in vacation lock mode, and ensure the opener has power (check GFCI outlets and breakers).
How to reset sensors on garage door?
First, clean both sensor lenses with a soft, dry cloth to remove any dust or debris. Loosen the mounting bracket on the sensor with the blinking LED light. Gently adjust the sensor until its light turns solid green (both sensors should have solid lights). Tighten the mounting screws carefully to maintain alignment. Test the door—if it closes successfully, you’ve properly reset and aligned the sensors.
Can I spray WD-40 on garage door rollers?
Traditional WD-40 isn’t ideal for garage door rollers because it’s a solvent, not a lubricant. It may provide temporary relief but can attract dirt and cause rollers to gum up over time. Instead, use a silicone-based or lithium grease spray specifically designed for garage doors. Apply lubricant to the roller stems and hinges, but avoid getting lubricant on the tracks themselves.
Why would my garage door opener open but not close?
This is almost always a safety sensor issue. The sensors detect an obstruction or lose sight of each other, preventing the door from closing as a safety measure. Common causes include dirty sensor lenses, misaligned sensors, or something blocking the infrared beam. Check both sensor lights—if either is blinking, clean the lenses and realign the sensors. Sunlight interference and cold weather frost can also cause this issue.
Conclusion
Dealing with a garage door that won’t close is frustrating, but as we’ve covered, most issues are within your ability to fix. Start with the safety sensors—they’re the culprit in about 70% of cases. Clean those lenses, check the alignment, and inspect for corroded wires. From there, work through remote batteries, wall controls, travel limits, and track obstructions.
Remember the troubleshooting insights from real homeowners: cold weather can frost sensor lenses, direct sunlight can interfere with infrared beams, and sometimes the vacation lock mode gets engaged accidentally. These often-overlooked causes have solved the problem for many frustrated garage door owners.
For preventive maintenance, I recommend cleaning your sensor lenses monthly, lubricating rollers and hinges annually, and doing a visual inspection of tracks and cables every few months. These simple steps can prevent many common garage door issues before they start.
However, also know when to call a professional. Broken springs, snapped cables, severely damaged tracks, and doors that feel heavy when lifted manually all require expert repair. Garage doors are under tremendous tension, and some repairs genuinely aren’t DIY-friendly.
Most importantly, don’t leave your garage door stuck open overnight. Beyond the security risk, an open garage exposes your home to weather, pests, and temperature extremes. Whether you fix it yourself or call a pro, get that door closed and secure your home.
Leave a Comment