
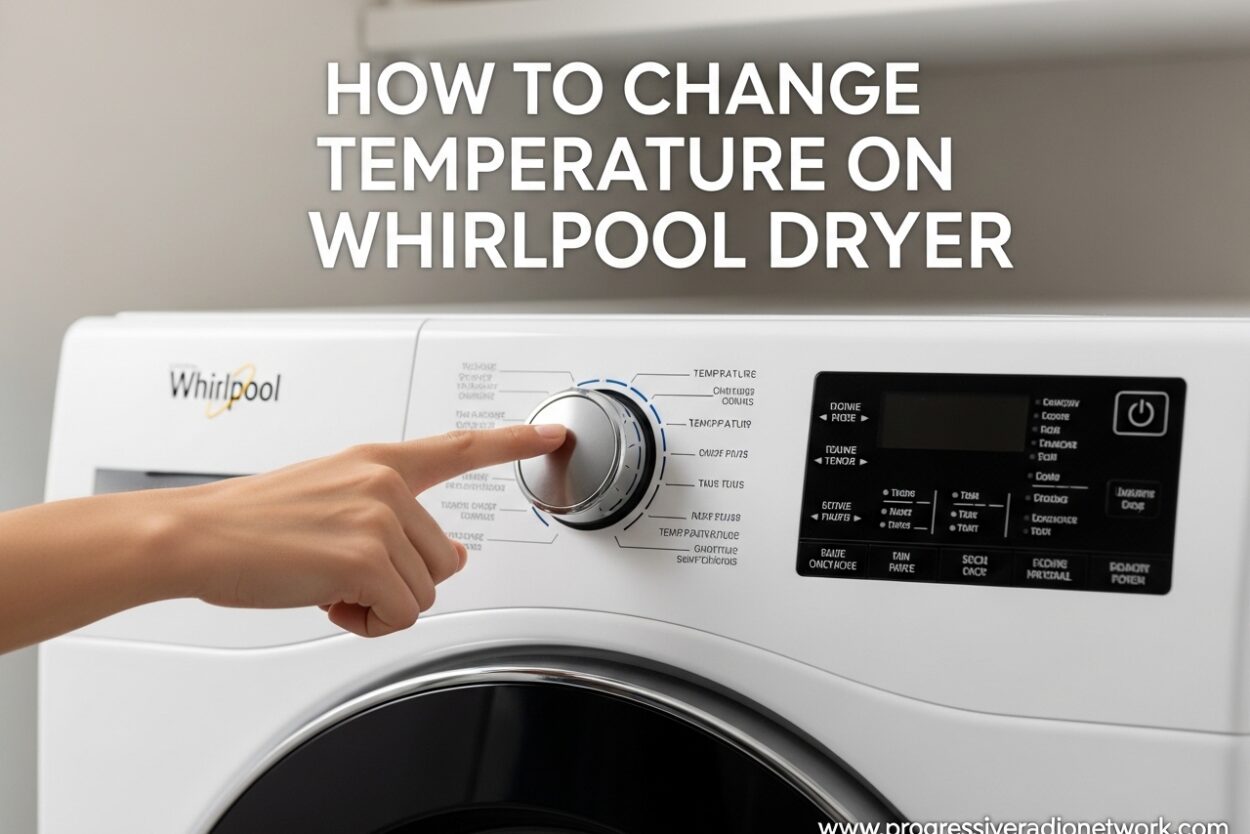
If you’ve ever stood in front of your Whirlpool dryer, pressing the temperature button without any response, you’re not alone. This is one of the most common frustrations Whirlpool dryer owners face. Understanding how to change the temperature setting on your Whirlpool dryer can save your clothes from damage and improve drying efficiency.
In this guide, I’ll walk you through exactly how Whirlpool dryer temperature controls work, why sometimes the temperature button seems unresponsive, and what you can do to customize your drying cycles for different fabric types.
Understanding Whirlpool Dryer Temperature Controls
Whirlpool dryers come with different control panel designs depending on the model and year of manufacture. The most common types include traditional dial controls, electronic touchpad controls, and hybrid systems with both buttons and a dial.
The temperature button on your Whirlpool dryer cycles through available heat settings when pressed. On most modern models, you’ll see options like High, Medium, Low, Delicate, and sometimes Air Fluff or Sanitize. Each setting corresponds to a specific temperature range designed for different fabric types.
What confuses many users is that not all drying cycles allow temperature changes. This is especially true for auto dry or sensor dry cycles, which we’ll cover in detail later in this guide.
How to Change Temperature on Whirlpool Dryer
Changing the temperature on your Whirlpool dryer is straightforward when you know the right steps. Here’s the process for most models:
Step 1: Select your desired drying cycle using the cycle selector knob or button. This could be Normal, Heavy Duty, Delicates, or another cycle name.
Step 2: Before pressing the start button, press the TEMPERATURE button to cycle through available heat settings. Each press typically advances to the next temperature option.
Step 3: Watch the display panel or indicator lights to see which temperature is currently selected. The chosen setting will usually be illuminated or displayed on the screen.
Step 4: Once your desired temperature is selected, press START to begin the drying cycle.
Important Note: On some Whirlpool dryer models, you can change the temperature even after the cycle has started. To do this, open the dryer door, press the TEMPERATURE button to select your preferred heat setting, then close the door and press START again. The cycle will resume with the new temperature.
Whirlpool Dryer Temperature Settings Explained
Understanding what each temperature setting actually does helps protect your clothes and optimize drying performance. Here’s a breakdown of Whirlpool dryer temperature settings and their typical uses:
High Heat: Around 140°F (60°C). This setting is best for heavy fabrics like towels, jeans, and cotton bedding. The high temperature helps evaporate moisture quickly from thick materials but can damage delicate fabrics.
Medium Heat: Around 135°F (57°C). Often labeled as “Permanent Press,” this setting works well for synthetic blends, wrinkle-prone fabrics, and everyday clothing. It provides effective drying without the excessive heat that can cause shrinkage.
Low Heat: Around 125°F (52°C). This gentle setting is ideal for delicate items, lightweight fabrics, and dark colors that might fade with high heat. It takes longer but protects your more fragile garments.
Delicate: Also around 125°F (52°C). Similar to Low Heat but often paired with a shorter cycle time. Use this for lingerie, sheer fabrics, and anything labeled as delicate on the care tag.
Sanitize: The hottest setting available, reaching up to 150°F or higher. This cycle is designed to kill bacteria and dust mites, making it perfect for bedding, towels, and items that need thorough sanitization. The sanitize cycle typically runs longer to ensure the entire load reaches the target temperature.
Air Fluff: No heat. This setting circulates room-temperature air through the drum. It’s perfect for freshening items that aren’t dirty, removing pet hair, or fluffing pillows and comforters without applying any heat.
Auto Dry vs Manual Dry: Critical Difference
This is the most important concept to understand when troubleshooting temperature issues on your Whirlpool dryer. The difference between auto dry (also called sensor dry) and manual dry (timed dry) cycles affects your ability to change temperature settings.
Auto Dry / Sensor Dry Cycles: These cycles use moisture sensors to detect when clothes are dry and automatically stop the cycle. On many Whirlpool models, auto dry cycles have preset temperatures that cannot be adjusted. When you select an auto dry cycle, the dryer determines the appropriate heat level based on the cycle type (like “Normal” or “Casual”).
If you’re pressing the temperature button while an auto dry cycle is selected and nothing happens, this is likely why. The temperature is locked by the cycle’s programming.
Manual Dry / Timed Dry Cycles: These cycles run for a specific amount of time that you set. On timed dry cycles, you typically have full control over the temperature setting. You can choose any available heat level regardless of the cycle duration.
The Solution: If you need to adjust the temperature for a particular load, switch to a timed dry cycle instead of an auto dry cycle. This will give you manual control over the heat setting. Simply select the timed dry option, set your preferred time, then adjust the temperature as needed.
Temperature Conversion Guide (Fahrenheit to Celsius)
Many Whirlpool dryer owners find themselves confused when switching between older models that display temperatures and newer ones that use setting names. This quick reference chart shows the typical temperature equivalents:
- High: 140°F / 60°C
- Medium: 135°F / 57°C
- Low: 125°F / 52°C
- Delicate: 125°F / 52°C
- Sanitize: 150°F+ / 65°C+
- Air Fluff: Ambient temperature only
How to Disable Control Lock on Whirlpool Dryer
One of the most common reasons the temperature button won’t respond on a Whirlpool dryer is the control lock feature. This safety feature prevents accidental changes to settings, which is helpful if you have children who might play with the controls.
Signs that Control Lock is Active:
- Buttons beep when pressed but don’t function
- Control lock indicator light is illuminated (often shows a padlock icon)
- Dryer won’t start even when everything appears set correctly
How to Disable Control Lock:
Most Whirlpool dryers use a simple method to toggle the control lock on and off. Press and hold the CONTROL LOCK button (or sometimes labeled as CONTROL LOCK / OPTIONS) for 3-5 seconds. You’ll usually hear a beep and the control lock indicator light will turn off.
On some models, the control lock function is integrated with other buttons. If you don’t see a dedicated control lock button, try pressing and holding the START button for 3 seconds, or look for a button with a padlock symbol.
Pro Tip: If pressing and holding the control lock button doesn’t work, try unplugging your dryer for 1-2 minutes. This can reset the control panel and clear any electronic glitches that might be preventing the controls from responding.
Why Your Temperature Button Isn’t Working
Beyond control lock issues and auto dry cycle limitations, there are several other reasons why your Whirlpool dryer temperature button might not be responding:
Touchpad Malfunction: On electronic control panel models, the touchpad can wear out or become unresponsive over time. If certain areas of the panel don’t respond while others do, this suggests a touchpad issue rather than a lock problem.
Control Board Problems: The main control board processes all button inputs. If this component fails, some or all buttons may become unresponsive. You might notice other buttons not working as well, or the display behaving erratically.
Loose Connections: Sometimes the ribbon cable connecting the control panel to the main board can become loose, especially on older models. This can cause intermittent or complete loss of button function.
Troubleshooting Steps:
Try these steps in order before calling for service:
- Verify control lock is off (hold button for 3 seconds)
- Try a timed dry cycle instead of auto dry
- Unplug dryer for 2 minutes, then plug back in
- Test other buttons to see if they respond
- Check for error codes on the display
Whirlpool Dryer Not Hot Enough: Solutions
If your Whirlpool dryer runs but doesn’t seem to get hot enough, the problem might not be with the temperature setting at all. Here are common causes and solutions:
Clogged Lint Filter: A buildup of lint restricts airflow and can significantly reduce drying temperature. Clean your lint filter before every load for optimal performance.
Blocked Exhaust Vent: If the vent hose behind your dryer is crushed, clogged, or too long, hot air can’t escape properly. This causes the dryer to run cooler and take longer to dry clothes. Disconnect and clean the vent hose at least once a year.
Thermal Fuse Issues: The thermal fuse is a safety device that cuts power to the heating element if the dryer overheats. If this fuse blows, your dryer may run but produce no heat at all. This typically requires professional service.
Heating Element Failure: On electric dryers, the heating element can burn out over time. If your dryer runs but produces no heat, this is a likely culprit.
Gas Valve Problems: On gas dryers, issues with the gas valve or igniter can prevent proper heating. These repairs require professional service due to safety concerns.
How to Reset Your Whirlpool Dryer
Sometimes a simple reset can resolve control panel issues and restore temperature button functionality. Here’s how to perform a hard reset on your Whirlpool dryer:
Step 1: Make sure the dryer is turned off and no cycle is running.
Step 2: Unplug the dryer from the electrical outlet. If you have a gas dryer, you can also turn off the gas supply for added safety.
Step 3: Wait at least 5 minutes. This allows the capacitors in the control board to fully discharge and clears any temporary electronic glitches.
Step 4: Plug the dryer back in (and turn gas back on if applicable).
Step 5: Test the temperature button by selecting a timed dry cycle and pressing the temperature button to cycle through options.
If the reset doesn’t resolve your issue, the problem likely requires professional service. Contact Whirlpool customer service or a qualified appliance repair technician.
Safety Tips for Temperature Changes
When adjusting temperature settings on your Whirlpool dryer, keep these safety considerations in mind:
Always Read Care Labels: Fabric care labels provide specific temperature recommendations. Following these guidelines prevents shrinkage, fading, and fabric damage.
Sort by Temperature: Group similar fabrics together rather than mixing heavy items with delicates. This ensures each item gets the appropriate heat level.
Test New Items: If you’re unsure about a garment’s heat tolerance, start with a lower temperature setting and check the item periodically during the cycle.
Never Override Safety Features: If your dryer has a control lock or other safety feature activated, there’s usually a good reason. Don’t attempt to bypass or override these features.
When in Doubt, Go Lower: It’s better to run an additional cycle on low heat than to damage clothes with excessive heat. Modern fabrics, especially athletic wear and synthetics, can be permanently damaged by high temperatures.
FAQ
What is the hottest setting on a Whirlpool dryer?
The hottest setting on a Whirlpool dryer is the Sanitize cycle, which reaches temperatures of 150°F or higher. This cycle is designed to kill bacteria and dust mites, making it ideal for bedding, towels, and items that need thorough sanitization. The High heat setting is the next hottest at approximately 140°F.
How to change temperature on whirlpool dryer?
To change temperature on a Whirlpool dryer, select your drying cycle first, then press the TEMPERATURE button to cycle through available heat settings. Each press advances to the next option. Watch the display or indicator lights to see your selection. Note that on auto dry cycles, temperature may not be adjustable – switch to timed dry for manual control.
Why can’t I change the temperature on my Whirlpool dryer?
The most common reason you can’t change temperature is that you’re using an auto dry or sensor dry cycle. These cycles have preset temperatures that cannot be adjusted. Switch to a timed dry cycle for manual temperature control. Another common cause is the control lock feature being activated – press and hold the control lock button for 3 seconds to disable it.
Where is the thermal switch on a whirlpool dryer?
The thermal fuse (thermal switch) on a Whirlpool dryer is typically located on the back of the dryer, near the heating element housing or exhaust vent. On electric models, you’ll need to remove the rear access panel to access it. On gas models, it’s often behind the lower front access panel. The thermal fuse is a small white component with two wire connections.
How do I change the thermostat on my whirlpool dryer?
Changing a dryer thermostat requires technical knowledge and should be done by a qualified technician. The process involves disconnecting power, accessing the thermostat location (usually near the heating element or blower housing), removing wires from the old thermostat, installing the new one, and reconnecting wires. Always unplug the dryer before attempting any repairs.
Why is my Whirlpool dryer not hot enough?
If your Whirlpool dryer isn’t hot enough, check these common causes: clogged lint filter, blocked exhaust vent, or a tripped thermal fuse. Clean the lint filter before every load and ensure the exhaust vent is clear and not crushed. If these don’t solve the problem, you may have a faulty heating element (electric models) or gas valve issues (gas models) requiring professional service.
How to do a hard reset on a Whirlpool dryer?
To perform a hard reset on your Whirlpool dryer, turn it off and unplug it from the electrical outlet. Wait at least 5 minutes to allow the control board capacitors to fully discharge. Plug the dryer back in and test the controls. This reset can clear temporary electronic glitches and restore button functionality.
Conclusion
Understanding how to change the temperature on your Whirlpool dryer is essential for proper fabric care and efficient drying. The key takeaways are to remember that auto dry cycles have preset temperatures, control lock can prevent button responses, and a simple reset can resolve many electronic glitches.
If you’ve tried all the troubleshooting steps and your temperature button still won’t respond, or if your dryer isn’t heating properly despite correct settings, it may be time to contact Whirlpool customer service or a qualified appliance repair technician. Electrical and gas dryer repairs can be dangerous and should be left to professionals.
By following the Whirlpool dryer change temperature guide above, you can customize your drying cycles to protect your clothes and optimize drying performance for every load.
Leave a Comment