
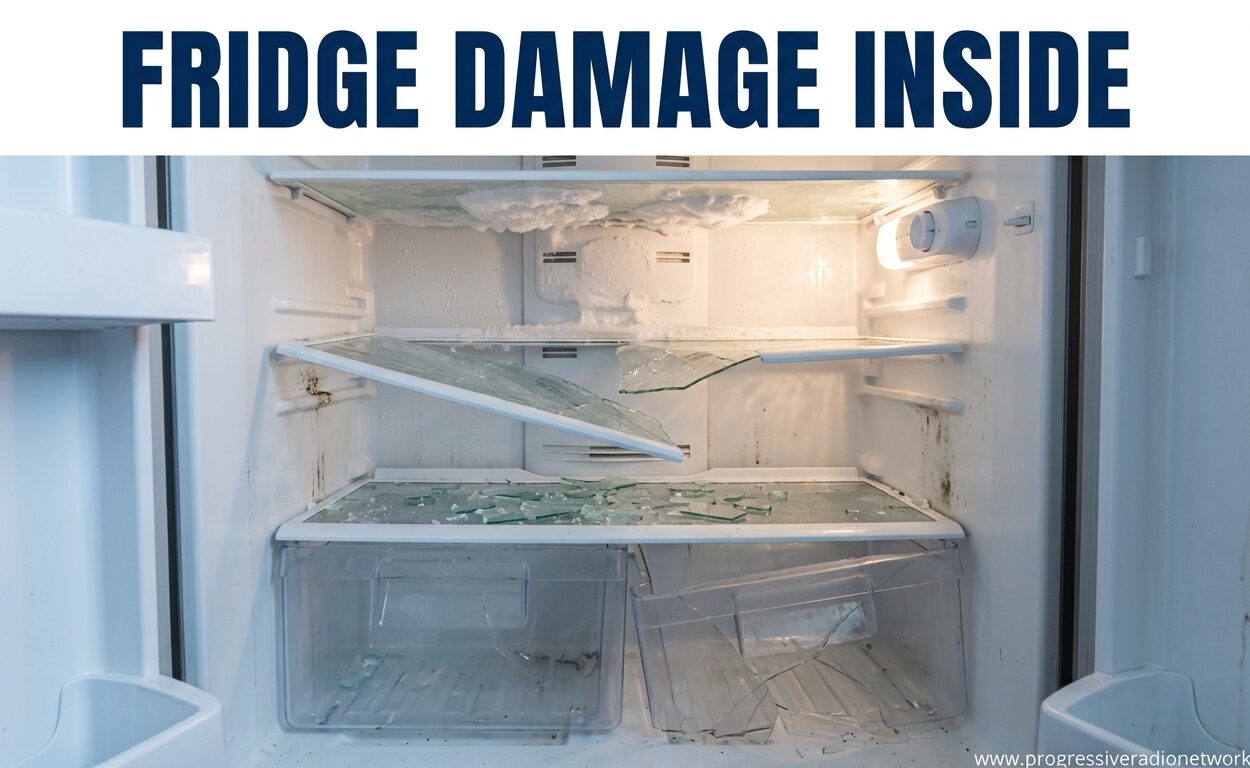
Discovering damage inside your refrigerator can trigger immediate panic. I’ve seen countless forum posts from homeowners who accidentally punctured their freezer wall while defrosting or found cracks after delivery. The good news is that not all fridge damage inside spells disaster for your appliance.
In this comprehensive guide, I’ll walk you through everything you need to know about internal refrigerator damage. You’ll learn how to identify different types of damage, understand what’s actually dangerous versus cosmetic issues, and discover safe repair methods using food-grade materials.
Table of Contents
- What is Fridge Damage Inside?
- Fridge Damage Inside: Common Types and What They Mean
- What Causes Fridge Damage Inside?
- Is Fridge Damage Inside Dangerous? Safety Concerns Explained
- How to Fix Minor Fridge Damage Inside: DIY Repair Guide
- When to Call a Professional vs. Replace Your Refrigerator
- Preventing Future Fridge Damage Inside
- FAQ
- Conclusion
What is Fridge Damage Inside?
Fridge damage inside refers to any physical harm to the interior surfaces and components of your refrigerator or freezer. This includes damage to the plastic liner, interior walls, shelving brackets, and in serious cases, the internal cooling system components.
The interior of most modern refrigerators consists of a plastic or metal liner that protects the insulation and refrigerant lines beneath. When this liner is compromised, it can range from purely cosmetic issues to serious problems affecting your fridge’s ability to cool properly.
Understanding the type and extent of damage is crucial because it determines whether you can safely fix it yourself or need professional repair or replacement.
Fridge Damage Inside: Common Types and What They Mean
Internal refrigerator damage comes in several forms, each with different implications for safety and repair. Let me break down the most common types I’ve encountered:
Punctures and Holes: These occur when something sharp penetrates the interior wall. Small punctures from nails or screws during installation are concerning because they may reach refrigerant lines. Larger holes from sharp objects like knives or ice picks are more serious and almost always affect cooling performance.
Cracks in the Liner: Hairline cracks in the plastic liner can develop from age, temperature fluctuations, or impact. While small cracks might be cosmetic, larger ones that expand or expose insulation need attention to prevent moisture damage and bacterial growth.
Dents and Impact Damage: Dents from dropped items or delivery damage are usually cosmetic. However, deep dents that stretch the plastic thin or create stress points in the liner could potentially compromise the seal around refrigerant lines.
Scratches and Surface Wear: Surface scratches from cleaning or normal use are purely cosmetic and don’t affect performance. These are the most common type of interior damage and require no repair.
What Causes Fridge Damage Inside?
Understanding what caused the damage helps determine the appropriate response. Based on my research and real user experiences, here are the most common causes:
Defrosting Accidents: This is arguably the number one cause of interior punctures. Many people use sharp objects like knives, screwdrivers, or ice picks to chip away ice buildup. One slip can puncture the freezer wall, potentially damaging refrigerant lines. Reddit has dozens of posts from users who heard hissing sounds after this exact scenario.
Delivery and Installation Damage: New refrigerators sometimes arrive with damage from shipping. Forklift punctures, dropped units, or improper installation can crack or dent interior surfaces. Always inspect your new fridge thoroughly before the delivery team leaves.
Falling Objects: Heavy items falling from shelves can create dents, cracks, or punctures. Frozen foods dropped from the freezer are particularly common culprits due to their weight and hardness.
Normal Wear and Tear: Over time, plastic liners can become brittle and develop small cracks from repeated temperature cycling. Older refrigerators (10+ years) are more prone to this type of damage.
Improper Cleaning: Using abrasive cleaners or sharp scraping tools to remove stubborn spills or ice can scratch or damage the protective interior coating.
Is Fridge Damage Inside Dangerous? Safety Concerns Explained
This is the most common question I see, and the answer depends entirely on what type of damage occurred. Let me give you a clear framework to assess safety.
The Danger Zone: Refrigerant Line Damage
If you’ve punctured a refrigerant line, you’ll typically know immediately. Common signs include:
- A distinct hissing or whistling sound that lasts several seconds
- White gas or mist escaping from the hole
- Chemical odor
- Rapid loss of cooling within hours
- Frost buildup in unusual places
Refrigerant itself isn’t typically toxic in small amounts, but it’s a pressurized chemical system that should only be handled by professionals. If you suspect refrigerant line damage, unplug the refrigerator immediately and don’t attempt to use it. This requires professional repair or replacement.
The Safe Zone: Cosmetic and Minor Structural Damage
Most internal refrigerator damage is cosmetic and doesn’t pose safety risks. Small cracks, dents, and scratches that don’t penetrate deeply into the wall are generally safe. Your fridge will continue cooling normally, and the damage is purely aesthetic.
Food Safety Considerations
Any damage that creates crevices where bacteria can grow could potentially affect food safety. Cracks that expose insulation or create holes where moisture can accumulate should be sealed to prevent mold and bacterial growth. Always clean damaged areas thoroughly before attempting repairs.
How to Fix Minor Fridge Damage Inside: DIY Repair Guide
For minor damage that doesn’t affect cooling, DIY repair is often possible using food-safe materials. Here’s a step-by-step approach based on successful methods shared by homeowners and repair professionals:
Materials Needed:
- Food-grade silicone sealant (ensure it’s rated for refrigerator use)
- Food-safe epoxy (for larger cracks and holes)
- Isopropyl alcohol for cleaning
- Small putty knife or applicator
- Sandpaper (fine grit, for smoothing rough edges)
Step 1: Assess the Damage
Before attempting any repair, verify your fridge is still cooling properly. If it’s not, stop here and call a professional. Only proceed with DIY repair if cooling is normal and damage appears superficial.
Step 2: Clean the Area Thoroughly
Use warm soapy water or isopropyl alcohol to clean the damaged area completely. Remove any food residue, ice, or debris. Allow the area to dry completely – moisture is the enemy of good adhesion.
Step 3: Prepare the Surface
For small cracks, use fine sandpaper to gently roughen the edges. This helps the sealant adhere better. For holes, ensure there are no loose pieces of plastic or liner that could interfere with the repair.
Step 4: Apply Food-Grade Sealant
For small cracks and holes under 1/4 inch, food-grade silicone sealant is your best option. Apply a generous amount, working it into the crack or hole with your putty knife. Smooth it evenly with the surrounding surface.
Step 5: Use Epoxy for Larger Damage
For cracks larger than 1/4 inch or holes that need structural reinforcement, use a food-safe epoxy. Mix according to the manufacturer’s instructions and apply carefully to fill the damaged area completely.
Step 6: Allow Proper Curing Time
This is where most people rush the process. Let your repair cure for at least 24 hours before putting food back in the area. Some epoxies may require even longer curing times – always follow the product instructions.
When NOT to Attempt DIY Repair:
- If cooling performance has changed
- If you heard hissing or saw gas when damage occurred
- If damage is near electrical components
- If the hole is larger than 1 inch
- If you’re unsure about the safety of the repair
When to Call a Professional vs. Replace Your Refrigerator
Sometimes professional repair or replacement is the smarter choice. Here’s how to decide:
Signs You Need Professional Help:
- Refrigerant leak confirmed (hissing, gas, loss of cooling)
- Electrical issues alongside physical damage
- Damage affecting multiple components
- Compressor failure after damage occurred
- Warranty still valid on the refrigerator
Repair vs. Replacement Cost Considerations:
The sealed refrigerant system (compressor, condenser, evaporator) is typically the most expensive repair, ranging from $500 to $1200+. For refrigerators over 10 years old, replacement is usually more cost-effective than major repairs. Newer models might still be worth repairing, especially if they’re high-end units.
Warranty and Insurance Options:
Check if your refrigerator is still under manufacturer warranty – some cover internal damage for up to 5-10 years. Homeowners insurance may cover damage from power surges or accidents, though claims for minor damage often aren’t worth the deductible increase.
Preventing Future Fridge Damage Inside
Once you’ve addressed current damage, prevention becomes key. Here are proven habits to avoid future problems:
Safe Defrosting Practices:
Never use sharp objects to remove ice. Use a plastic scraper or the defrost function if available. For manual defrosting, place bowls of hot water inside to speed up melting naturally.
Regular Maintenance:
Clean refrigerator coils annually, check door seals for cracks, and avoid overloading shelves. Preventive maintenance extends your fridge’s lifespan and reduces the likelihood of damage.
Gentle Cleaning:
Use soft cloths and mild cleaners. Avoid abrasive scrubbing pads or sharp tools that could scratch or puncture the liner.
Proper Loading:
Don’t overload shelves with heavy items. Distribute weight evenly and secure items that could fall. This is especially important in the freezer where frozen foods are hard and heavy.
FAQ
What happens if you pierce the inside of a fridge?
If you pierce a refrigerant line, you may hear a hissing sound and see white gas escape. The refrigerator will stop cooling within hours. Unplug immediately and don’t use it – refrigerant leaks require professional repair.
What are the signs of a dying refrigerator?
Common signs include: food spoiling faster than usual, excessive condensation, strange noises, the motor running constantly, ice buildup in the freezer, and inconsistent temperatures throughout the compartments.
What is the most expensive thing to fix on a refrigerator?
The sealed refrigerant system (compressor, condenser, evaporator) is typically the most expensive repair, often ranging from $500 to $1200+. If the fridge is over 10 years old, replacement is usually more cost-effective.
How to fix a cracked fridge interior?
For small cracks and holes: clean the area thoroughly, let it dry completely, apply food-grade silicone sealant or epoxy, smooth it evenly, and allow to cure for 24 hours. For larger damage or if cooling is affected, call a professional.
Conclusion
Fridge damage inside ranges from cosmetic scratches that don’t affect performance to serious punctures requiring professional repair. The key is proper assessment – determine if cooling is affected, check for signs of refrigerant damage, and then decide whether DIY repair with food-grade sealants makes sense or if professional help is needed.
Most minor internal damage can be safely repaired at home using food-grade silicone or epoxy, as long as you take time to clean, prepare, and allow proper curing. However, any damage affecting cooling performance or involving refrigerant lines requires immediate professional attention.
By understanding what causes interior damage and practicing safe defrosting and maintenance habits, you can prevent most common issues and extend your refrigerator’s lifespan for years to come.



Leave a Comment