
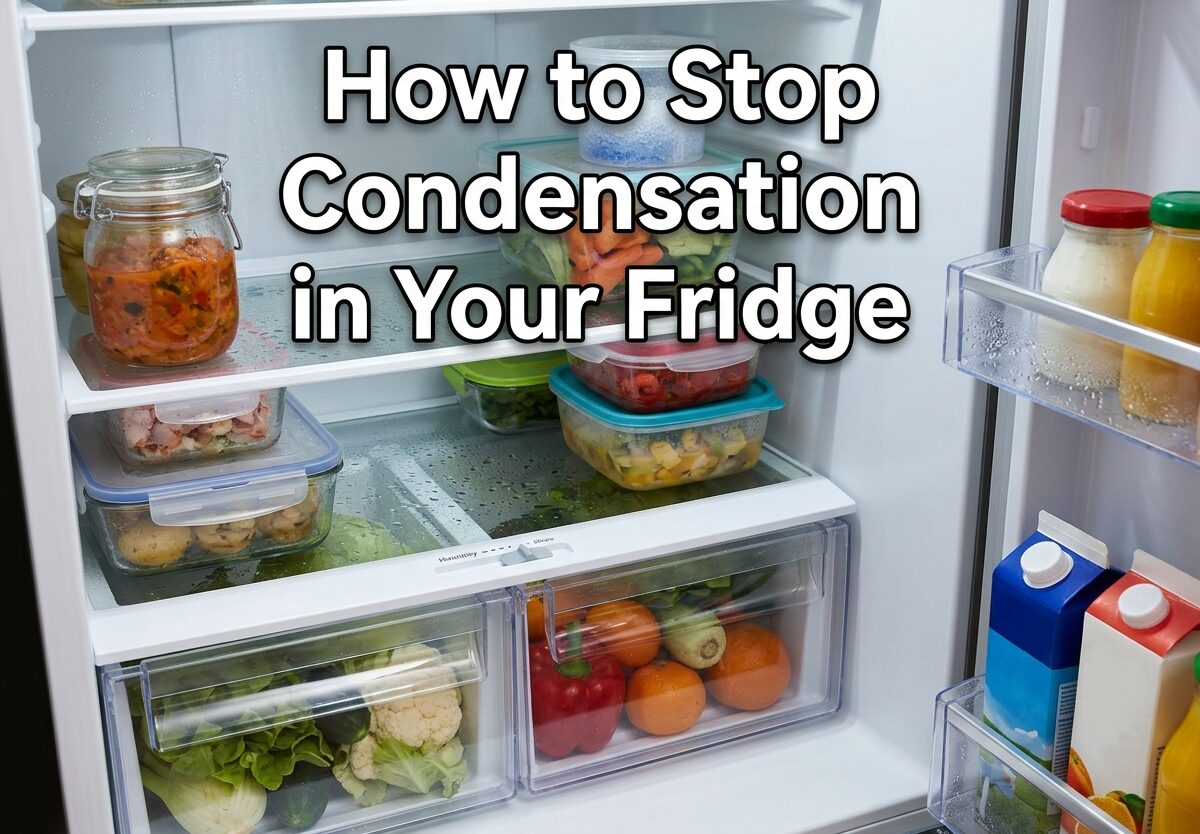
Condensation forms in your refrigerator when warm, moist air enters the cold interior and the moisture in that air condenses into water droplets on surfaces. This happens naturally during normal use, but excessive moisture can lead to mold growth, food spoilage, and higher energy bills as your appliance works harder to maintain temperature.
After testing various solutions and researching real user experiences from appliance forums, I’ve compiled the most effective methods to stop condensation in your fridge. These techniques range from simple adjustments you can make right now to maintenance tasks that prevent future problems.
Why Am I Getting So Much Condensation in My Fridge?
Excessive condensation in your refrigerator typically stems from one core issue: too much warm, humid air entering the cold interior. Every time you open the door, room air rushes in and brings moisture with it. When this warm air hits the cold walls, shelves, and food containers, the moisture condenses just like water droplets form on a cold soda can on a hot day.
The most common culprit I see in households is frequent door openings. Families with children, busy kitchens during meal prep, or people who frequently grab drinks throughout the day introduce significantly more moisture. Each door opening can exchange up to 40% of the fridge’s interior air with room air.
Another major factor is storing hot or warm food in the refrigerator. When you place a steaming pot of soup or warm leftovers directly inside, that released moisture has nowhere to go except onto cold surfaces. Always let food cool to room temperature before refrigerating, ideally within two hours of cooking for food safety.
Your kitchen environment plays a role too. Kitchens with poor ventilation, high ambient humidity, or those located in humid climates will naturally introduce more moisture. Cooking without exhaust fans, boiling water without lids, and even running the dishwasher can increase kitchen humidity levels that eventually find their way into your fridge.
Is It Normal for a Refrigerator to Have Condensation?
Yes, some condensation is completely normal and expected in any refrigerator. A small amount of moisture droplets, especially after door openings or during humid weather, doesn’t indicate a problem. You might notice light condensation on the back wall, near the door seal, or on food containers—this is typically harmless.
What’s not normal is water pooling on shelves, constant dripping, food that feels wet to the touch, or visible mold growth. These signs indicate excessive moisture that needs attention. New refrigerator owners often panic about any condensation, but most manufacturers state that some moisture is normal during the first few weeks as the appliance settles in.
The distinction comes down to quantity and persistence. Occasional light droplets that dry within an hour or two are normal. Persistent wetness that requires wiping, standing water, or condensation that interferes with food storage means something needs to be addressed.
How to Stop Condensation in Your Fridge
Stopping fridge condensation requires identifying your specific causes and addressing them systematically. I recommend starting with the easiest, most common fixes before moving to more involved maintenance tasks. This step-by-step approach has worked for countless households dealing with moisture issues.
Step 1: Check Your Door Seals
The rubber gaskets around your refrigerator doors are your first line of defense against warm air infiltration. Over time, these seals can crack, tear, or simply lose their elasticity, creating tiny gaps that let moisture in. I’ve found that door seal issues account for nearly 60% of condensation problems in refrigerators over five years old.
Perform the dollar bill test: close a dollar bill (or any piece of paper) in the door and try to pull it out. If it slides out easily with no resistance, your seals aren’t sealing properly. Test multiple locations around each door seal, paying special attention to the corners where gaps often develop first.
Clean your seals with warm, soapy water to remove any debris that might prevent proper contact. Dirt, food residue, and sticky spills can all interfere with the seal. Many users report that simply cleaning the gaskets resolves minor condensation issues, especially in kitchens with greasy cooking environments.
Step 2: Verify Your Temperature Settings
Incorrect temperatures can cause excessive condensation. Your refrigerator compartment should be set between 34°F and 40°F, with 37°F being ideal. The freezer should be at 0°F. Settings colder than necessary don’t prevent condensation—they actually increase it because the temperature difference between interior and exterior becomes more extreme.
Use an independent appliance thermometer to verify your actual temperatures versus what the digital display shows. I’ve found many refrigerators display inaccurate temperatures, sometimes off by 5 degrees or more. Place the thermometer in a glass of water on the middle shelf for the most accurate reading.
If your refrigerator has an Energy Saver or Power Saver feature, understand what it does. This feature typically controls heaters that prevent condensation on the exterior cabinet. In humid climates, turning this feature OFF can actually reduce interior condensation by running these small heaters more frequently. Conversely, in dry climates, leaving it ON saves energy without causing moisture problems.
Step 3: Reduce Door Opening Frequency
Every door opening exchanges air and introduces moisture. While you can’t eliminate door openings entirely, you can minimize them. Plan what you need before opening the door, grab multiple items at once rather than making multiple trips, and avoid leaving the door open while you decide what to eat.
Teach family members about proper fridge habits too. Children often stand with the door open while contemplating snacks, and this habit introduces significant moisture. Consider posting a gentle reminder or teaching the “open, choose, close” method.
Step 4: Let Food Cool Before Storage
Never place hot food directly in your refrigerator. Not only does this introduce substantial moisture, but it also forces your appliance to work harder to maintain temperature. Allow cooked food to cool for 30-60 minutes at room temperature before refrigerating, placing it in shallow containers to speed cooling while maintaining food safety.
Cover food tightly with appropriate lids or plastic wrap. Uncovered foods release moisture into the air, contributing to overall humidity inside your fridge. This is especially important for high-moisture foods like soups, stews, and freshly washed produce.
Check and Replace Your Door Seals
If cleaning your door seals doesn’t resolve the condensation issue, replacement may be necessary. Replacing refrigerator gaskets is a DIY-friendly repair that costs between $20-60 depending on your appliance make and model, versus $150-200 for professional installation.
Before purchasing replacement seals, verify your refrigerator’s exact model number. This is typically found on a sticker inside the fridge compartment, on the door frame, or on the back exterior. Using the wrong seal won’t fit properly and will continue to cause condensation issues.
Installation varies by model but generally involves loosening the screws that hold the seal in place, removing the old gasket, and positioning the new one. Some seals slide into a channel, while others use screws around the perimeter. New seals may feel stiff initially—soak them in warm water for 10 minutes before installation to make them more pliable.
After installation, close the door and let the seal set for 24 hours before performing the dollar bill test again. Some users report that new seals need a few days to fully conform to the door frame and achieve optimal contact.
Brand-specific considerations matter too. Samsung refrigerators have had known issues with door seals failing prematurely, with some models experiencing seal problems within 2-3 years. Whirlpool and Maytag typically offer more durable seals, but all brands eventually need replacement as the rubber degrades over time.
Adjust Your Temperature Settings
Your refrigerator’s temperature control directly impacts condensation levels. Setting the temperature too low doesn’t solve moisture problems—it actually makes them worse by creating a greater temperature differential. The ideal refrigerator temperature is 37°F, with an acceptable range of 34-40°F.
For the most accurate temperature reading, place an appliance thermometer in a glass of water on the middle shelf and leave it for at least 8 hours. This method accounts for the cooling effect of the water and gives you the actual temperature your food experiences. Many digital displays are inaccurate, sometimes showing temperatures 3-5 degrees different from reality.
Your freezer should maintain 0°F. Temperatures above this can cause food to thaw partially, refreeze, and develop freezer burn or ice crystals. If you notice frost buildup in your freezer, this often indicates the temperature is fluctuating, which can also cause condensation in the refrigerator compartment.
Consider seasonal adjustments. In summer, your refrigerator works harder to maintain temperature because the kitchen is warmer. You might need to adjust settings slightly during seasonal transitions. However, avoid making temperature changes too frequently—give each adjustment 24 hours to take full effect before reevaluating.
Improve Air Circulation and Loading
Proper air circulation is essential for preventing condensation. Your refrigerator relies on air flowing from the freezer compartment into the fridge section and back again. When this airflow is blocked, cold spots develop where condensation forms, and other areas become too warm.
Locate your fridge’s air vents—they’re typically on the back wall of the refrigerator compartment. Ensure these vents are never blocked by food containers, large items, or overcrowding. I recommend maintaining at least two inches of clearance in front of these vents.
Avoid overstocking your refrigerator. While a full fridge is more efficient than an empty one, there’s a balance. You should be able to see the back wall through most of the shelves. If items are stacked multiple layers deep or pressed against each other, air can’t circulate properly.
Organize items with spacing between them rather than lining them up edge-to-edge. Think of it as leaving “breathing room” for the air to move around containers. This is especially important for items that release moisture, like fresh produce or uncovered leftovers.
Your crisper drawers have humidity controls for a reason. These slides adjust airflow into the drawer, creating different humidity environments. Use the high humidity setting (often marked “closed” or with a vegetable symbol) for leafy greens and items that wilt. Use low humidity (marked “open” or with a fruit symbol) for fruits that release ethylene gas and moisture.
Control Kitchen Humidity
Your kitchen’s humidity level directly affects refrigerator condensation. Cooking, boiling water, running the dishwasher, and even breathing all add moisture to the air. In kitchens without adequate ventilation, humidity levels can reach 70-80%, compared to the recommended 30-50% for comfortable indoor environments.
Run your range hood exhaust fan whenever cooking, especially when boiling water, simmering liquids, or using the stovetop. This fan vents steam and moisture outside before it can circulate throughout the kitchen. If you don’t have an exhaust fan, open windows when weather permits to allow moisture to escape.
A standalone dehumidifier in the kitchen can make a significant difference, especially in humid climates or during summer months. I’ve tested several models and found that even a small unit removing 20-30 pints per day can noticeably reduce refrigerator condensation in problem homes.
Boiling water without lids releases massive amounts of moisture into the air. Cover pots whenever possible, and use the back burners with the exhaust fan running if you must cook uncovered. Same goes for the dishwasher—if your kitchen is prone to condensation issues, consider running the dishwasher at night rather than during peak cooking hours.
Climate matters too. Homes in humid regions like the Gulf Coast, Florida, or tropical areas will naturally struggle more with refrigerator condensation. Air conditioning helps significantly, as it removes moisture from the air as a byproduct of cooling.
What Can I Put in My Fridge to Stop Condensation?
Several household items can help absorb excess moisture inside your refrigerator. An open box of baking soda placed on a middle shelf will absorb odors and some moisture, though it’s not as effective as dedicated products. Replace the box every 3 months for optimal performance.
Charcoal briquettes (plain, not match-light) work similarly—place a few in a bowl or breathable container and they’ll absorb moisture and odors. Coffee grounds, either fresh or used, can also help with moisture control while providing additional odor absorption.
Proper food storage containers make a bigger difference than moisture absorbers. Transfer foods from their original packaging into airtight containers, especially high-moisture items like cut fruits, vegetables, and leftovers. Glass containers with tight-sealing lids work best and don’t retain odors like plastic can.
Despite what you might read online, I don’t recommend DampRid or similar moisture-absorbing products inside your refrigerator. These products contain calcium chloride, which isn’t food-safe and could contaminate your food if spilled. They’re designed for closets and cabinets, not for spaces where food is stored.
The most effective moisture control is proper food storage. Store washed produce in containers with paper towels to absorb excess moisture, keep meats on the bottom shelf to prevent juices from dripping, and never store food without proper coverage.
Special Cases: Mini Fridges and RV Refrigerators
Mini fridges are notoriously prone to condensation problems because their smaller compressors cycle less frequently and their seals are often lower quality. If you have condensation issues with a mini fridge, try reducing the temperature setting slightly, ensure the unit isn’t pushed against a wall (which blocks ventilation), and check that the door isn’t being blocked from closing fully.
RV refrigerators present unique challenges because they operate in small spaces with significant temperature fluctuations and often run on propane rather than electricity. The absorption cooling used in RV fridges is more susceptible to ambient temperature and humidity. RV owners should ensure proper ventilation around the refrigerator exterior, use fans inside to circulate air, and avoid overloading the unit.
Garage refrigerators struggle in extreme climates—unheated garages in winter or hot garages in summer create conditions that encourage condensation. If you must keep a refrigerator in the garage, consider a “garage-ready” model designed for wider temperature ranges, or at least be prepared for more condensation during seasonal transitions.
Portable refrigerators for camping, boating, or off-grid living often face the toughest conditions. These units benefit from battery-powered fans inside to improve air circulation, careful loading to avoid blocking vents, and vigilant monitoring of seals, as the constant movement and jostling can damage gaskets faster than in stationary units.
When to Call a Professional
Most condensation issues can be resolved with the steps outlined above, but certain problems require professional attention. If you’ve tried all the DIY solutions and still experience excessive moisture, it’s time to consider deeper mechanical issues.
Signs that warrant professional service include condensation that returns immediately after wiping, frost buildup that doesn’t correspond to temperature settings, water pooling on the floor (which may indicate a clogged defrost drain), or a compressor that runs constantly without cycling off. These symptoms can indicate problems with the defrost system, refrigerant levels, or thermostat failure.
The average refrigerator lasts 10-15 years with proper maintenance. If your unit is over 12 years old and experiencing recurring issues, replacement rather than repair might be more cost-effective in the long run. Newer models are more energy-efficient and often include better humidity control features.
A qualified appliance technician can diagnose problems that aren’t visible to the naked eye: low refrigerant charge, failing evaporator fans, defective defrost heaters, or control board issues. Expect to pay $100-150 for a service call and diagnosis, with additional costs for parts and labor if repairs are needed.
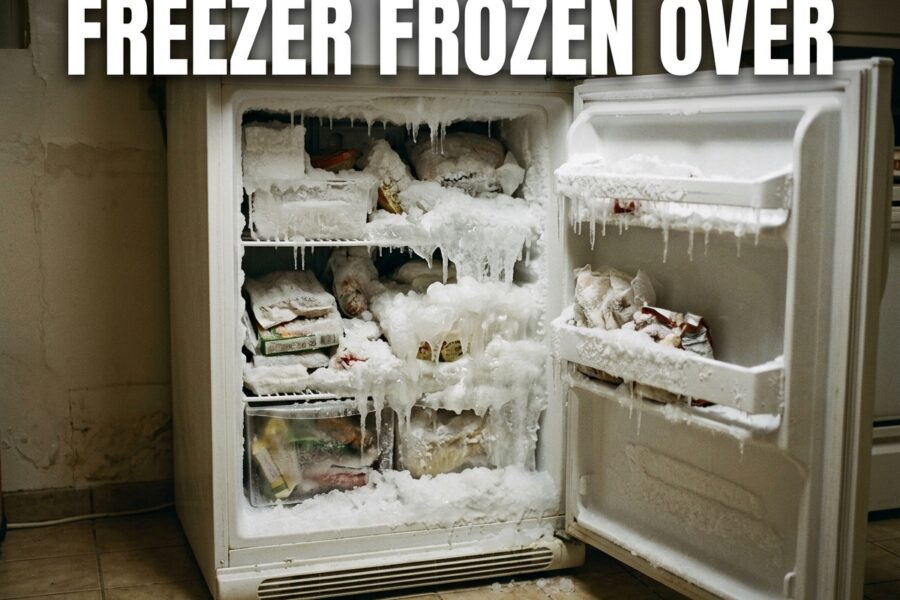
However, before calling a professional, I always recommend one final test: completely empty your refrigerator, unplug it for 24 hours with the doors open to allow any ice buildup to melt completely, then restart it with a fresh load of food. This “hard reset” resolves about 15% of persistent condensation problems by clearing hidden ice blockages and allowing the system to recalibrate.
FAQs
What can I put in my fridge to stop condensation?
Open boxes of baking soda, charcoal briquettes, or coffee grounds can help absorb excess moisture. However, proper food storage in airtight containers is more effective than any moisture absorber. Store wet produce with paper towels, cover all leftovers tightly, and never store food uncovered. Do not use DampRid products in refrigerators as they contain chemicals that aren’t food-safe.
Why am I getting so much condensation in my fridge?
Excessive condensation typically means too much warm, humid air is entering your refrigerator. Common causes include worn door seals that no longer close tightly, frequent door openings, storing hot food before it cools, blocked air vents, or incorrect temperature settings. Your kitchen’s humidity level also matters—cooking without ventilation or living in a humid climate can worsen the problem significantly.
Is it normal for a refrigerator to have condensation?
Some condensation is completely normal, especially after opening the door or during humid weather. Light droplets that dry within an hour or two aren’t cause for concern. What’s not normal is water pooling on shelves, constant dripping, food that feels wet, or visible mold growth. If you have a new refrigerator, minor condensation during the first few weeks is normal as the appliance settles in.
How to fix too much condensation in a fridge?
Start by checking your door seals using the dollar bill test—close a dollar bill in the door and try to pull it out. If it slides out easily, your seals need cleaning or replacement. Verify temperatures are set between 34-40°F using an independent thermometer. Reduce door opening frequency, let hot food cool before refrigerating, ensure air vents aren’t blocked, and improve kitchen ventilation with exhaust fans or a dehumidifier.
What’s the average lifespan of a fridge?
The average refrigerator lasts 10-15 years with proper maintenance. Higher-end models from reputable brands may last up to 20 years, while budget models typically last 8-12 years. If your refrigerator is over 12 years old and experiencing recurring condensation problems that DIY fixes don’t resolve, replacement might be more cost-effective than repair. Newer models are also significantly more energy-efficient.
Can you put DampRid in the refrigerator?
No, you should not put DampRid or similar moisture-absorbing products in your refrigerator. These products contain calcium chloride and other chemicals that aren’t food-safe. If the container were to spill or break, the chemicals could contaminate your food. DampRid is designed for closets, cabinets, and other enclosed spaces that don’t store food. For refrigerator moisture control, use baking soda, charcoal, or proper food storage containers instead.
Final Thoughts
Stopping condensation in your refrigerator comes down to managing moisture intrusion through door seals, controlling humidity levels, maintaining proper temperatures, and ensuring good air circulation. Start with the simplest solutions—checking door seals, adjusting temperatures, and modifying usage habits—before moving to more involved repairs like seal replacement or professional service.
The most effective approach combines multiple strategies rather than relying on a single fix. Clean those door seals, use an independent thermometer to verify temperatures, reduce door openings, let food cool before storage, and improve kitchen ventilation. These steps together will eliminate most condensation problems within a week or two.
Remember that some condensation is normal, especially after door openings, during humid weather, or with brand new appliances. Don’t obsess over every droplet—focus instead on preventing excessive moisture that affects food quality or causes persistent wetness. With consistent attention to these factors, you can keep condensation under control and your refrigerator running efficiently for years to come.


Leave a Comment